Take meeting notes that turn into tasks
Start meetings from the Meeting template, write action items with owners and dates, and follow them up on the Tasks board and the Calendar.
Most meetings end with a short list of things people said they'd do. A week later half of them have quietly vanished, because the list lives in the minutes and nobody reads the minutes again.
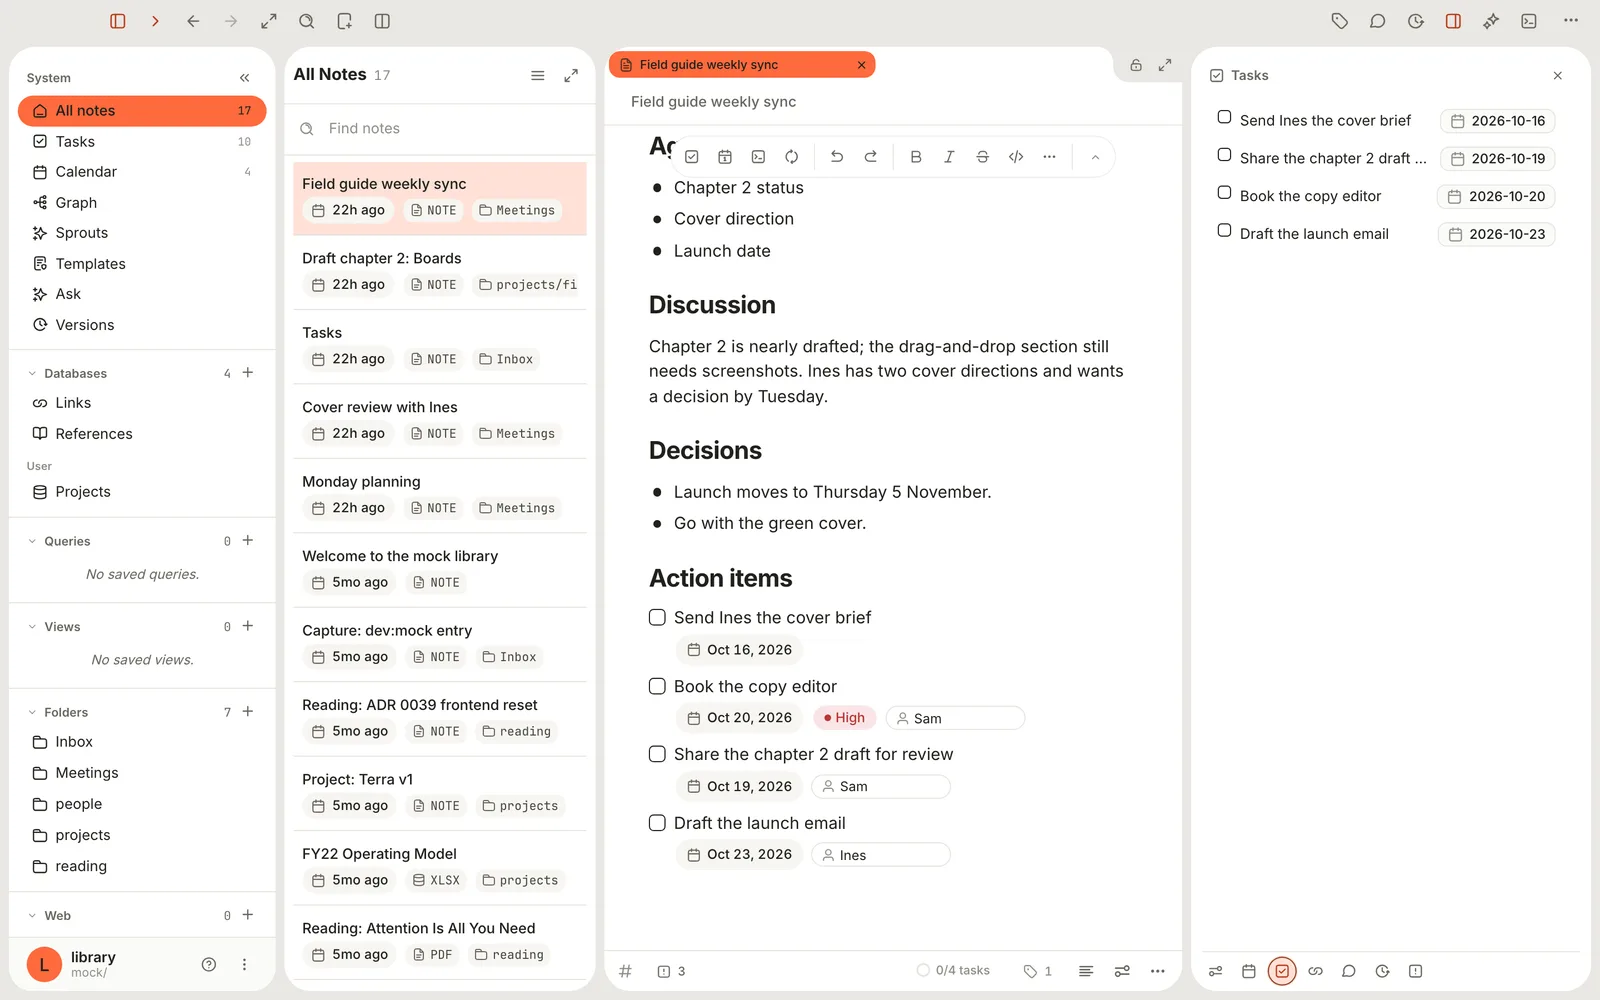
In Terra, an action item is an ordinary task: a checkbox line in the meeting note, with an owner and a due date. The moment you write it, it's on the Tasks board, and with a date it's on the Calendar too, next to the meeting it came from. This guide follows the field-guide team's weekly sync on Thursday 15 October, from a blank page to the follow-up.
How it fits together
A meeting note is a normal note. Three things turn it into a working record:
| Part | What it is | Where it shows up |
|---|---|---|
| The Meeting template | Sections for attendees, agenda, discussion, decisions and action items | The note itself |
start-time and end-time | Two properties holding the meeting's date and time | The Calendar |
| Action items | Task lines with assignee= and due= | Tasks, the Calendar and the Tasks drawer |
Step 1Start the note from the Meeting template
A template gives every meeting the same shape, so the action items are always in the same place.
In the sidebar, right-click your
Meetingsfolder and choose New from template….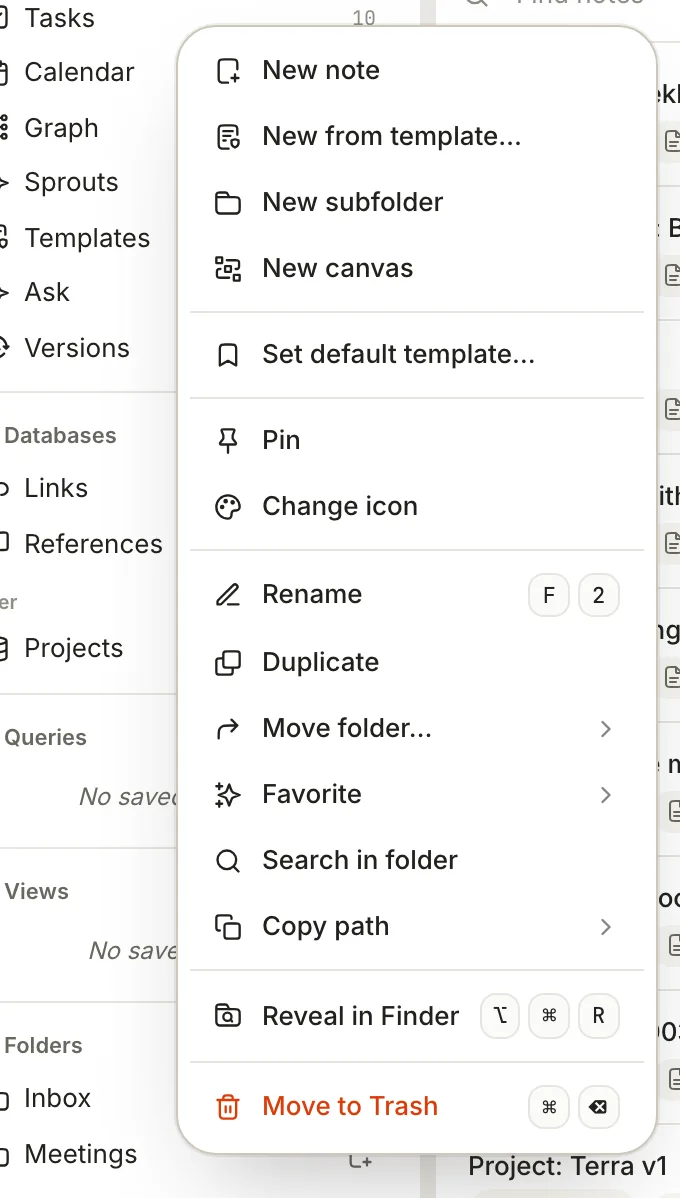
Starting from the folder puts the new note straight into it. Click Meeting, or move to it with the arrow keys and press Return.
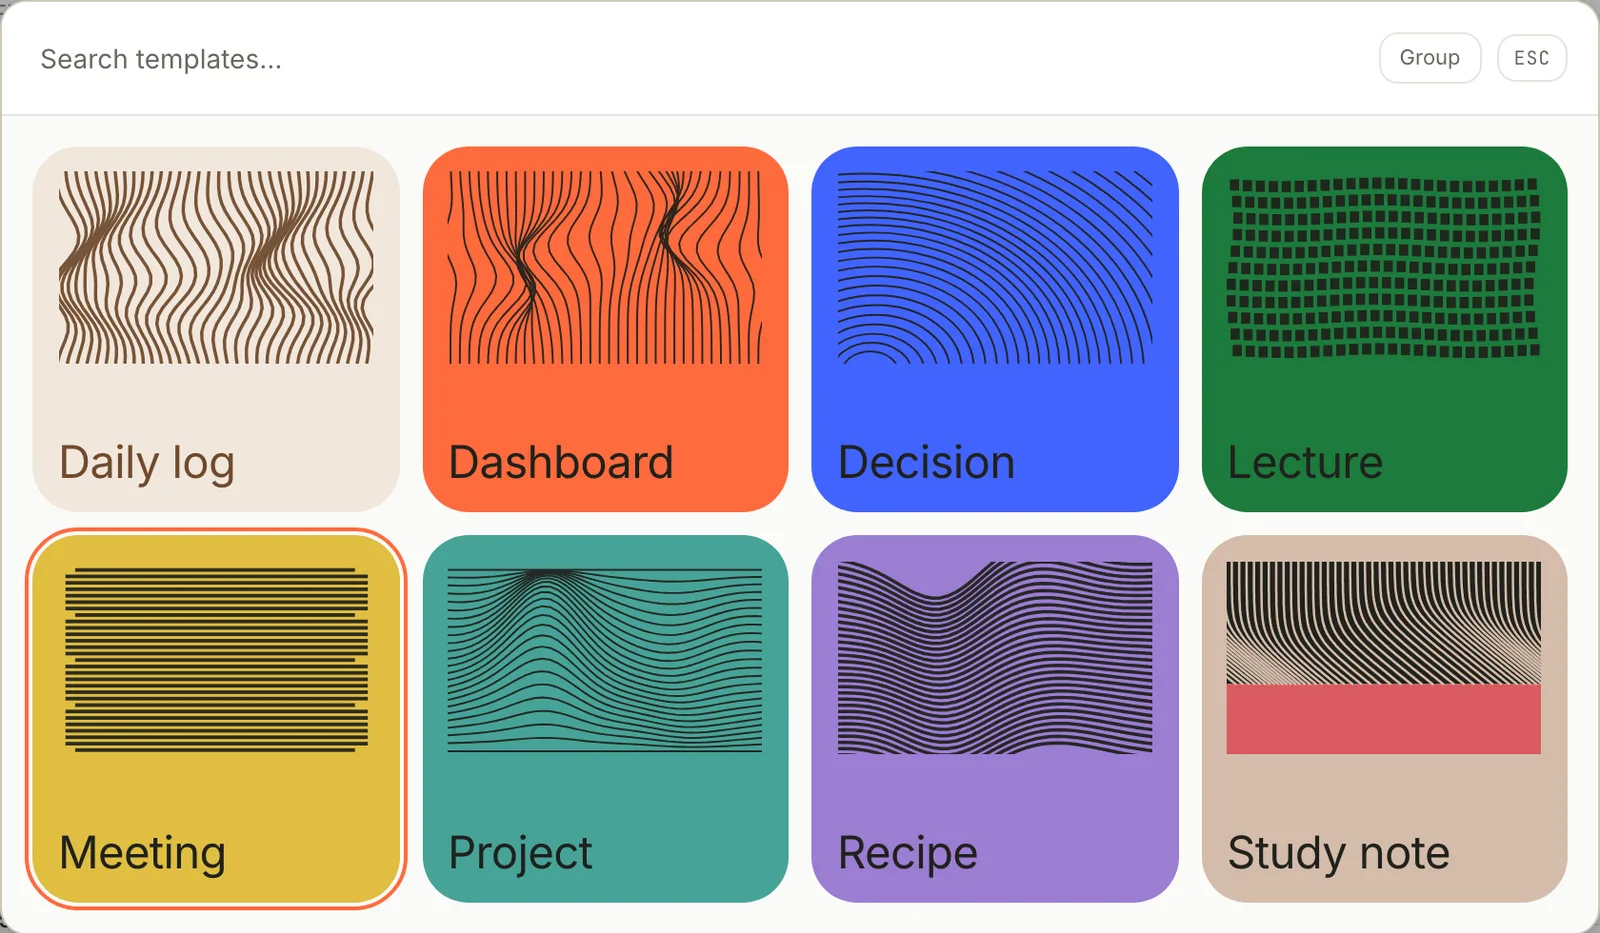
Terra's built-in templates. Type in the search box to narrow them down. Terra creates a note called Meeting in the folder and opens it, with today's date and the current time already filled in.
Click the title and rename it: Field guide weekly sync. The template also writes the title as a heading at the top of the page; change that heading too, or delete it.
You can start a meeting note from anywhere with File › New from Template… (⇧⌘N). The note then goes into the folder of the note you have open.
The template's sections are plain Markdown, so the note looks like this as you fill it in:
**Date:** October 15, 2026
**Time:** 10:00

## Attendees

Sam, Ines

## Agenda

- Chapter 2 status
- Cover direction
- Launch date

## Discussion

Chapter 2 is nearly drafted; the drag-and-drop section still needs screenshots.

## Decisions

- Launch moves to Thursday 5 November.
- Go with the green cover.

## Action items

- [ ]
Step 2Put the meeting on the Calendar
The Date and Time lines are text for people to read; the Calendar doesn't read them. To put the meeting on the Calendar, give the note a start time.
Under the note's properties, click + (Add property).
Choose Existing property, type
timeand pickstart-time.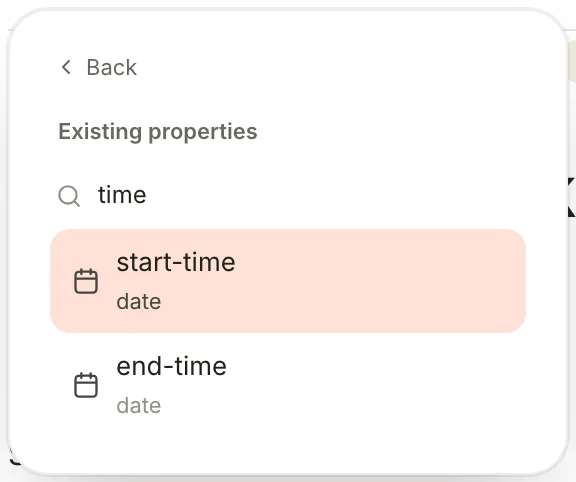
start-time and end-time are built into every Library, ready for meetings. Click the new property's value and pick the date and time: 15 October, 10:00.
Add
end-timethe same way and set it to 10:45.
The meeting's start and end, as properties of the note.
The meeting now appears on the Calendar on Thursday the 15th, with its start time in front of the title. To have the Calendar use the end time as well, open Calendar, click View preferences and set Dates › End to end-time. You only do that once.
Step 3Write the action items
An action item needs three things: what, who and by when. Write each one as a task under Action items; the template leaves an empty checkbox there to start you off.
- Click after the empty checkbox and type the first action: Send Ines the cover brief.
- Add a due date at the end of the line:
::: due=2026-10-16. When you type the next space, it becomes a date pill. - Press Return for the next action. For one that belongs to someone else, add an owner too, typing
:::before each property:::: due=2026-10-20, then::: priority=high, then::: assignee=Sam. - Prefer menus? Click ⋯ at the end of a task's line, choose Properties and switch on Due, Assignee or Priority.
When you're done, the section reads:
## Action items

- [ ] Send Ines the cover brief ::: due=2026-10-16
- [ ] Book the copy editor ::: due=2026-10-20 priority=high assignee=Sam
- [ ] Share the chapter 2 draft for review ::: due=2026-10-19 assignee=Sam
- [ ] Draft the launch email ::: due=2026-10-23 assignee=Ines
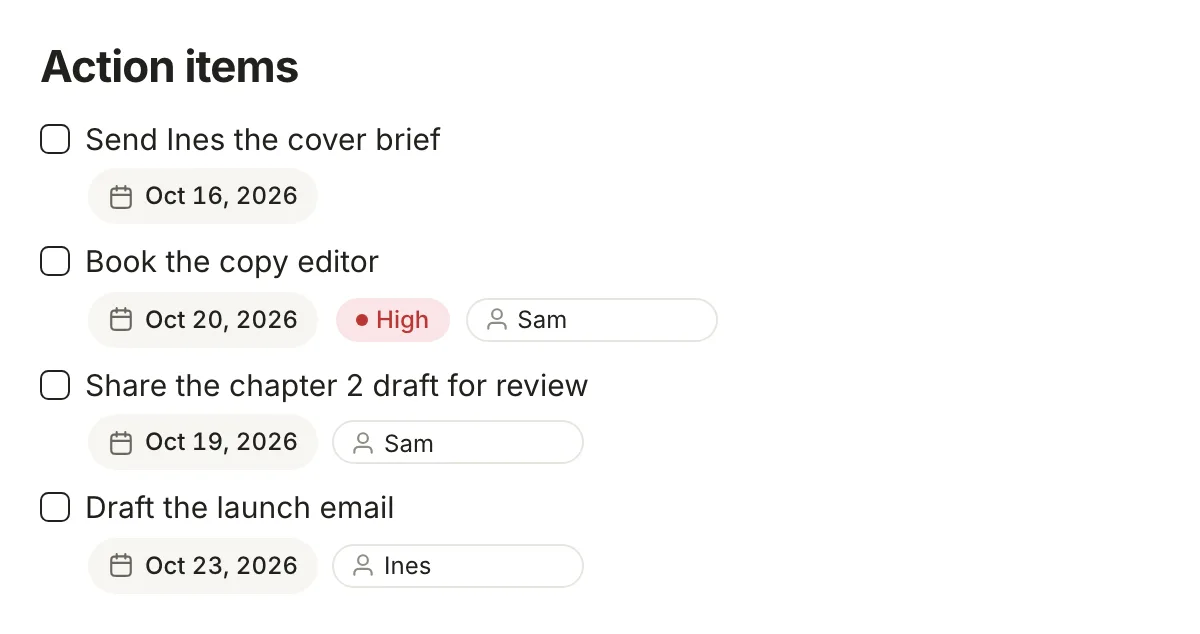
Keep decisions as plain bullets under Decisions. Only things someone has to do should be tasks, or the board fills up with statements.
Step 4Follow up on the Tasks board
The action items are already on the board; there's no import step. The line under each card's title names the meeting it came from.
Click Tasks in the sidebar.
Give the board a second view, so the main one keeps its status columns: click + (Add view) in the header, click the Board layout, type By person in Name, click Save view and close the panel.
Click Show boards as in the header and choose Assignee. The board regroups into a column per person, plus No value for tasks without an owner.
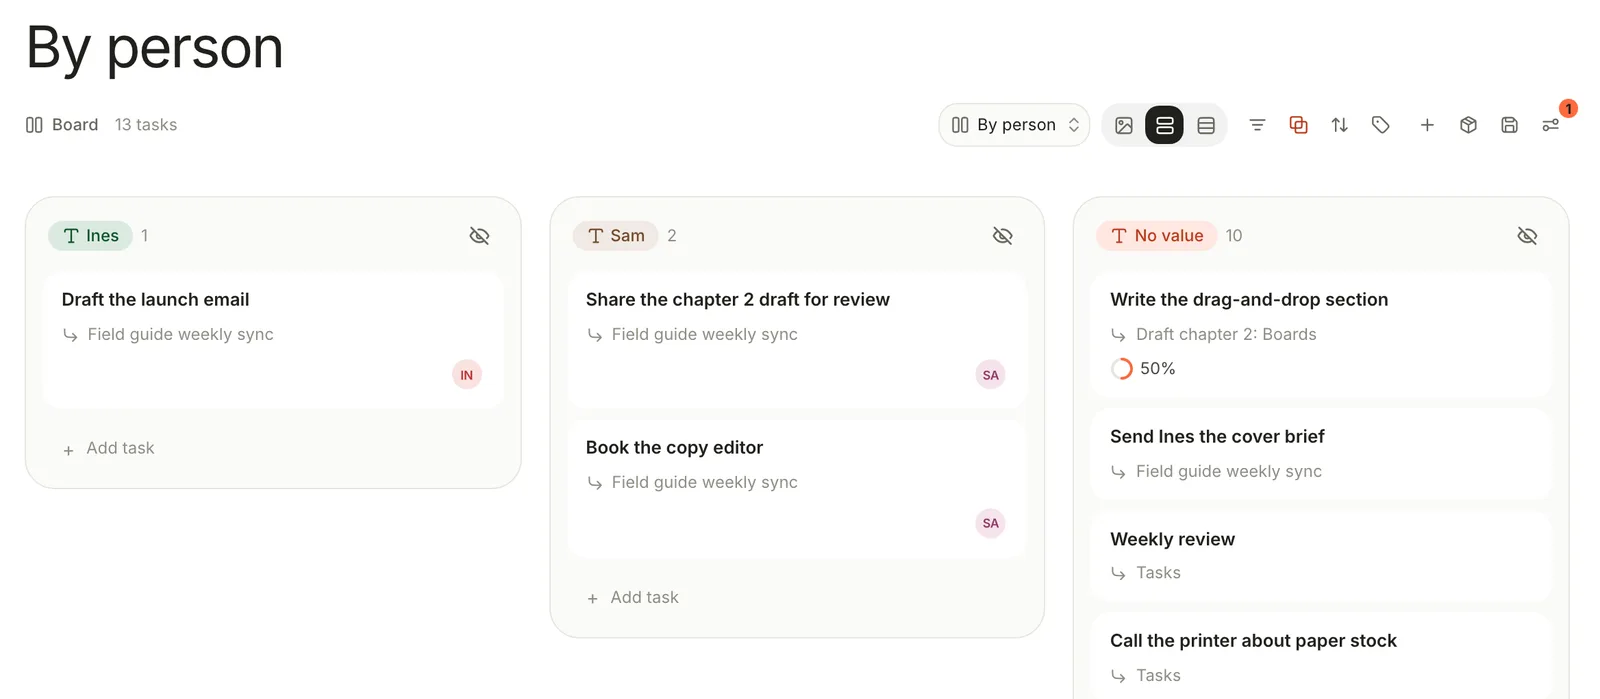
Grouped by assignee. Each card still shows the meeting it came from. Click Properties in the header to add due dates to the cards. Drag a card to another person's column to hand the task over. Terra rewrites
assignee=in the meeting note.Switch between Board and By person with the view menu at the right of the header.
To see one meeting's items only, open Filters and click + (Add condition). Change Title to Note and is to contains, then type part of the meeting's title. Click Clear all in the same panel when you're done.
Step 5Check in before the next meeting
Before next week's sync, look at what came out of this one.
Open last week's meeting note.
Click Properties in the toolbar (⌘R), then Show Tasks in the row of buttons along the bottom of the panel. The Tasks drawer lists the note's action items with their dates.
Open Calendar to see the meeting and the action items' due dates side by side.
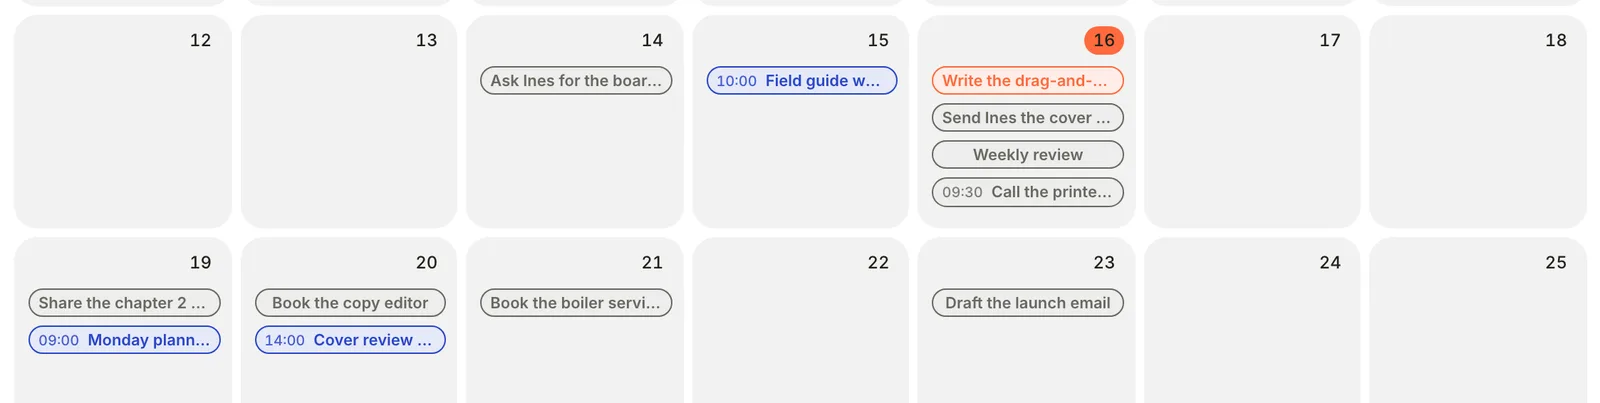
The meeting on the 15th and the action items on their due dates. Carry anything unfinished into the new meeting's Action items, or move it: open the task in Edit task, click Move task to note and pick the new meeting. Terra moves the line under a
## Tasksheading there.
Step 6Bring in meetings from Granola (optional)
If you record meetings with Granola, Terra can turn each one into a note in Meetings/, with Granola's summary and its action items as tasks under ## Action items. Action items are lines under headings such as Action items, Next steps, Follow-ups or To-dos in Granola's summary, plus any checkboxes.
Open Settings (⌘,), click Integrations, then Configure on the Granola row.
To import one meeting, click Import, paste the meeting's public share link (it starts
https://notes.granola.ai/p/) into Share link, and click Import on the Import meeting row.To bring in your private meetings, click Sync, paste your Granola Personal API key, and click Connect. Then click Sync on the Sync now row. Your key is kept in the macOS Keychain.
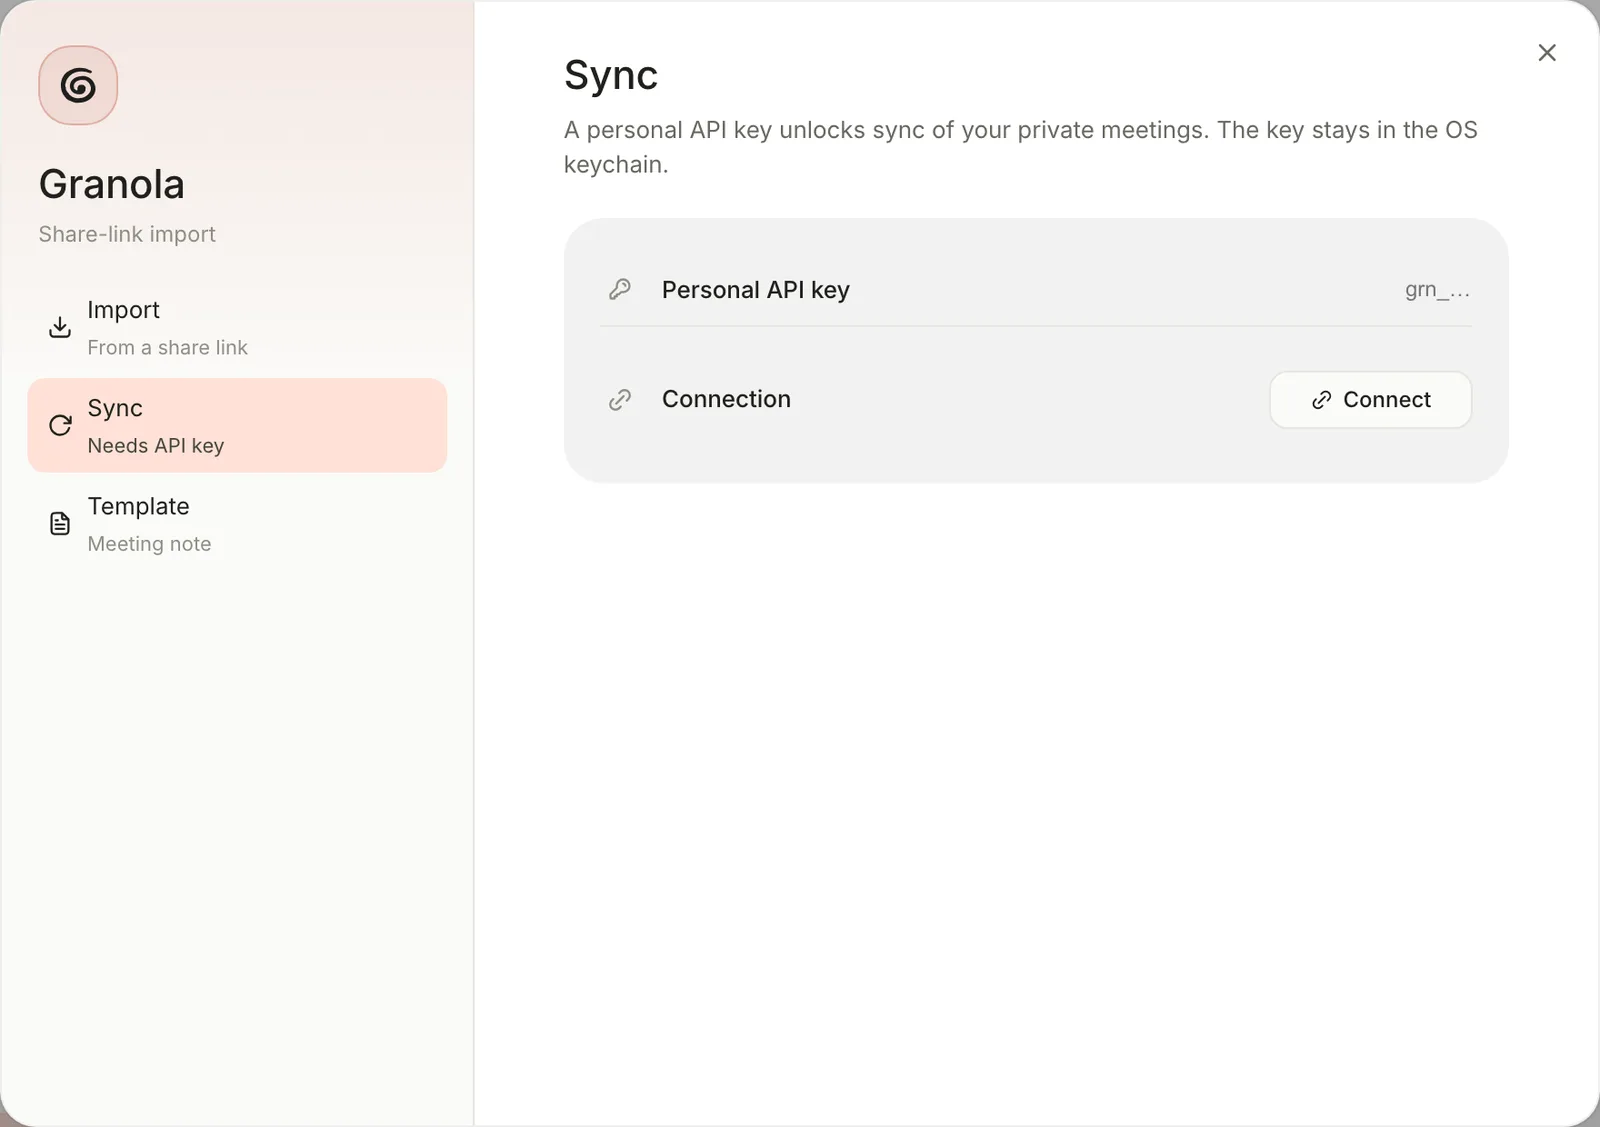
Sync needs a personal API key from your Granola account. Import works from a share link alone. To keep pulling new meetings, switch on Scheduled sync and choose how often under Sync every.
The first Sync brings in every meeting in your Granola account, not only recent ones. Scheduled sync runs while Terra is open and switches off when you quit, so turn it on again next time.
Features you might have missed
A calendar of meetings
Right-click Calendar in the sidebar, choose New calendar database and call it Meetings. Use its Filters to keep only the Meetings folder. Unlike the built-in Calendar, a calendar database you make switches Display mode to Week, Day or Agenda, which lists the next two weeks of meetings.
Live Jira and Confluence cards
If you've connected Jira or Confluence under Settings › Integrations, paste an issue or page link on an empty line of the meeting note and choose Embed. You can also type / and pick from Connected apps. The card shows the issue's details, and Refresh in its options fetches the latest.
Give a big action item its own note
When an action item turns into a project, open it in Edit task, click Move task to note and choose New note: …. The task moves into a new note in Inbox, named after it.
Daily stand-ups
For a quick daily page, use the Daily log template instead: it's dated for today, with Wins, Blockers and Tomorrow sections. Tasks you write under Tomorrow join the board like any others.
Troubleshooting
The meeting isn't on the Calendar
The Calendar reads start-time, not the Date line the template writes. Add the property as in step 2.
An action item isn't on the Tasks board
Check that it's a checkbox in a bulleted list, - [ ] …, not a numbered item or plain text. See Task syntax.
The owner shows as text in the title
The assignee probably has a space in it. Use one word or hyphens: assignee=sam-lee.
Granola's action items appear twice
The meeting was edited above <!-- terra:sync:end --> and then synced again. Delete the extra copies, and work on action items below the line from now on.
The Granola import says "Already up to date — no changes written."
That meeting is already in your Library and nothing has changed in Granola since.
What's next
- Run your week with tasks and the calendar — a weekly routine for everything these meetings produce.
- Tasks — statuses, the board and the Edit task dialog.
- Templates — change the Meeting template or make your own.
- Calendar — choose the dates it uses and make calendars of your own.
Was this guide helpful?