Highlight, annotate and keep every mark
Highlight books in six colours, add notes and tags, find any passage again in seconds and export it all to a note. Your annotations live in a plain file beside the book.
Highlights are only useful if you can find them again. In most reading apps they pile up inside the app — locked to one device, hard to search, impossible to take with you.
Terra keeps your highlights next to the book, in your Library, as a plain file you own. You can colour-code them, write a note on any passage, tag ideas as you go, filter a 400-page book down to the six passages about one theme, and turn the lot into a note you can quote from. This guide walks through all of it, then opens up the file where everything is kept.
How it fits together
Every book in Terra is three files that live side by side:
Reading/
├── Quiet Systems.epub          ← the book. Terra never changes it.
├── quiet-systems.md            ← the book's note: title, author, cover, your writing
├── quiet-systems.terra.json    ← the sidecar: your place, highlights, bookmarks, settings
└── attachments/quiet-systems/cover.jpg
The sidecar is the file ending in .terra.json. Terra writes to it automatically, a moment after you stop reading or marking — there's no save button. Because it sits in your Library folder, it travels wherever the folder goes: your backup, your sync service, a Git repository.
Books and PDFs keep annotations differently, and it's worth knowing which is which:
| Highlights are stored | Visible in other apps? | |
|---|---|---|
| Books (EPUB) | In the sidecar. The EPUB is never touched. | Export them as an annotation file or a note |
| PDFs | Written into the PDF file, and quoted in the PDF's note | Yes — Preview and Acrobat show them |
| PDF markup (pen, boxes, callouts) | In the sidecar. The PDF is never touched. | No |
| Images | Can't be annotated yet | — |
Step 1Make your first highlight
Open a book and click once on the page.
Drag across the words you want to keep. A small bar of colour swatches appears above your selection.
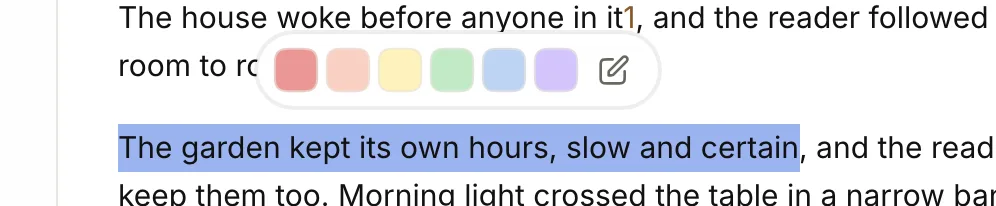
Select text and the highlight bar appears: six colours, plus the pencil for a highlight with a note. Click a colour. The highlight is saved straight away, in your most recent style.
That's it for a quick mark. Terra remembers the colour and style you used last and offers them first next time.
Add a note and tags as you highlight
Often the reason you highlighted something is the interesting part. Capture it while it's fresh:
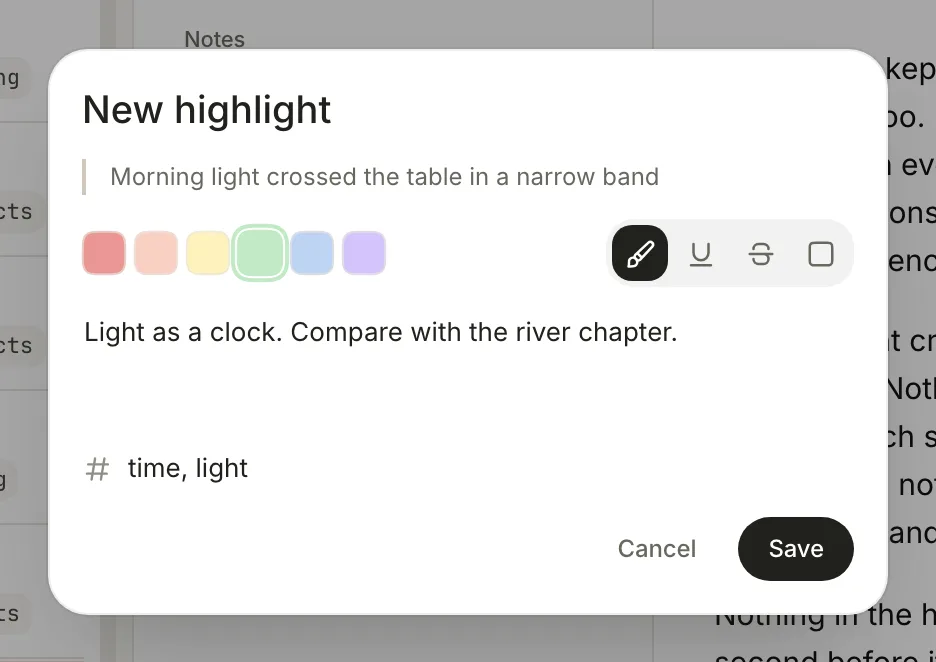
- Select the text, then click the pencil (Highlight with note) instead of a colour. The New highlight window opens with your quote at the top.
- Choose a colour. Pick a system and stick to it — for example, yellow for key ideas, green for evidence, blue for quotes you'll use, pink for disagreements.
- Choose a style: Highlight, Underline, Strikethrough or Outline.
- Type your thought in Add a note.
- Add tags in Tags, separated by commas —
time, light. Tags let you pull every passage on a theme together later. - Click Save.
Hover over a highlight that has a note and the note appears as a tooltip — no need to open anything.
Step 2Highlight faster
Once you're in the rhythm of a book, every click counts. With text selected:
| To | Press |
|---|---|
| Highlight in your last colour and style | ⌥⇧Q |
| Highlight and open the note window | ⌥⇧A |
Two switches in the Highlights tab make it faster still. Click the ⋯ (Highlight options) above the list:
- Quick highlight — the pencil and ⌥⇧A save the highlight right away instead of opening the window. Add the note later.
- Highlight on select — every selection becomes a highlight the moment you let go of the mouse. Ideal for a fast first pass through a chapter; it switches itself off when you quit.
Step 3Edit, recolour or delete
- Edit a highlight: hold ⇧ and click it in the text. Or, in the Highlights list, point at the row, click More (⋯) and choose Edit. Change the colour, style, note or tags and click Save.
- Delete one: click Delete in the edit window, or choose More › Delete on its row.
- Delete many: Highlight options › Delete all. If a filter is on, the item reads Delete N shown and only removes what's listed. Terra asks Delete N highlights? first.
Step 4Find your annotations again
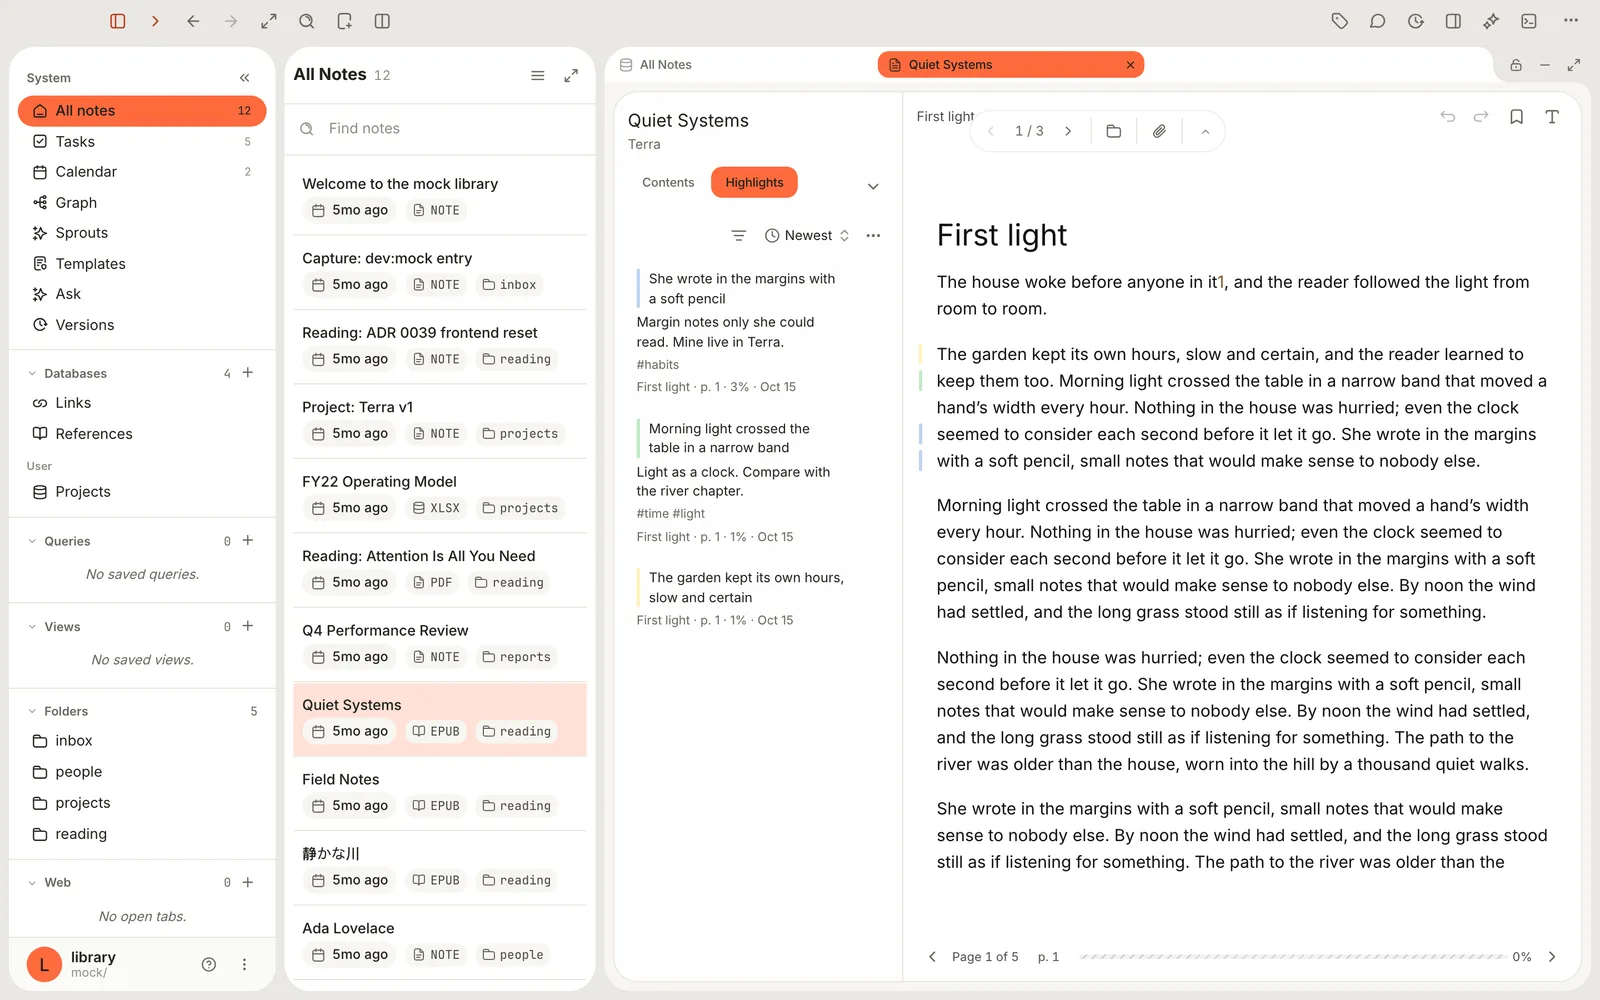
Open the Highlights tab beside the book. Every highlight is listed with its quote, your note, its tags, and a line telling you where it is — chapter, page, how far into the book, and the date.
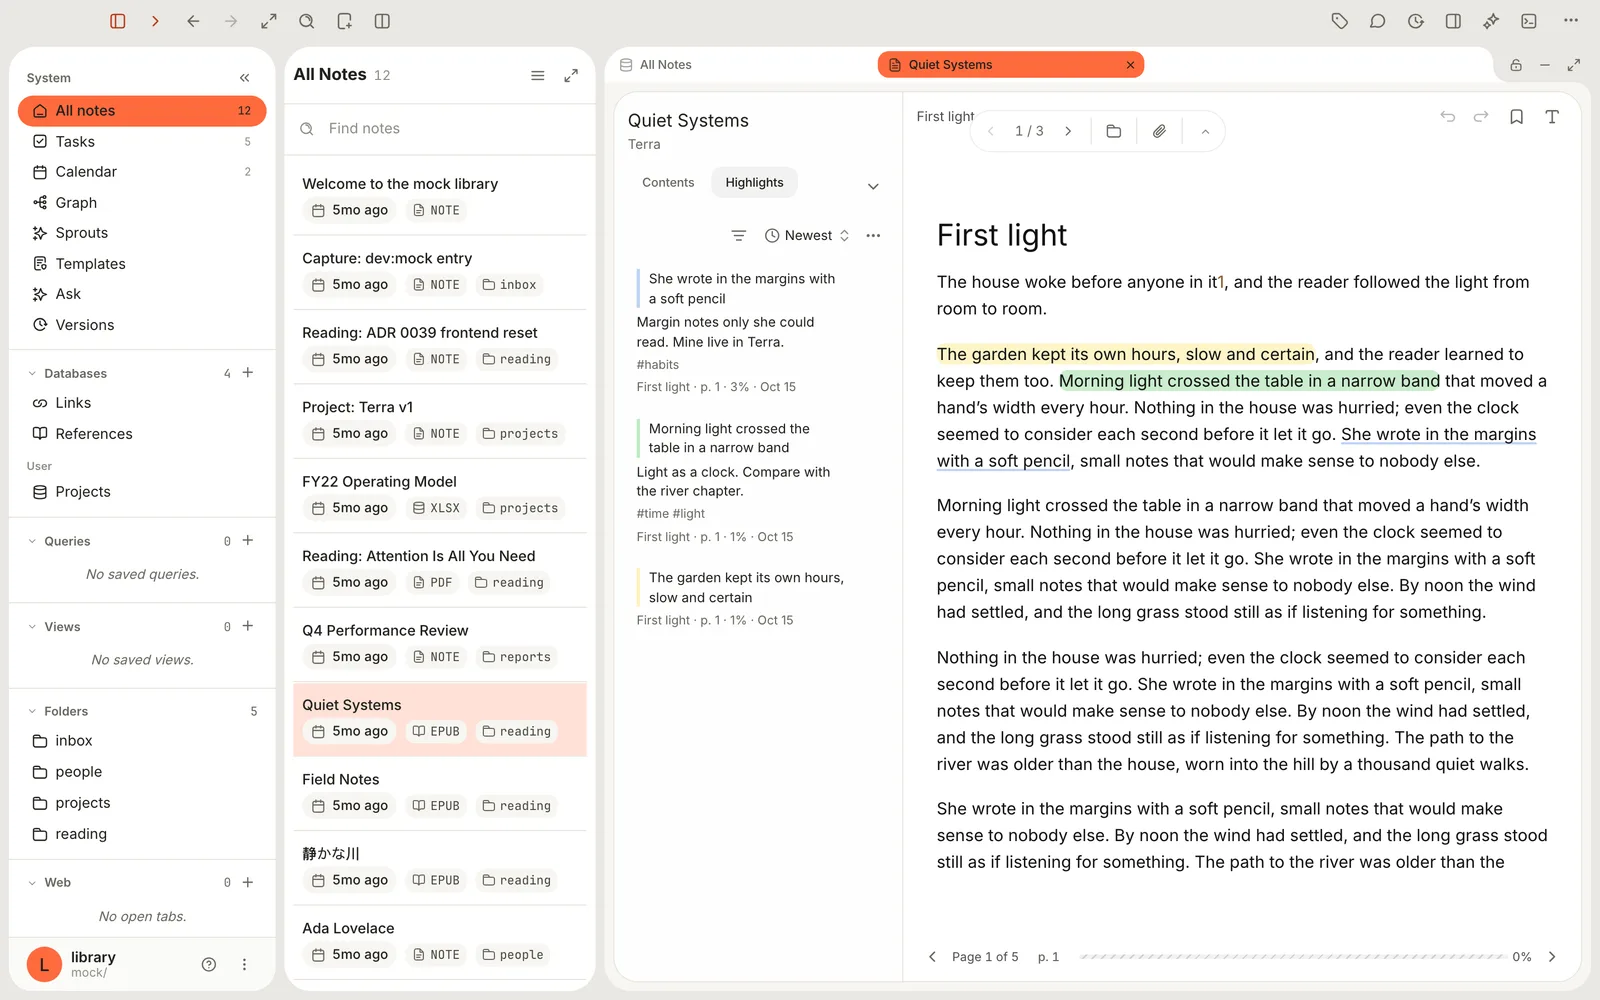
Jump to a passage: click its row. The reader turns to it and outlines it.
Sort: click Newest to choose Newest, Last edited or Reading order. Reading order is the one you want for reviewing a book start to finish.
Filter: click the funnel (Filter). It lists only what the book actually has: its colours, its styles and its tags. Pick one or more; anything matching any of them is shown. Clear filter resets.
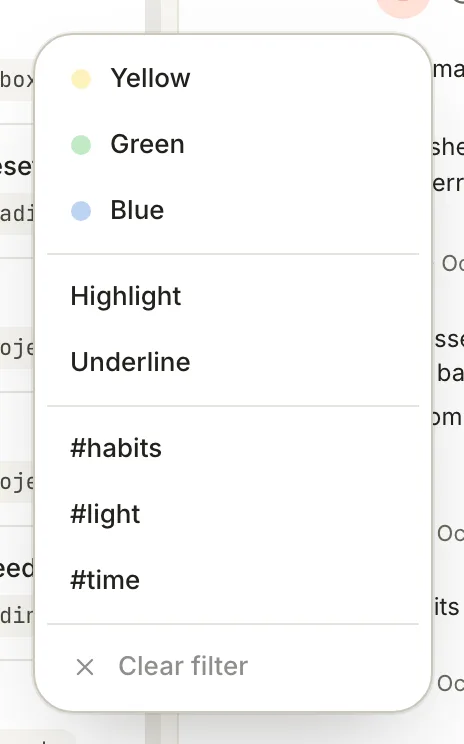
Filter by colour, style or tag. Choose several to widen the list.
The list shows five at a time; use the page arrows below it for more.
See highlights in the margin instead
Sometimes you want to reread without the colour. Highlight options › Show has three choices:
- In text — highlights painted on the words (the default).
- In margin — the text stays clean, with a coloured tick in the margin beside each highlight.
- Hidden — no marks at all, bookmarks included. Making a new highlight switches back to In text.
⌥⇧⌘Z flips between In text and In margin.
Step 5Bookmark pages
Bookmarks mark places rather than passages — the start of an argument, a chart you'll come back to.
- Press ⌘B, or click Bookmark this page at the top of the page. A mark appears in the margin.
- To name it as you go, press ⌥⇧B, type a Name, choose a colour and tags if you like, and click Save.
- Find bookmarks on the Bookmarks tab. In a narrow pane it's behind the arrow next to Highlights.
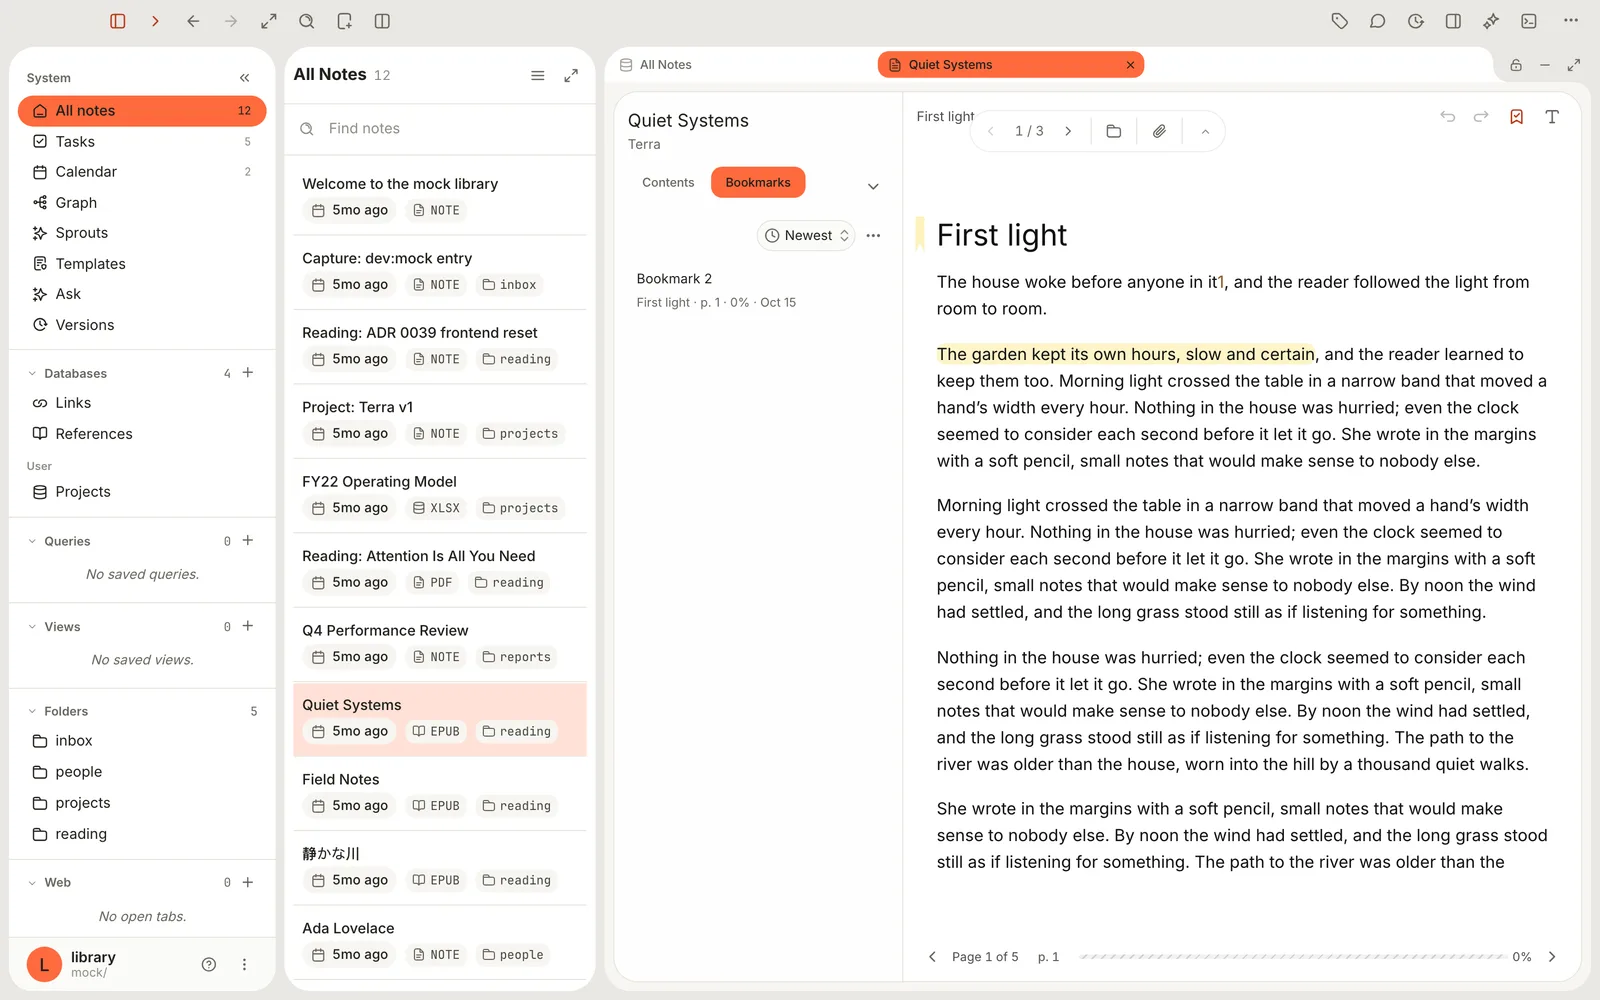
To remove a bookmark, go to its page and press ⌘B again.
Why is my first bookmark called "Bookmark 2"?
Highlights and bookmarks share one counter, so if you highlighted something first, your first bookmark is numbered 2. Name bookmarks with ⌥⇧B if the numbers bother you.
Step 6Take your highlights anywhere
Exporting turns your marks into something you can write with, share or carry to another copy of the book. What you export is exactly what the list shows, so set a filter first if you only want some — say, everything tagged quote.
On the Highlights tab (or Bookmarks), click Highlight options, then point at Export.
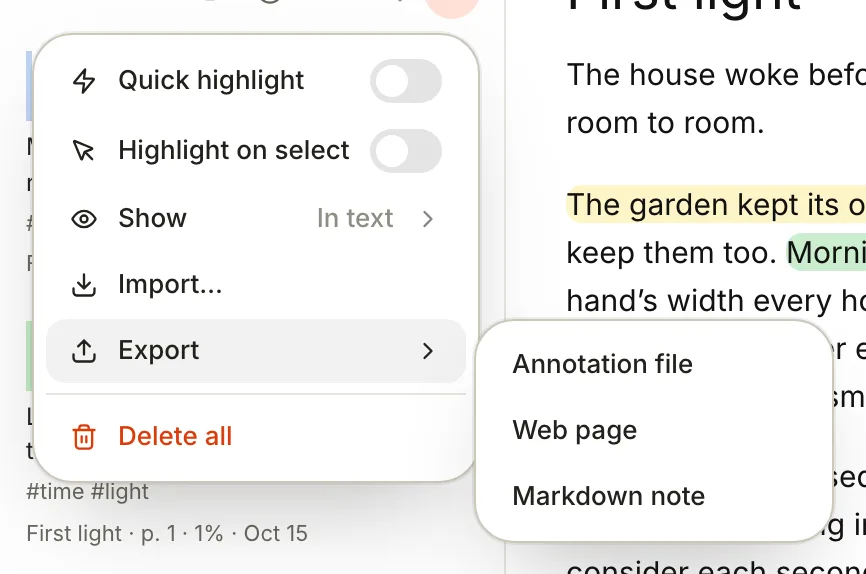
Export offers three formats. Import… brings annotations back in. Choose a format:
- Markdown note — a new note in your Library, ready to quote from and link to.
- Web page — a single
.htmlfile to share or print. - Annotation file — a
.jsonfile in the W3C Web Annotation standard, for backup or for moving highlights to another copy of the book.
Give it a Title (Terra suggests Quiet Systems — annotations) and click Export.
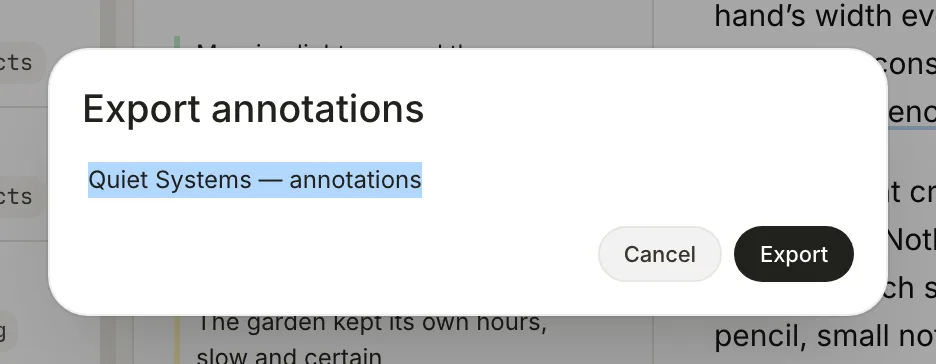
Name the export. A Markdown note goes to your Inbox; the other formats ask where to save the file. For a Markdown note, Terra shows Created "Quiet Systems — annotations"; click Open. Your highlights are grouped by chapter, in reading order, each quote followed by your note, its colour, page and tags.
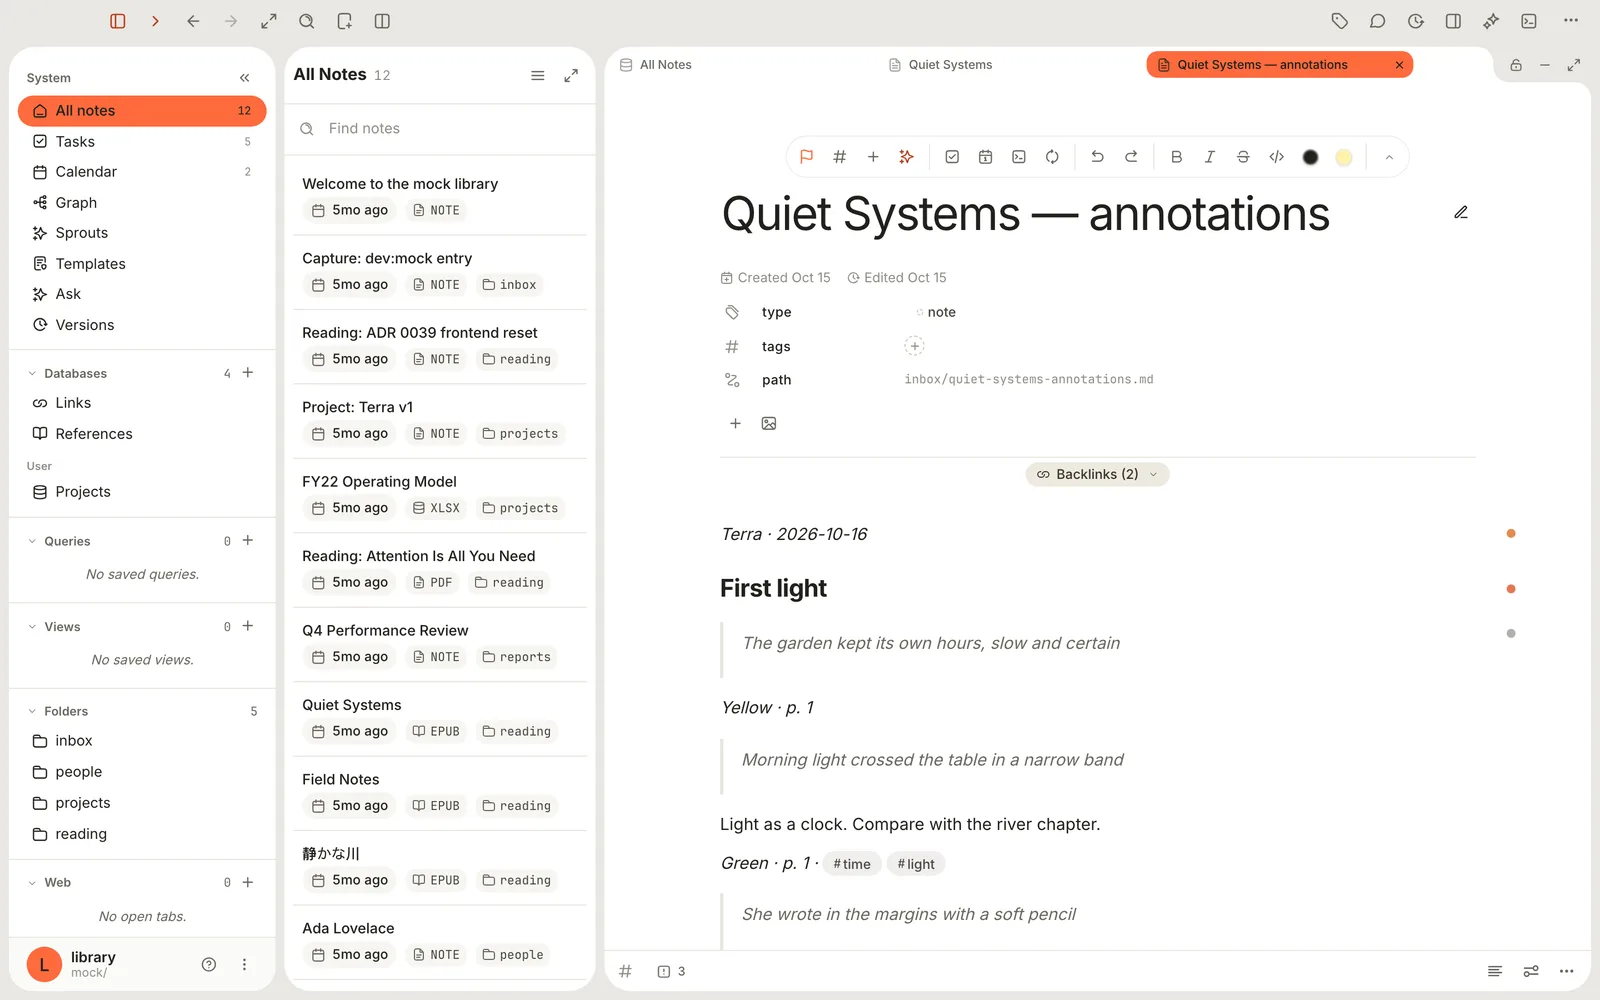
Here's what that note looks like as Markdown:
*Terra · 2026-10-16*

## First light

> The garden kept its own hours, slow and certain

*Yellow · p. 1*

> Morning light crossed the table in a narrow band

Light as a clock. Compare with the river chapter.

*Green · p. 1 · #time #light*
The export is a snapshot. New highlights don't appear in it automatically; export again when you want an updated copy. The book's own note is never changed by an export.
Move highlights to another copy of the book
Bought a new edition, or added the book to a second Library? Export an Annotation file from the first copy, then open the second and choose Highlight options › Import… and pick the file. Terra places each highlight on the same words. If some are already there, it asks whether to Import new ones only or Import all, replacing the matches with the file's versions.
Step 7Look inside the sidecar
You never need to open the sidecar, but it helps to know it's ordinary text. Open it in any text editor (it's the .terra.json file next to the book's note) and you'll find one block for the book, holding:
- position — where you stopped, so the book reopens there
- highlights — every highlight with its colour, style, your note (stored as
text), tags, page and quote - bookmarks — the same shape, with the bookmark's name in
text - settings — this book's theme, layout and text choices
Here's an abridged example:
{
  "schemaVersion": 1,
  "noteId": "01JB4…",
  "blocks": [
    {
      "type": "epub-reader",
      "payload": {
        "position": { "href": "OPS/text/ch1.xhtml", "spineIndex": 0, "progress": 0.2 },
        "highlights": [
          {
            "id": "81e0a757-e52b-4053-babf-e96e07debbc0",
            "kind": "highlight",
            "color": "green",
            "style": "solid",
            "text": "Light as a clock. Compare with the river chapter.",
            "tags": ["time", "light"],
            "page": "1",
            "created": 1792109100188,
            "locator": {
              "title": "First light",
              "text": {
                "before": "…from room to room. The garden kept its own hours… ",
                "highlight": "Morning light crossed the table in a narrow band",
                "after": " that moved a hand's width every hour."
              },
              "locations": { "cfi": "epubcfi(/6/2!/4/8,/1:…)" }
            }
          }
        ],
        "bookmarks": [],
        "settings": { "theme": "sepia", "flow": "paginated", "columns": "auto" }
      }
    }
  ]
}
("style": "solid" is the Highlight style; created is a timestamp in milliseconds.)
How highlights survive font changes
Change the font size, switch to two columns or resize the window, and every highlight stays on the same words. That's because Terra saves each one several ways at once: the exact spot in the chapter, the quoted words with a little text either side, and a standard EPUB location. When the page reflows, it finds the words again — and if one way fails, it tries the next.
If the book itself changes (say you replace it with a corrected edition) and Terra can't find a passage, the highlight stays in your list marked Not found in text. One placed only by its position in the book is marked Approximate. Terra never deletes a highlight just because it can't place it.
Reading it with other tools
The sidecar is Terra's own format, but it's plain JSON, so scripts and other tools can read it. For anything that should understand highlights in a standard way, use Export › Annotation file instead: it follows the W3C Web Annotation format, with EPUB locations other software can resolve.
Step 8Back up, sync and move books safely
- Backups and sync. Anything that copies your Library folder — Time Machine, iCloud Drive, Dropbox — copies the sidecar with it. If you use Versions, sidecars are saved in each version like your notes.
- What stays on this Mac. Your reading defaults (Save as default), last-used colour and style, Quick highlight and the Show setting are preferences on this Mac, not part of the Library.
- Moving files in Finder. Terra matches a sidecar to its note by name:
quiet-systems.md↔quiet-systems.terra.json. If you rename or move a book's note in Finder, rename or move its.terra.jsonthe same way. The EPUB itself can move freely — Terra recognises it by its contents. - Before a big reorganisation, export an Annotation file for books you've marked heavily. It's a small file and a complete copy of your highlights.
- Deleting the sidecar resets the book: it reopens at the beginning with no highlights or bookmarks, and Terra creates a fresh sidecar as soon as you read again.
Highlight and mark up PDFs
PDFs work a little differently, because the PDF format has its own annotations that other apps understand.
Highlight text in a PDF
Open the PDF and click Highlight text in the floating tools.
Drag across the words. The highlight is written into the PDF itself, and the PDF's note gains a quote under Highlights, with the page number:
## Highlights

> quoted text
> — p. 3
To remove a highlight, drag across the same words again.
Right-click Highlight text to choose its ink colour.
With the note shown beside the PDF, click a highlight on the page to scroll the note to its quote, or click a quote in the note to jump to the page.
Draw on a page
Click Markup to pick up the pen. Right-click it for more: brushes (Pen, Fineliner, Pencil, Marker, Brush, Highlighter, Dashed, Dotted, Box), a Width from 1 to 24 points, an ink colour, an Eraser and a Text callout. Put the pen down and click any mark to change it, delete it, or start a comment thread with Add a comment…. Markup lives in the sidecar, so the PDF file is unchanged; marks with text or comments are also quoted in the note under Annotations.
Cite a PDF passage
Give the PDF's note a type such as paper or book, then in any note type @ followed by a word from the source's title. Your highlights appear as indented choices under the source, with their page numbers; pick one to insert the quote with its citation. Build a research library covers citations in full.
Features you might have missed
- Tags are filters. Tag highlights by theme as you read (
argument,method,quote), and the Filter menu turns a long book into a short list. - Reading order review. Sort by Reading order and click down the list to reread just your marked passages, in sequence.
- Notes on hover. Point at any highlight with a note to read it without opening anything.
- Margin mode for rereading. Show › In margin keeps the page clean while still showing where you marked.
- Every reader shortcut is yours. Change any of them in Settings › Hotkeys under Reader.
Troubleshooting
"Select some text first"
Quick highlight (⌥⇧Q) and Highlight with note need a selection. Drag across some words, then press the keys again.
I can't highlight in this book
Books laid out page by page (fixed-layout EPUBs, like picture books and some textbooks) can be bookmarked but not highlighted yet.
A highlight says "Not found in text" or "Approximate"
Terra couldn't find the exact words in the current copy of the book — usually because the EPUB was replaced with a different edition. The highlight, its note and tags are kept; click it to go to the nearest place Terra can find.
My highlights are gone after I moved or renamed the book
The book's sidecar probably didn't come along. Look for a .terra.json file with the book's old name in its old folder and move it next to the book's note, renamed to match. If you exported an Annotation file, you can also bring everything back with Highlight options › Import….
A PDF won't highlight
Highlighting needs a PDF with real text. Scanned pages are pictures of text; run them through an OCR tool first.
What's next
- Read comfortably in the e-reader — themes, fonts and moving around a book.
- Build a research library — cite books and papers, with page numbers.
- How Terra stores your notes — the rest of what lives in your Library folder.
Was this guide helpful?