# Get started with Terra
> Install Terra, open a Library, then write, format, link, tag and find your first notes. About fifteen minutes from download to a working Library.
Source: https://terramd.io/docs/quickstart
Terra keeps your notes as plain Markdown files in a folder on your Mac. You write in a rich editor, and Terra saves ordinary text files that any other app can open.
This quickstart takes you from a fresh install to a few linked, tagged notes you can find again in seconds. The example is a small project: you're launching a pocket guide to the birds of the lower valley, and the plan lives in Terra.
> [!SUMMARY]
> - Open a Library, the folder where your notes live
> - Write a note and format it as you type
> - Make one point stand out with a Sprout
> - Link two notes and tag them
> - Find any note again in a couple of keystrokes
> [!BEFORE]
> - A Mac with macOS 14 (Sonoma) or later
> - An internet connection the first time you open Terra, to sign in
> - About 15 minutes
## Step 1: Install and open Terra
1. Download Terra for Mac and move **Terra** to your **Applications** folder.
2. Open Terra.
3. If a banner says **Sign in to edit your notes.**, click **Sign in**. Your browser opens so you can sign in. When the page says **Signed in.**, come back to Terra. Until you sign in, notes open read-only.
## Step 2: Open or create a Library
A [Library](https://terramd.io/docs/libraries) is the folder Terra treats as your collection of notes. It can be a new, empty folder or a folder of Markdown files you already have, such as an Obsidian vault.
1. On the **Open a library** screen, click **Choose folder**.
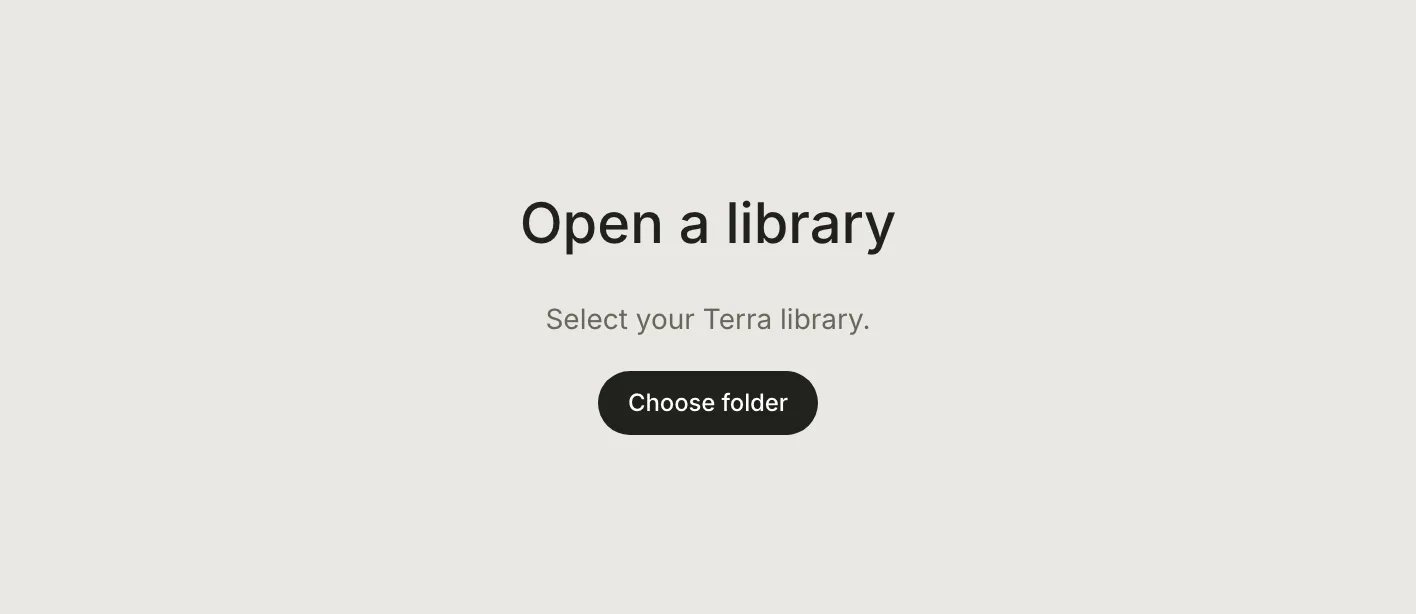
2. Pick a folder:
- **To start fresh**: Pick a folder on your machine, click **New Folder**, name it (for example *Notes*) and click **Open**.
- **To use files you already have**, select its folder and click **Open**. Terra maintains your work structure.
3. Terra opens the Library on **All notes**.
Terra adds a hidden `.terra` folder, where it keeps its search index and this Library's settings, and an `Inbox` folder for new notes. Next time, Terra reopens this Library on its own. To switch Libraries later, press ⌘ O.
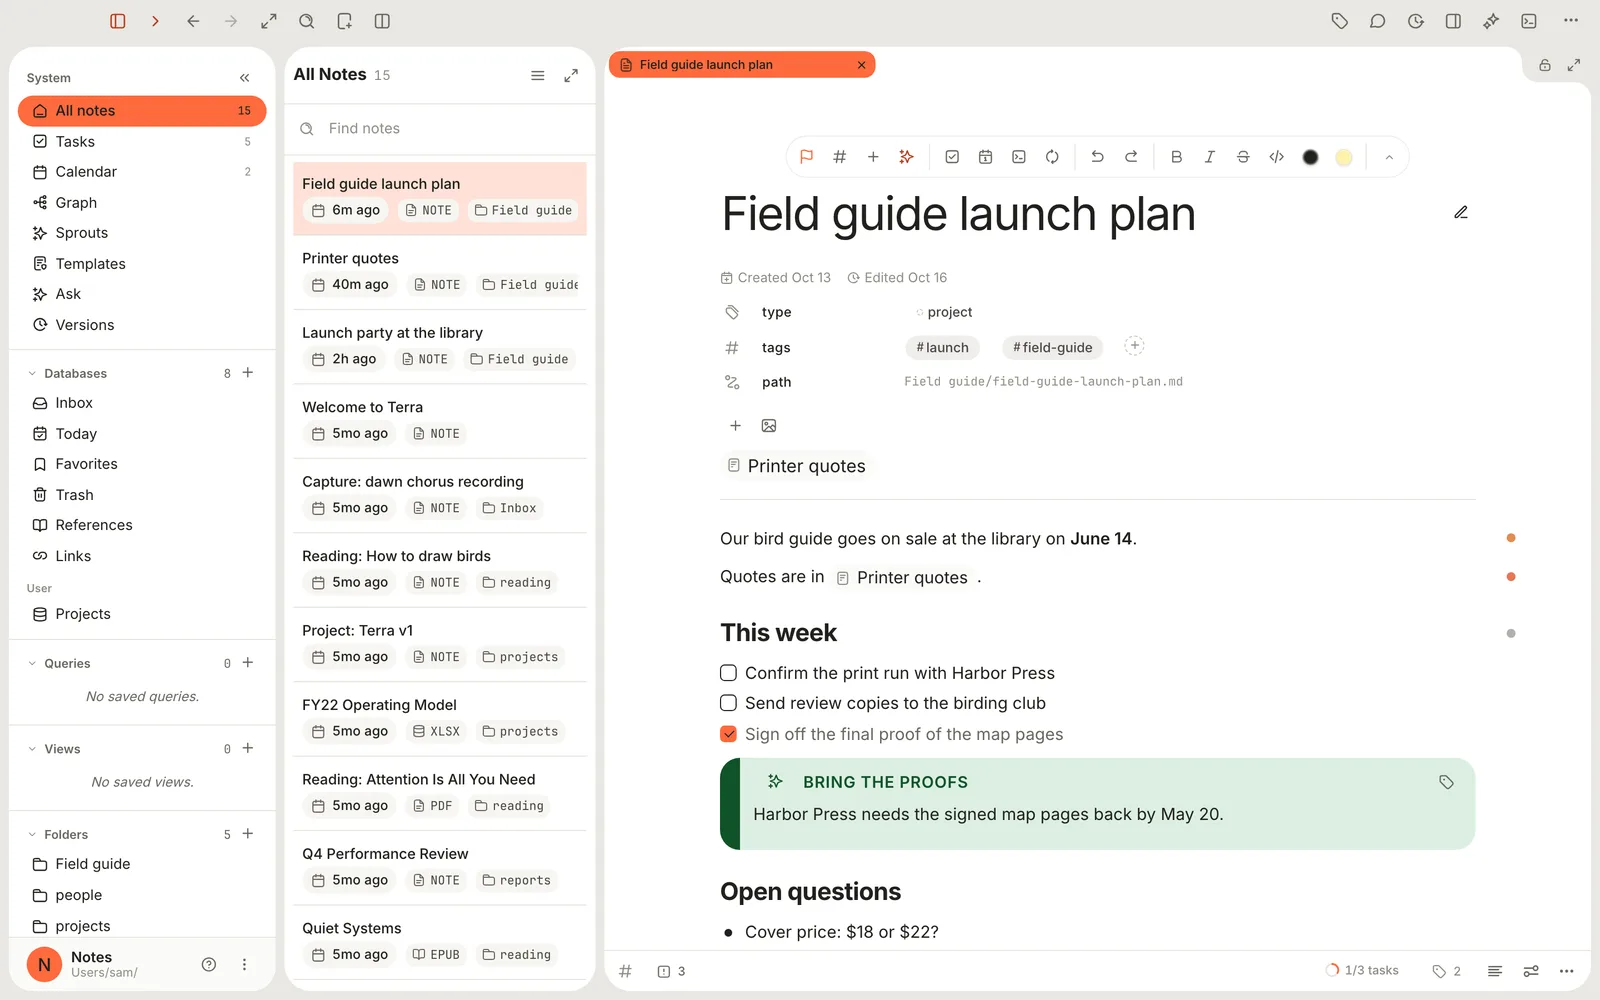
The **sidebar** is sectioned and includes surfaces such as **All notes**, **Tasks** and **Calendar**, then your own databases, saved views and folders. The **file list** shows a filter view of the picked surface in the sidebar. The open file or database fills the rest of the window. [Find your way around](https://terramd.io/docs/find-your-way-around) is the full tour.
## Step 3: Write your first note
1. Press ⌘ N, or choose **File › New Note**. New notes always start in your Library's `Inbox` folder.
2. Click **Untitled** and type a title: *Field guide launch plan*. **Path preview** shows the file name Terra will use.
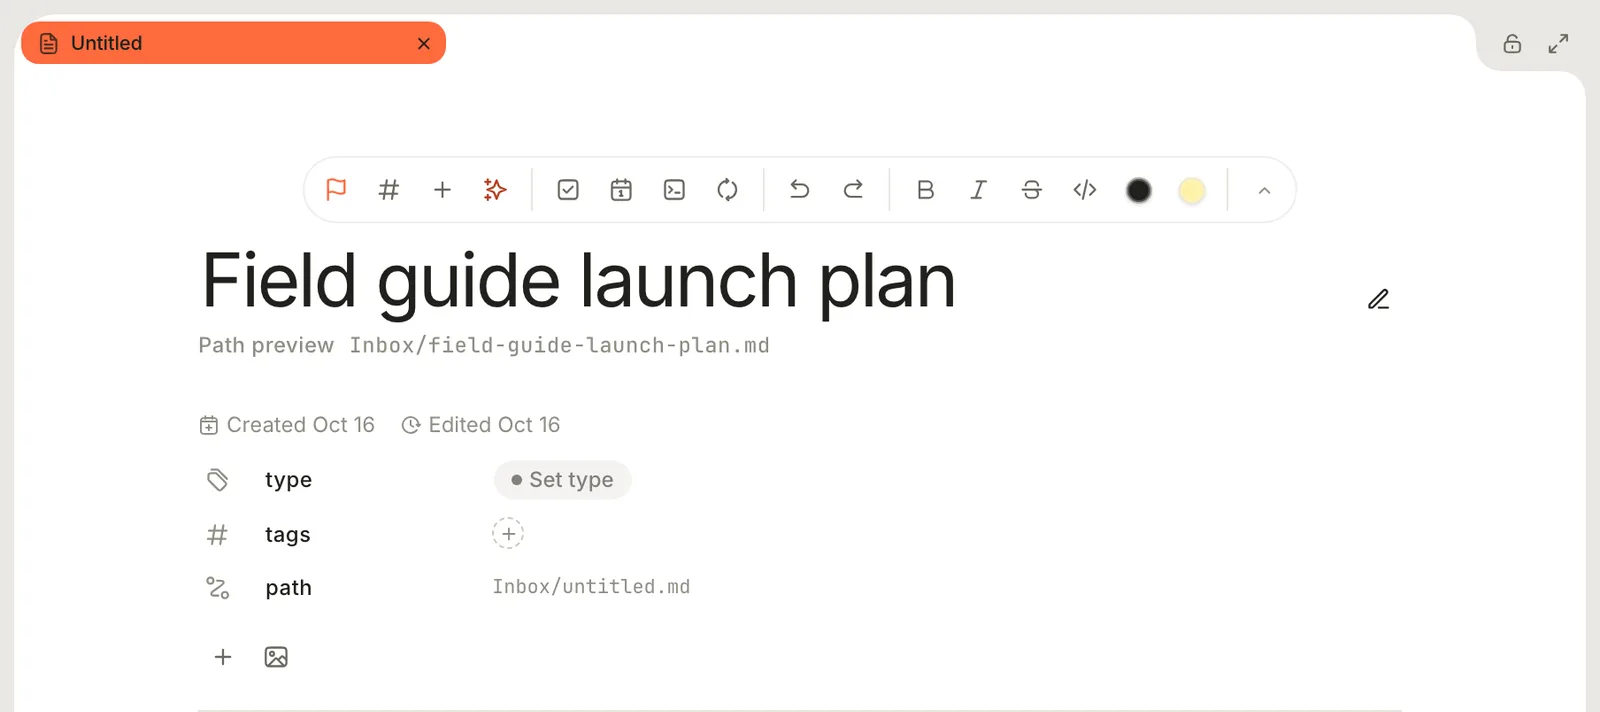
3. Press Return. Terra renames the file to match: `Inbox/field-guide-launch-plan.md`.
There's no Save button. Terra saves as you type.
## Step 4: Format as you type
Terra's principal data format is Markdown, formatted inside the file.
1. Click below the properties and type the first line, with two asterisks on each side of the date: `**June 14**`. Once the last asterisk is recognized this text turns bold.
2. Press Return and type `## `. The line becomes a heading after you type the space after `##`.
3. Press Return, type `[ ]` and a space. The brackets turn into a checkbox.
4. Press Return for each new to-do.
5. Click the last checkbox to tick it off.
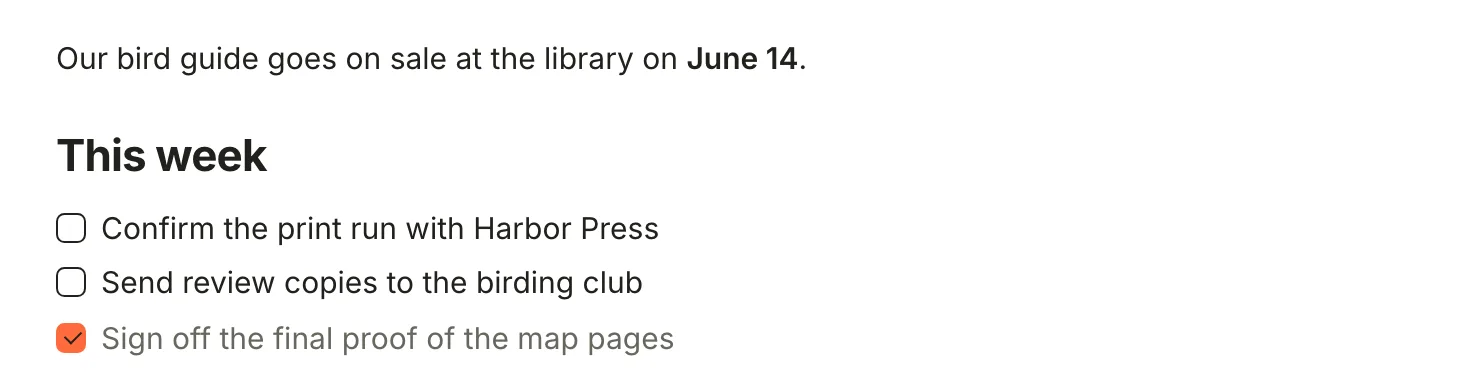
In the file, Terra saves standard Markdown:
```markdown
Our bird guide goes on sale at the library on **June 14**.
## This week
- [ ] Confirm the print run with Harbor Press
- [ ] Send review copies to the birding club
- [x] Sign off the final proof of the map pages
```
You can read more about recognized markdown in [basic formatting syntax](https://terramd.io/docs/formatting-syntax)
## Step 5: Add a Sprout
A [Sprout](https://terramd.io/docs/sprouts) is Terra's word for a callout.
1. Type `/sprout` and press Return.
2. Type what the sprout should say.
3. Click **Note** at the top of the Sprout and type title.
4. Click the icon at the Sprout's top left and choose **Tip** to change its class.

In the file, a Sprout is a quote with its kind in brackets.
```markdown
> [!tip] Bring the proofs
> Harbor Press needs the signed map pages back by May 20.
```
The `/` menu inserts other blocks too, such as tables, code blocks and dividers. The **+** button (**Insert block**) in the editor toolbar opens the same menu.
> [!NOTE] Sprouts are meant to grow.
> Sprouts are meant to grow. By clicking on the `Tag` icon you can assign a sprout its own queryable properties, while clickling on the Sprout icon allows you to `Convert to Note` making this sprout its own full fleged note automatically.
You can read more about sprouts in [Sprouts](https://terramd.io/docs/sprouts).
## Step 6: Link two notes
A link lets you jump from one note to another, and Terra keeps track of the links pointing back. See [Links and backlinks](https://terramd.io/docs/links-and-backlinks).
1. Make a second note: press ⌘ N.
2. Go back to the plan: press ⌘ [, or click it in the note list.
3. Click at the end of the first line, press Return and type *Quotes are in @pri*. A list of matching notes appears.
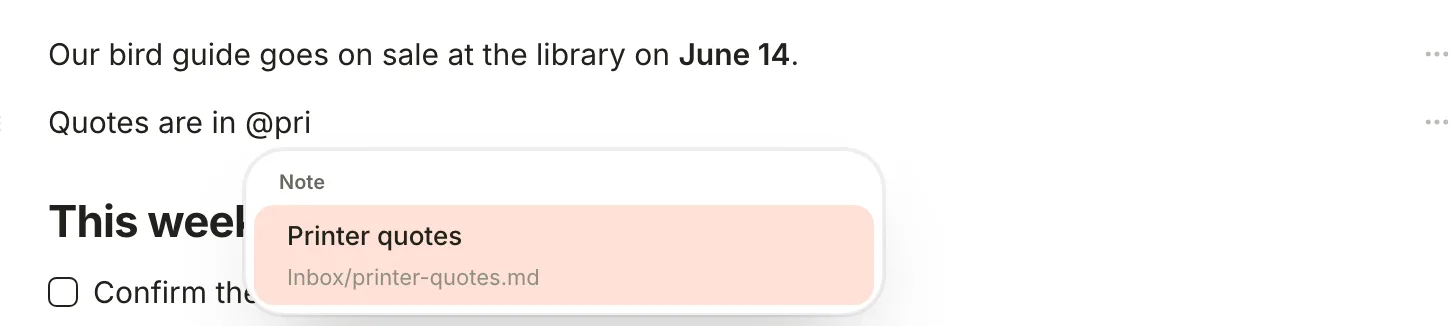
4. Under **Note**, pick **Printer quotes**. The link shows as a chip with the note's title. Click it to open the note.
5. Open **Printer quotes**. Above its text, **Backlinks (1)** shows that one note links here. Click it to see which.
In the file, the link is a wiki-link: `[[Printer quotes]]`. If you rename Printer quotes later, Terra updates the link in every note that uses it.
> [!NOTE] Coming from Obsidian?
> In this version, typing `[[` by hand doesn't make a clean link. Use `@` instead.
## Step 7: Tags
[Tags](https://terramd.io/docs/tags) group files across your library.
1. Click **#** (**Tag note**) in the editor toolbar.
2. Type `launch` and choose **Create tag launch**. The tag appears in the note's **tags** row.
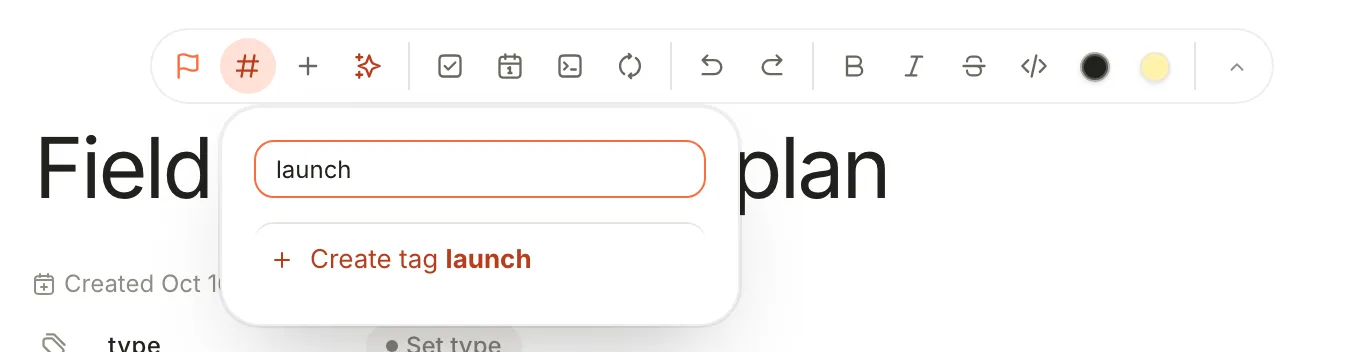
3. Open **Printer quotes** and tag it `launch` as well. This time, `launch` is in the list.
4. Right-click either `#launch` pill and choose **Open tag page** to see every note with that tag.
You can also tag from the text: type `#launch` followed by a space and it becomes a tag.
## Step 8: Find it again
1. Press ⌘ P (**Go to file**) and type a few letters of a title, such as `quot`. Press Return to open the top match.

2. To search what's *inside* your notes, press ⇧ ⌘ F or click **Search** in the toolbar. Try `tag:launch`, or a phrase in quotes. [Find anything in your Library](https://terramd.io/docs/power-search) shows what else it can do.
3. Press ⌘ K for the command palette. It runs any command by name, opens notes, and answers questions such as *how do I split a pane?* from Terra's Help.
## Troubleshooting
> [!NOTE]- My new note isn't in the folder I wanted
> New notes always start in `Inbox`. To file one, click **⋯** (**Note actions**) at the bottom right of the note and choose **Move note**, then a folder. You can also drag the note from the note list onto a folder in the sidebar.
> [!NOTE]- I can read my notes but can't type
> Terra opens notes read-only when you're signed out or your trial or subscription has ended. The banner at the top says which, with a button to fix it: **Sign in**, **Subscribe**, **Renew** or **Try again**. If the banner says **This Library was last edited by a newer Terra. Update to edit.**, update Terra on this Mac.
## Where to go next
- [Find your way around](https://terramd.io/docs/find-your-way-around): every part of the window, from split panes to Zen mode.
- [Bring in your notes](https://terramd.io/docs/bring-in-your-notes): import from Obsidian, Notion, Bear, Evernote and more.
- [Basic formatting syntax](https://terramd.io/docs/formatting-syntax): headings, lists, links, code and more, as you type them.
- [Databases](https://terramd.io/docs/databases): turn a folder of notes into a table, board or calendar.
- [Keyboard shortcuts](https://terramd.io/docs/keyboard-shortcuts): every key, and how to change them.
- [Make Terra yours](https://terramd.io/docs/make-terra-yours): themes, fonts and your own toolbar.
---
# Find your way around
> A map of the Terra window, from the toolbar, sidebar and note list to tabs, split panes, peeks, drawers, the shelf, Zen mode and the terminal.
Source: https://terramd.io/docs/find-your-way-around
Terra works in one window. Generally: a sidebar for getting around, a list of files, and one or more panes for the files you're working on. This page discusses each suface explicitly.

| Surfacce | Where | Description |
| --- | --- | --- |
| Toolbar | Across the top | Shortcuts and commands |
| Sidebar | Left | Views, databases, saved layouts and folders |
| File list | Beside the sidebar | The files in whatever you picked in the sidebar |
| Panes | The rest | The files, databases and pages you have open |
## Toolbar
The toolbar holds window-wide buttons. Hover over one to see its name and shortcut. The default Terra window contains from the left: **Sidebar**, **Database drawer** (the note list), **Back**, **Forward**, **Zen mode**, **Search**, **New…** and **Split**. With more than one pane open, **Split** allows the user to arange their panes by preference, such as **Side by side** or **60 / 40**. On the right: **Manager**, **Comments**, **Versions**, **Properties**, **AI conversations** and **Terminal**. The **⋯** button contains everything that does not fit.
To add, remove or rearrange buttons, right-click any of them and choose **Customize toolbar…**. See [Customizing Terra](https://terramd.io/docs/make-terra-yours#put-your-buttons-on-the-toolbar).
## Sidebar
The sidebar is your libraries launcher
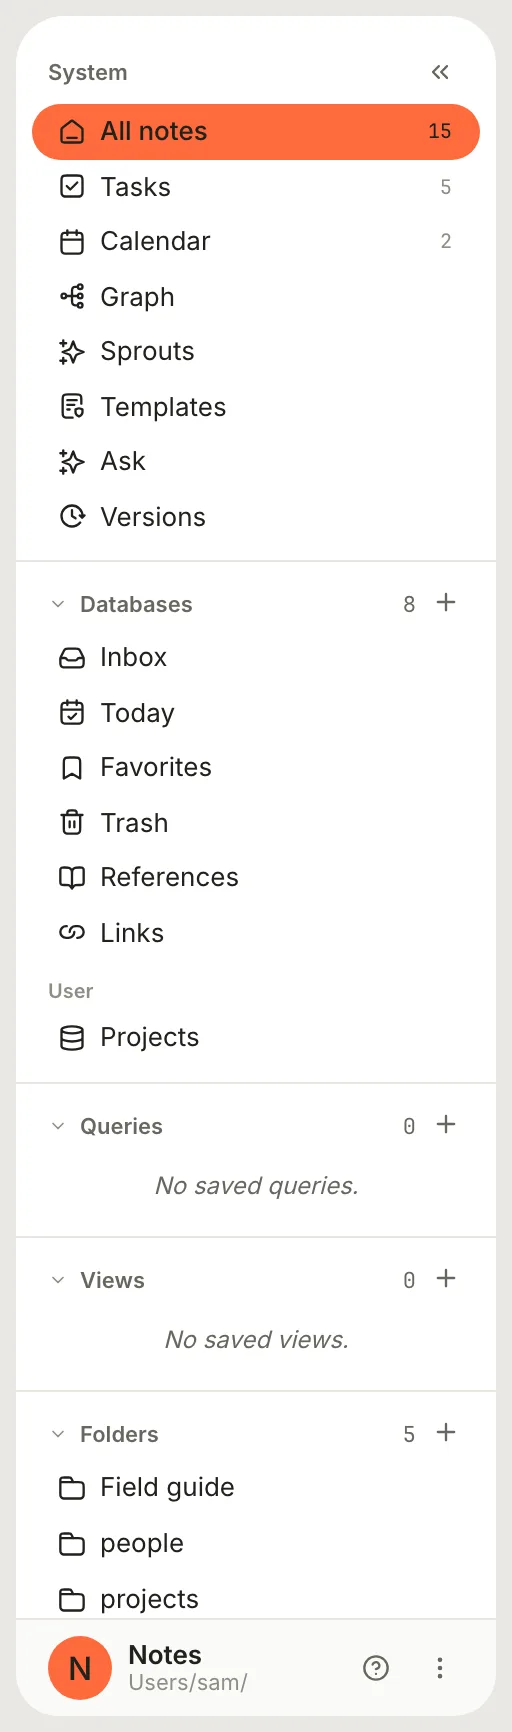
| Section | What's in it |
| --- | --- |
| System | **All notes**, **Tasks**, **Calendar**, **Graph**, **Sprouts**, **Templates**, **Ask** and **Versions** |
| Databases | Built-in collections (**Inbox**, **Today**, **Favorites**, **Trash**, **References**, **Links**), then your own [databases](https://terramd.io/docs/databases) under **User** |
| Canvases | Your free-form [canvases](https://terramd.io/docs/canvas-and-mind-maps). It appears once you have one. |
| Queries | Saved [queries](https://terramd.io/docs/queries) |
| Views | Saved arrangements of panes. Not the same as a database's views. |
| Folders | The real folders inside your Library folder |
| Web | Web pages open in Terra |
The **+** in each section creates something in it, such as a database, a saved layout or a folder. Right-click a section's name for **Collapse all** and **Expand all**, or right-click a row for more, such as **Pin to rail**.
At the bottom are the Library's name and folder, a `?` button for Help, and the `⋮` **Library menu**, with **Switch library…**, **Open in Finder**, **Library settings…** and **Copy library path**.
Hide the sidebar with ⌘ B. A slim rail replaces it with **All notes**, **Tasks**, **Calendar** and everything you've pinned. In a narrow window, Terra folds the sidebar into the rail on its own.
## File list
The file list shows the files from whatever you picked in the sidebar: all notes, a folder, a tag or one of your databases. Click a note to open it in the pane. Hold ⌘ as you click to open it in a new tab.
- Type in **Find notes** to filter the list.
- Click **☰** (**More explorer controls**) for **Filter**, **Sort**, **Group**, **Properties**, the row density and **Reset view**.
- Drag a note onto a folder in the sidebar to move it there, or onto the edge of a pane to open it beside what's there.
The list steps aside for views that fill the window, such as **Tasks** and **Calendar**. Show or hide it any time with **Database drawer** in the toolbar.
## Panes and tabs
A pane is a tile in the main part of the window. Each one holds tabs: notes, databases, web pages, Help.
When a pane already shows something, clicking a note in the sidebar or the note list opens it in a new tab. Clicking a link inside a note opens it in place. Right-click a tab for **Close**, **Close Others**, **Close Left**, **Close Right**, **Close All**, **Pin Tab** and, for notes, **Duplicate**. Pinned tabs stay put when you close the others. ⇧ ⌘ T reopens the last tab you closed.
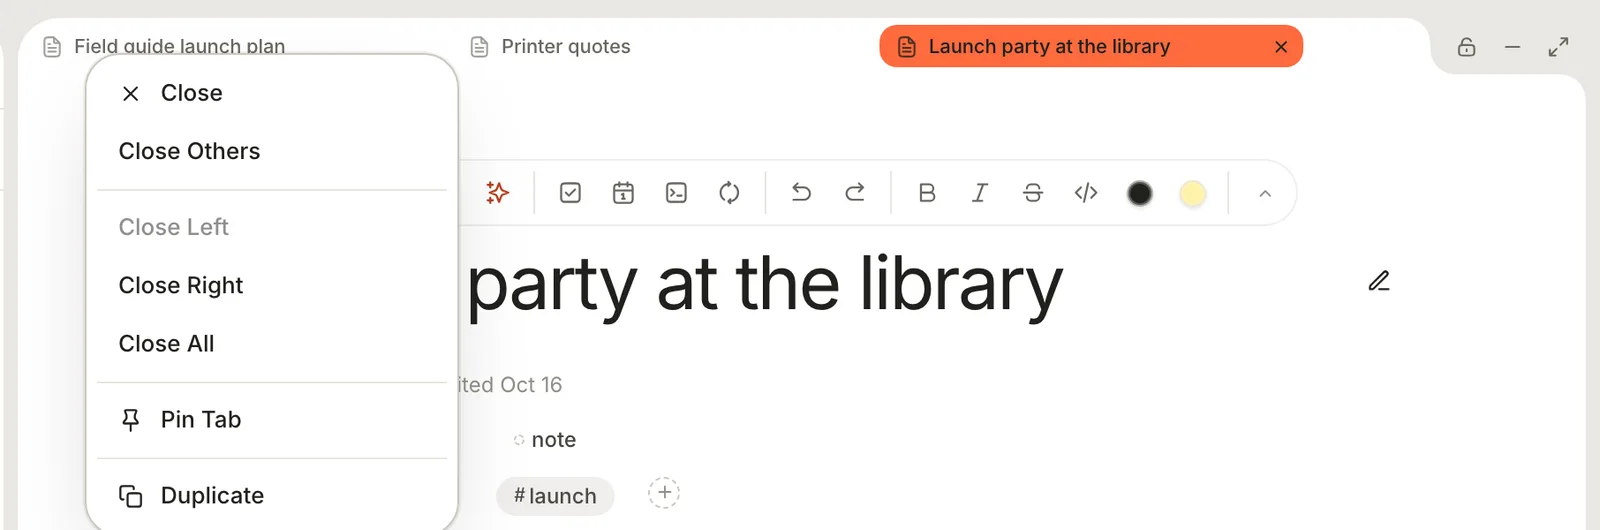
At the right end of each pane's row of tabs are three buttons: **Lock pane** keeps it in place when you change the layout, **Minimize to shelf** parks it at the bottom of the window, and **Maximize pane** gives it the whole window until you press Esc.
## Split panes
Work on two to four things side by side.
- Click **Split** in the toolbar, or press ⌘ \. A second pane opens to the right.
- Or drag a note, or a tab, onto the edge of a pane and drop it on **Split**.
- Pick a layout from the toolbar: **Side by side**, **60 / 40** or **Stacked** for two panes, **Three columns** or **Main + two** for three, **2 × 2** for four.
- Drag the line between two panes to resize them. Hold ⇧ to snap to thirds, or double-click it to make them equal.
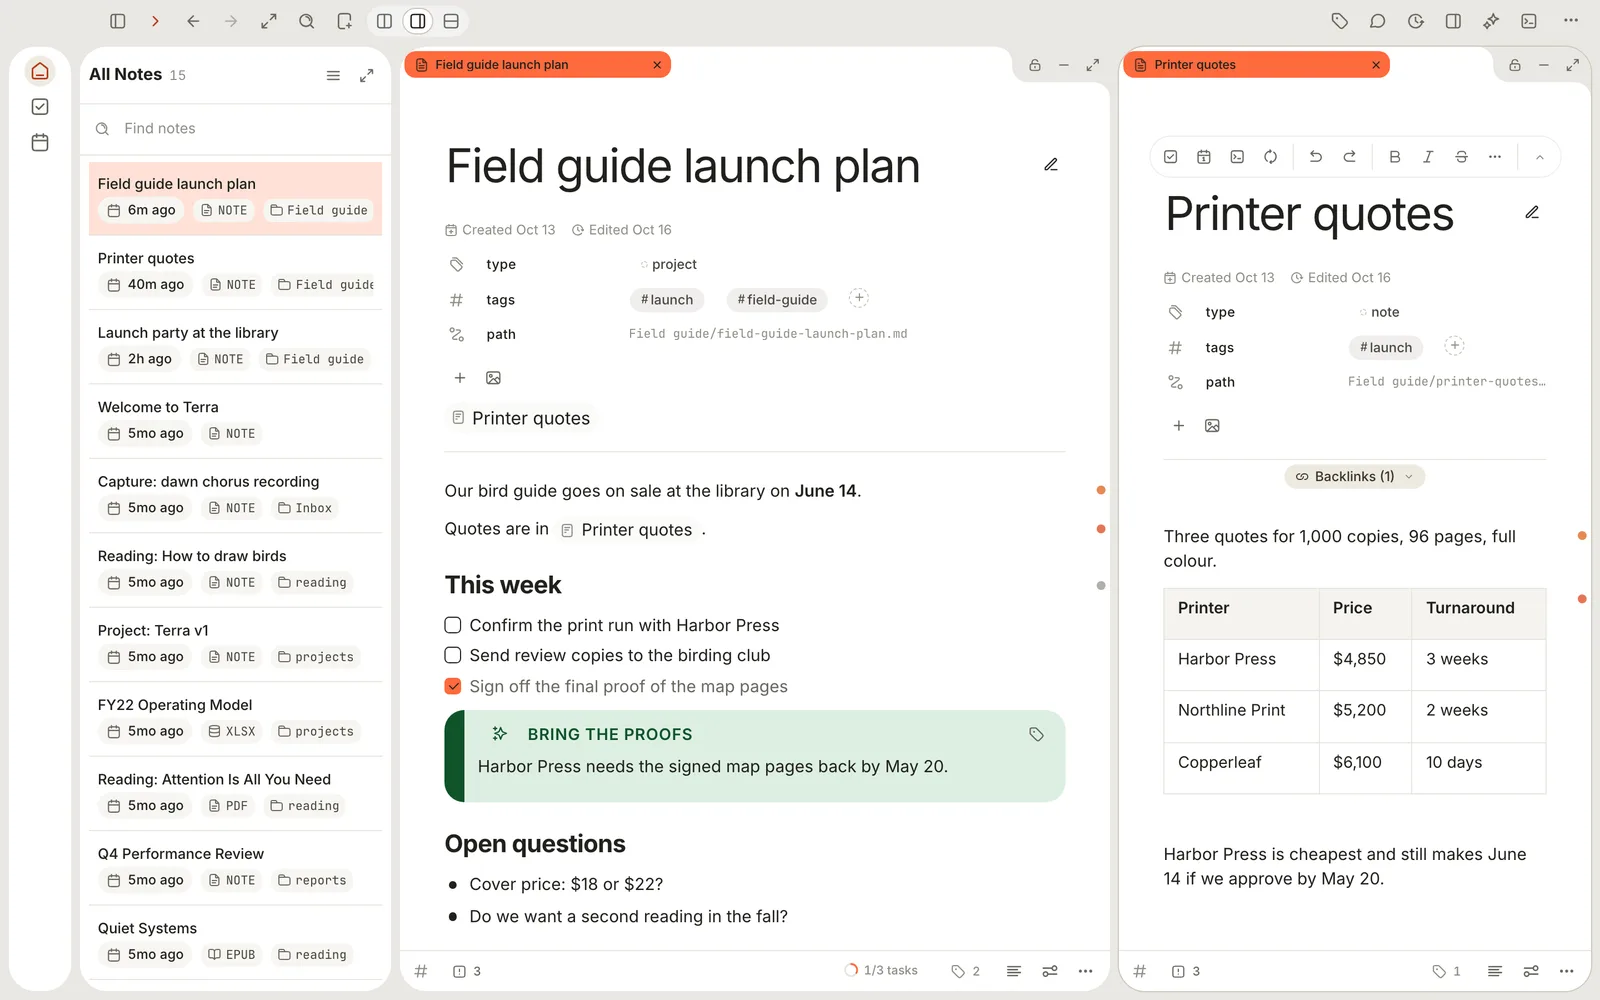
A window holds up to four panes. To keep an arrangement, click **+** in the sidebar's **Views** section, type a **View name**, click **Next**, then **Save**. Clicking the view later brings the panes back. See [Views and layouts](https://terramd.io/docs/views-and-layouts) for the views inside a database, which are a different thing.
## Peek
A peek shows a note over the pane you're in, without leaving your place. Clicking a row in a database opens it in a peek, docked on the right.
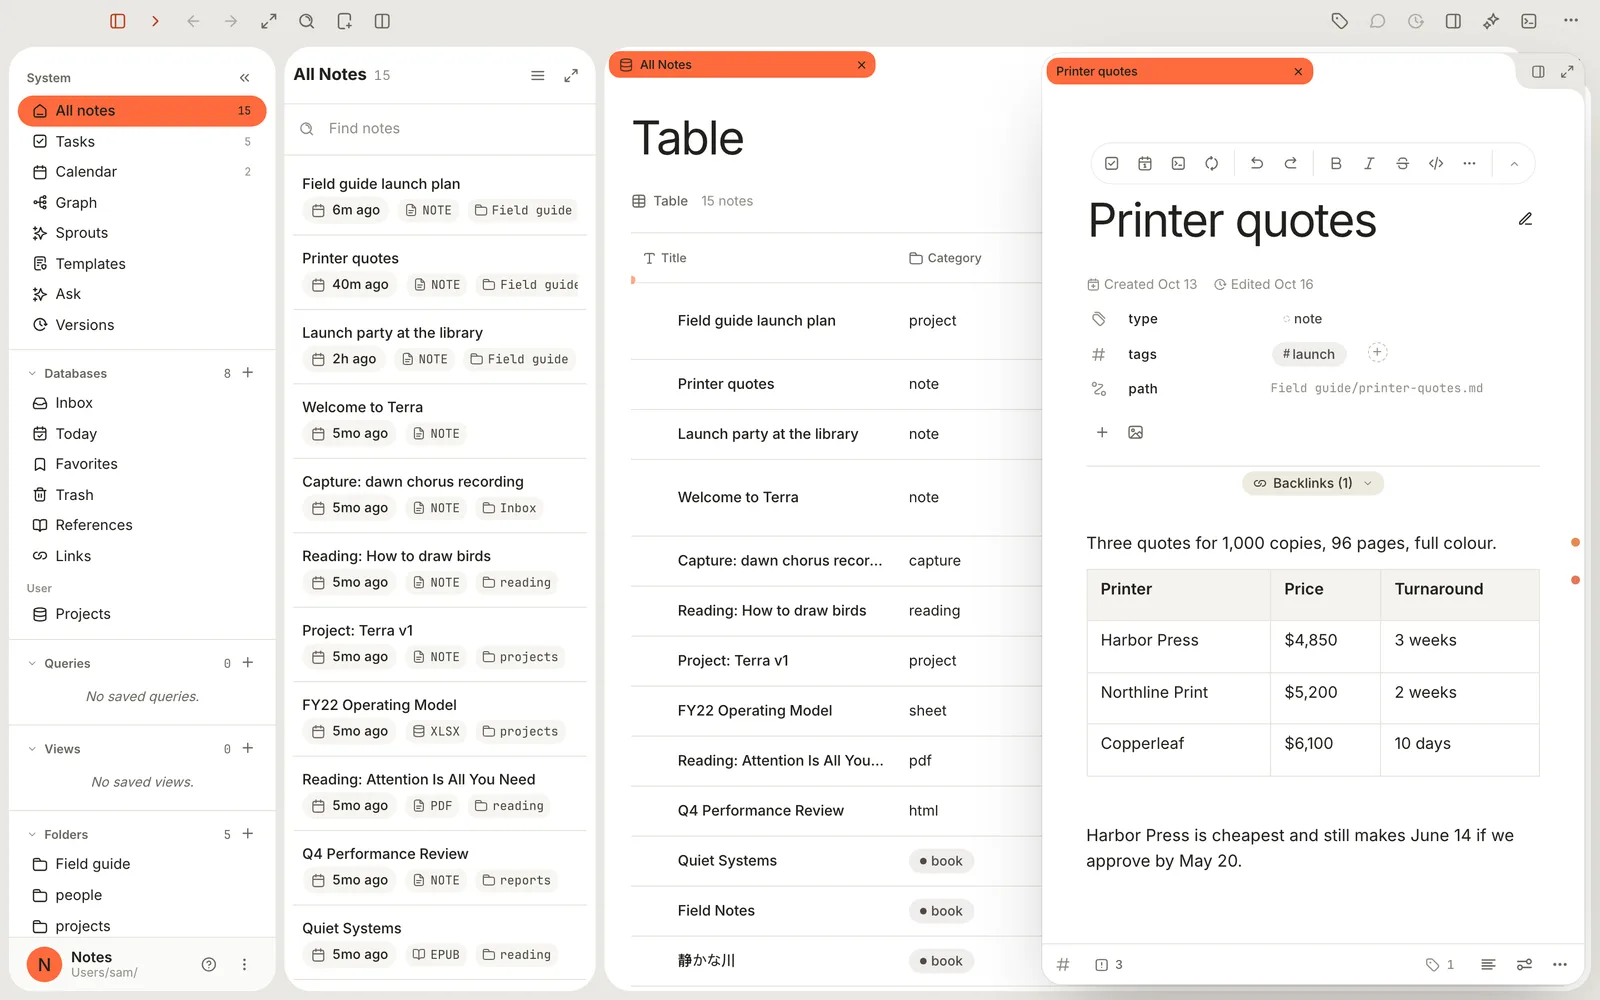
- Click the position button at the peek's top right to choose **Dock left**, **Dock right**, **Center**, **Bottom sheet** or **Open in split**. You can also drag the peek by its header.
- **Maximize pane** turns the peek into a pane of its own.
- Press ⌃ ⇧ J or ⌃ ⇧ K for the next or previous row.
- Press Esc, or click **×**, to close it. Up to four peeks can be open at once.
A database view can open notes in a pane or full page instead: change **Open notes** in its settings. See [Databases](https://terramd.io/docs/databases).
## Drawers
The panel on the right holds information about the open note. Click **Properties** in the toolbar, or press ⌘ R, to show or hide it.
Buttons along the bottom of the panel turn its sections on and off: **Properties**, **Calendar**, **Tasks**, **References**, **Comments**, **Versions** and **Diagnostics**. Beside **Tasks** and **Calendar**, the panel offers **Calendar**, **Tasks** and **Filter** instead. The **Comments** and **Versions** buttons in the toolbar open those sections directly.
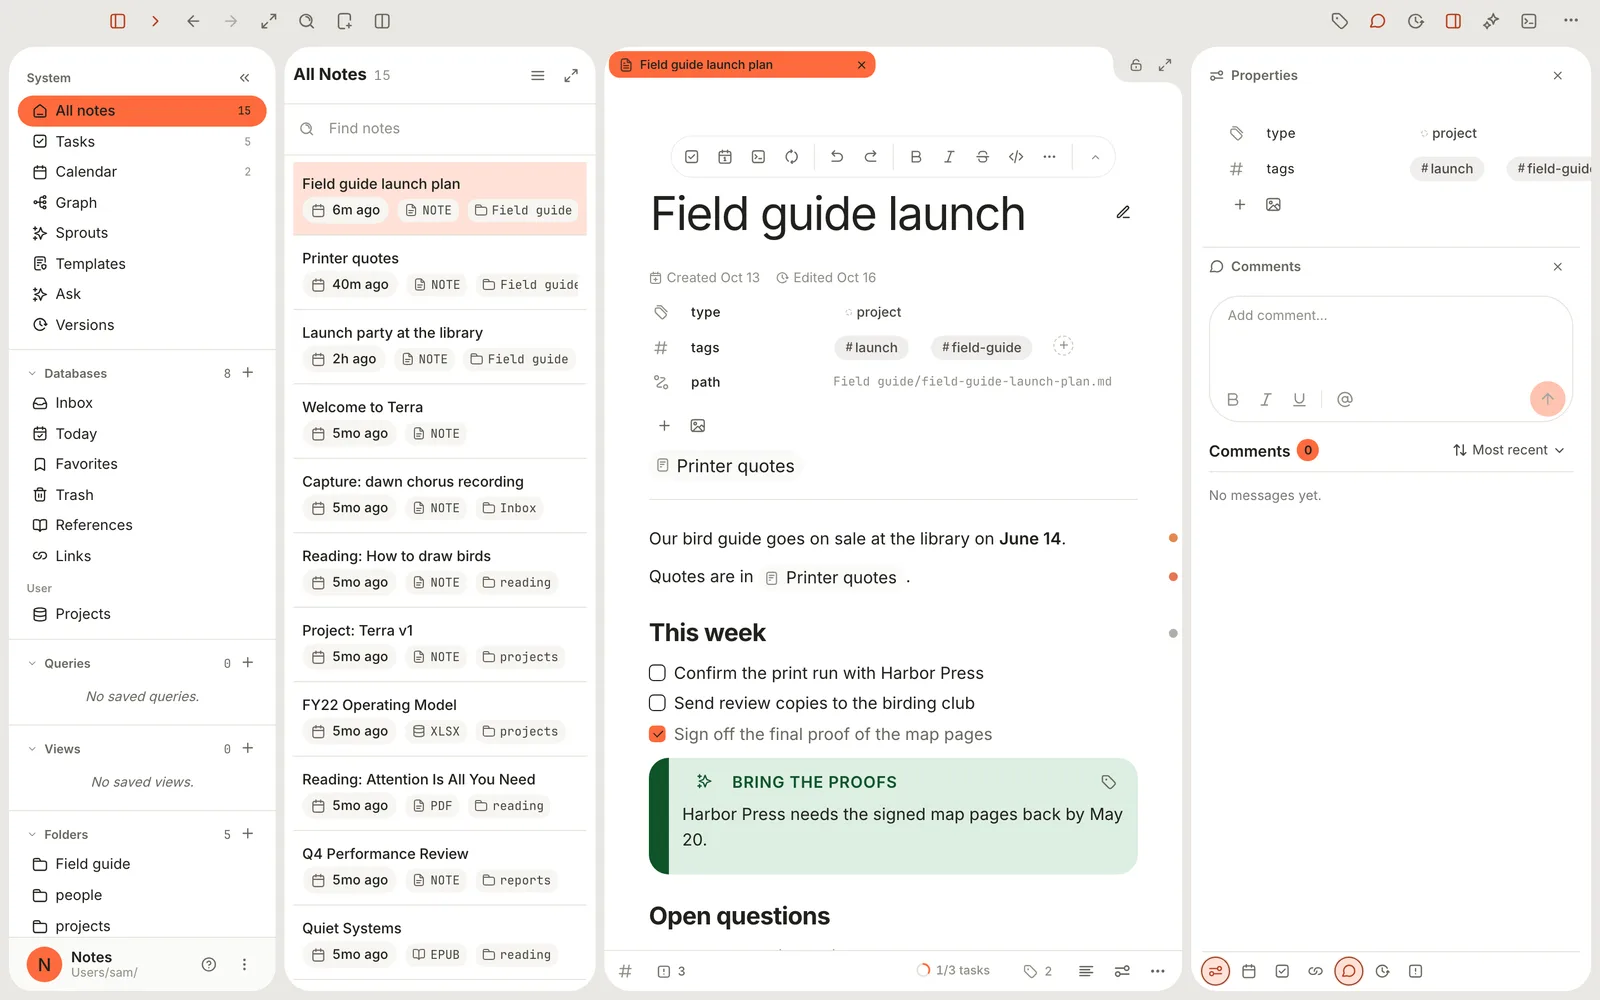
**AI conversations** in the toolbar opens a separate drawer for chatting with the assistant. See [Ask your Library](https://terramd.io/docs/ask-your-library).
## Shelf
The shelf is a strip at the foot of the window for panes you've set aside. Click **Minimize to shelf** in a pane's header to park it there. Click it on the shelf to bring it back, or drag it onto a pane. The last pane in the window can't be minimized.

## Zen mode
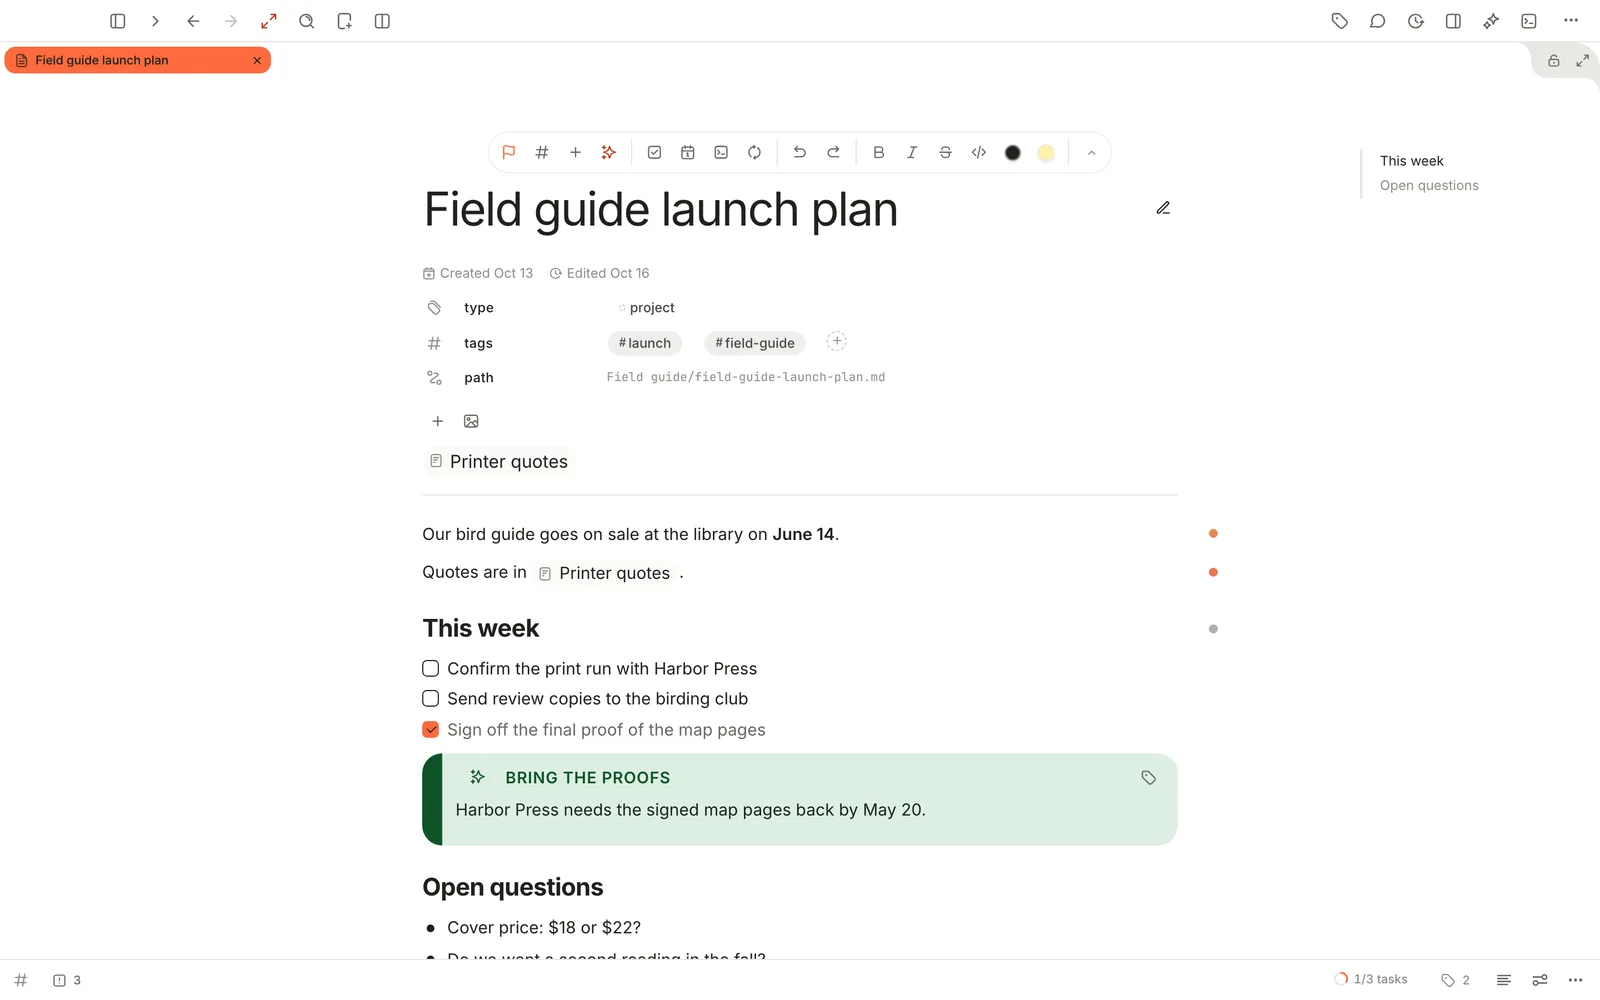
Zen mode clears everything but your panes. Press ⌥ ⌘ Z, click **Zen mode** in the toolbar, or right-click an empty part of the window and choose **Zen mode**. The sidebar, rail, note list, **Properties** and **AI conversations** all close. Do the same again to leave: the sidebar and the note list come back.
## Terminal
Terra has a terminal for running commands in your Library's folder. Press ⌘ J, or click **Terminal** in the toolbar, and the panel opens under your panes. Click **Open a terminal**. macOS asks **Open this exact terminal?**; click **Allow**.
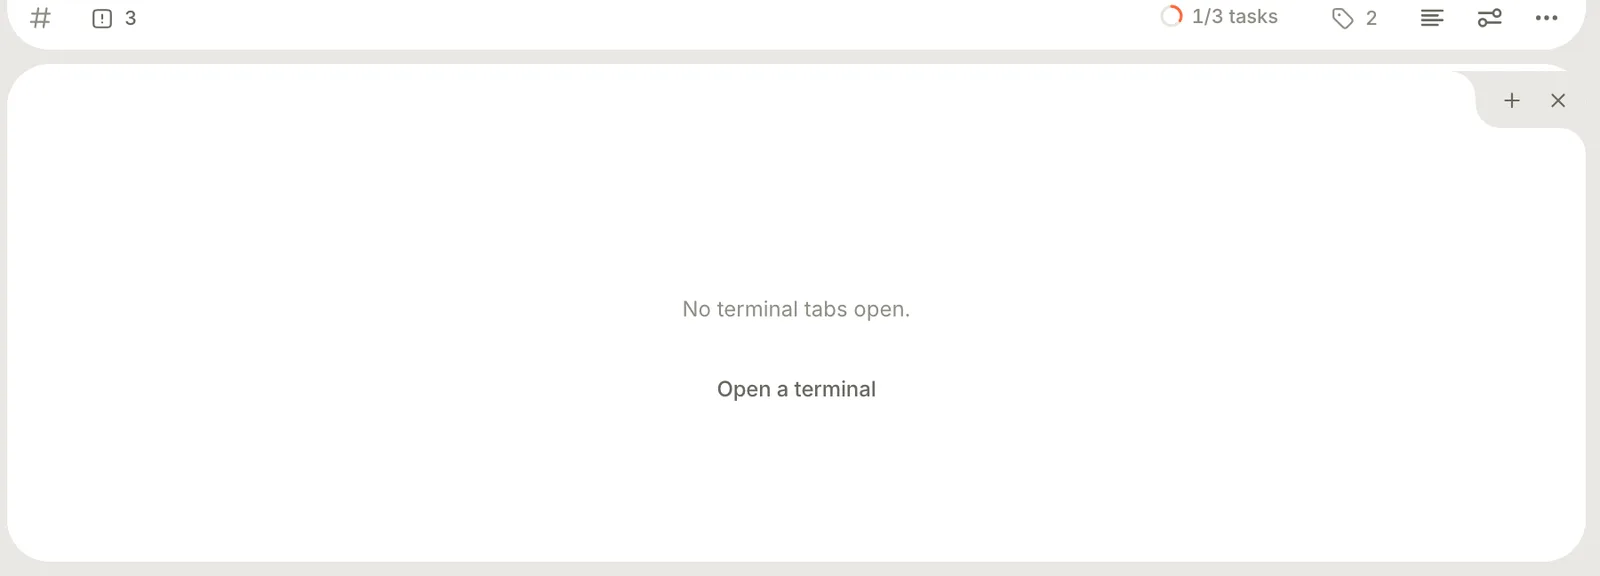
Use **+** for more terminal tabs, and **×** (**Close terminal panel**) to put it away. If you never use it, switch **Terminal** off in **Settings › Features**.
## Command palette
The command palette runs any command by name. Press ⌘ K or ⇧ ⌘ P and start typing. It lists commands with their shortcuts, notes whose titles match, and answers from Terra's Help. Commands that can't run right now appear dimmed, with the reason underneath.
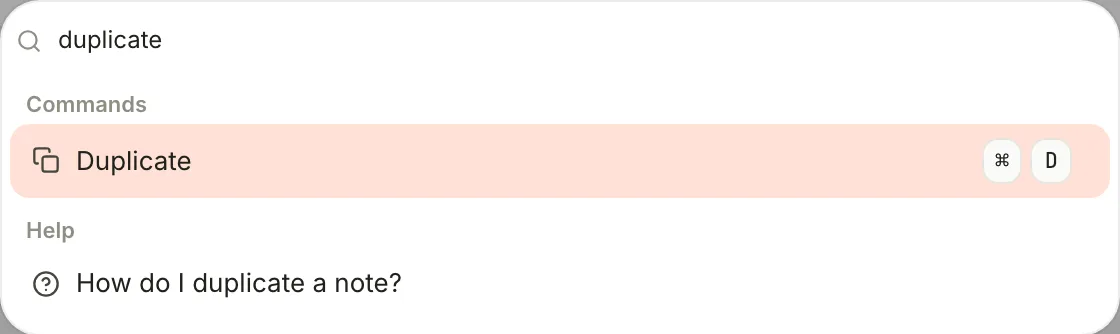
To open a note by name, ⌘ P (**Go to file**) is quicker. To search inside notes, press ⇧ ⌘ F; see [Find anything in your Library](https://terramd.io/docs/power-search).
## Settings
Press ⌘ , or choose **Terra › Settings…**. Settings is grouped down the left: **Workspace** (Account, General), **App** (Appearance), **Library** (Editor, Hotkeys, Toolbar, Privacy, AI, Search, Capture, Database, Files, Canvas, Import, Features) and **System** (Open With, Code, Lint, Integrations, Advanced). Settings in the **Library** group, and most of **Appearance**, belong to the Library that's open. Most changes take effect straight away; the **Toolbar** pane is the exception, with its own **Apply** button.
## Help
- The **Help** menu has **Search Help…**, **Keyboard Shortcuts** and **What's New**.
- The **?** at the bottom of the sidebar opens the same: **Full changelog**, **Keyboard shortcuts** and **Documentation**.
- Type a question into the command palette, such as *how do I split a pane?*, to see answers from Help.
Help opens as a tab, so you can keep it beside your work.
## Related
- [Get started with Terra](https://terramd.io/docs/quickstart): your first notes, step by step.
- [Keyboard shortcuts](https://terramd.io/docs/keyboard-shortcuts): every key for the parts of the window on this page.
- [Make Terra yours](https://terramd.io/docs/make-terra-yours): themes, fonts and your own toolbar.
- [Glossary](https://terramd.io/docs/glossary): the Terra words used here.
---
# Bring in your notes from another app
> Move your notes into Terra from Obsidian, Notion, Bear, Evernote, Roam, a Markdown folder or a reference manager, or open an existing folder as it is.
Source: https://terramd.io/docs/bring-in-your-notes
You've built up years of notes somewhere else: an Obsidian vault, a Notion workspace, a stack of Evernote notebooks. Moving to a new app shouldn't mean copying pages across one at a time.
Terra gives you three ways in. If your notes are already Markdown files, you can open their folder as a [Library](https://terramd.io/docs/libraries) and carry on with the same files. For other apps, Terra's importer turns an export into Markdown notes inside your Library and leaves the original untouched. And single files, such as PDFs, images or a few stray notes, you can drag straight in from Finder.
> [!SUMMARY]
> - Choose between opening a folder as it is and importing a copy
> - Open an Obsidian vault or a Markdown folder as a Library
> - Import from Obsidian, Notion, Bear, Evernote, Roam, Markdown folders and reference managers
> - Check what came in, including links that didn't connect
> - Drag individual files in from Finder
> [!BEFORE]
> - Terra installed. To import, have a Library open; to use an existing folder, you'll open it as the Library in Step 1.
> - An export from your old app, unless it's Obsidian or a plain folder of Markdown. Step 3 lists what each source needs.
> - About 10 minutes, plus however long a large import takes.
## How it fits together
| Your notes are… | Best way in | Your original files |
| --- | --- | --- |
| An Obsidian vault or another folder of `.md` files you'll keep using | Open the folder as a Library ([Step 1](#open-a-markdown-folder-as-a-library)) | Used where they are; Terra edits them |
| In Obsidian, but you'd rather try Terra on a copy or add them to a Library you already have | Import ([Steps 2 to 5](#open-the-importer)) | Left alone |
| In Notion, Bear, Evernote, Roam, Apple Notes or a reference manager | Import ([Steps 2 to 5](#open-the-importer)) | Left alone |
| A handful of files | Drag them in ([Step 6](#drag-in-individual-files)) | Left alone; Terra copies them |
## Step 1: Open a Markdown folder as a Library
If your notes are already Markdown files, Terra can use them where they are, with nothing converted or copied.
1. Press ⌘ O (or choose **File › Open Library…**) and choose **Open other…**. If no Library is open yet, click **Choose folder** instead.
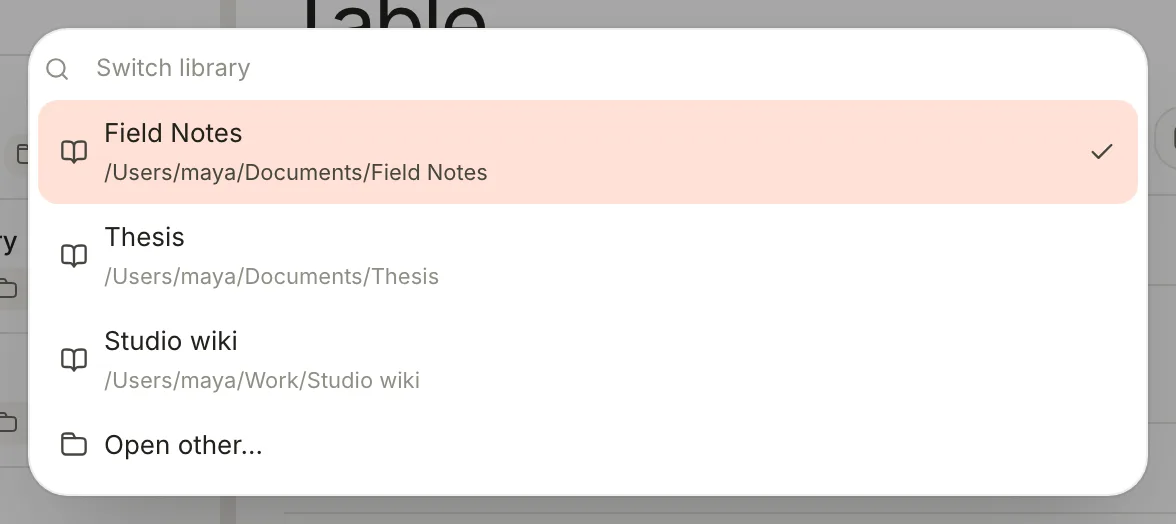
2. Pick your vault or notes folder and click **Open**.
Terra adds what it needs, a hidden `.terra` folder and `.terra-library.toml` plus an `Inbox` folder and `Themes/default.css`, and leaves your notes as they are. Notes without a header show their file name as the title, and links written `[[Note name]]` work in Terra too.
> [!NOTE] Coming from Obsidian
> - Terra writes its own header (`id`, `title`, `created`, `updated`) into a note the first time you edit it, and saves the file in its own Markdown style. [What Terra changes when it saves](https://terramd.io/docs/how-terra-stores-your-notes#what-terra-changes-when-it-saves) lists the details.
> - Obsidian's settings folder, `.obsidian`, appears in Terra's **Folders** list. It holds no notes; leave it be.
> - Callouts show as [Sprouts](https://terramd.io/docs/sprouts). Terra's kinds are lowercase (`> [!tip]`), so `> [!TIP]` shows without its colour, and a collapsible callout (`> [!note]-`) stays a plain quote.
> - Obsidian plugins and their settings don't carry over.
## Step 2: Open the importer
Importing makes converted copies of your notes in the Library that's open now, so you can try Terra without touching the originals.
1. Right-click an empty part of the sidebar, such as the space under **Views**, and choose **Import library…**.
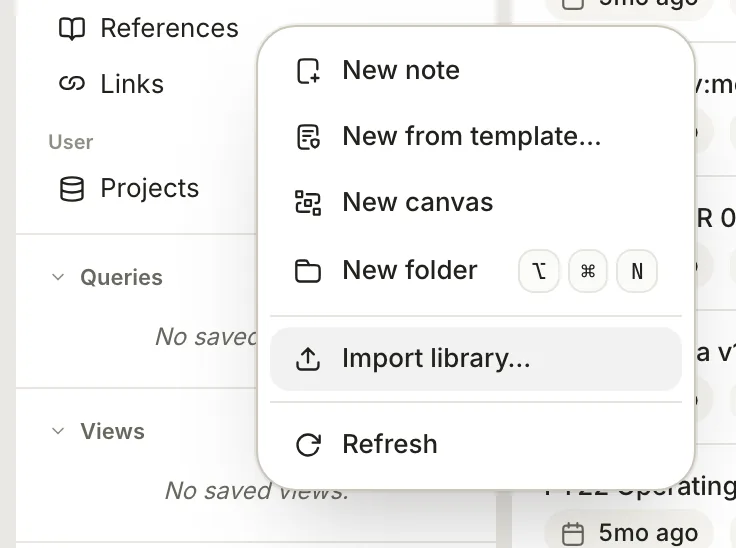
2. The **Import** window opens. (The same options are in **Settings › Import**.)
## Step 3: Choose your source
1. Under **Source**, click the app your notes come from.
2. Click **Browse** and pick the export or folder in the window that opens, or paste its path into the box.
3. **Destination** shows where the notes will go, a folder such as `Imported/Obsidian/` in your Library. You can't change it here, but you can move the notes afterwards.
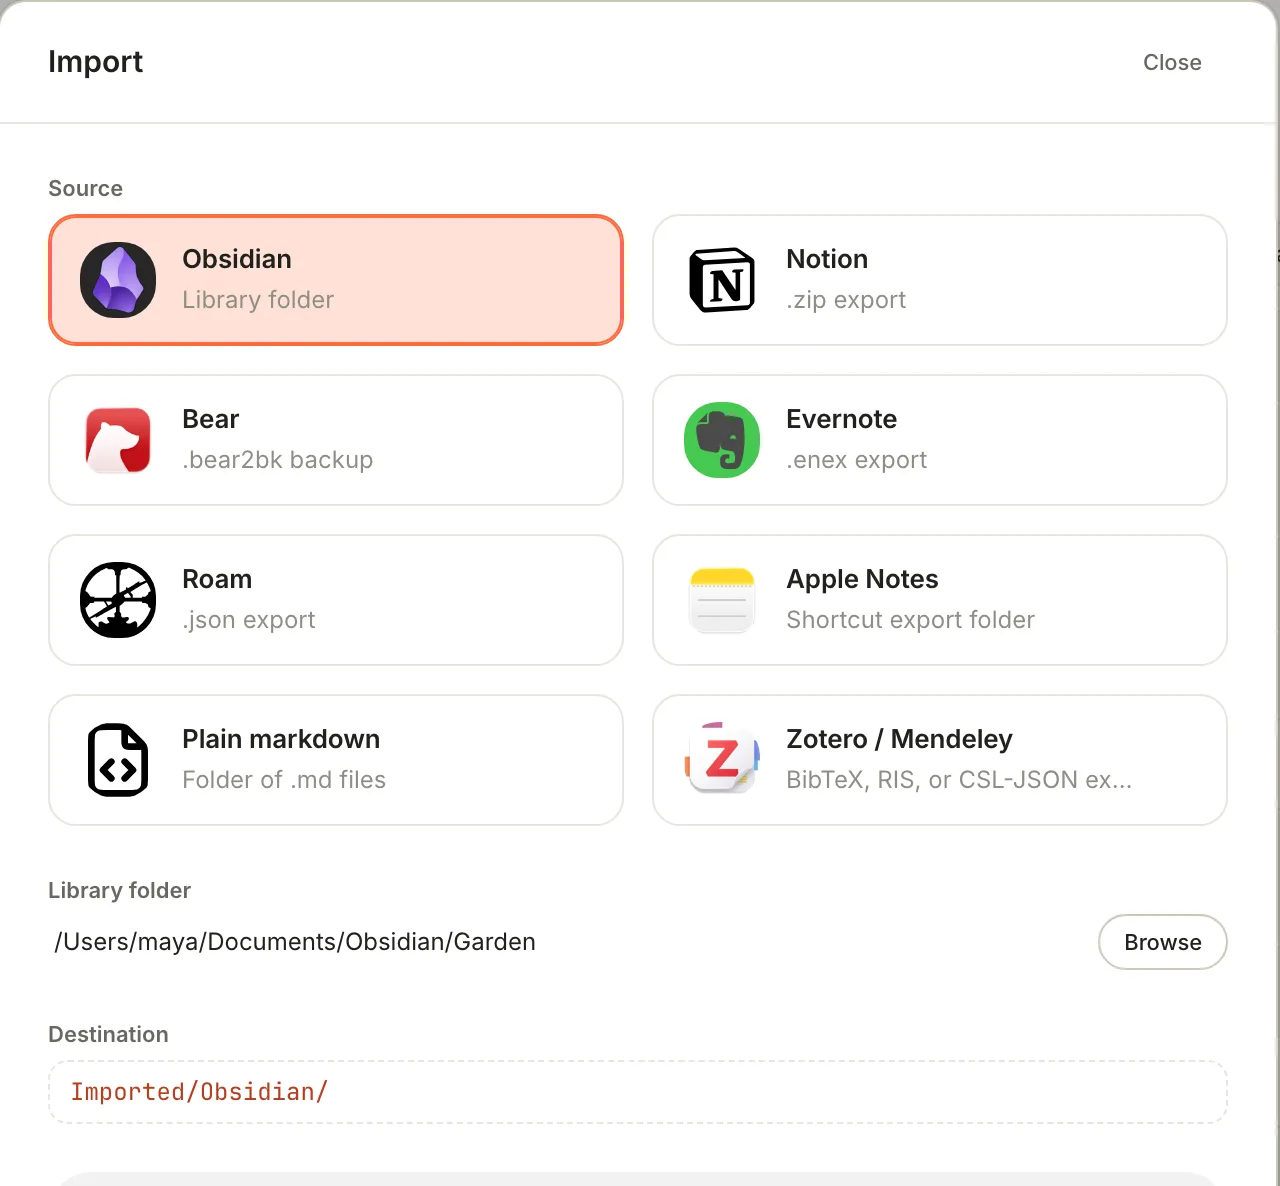
What each source expects, and what Terra does with it:
| Source | What to give Terra | What Terra does |
| --- | --- | --- |
| **Obsidian** | The vault folder | Keeps each note's header, its text and your `#tags`. Uses each file's dates for created and updated, adds a `recurrence` property for the first recurring task (`🔁 every …`) in a note, and skips the `.obsidian` folder. |
| **Notion** | A `.zip` export in **Markdown & CSV** format | Turns page properties into note properties and fixes up callouts and links between pages. Formula, rollup and relation values come in as text. Each Notion database becomes a note with its CSV file attached, not a Terra database. |
| **Bear** | A `.bear2bk` backup | Moves tags written on lines of their own into the note's tags, and removes those lines. |
| **Evernote** | An `.enex` export | Converts each note to Markdown with its title, dates, tags and attachments. Each notebook becomes a folder. |
| **Roam** | A `.json` export | Makes one note per page. Blocks become nested bullets, block references become embeds, and `key:: value` lines become properties. |
| **Apple Notes** | A folder of Markdown files exported from Apple Notes | Reads the folder like plain Markdown. Apple Notes can't make this export itself, and Terra doesn't include an export Shortcut yet. |
| **Plain markdown** | A folder of `.md` files | Copies each note as it is, header included. |
| **Zotero / Mendeley** | A BibTeX (`.bib`), RIS (`.ris`) or CSL-JSON (`.json`) export | Makes one note per reference, with its citation key and bibliographic details as properties. See [Build a research library](https://terramd.io/docs/research-library). |
> [!NOTE] Images in vaults and folders
> For Obsidian, Apple Notes and plain Markdown, images and files that sit in the same folder as a note are copied into an `attachments` folder beside it, and the note's links to them are updated. Files kept somewhere else, such as one shared attachments folder for the whole vault, aren't copied. If you rely on one, open the vault as a Library instead (Step 1).
## Step 4: Set the options and start
1. Choose a **Conflict policy**, which decides what happens when a note of the same name is already in the destination: **Skip existing** (the default), **Keep both (suffix)** or **Replace**. It matters when you import the same source twice.
2. Leave **Copy attachments** on to bring linked files along, and **Preserve original timestamps** on to keep the dates from your old app where it has them.
3. To check before you commit, click **Preview contents**. **Import preview** counts the **Notes** and **Attachments** to come, and shows **Needs review** if some files can't be read.
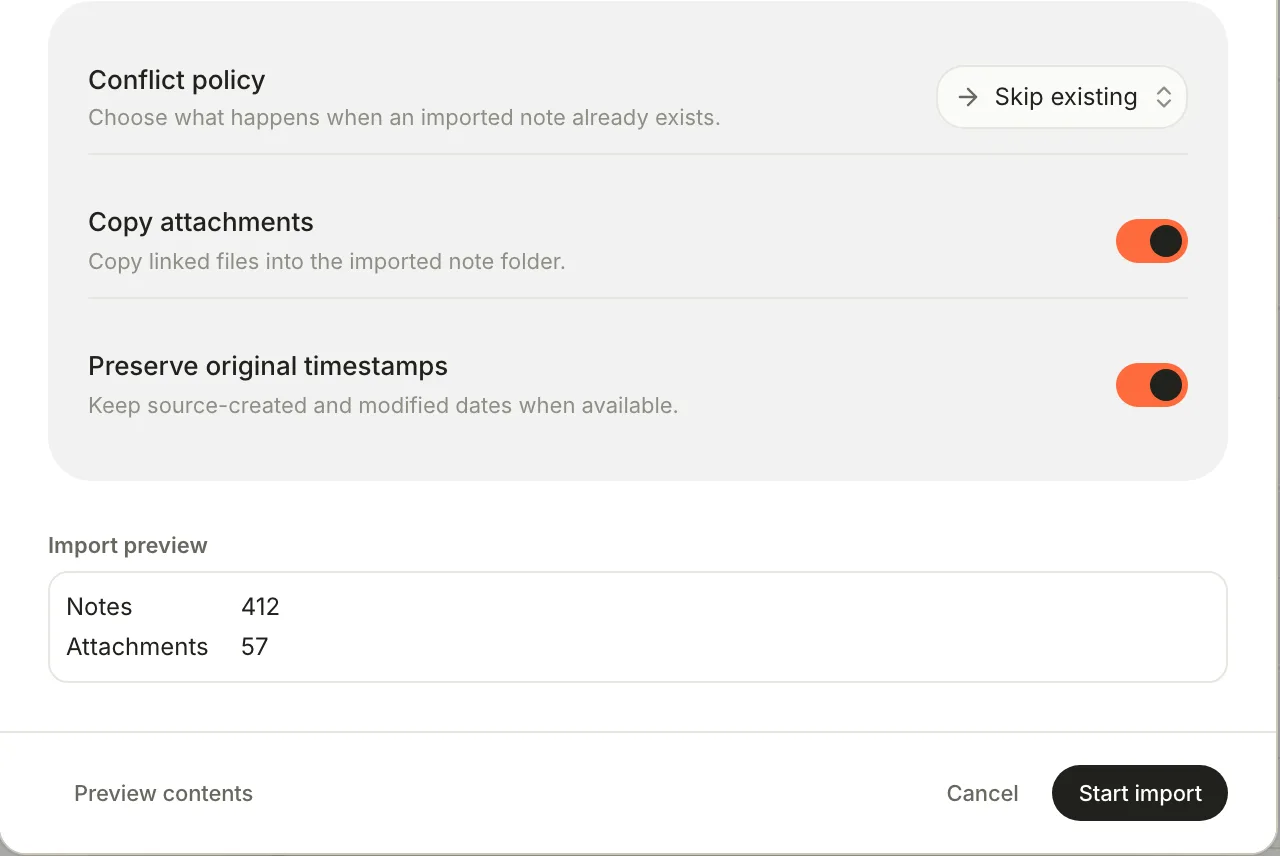
4. Click **Start import**. The window closes, and a progress bar at the bottom of Terra's window shows **Imports** with the source, a count and the last note written. Click **Cancel** on it to stop.
## Step 5: Check what came in
1. When the bar reaches 100%, click **▾ Show details** for a summary of the run.
2. Find the new notes under **Folders** in the sidebar: open **Imported**, then the folder for your source. Open a few notes to see how they came through.
3. Click **Dismiss** to put the summary away.
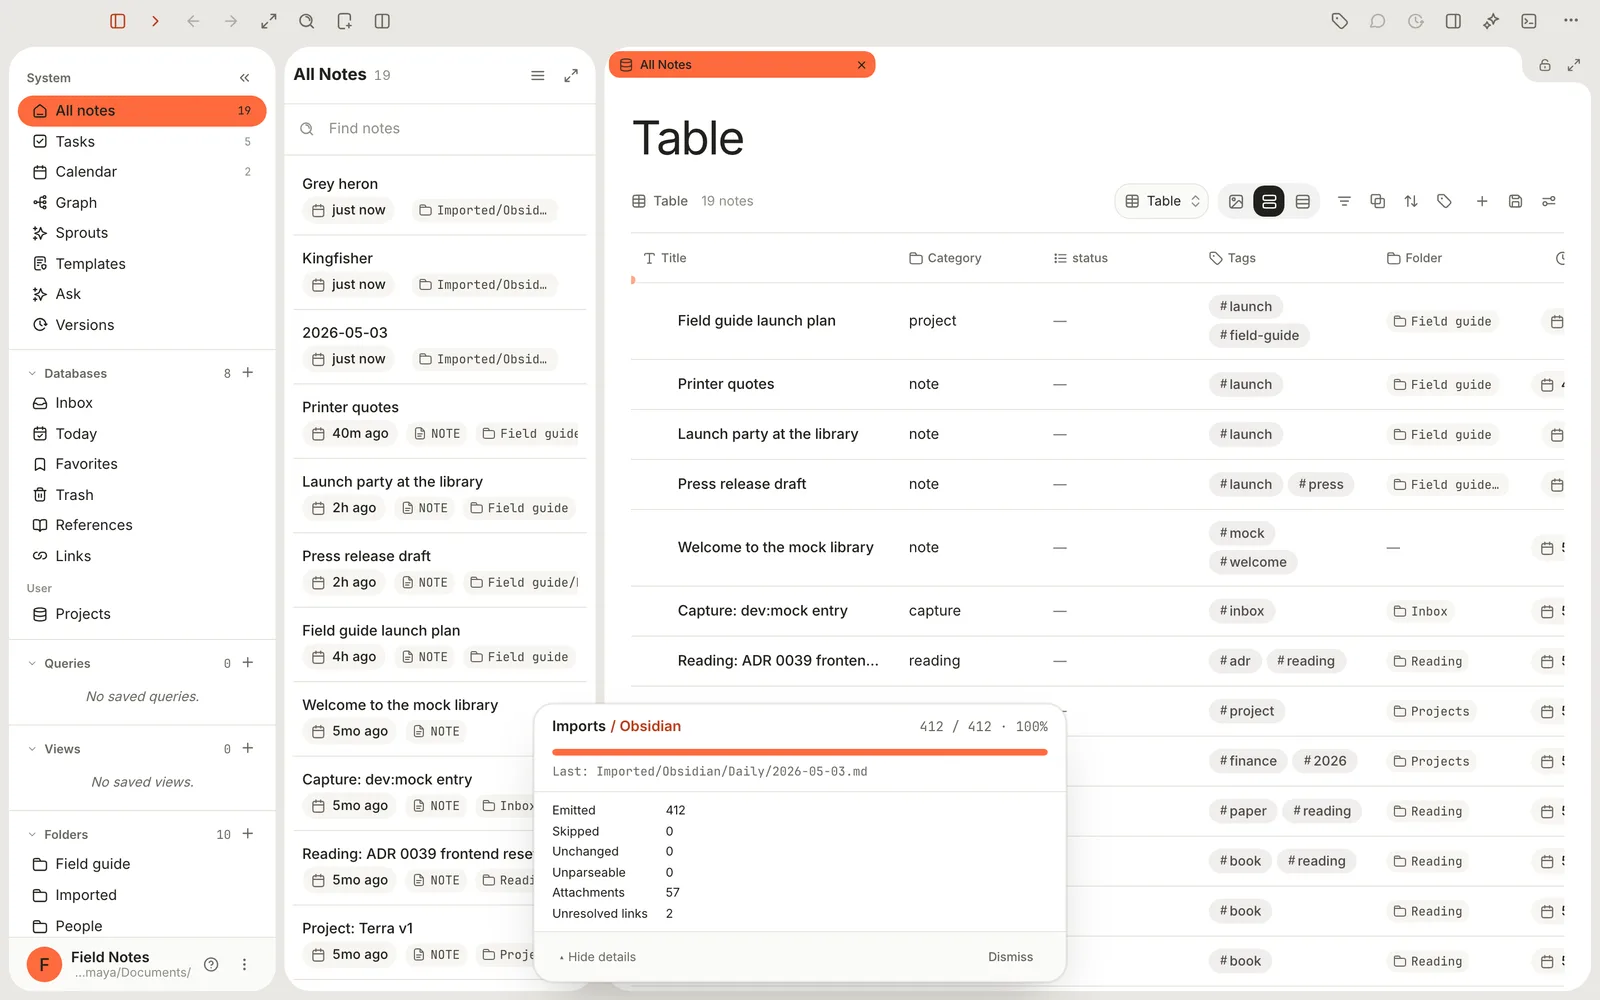
| In the summary | What it counts |
| --- | --- |
| **Emitted** | Notes written to your Library |
| **Skipped** | Notes left out because they already existed (with **Skip existing**) |
| **Unchanged** | Notes that were already identical (with **Replace**) |
| **Unparseable** | Files Terra couldn't convert |
| **Attachments** | Files copied |
| **Unresolved links** | Links to notes that weren't part of the import |
Unresolved links point at notes your old app didn't export, or that live in another place. Once the notes are in, you can move them into folders of your own, add [properties](https://terramd.io/docs/properties) and [tags](https://terramd.io/docs/tags), or build [databases](https://terramd.io/docs/databases) around them.
## Step 6: Drag in individual files
For a few files rather than a whole collection, drag them from Finder onto a folder in Terra's sidebar, or into the window. Terra copies them into your Library and gives each one a note. Markdown files become notes; PDFs, EPUB books, images, spreadsheets and web pages open in Terra's viewers; anything else gets a note with a link to it.
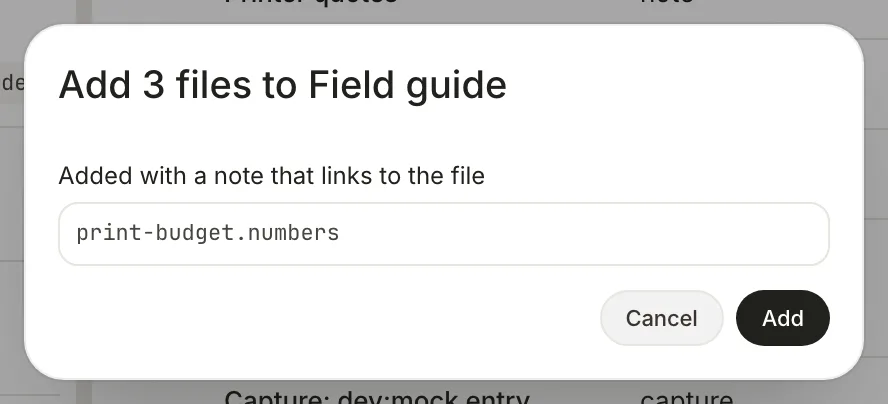
[Add files from Finder](https://terramd.io/docs/files-and-folders#add-files-from-finder) covers where dropped files go, and [Accepted file formats](https://terramd.io/docs/file-formats) lists every format.
## Troubleshooting
> [!NOTE]- Preview contents and Start import are greyed out
> They wait for a path. Choose a file or folder with **Browse**, or paste its path into the box.
> [!NOTE]- "Preview failed" or "Run failed"
> The message after it says what went wrong. Most often the path points at the wrong kind of file for the source, such as a folder where Notion expects a `.zip` export.
> [!NOTE]- I imported twice and have doubled notes
> With **Keep both (suffix)**, a second import adds a copy of each note, with `-2` at the end of its file name. To start over, right-click your source's folder under **Imported** › **Move to Trash**, then import once more with **Skip existing**.
> [!NOTE]- My Notion databases came in as notes with a CSV file
> That's expected: Terra doesn't turn Notion databases into Terra databases. The original CSV is attached to a note, and each row page comes in as a note of its own, usually in a folder named after the database. A folder opens as a [database](https://terramd.io/docs/databases) in Terra, so click that folder to see the rows as a table.
> [!NOTE]- Images are missing from imported Obsidian notes
> Only files in the same folder as a note come along. Open the vault as a Library (Step 1) to use it with all its files in place.
## What's next
- [Libraries](https://terramd.io/docs/libraries) — switch between your old folder and other Libraries.
- [Files and folders](https://terramd.io/docs/files-and-folders) — organise what you brought in.
- [How Terra stores your notes](https://terramd.io/docs/how-terra-stores-your-notes) — what Terra adds to your files.
---
# Sync and back up your Library
> Your notes are ordinary files, so any backup or sync tool works. Use Time Machine, a cloud folder or Terra's Versions, and know what each covers.
Source: https://terramd.io/docs/sync-and-back-up
Years of notes shouldn't depend on one laptop. A failed drive, a stolen bag or a careless delete can happen to anyone, and sooner or later you'll want the same notes on a second Mac.
Terra doesn't run a sync service of its own, and it doesn't need one: a [Library](https://terramd.io/docs/libraries) is a folder of ordinary files, so the backup and sync tools you already trust work with it. Terra adds one tool of its own, [Versions](https://terramd.io/docs/glossary#versions), which keeps a history of your notes you can compare and restore, and can send that history to a Git server.
> [!SUMMARY]
> - Know which files make up a Library, and what stays on each Mac
> - Back up with Time Machine or any other backup app
> - Keep a Library in iCloud Drive, Dropbox or OneDrive without losing edits
> - Save versions of your notes, then compare and restore them
> - Send your versions to a Git server and bring them back
> [!BEFORE]
> - A Library open in Terra. New to Libraries? Read [Libraries](https://terramd.io/docs/libraries) first.
> - For Versions: git on your Mac, from Apple's Command Line Tools for Xcode or from Homebrew.
> - To sync through a Git server: an account with a Git host such as GitHub, and Terminal set up to sign in to it.
> - About 15 minutes.
## How it fits together
| Option | Best for | Includes Terra's `.terra` folder |
| --- | --- | --- |
| A backup app, such as Time Machine | Getting everything back after a lost or broken Mac | Yes |
| A cloud folder: iCloud Drive, Dropbox or OneDrive | The same Library on more than one Mac | Yes |
| Versions | A history of each note that you can compare and restore, optionally kept on a Git server | No |
Versions answers "what did this note say last Tuesday?"; a backup covers everything else. They work well together.
## Step 1: Know what to keep
Everything that belongs to a Library is inside its folder: your notes, attachments and sidecars, and the hidden `.terra` folder, which holds your [databases](https://terramd.io/docs/databases), [templates](https://terramd.io/docs/templates), saved views, AI chats and the Library's settings. Back up the whole folder, hidden files included. [How Terra stores your notes](https://terramd.io/docs/how-terra-stores-your-notes) explains each part.
1. Click **⋯** (**Library menu**) at the bottom of the sidebar.
2. Choose **Open in Finder** to see where the folder is, or **Copy library path** to copy its location.
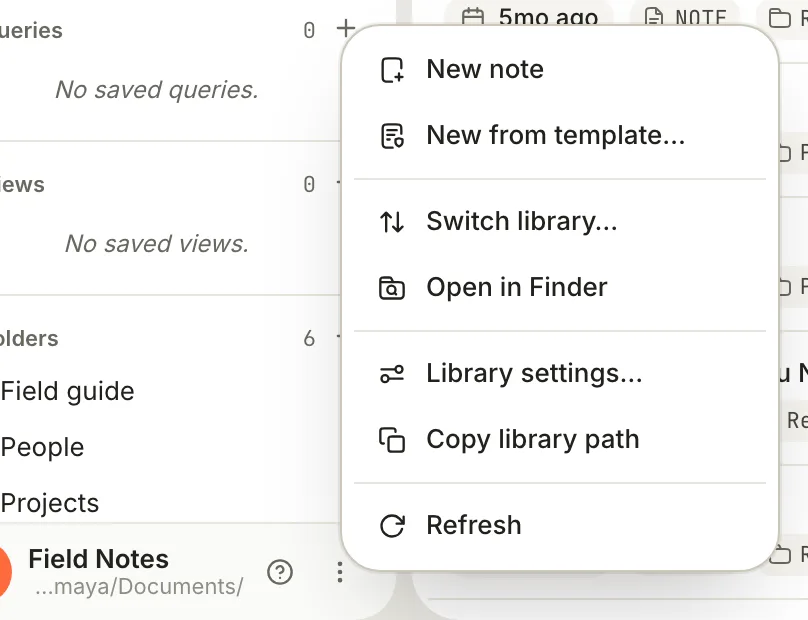
A few things live on each Mac, not in the Library: AI provider keys (in the Keychain), the **Light**, **Dark** or **System** appearance, **Open at launch**, and how you've arranged the sidebar and panes.
## Step 2: Back up with Time Machine
Time Machine, built into macOS, backs up your whole Mac to an external drive, hidden files included, so a Library in your home folder is covered. Turn it on in **System Settings › General › Time Machine**. Any backup app that copies folders works too.
To get back an older copy of a single note, open the Library folder in Finder and browse your Time Machine backups to the date you want. Restore the note's `.md` file, and its `.terra.json` file too if it has one. Terra notices the restored file and updates the note.
## Step 3: Share a Library through a cloud folder
To use the same Library on two Macs, keep it in a folder that iCloud Drive, Dropbox or OneDrive syncs.
1. Switch to another Library, or quit Terra.
2. In Finder, move the Library folder into your iCloud Drive, Dropbox or OneDrive folder.
3. Open Terra, press ⌘ O, choose **Open other…** and pick the folder in its new place.
4. On your other Mac, wait until the folder has finished downloading, then open it the same way.
A few habits keep this smooth:
- **Keep the files downloaded.** If your sync service removes local copies to save space (such as iCloud's **Optimize Mac Storage**), Terra waits for each file to download, and the Library opens slowly.
- **Let edits sync before switching Macs.** If two Macs change the same note before syncing, the service may keep a "conflicted copy". It has the same `id` as the original, so Terra shows only one of the two. Combine them by hand in Finder and delete the copy.
- **Connect AI providers on each Mac.** Keys stay in each Mac's Keychain (see [Ask your Library](https://terramd.io/docs/ask-your-library#troubleshooting)).
## Step 4: Turn on Versions
Versions uses git, the version-control tool programmers use, to keep a history of your notes. It's off until you turn it on.
1. Click **Versions** in the sidebar, under **System**.
2. Click **Initialize version control**.
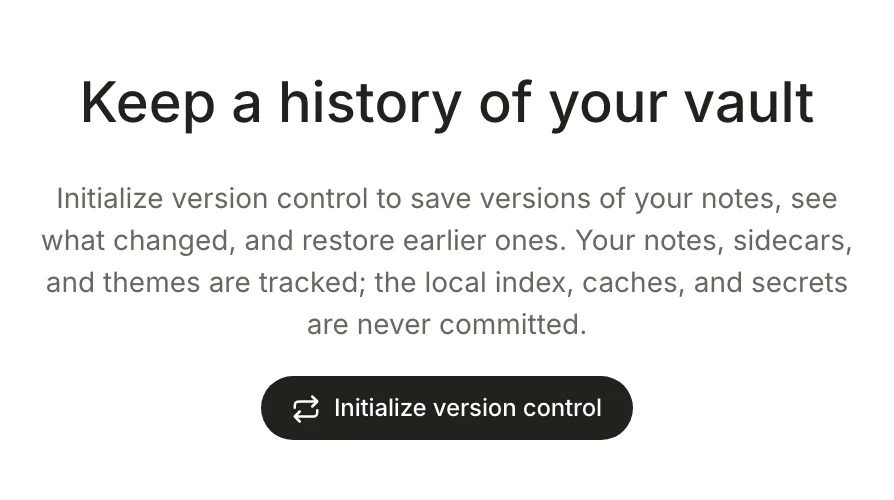
3. macOS asks **Initialize version control?** Click **Allow**. Terra makes the Library a git repository and adds two small files, `.gitignore` and `.gitattributes`. Nothing is saved yet.
If the page says **Version control unavailable** instead, git isn't installed. Install it, then open the Library again.
> [!WARNING] Versions doesn't keep the .terra folder
> Every file in the Library is tracked except `.terra`, which also holds the search index, caches and secrets. That means your databases, templates, saved views and Library settings aren't part of your versions. Keep them safe with a backup or a cloud folder.
## Step 5: Save a version
A version is a snapshot of every changed file in the Library. Terra never saves one on its own, so save whenever you reach a point you might want to come back to, such as the end of a work session.
1. On the **Versions** page, click **Save version**.
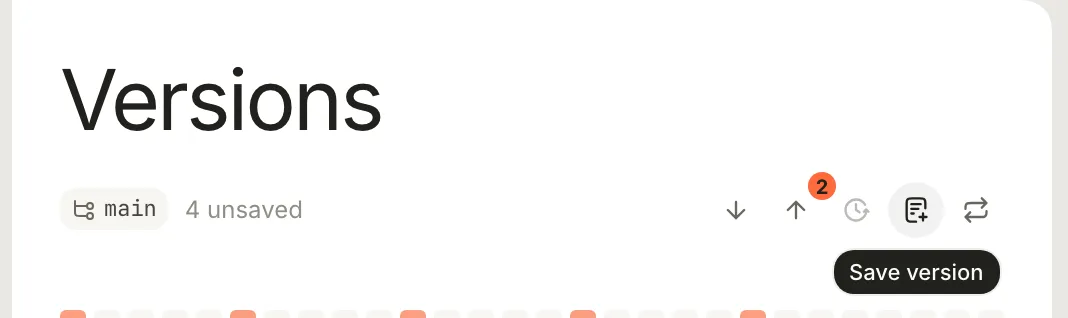
2. macOS asks **Commit Library changes?** Click **Allow**.
3. A message confirms it, for example **Saved version 4e1a9c2**. The version is named with the date and time.
**Save version** is greyed out when nothing has changed. A note with changes that aren't in a version yet shows **Modified** at the bottom of the note.
## Step 6: Compare and restore a note
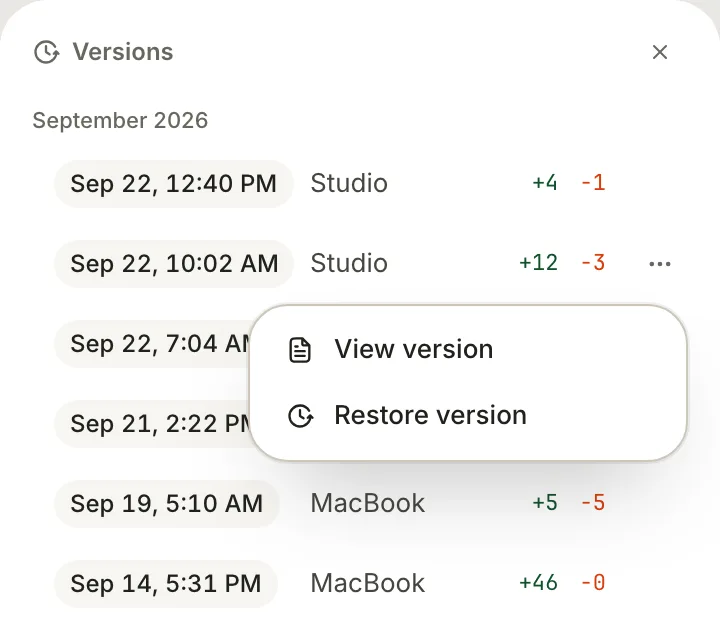
1. Open the note, then click **Versions** in the toolbar (the clock at the top right). The Versions panel lists the note's saved versions, newest first, with how many lines each one added and removed.
2. Click a version to see what it changed, in a pane beside the note.
3. To go back to it, click **⋯** next to the version and choose **Restore version**. When macOS asks **Restore this file version?**, click **Allow**. A message says **Restored to the save from** and the date. **View version** shows it without changing anything.
> [!WARNING] Restoring replaces later changes
> **Restore version** puts back the note's Markdown file exactly as it was, including over edits you've made since your last saved version. Save a version first if you might want them. Attachments and the note's sidecar aren't restored.
## Step 7: Send versions to a Git server
To keep your history off this Mac, push your versions to a private repository on a Git host. Terra never asks for or stores git passwords, so you connect the repository once in Terminal.
1. Create an empty private repository on your Git host and copy its HTTPS or SSH address.
2. In Terra, choose **Library menu › Copy library path**.
3. In Terminal, run these lines, pasting your Library's path and your repository's address:
```bash
cd "/Users/maya/Documents/Field Notes"
git remote add origin git@github.com:maya/field-notes.git
git push -u origin HEAD
```
Sign in if git asks. The remote must be called `origin`, and its address must start with `https://` or use SSH.
From then on, use the buttons on the **Versions** page:
- **Push** sends your saved versions. The number on it counts versions waiting to go. macOS asks **Push Library commits?**; click **Allow**, and a message says **Pushed to upstream**.
- **Pull** brings in versions saved elsewhere and updates your files. The number on it counts versions waiting to come in. macOS asks **Pull and rewrite Library files?**; click **Allow**.
To start on a second Mac, clone the repository in Terminal (`git clone` and the address), then open the folder in Terra with **Open other…**. Because `.terra` isn't in git, that Mac starts with Terra's own default templates and settings, and without your databases.
## Go further
### Turn version history off
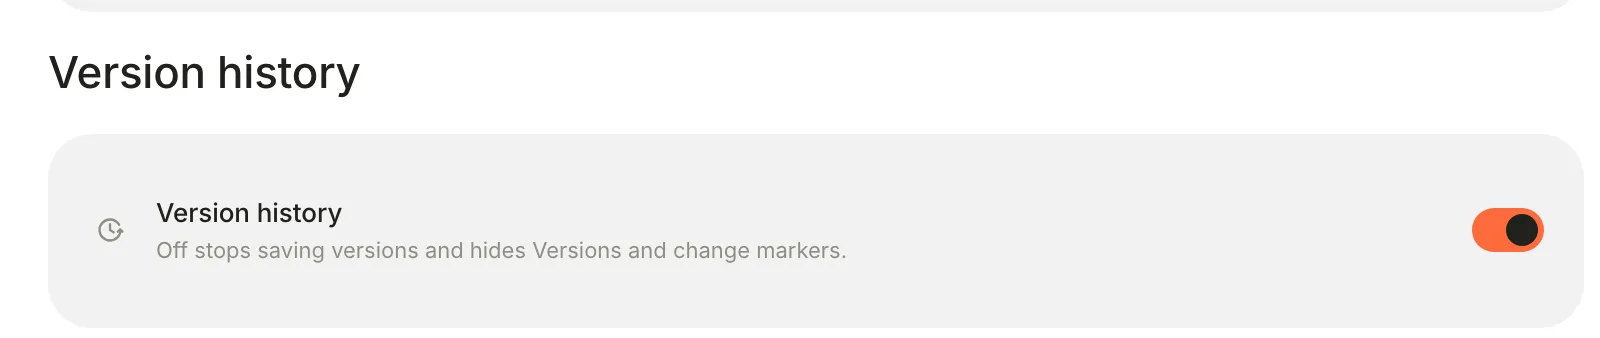
If you don't use Versions in a Library, switch it off in **Settings › Editor › Version history**. Terra then stops saving versions and hides **Versions** and the **Modified** marker. Your existing history stays in the folder.
### Resolve a conflict after pulling
If the same lines changed in two places, the message reads **Pulled with conflicts — resolve the marked notes**. Open each marked note in **Markdown source**, keep the text you want, delete git's `<<<<<<<`, `=======` and `>>>>>>>` lines, then click **Save version**.
## Troubleshooting
> [!NOTE]- Push or Pull fails with a sign-in error
> Terra never stores git credentials. In Terminal, go to the Library folder and run `git push` or `git pull` once, signing in when asked. Then try again in Terra.
> [!NOTE]- "remote transport is not allowed; use HTTPS or SSH"
> The `origin` remote has an address Terra won't use. Change it to an `https://` address or an SSH one, such as `git@github.com:maya/field-notes.git`, with `git remote set-url origin` and the new address.
> [!NOTE]- "no upstream configured for the current branch"
> Run `git push -u origin HEAD` once in Terminal, in the Library folder.
> [!NOTE]- "Version history is off. Turn it on in Settings → Editor."
> Version history is switched off for this Library. Turn on **Settings › Editor › Version history**.
## What's next
- [Libraries](https://terramd.io/docs/libraries) — open, switch and move Libraries.
- [How Terra stores your notes](https://terramd.io/docs/how-terra-stores-your-notes) — every file a backup should include.
- [Files and folders](https://terramd.io/docs/files-and-folders) — the Trash, and getting deleted notes back.
---
# Libraries
> A Library is a folder on your Mac that Terra treats as one workspace. Open, create and switch Libraries, and see what each one keeps.
Source: https://terramd.io/docs/libraries
A *Library* is a folder on your Mac that Terra treats as one workspace: your notes, folders and files, plus Terra's own settings, [databases](https://terramd.io/docs/databases) and [templates](https://terramd.io/docs/templates) for them. Any folder can be a Library, including one you already keep notes in. Obsidian calls the same idea a vault. Terra shows one Library at a time and remembers the ones you've used, so switching takes a keystroke.
## Open or create a Library
The first time you start Terra, it asks for a Library.
1. Click **Choose folder**.
2. In the folder picker that opens, titled **Choose a Terra library folder**, pick a folder:
- For a new Library, create an empty folder with the picker's **New Folder** button and select it.
- To use notes you already have, select the folder they're in, such as an Obsidian vault. Terra works with the files where they are; nothing is moved or converted.
3. Click **Open**. The Library opens on **All notes**.

From then on, Terra reopens the Library you used last each time it starts.
## What a new Library contains
The first time Terra opens a folder, it adds a few things and leaves your files alone:
| Item | What it's for |
| --- | --- |
| `Inbox/` | Where new notes and captures go |
| `Themes/default.css` | A starting point for a theme of your own |
| `.terra/` | Terra's hidden folder: the search index, plus this Library's settings, databases and templates |
| `.terra-library.toml` | A one-line marker recording which version of Terra's file layout the Library uses |
Terra also adds eight [templates](https://terramd.io/docs/templates) — **Daily log**, **Meeting**, **Study note**, **Project**, **Decision**, **Recipe**, **Lecture** and **Dashboard** — unless the Library already has templates of its own. There are no sample notes. A `Trash` folder appears the first time you delete something. [How Terra stores your notes](https://terramd.io/docs/how-terra-stores-your-notes) goes through each file.
Notes you already had stay exactly as they are. A Markdown file without Terra's [properties](https://terramd.io/docs/properties) shows its file name as the title and the file's own dates; Terra adds the properties the first time you edit the note.
## Switch Libraries
Press ⌘ O or choose **File › Open Library…**. Your recent Libraries are listed, most recent first, with a check beside the one that's open.
- Click a Library to switch to it. To filter the list, type part of its name.
- Choose **Open other…** to pick a folder that isn't listed.

The Library you choose replaces the current one in the same window. The list holds your last ten Libraries.
## The Library menu
Click **⋯** (**Library menu**) beside the Library's name at the bottom of the sidebar.

| Item | What it does |
| --- | --- |
| **New note**, **New from template…** | Start a note in `Inbox` |
| **Switch library…** | Open the list of recent Libraries |
| **Open in Finder** | Show the Library folder in Finder |
| **Library settings…** | Open Settings |
| **Copy library path** | Copy the folder's full path, such as `/Users/maya/Documents/Field Notes` |
| **Refresh** | Read the folder again, if a change made outside Terra hasn't appeared yet |
## Library settings and app settings
Most settings belong to the Library. They're saved inside it, in `.terra/preferences.toml`, so they go wherever the folder goes and each Library can be set up differently. In **Settings** (⌘ ,) that means every pane listed under **Library**, plus:
- the theme, interface style and fonts in **Appearance**
- **Display name** and the logo in **General**, which change how the Library is labelled at the foot of the sidebar without renaming its folder
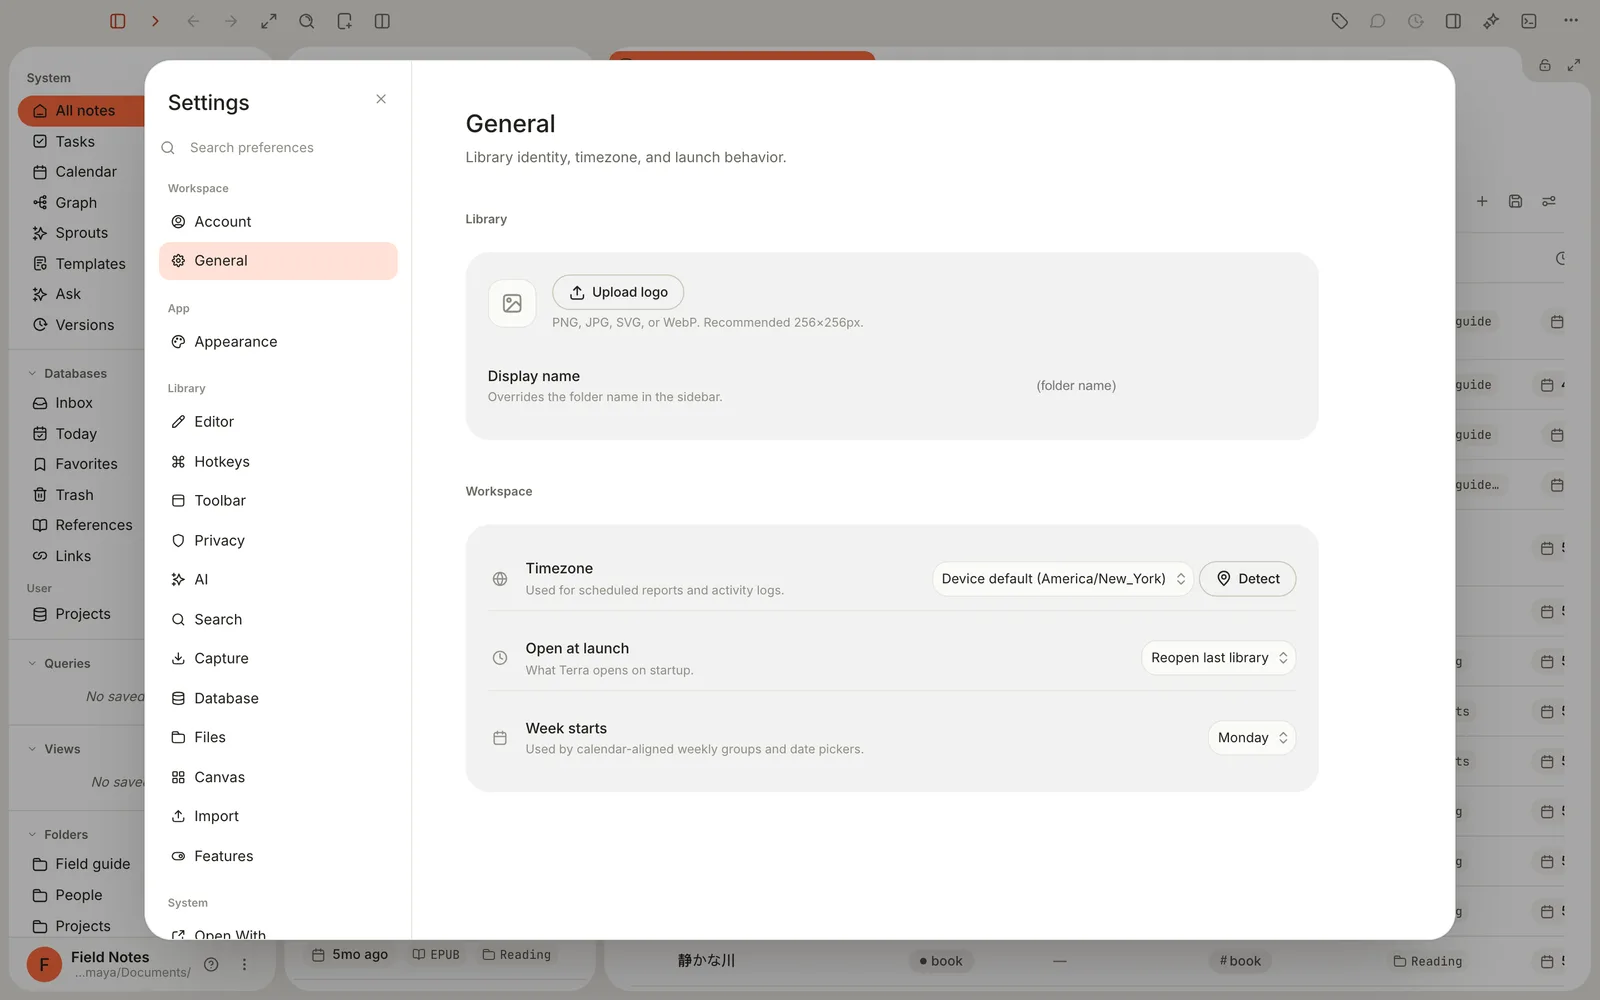
A few things belong to Terra on this Mac and apply to every Library:
- **Light**, **Dark** or **System** in **Appearance**
- **Timezone**, **Open at launch** and **Week starts** in **General**
- the sidebar's arrangement: pins, hidden rows, collapsed sections and any order you've dragged rows into
Terra also remembers each Library's pane layout and Back/Forward history on this Mac. AI provider keys are kept in your Mac's Keychain, never in the Library.
**Open at launch** offers **Reopen last library** (the default), **Show the library picker** and **Do nothing**. For now, the last two both start Terra on the **Open a library** screen.
## Use more than one Library
Separate Libraries suit notes that don't belong together, such as your own notes and a client's wiki. Each has its own folders, settings, databases, templates, toolbar, hotkeys and theme, and search covers only the Library that's open. Switch between them with ⌘ O.
## Move or rename a Library
A Library is a folder, so you move or rename it in Finder like any other folder. It's simplest to do while the Library isn't open: switch to another one or quit Terra first. Then press ⌘ O, choose **Open other…** and pick the folder in its new place.
Everything inside the folder comes along: notes, attachments, settings, databases and templates. What Terra keeps on this Mac by the folder's location starts afresh: the pane layout and Back/Forward history. AI providers also need connecting again; see [Ask your Library](https://terramd.io/docs/ask-your-library#troubleshooting).
If Terra starts and can't find the last Library, because it was moved or its drive is disconnected, it shows the **Open a library** screen with **library path no longer exists** and the old path. Click **Choose folder** and pick the folder again.
## When a Library opens read-only
If a Library was last opened by a newer version of Terra, an older version opens it read-only so it can't damage anything, and shows **This Library was last edited by a newer Terra. Update to edit.** You can still read and search. Update Terra to edit again.
## Related
- [Files and folders](https://terramd.io/docs/files-and-folders) — working with what's inside a Library.
- [How Terra stores your notes](https://terramd.io/docs/how-terra-stores-your-notes) — every file and hidden folder, explained.
- [Sync and back up your Library](https://terramd.io/docs/sync-and-back-up) — keep a copy somewhere safe.
- [Bring in your notes from another app](https://terramd.io/docs/bring-in-your-notes) — import, or open an existing folder.
---
# Files and folders
> Every note is a Markdown file and every folder is a real folder in your Library. Create, rename, move, duplicate, delete and restore them.
Source: https://terramd.io/docs/files-and-folders
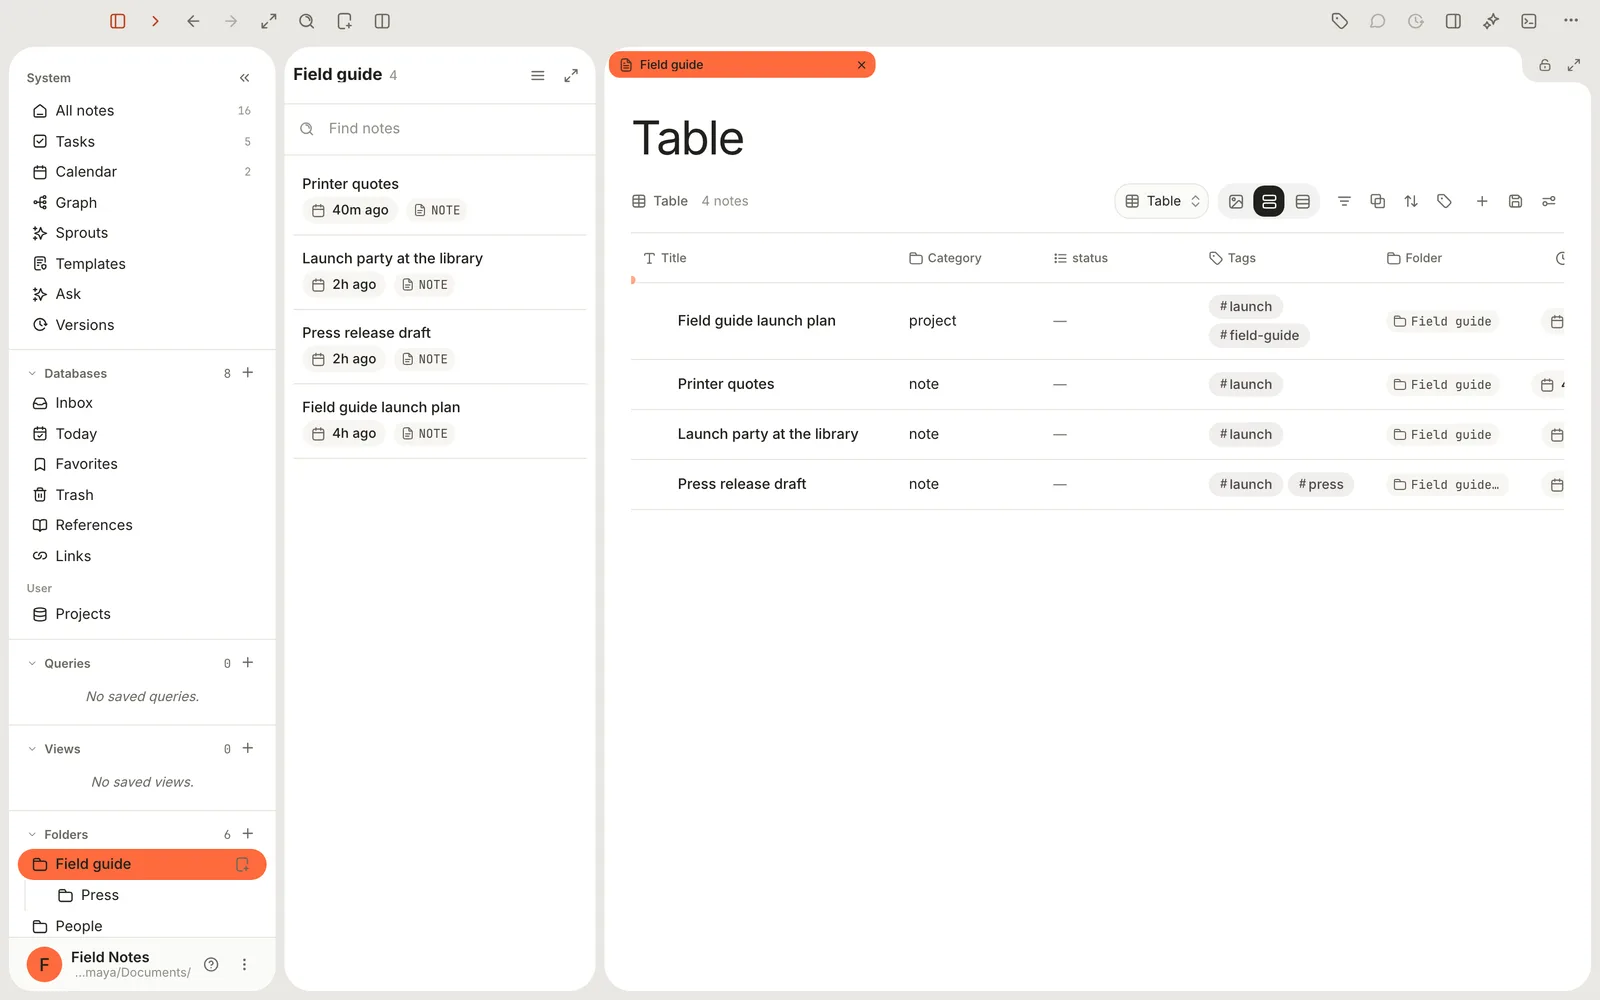
In Terra, a note is a Markdown file and a folder is a folder. Both live in your [Library](https://terramd.io/docs/libraries), an ordinary folder on your Mac, so the **Folders** list in the sidebar is the same tree you'd see in Finder. When you rename, move or delete something in Terra, the real files change; when you change them in Finder, Terra picks it up.
## Where things go
| When you… | Terra saves it in… |
| --- | --- |
| press ⌘ N, or choose **File › New Note** | `Inbox`, as `untitled.md` (then `untitled-2.md`, and so on) |
| right-click a folder and choose **New note** | that folder |
| click **+** next to **Folders** | a new folder at the top level of your Library |
| delete a note | the `Trash` folder, until you put it back or empty the Trash |
| duplicate a note | the same folder, titled "… Copy" |
| paste or drag an image into a note | an `attachments` folder beside the note |
| drop files from Finder | wherever you drop them (see [Add files from Finder](#add-files-from-finder)) |
## Create a note
- Press ⌘ N, choose **File › New Note**, or click **New…** in the toolbar and choose **New note**. An *Untitled* note opens, saved in `Inbox`.
- To start a note in a particular folder, point at the folder in the sidebar and click **New note here**, or right-click the folder and choose **New note**.
- **New from template…** sits in the same menus. See [Templates](https://terramd.io/docs/templates).
- To turn copied text into a note, right-click an empty part of the window and choose **Paste as note**.
- **New note** is also in the **Library menu** at the bottom of the sidebar, and when you right-click a sidebar heading or an empty part of the note list. [Quick capture](https://terramd.io/docs/capture-and-classify) files notes in `Inbox` too.
## Create a folder
1. Click **+** next to **Folders** in the sidebar.
2. Type a name and press Return. Esc cancels.
To put a folder inside another one, right-click the parent and choose **New subfolder**. **New folder** is also in the toolbar's **New…** menu and when you right-click the **Folders** heading or an empty part of the sidebar; with the sidebar focused, ⌥ ⌘ N does the same. Folder names can't contain a slash. Folders you make in Finder appear here too, even empty ones.
## Rename
Click a note's title, type a new one and press Return (Esc cancels). Terra renames the file to match: lowercase, with hyphens in place of spaces and punctuation, up to 80 characters. While you type, **Path preview** shows the new file name. If that name is taken, Terra adds `-2`.

Other notes that link to this one are updated for you, and a message says how many, for example **Updated 3 links in 2 notes**. Click **Undo** in the message to put the old links back.
> [!NOTE] Two renames that leave the file name alone
> Changing **title** in the Properties panel changes the title only. Renaming the file in Finder leaves the title stored inside it as it was.
To rename a folder, right-click it and choose **Rename**, or select it and press F2. Notes link to each other by title, so renaming or moving a folder doesn't break links. A folder can't be renamed `Inbox`, `Trash`, `Themes` or `Imported`, because Terra uses those names itself.
## Move
| To move | Do this |
| --- | --- |
| a note to a folder | Drag it from the note list onto the folder in the sidebar. |
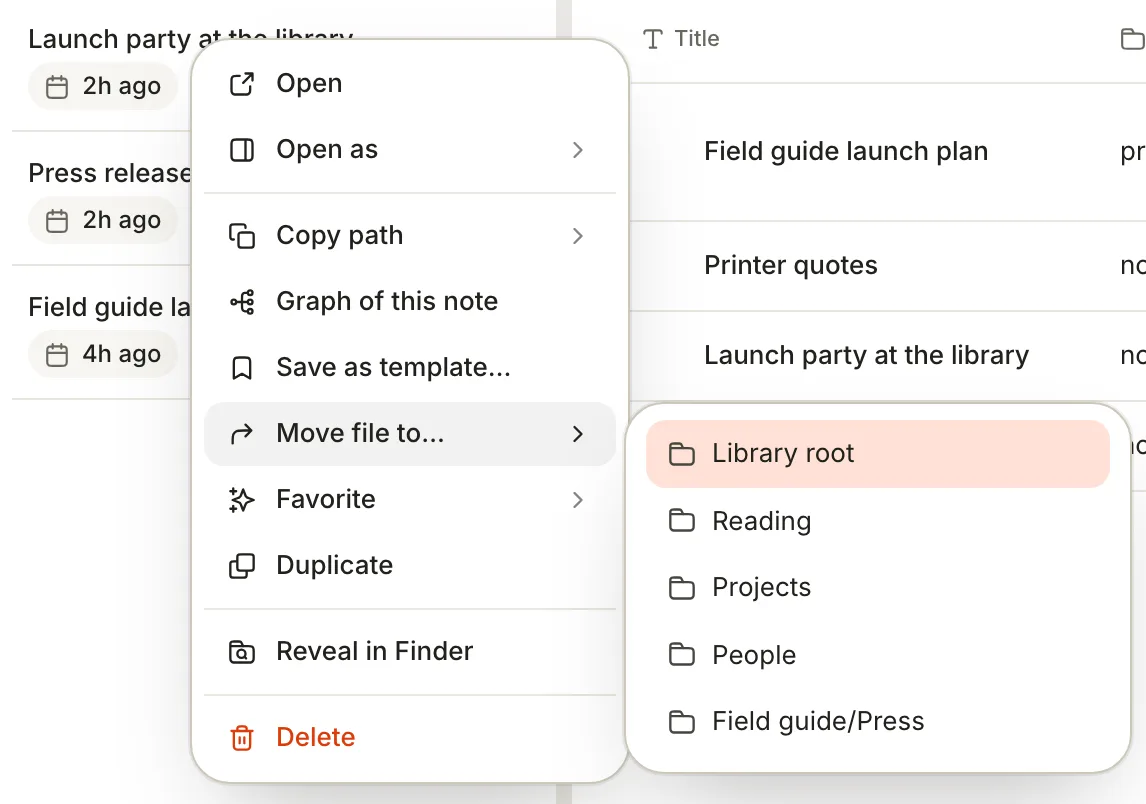
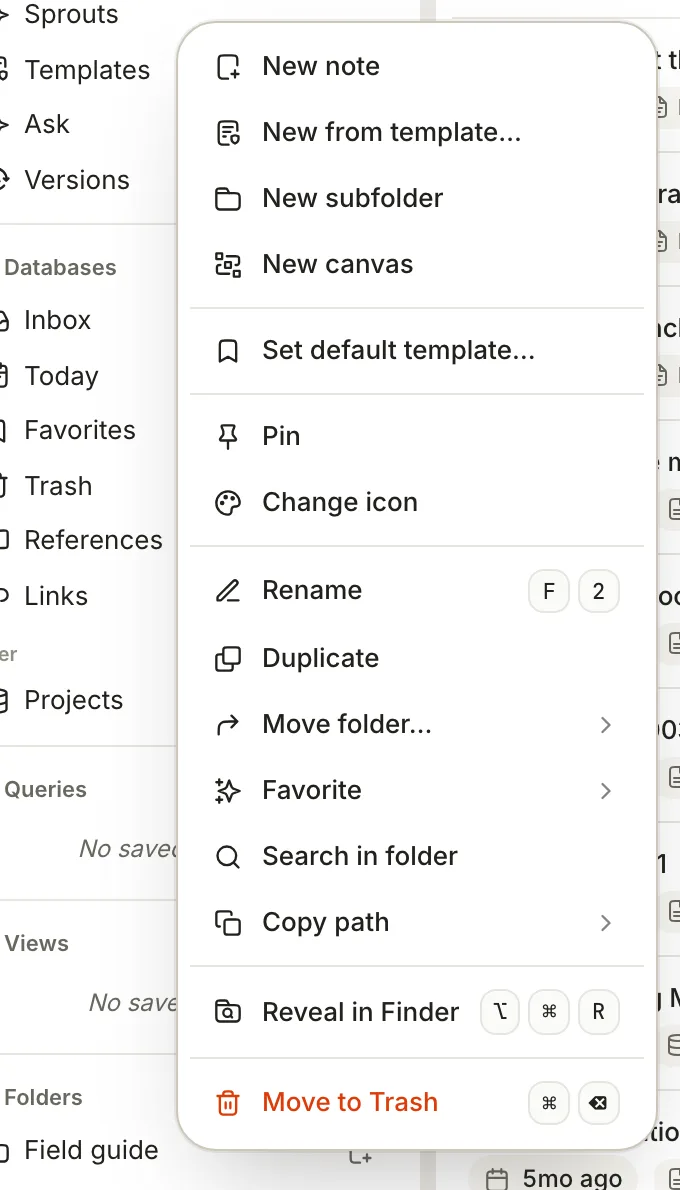
| a note, from a menu | Right-click it › **Move file to…** and pick a folder, or **Library root** for the top level. In an open note, click **⋯** (**Note actions**) at the bottom right › **Move note**. |
| several notes | Select their rows in a table, click **More actions** (**⋯**) in the bar that appears › **Move to**. |
| a folder | Drag it onto another folder, or right-click it › **Move folder…**. |
A note's attachments move with it.
## Duplicate
Right-click a note and choose **Duplicate**, or in an open note choose **Note actions › Duplicate note**. The copy lands in the same folder, titled "Printer quotes Copy", with its own copies of any attachments, and opens. **File › Duplicate** copies the open note too; if you've selected blocks in the editor, it copies those blocks instead.
To copy a folder with everything in it, right-click the folder and choose **Duplicate**. The copy sits beside it as "Field guide copy".
## Delete and restore
Deleting moves a note to the Trash; nothing is erased until the Trash is emptied.
- Right-click a note › **Delete**, or in an open note choose **Note actions › Delete note**, then click **Delete**. You can also drag a note onto **Trash** in the sidebar.
- A message says **Note moved to Trash**. Click **Undo** to bring the note back. After **Delete note**, pressing ⌘ Z while you're not typing also undoes it.
- To delete a folder, right-click it › **Move to Trash** and confirm. Each note inside can still be put back on its own.
On disk, the file moves into the `Trash` folder of your Library, and Terra writes the note's old location into it as `previous_path`.
**Put a note back.** Click **Trash** in the sidebar, under **Databases**. Right-click the note and choose **Put Back**; it returns to its old folder, which Terra recreates if it's gone. To put back several, select them and hold ⌥: **Delete** in the bar becomes **Put Back**.
**Empty the Trash.** In the Trash view, click **Empty trash** (the bin at the top) and confirm. Terra also empties notes that have been in the Trash for 30 days, whenever you open it. To change the period, open **View preferences** in the Trash view and set **Empty Trash automatically** (7 days to a year).
> [!WARNING] Emptying is permanent
> Notes erased from the Trash are deleted from your Mac, not moved to the macOS Trash. Inside the Trash view, selecting notes and clicking **Delete** erases them straight away, without asking.
## Favorites
Favorites keep the notes you use most within reach. Favoriting never moves a file.
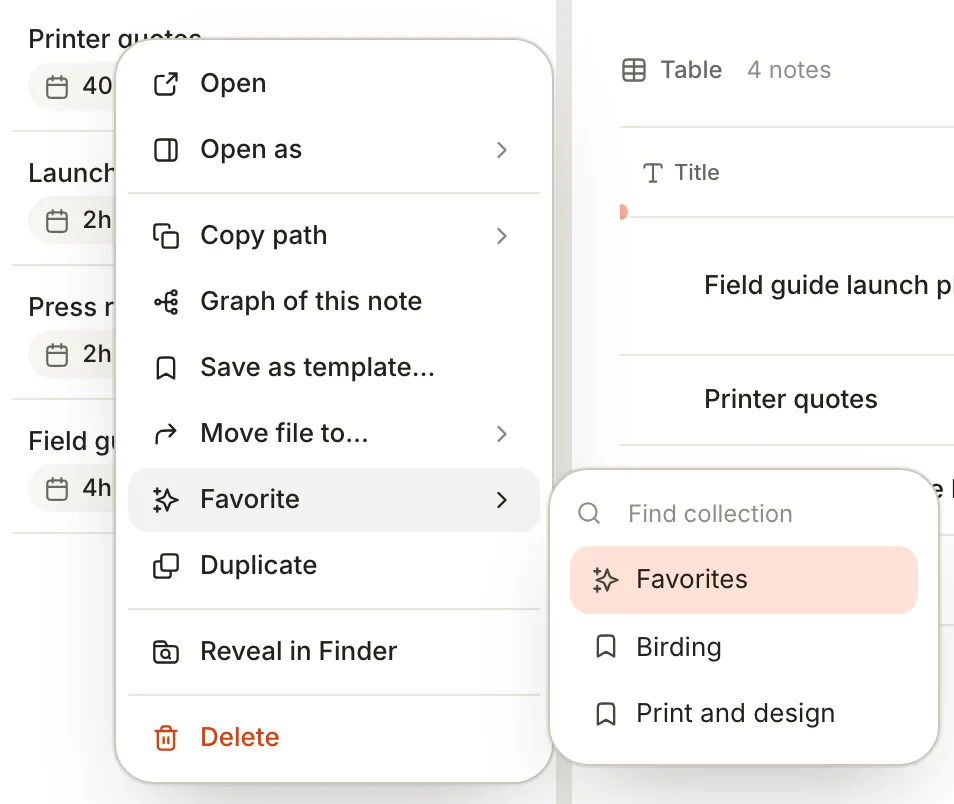
- In an open note, click **Add to Favorites** (the flag at the left of the editor toolbar) and choose **Favorites**. Or right-click a note in a list › **Favorite** › **Favorites**. Terra marks the note with the tag `#favorite`.
- Open them from **Favorites** in the sidebar, or with **View › Open Favorites**.
- For lists of your own, such as books to lend, right-click **Favorites** › **New favorites collection** and name it. Add notes from the same **Favorite** menu. A note can be in several collections, and collections can hold collections.
- To keep a whole folder handy, right-click it › **Favorite** and choose where to put it.
## Icons
Right-click a note's title and choose **Change icon** to pick an icon; **Default** removes it. The icon is saved in the note itself, as `icon` in its [properties](https://terramd.io/docs/properties). Folders and other sidebar rows have **Change icon** in their right-click menus too, but those icons are kept on this Mac only.
## The Folders list
The sidebar's **Folders** list shows every folder in your Library, subfolders nested under their parents, except `Inbox` and `Trash` (they have rows under **Databases**), `Themes` and the `attachments` folders Terra makes for notes.
Folders are listed alphabetically. To arrange them your own way, point at a folder and drag the handle that replaces its icon; the order is kept on this Mac only. Dragging the folder itself drops it into another folder instead.
With a folder selected in the sidebar, these keys work:
| Keys | What they do |
| --- | --- |
| F2 | Rename the folder |
| ⌥ ⌘ N | Make a new folder inside it |
| ⌥ ⌘ R | Reveal it in Finder |
| ⌥ ⌘ C | Copy its full path |
| ⌥ ⇧ ⌘ C | Copy its path inside the Library |
| ⌘ ⌫ | Move it to the Trash |
To find any note's file, right-click it in a list › **Reveal in Finder**. For the whole Library, click **⋯** (**Library menu**) at the bottom of the sidebar › **Open in Finder**.
## A folder is also a database
Click a folder and it opens in the main pane as a [database](https://terramd.io/docs/databases) of the notes inside it, subfolders included. You can change its [layout](https://terramd.io/docs/views-and-layouts), filter and sort it, and save views, which stay with the folder. To search one folder, right-click it › **Search in folder**; Terra fills in a `path:` filter for you (see [Search syntax](https://terramd.io/docs/search-syntax)).
## Add files from Finder
Drag files or whole folders from Finder into the Terra window. Terra copies them into your Library, leaving the originals where they were, and gives each file a note so it appears in lists and search.
- Drop on a folder in the sidebar, or while a folder is open, to put the files in that folder.
- Drop while a database is open, or on one in the sidebar, to add the files to it. If the database collects notes of one type, tag or status, the new notes get that value.
- Anywhere else, the files go to `Inbox`. To send every drop there, set **Settings › Files › Dropped files go to** to **Always Inbox**.
Terra asks before adding when a dropped folder's name is taken (**Create new folder** or **Merge**), when some files have no viewer, or when the drop is over 200 files or 500 MB. Files over 256 MB are skipped. [Accepted file formats](https://terramd.io/docs/file-formats) lists what Terra does with each kind of file.
## Related
- [Libraries](https://terramd.io/docs/libraries) — the folder that holds all of this.
- [How Terra stores your notes](https://terramd.io/docs/how-terra-stores-your-notes) — what's inside each file, and what's safe to edit elsewhere.
- [Databases](https://terramd.io/docs/databases) — the views a folder opens in.
- [Accepted file formats](https://terramd.io/docs/file-formats) — which files Terra can show.
---
# Accepted file formats
> Which files Terra opens and how: Markdown notes, PDFs, EPUB books, images, spreadsheets, web pages, and anything else as an attachment.
Source: https://terramd.io/docs/file-formats
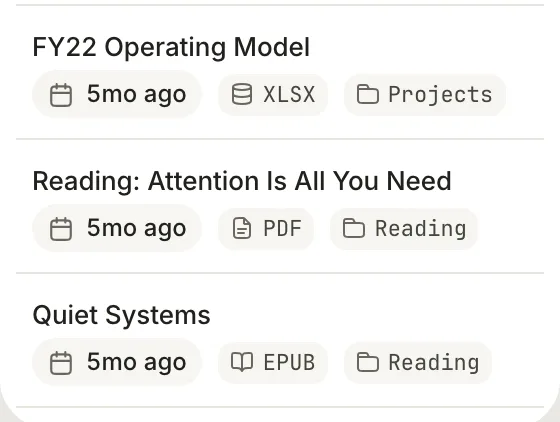
Notes in Terra are Markdown files, but a [Library](https://terramd.io/docs/libraries) can hold other files too. When you add a PDF, a book, an image, a spreadsheet or a saved web page, Terra copies it into the Library and gives it a note of its own, so it turns up in lists, search and [databases](https://terramd.io/docs/databases) like any note and opens in a viewer made for it. Anything else is kept as an attachment, with a note that links to it.
## What Terra does with each format
| Extension | What it becomes | Where it opens |
| --- | --- | --- |
| `.md` | A note | The editor |
| `.pdf` | A PDF, with its own note | The PDF viewer. Highlights are saved into the PDF itself; see [Annotate and keep every mark](https://terramd.io/docs/annotate-in-the-sidecar). |
| `.epub` | A book, with its own note | The [e-reader](https://terramd.io/docs/read-in-the-e-reader). Your highlights and place are kept beside the book, which is never changed. |
| `.png`, `.jpg`, `.jpeg`, `.gif`, `.webp`, `.svg`, `.heic`, `.avif` | An image, with its own note | The image viewer, which fits the picture to the window |
| `.bmp` | An image, with its own note | The editor, with the picture as the note's cover |
| `.xlsx`, `.csv` | A spreadsheet, with its own note | The spreadsheet view. Changes you make there are saved back to the file. |
| `.html`, `.htm` | A web page or report, with its own note | A page view inside Terra. Scripts in the page stay off until you click **Enable scripts**. |
| Anything else | An attachment, with a note that links to it | The note |
Only `.md` files are read as notes. Files ending in `.markdown` or `.txt` aren't, so if they hold Markdown or plain text, rename them to end in `.md`.
## Ways to add a file
- **Drag it into Terra** from Finder. This works for every format in the table; see [Add files from Finder](https://terramd.io/docs/files-and-folders#add-files-from-finder). Before adding files that have no viewer, Terra lists them so you can check:

- **Copy it into the Library folder** with Finder. Markdown files appear as notes straight away. PDFs, images, spreadsheets and web pages get their notes the next time you open the Library, with a message such as **Adopted 3 loose files**. Books and other files aren't picked up this way; drag them into Terra instead.
- **Paste or drop it into a note** to attach it to that note. Images appear in the text; other files become a link. They're stored in the note's `attachments` folder (see [How Terra stores your notes](https://terramd.io/docs/how-terra-stores-your-notes#where-the-pieces-live)).
- **Import** a whole collection from another app (below).
Terra always copies: the file you dragged from stays where it was.
## Limits
- Files over 256 MB are skipped when you drop them, and hidden files (names starting with a dot) are left out.
- Books protected with DRM can't be opened; Terra shows **Encrypted EPUB** instead.
- A web page larger than 8 MB isn't shown inside Terra. It says **Report too large to preview**; use **Reveal in Finder** to open it in another app.
## Formats you can import
Importing converts notes from another app into Markdown notes in your Library. [Bring in your notes from another app](https://terramd.io/docs/bring-in-your-notes) walks through it.
| From | What Terra reads |
| --- | --- |
| Obsidian | The vault folder |
| Notion | A `.zip` export |
| Bear | A `.bear2bk` backup |
| Evernote | An `.enex` export |
| Roam Research | A `.json` export |
| Apple Notes | A folder of Markdown files and images exported from Apple Notes |
| Plain Markdown | A folder of `.md` files |
| Zotero, Mendeley and other reference managers | A BibTeX (`.bib`), RIS (`.ris`) or CSL-JSON (`.json`) export |
## Related
- [Files and folders](https://terramd.io/docs/files-and-folders) — where added files go, and how to move them.
- [How Terra stores your notes](https://terramd.io/docs/how-terra-stores-your-notes) — notes, attachments and sidecars on disk.
- [Read in the e-reader](https://terramd.io/docs/read-in-the-e-reader) — books, PDFs and images in Terra.
- [Bring in your notes from another app](https://terramd.io/docs/bring-in-your-notes) — importing step by step.
---
# How Terra stores your notes
> Every note is a plain Markdown file with a short YAML header. See what Terra writes, where attachments and sidecars go, and what's safe to edit elsewhere.
Source: https://terramd.io/docs/how-terra-stores-your-notes
Terra keeps your notes as plain text files that any editor can open. Each note is a Markdown file (`.md`) with a short header of [properties](https://terramd.io/docs/properties) at the top, written in YAML, the same *frontmatter* format Obsidian and many other tools use. Nothing is locked inside a database: if you stopped using Terra tomorrow, your notes would still be ordinary files in ordinary folders.
## A note, as a file
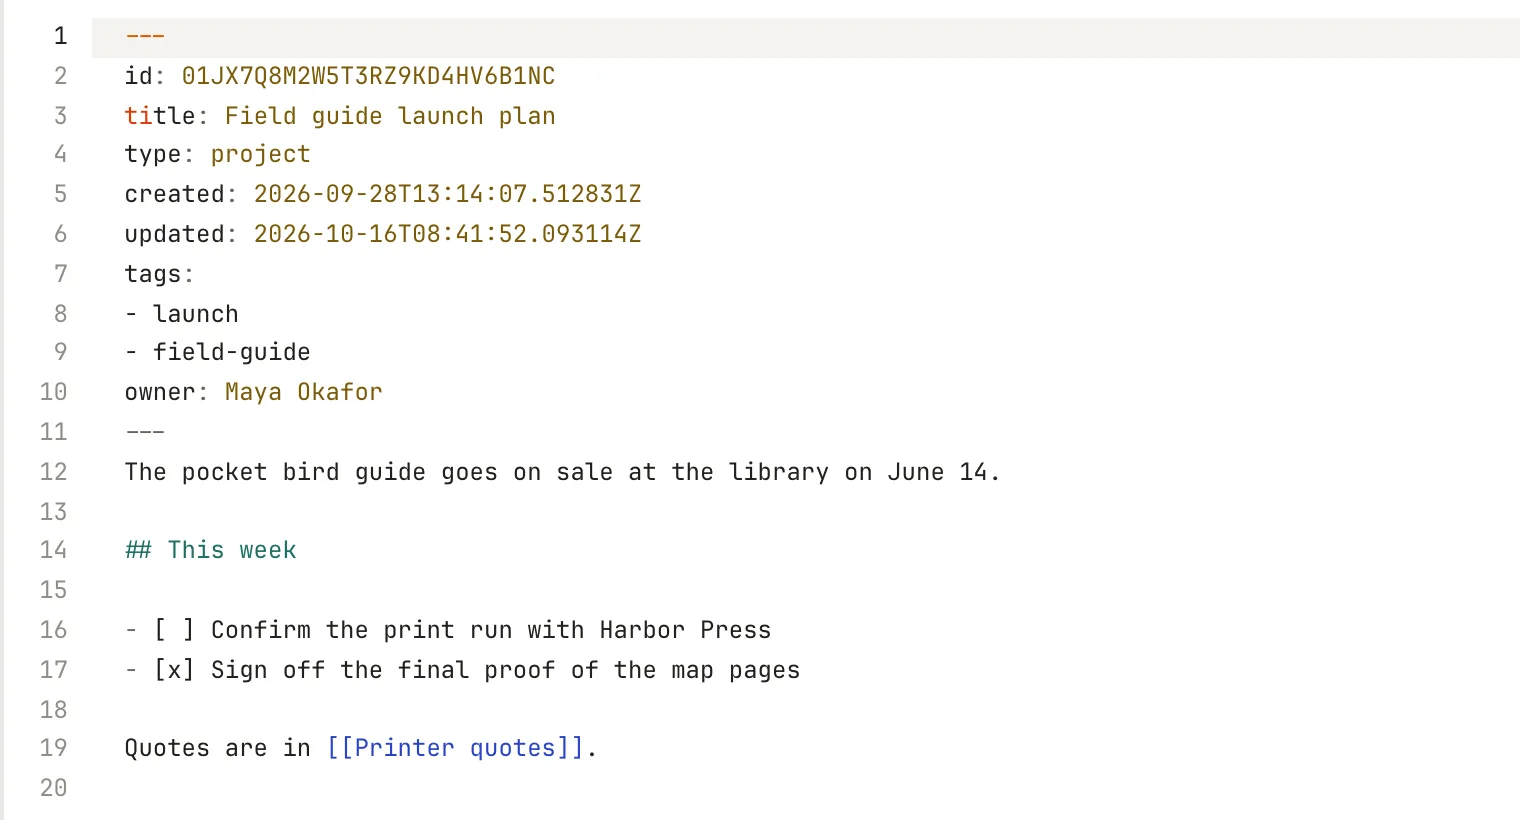
This is the complete file for a note called *Field guide launch plan*, saved as `Field guide/field-guide-launch-plan.md` in the Library:
```markdown
---
id: 01JX7Q8M2W5T3RZ9KD4HV6B1NC
title: Field guide launch plan
type: project
created: 2026-09-28T13:14:07.512831Z
updated: 2026-10-16T08:41:52.093114Z
tags:
- launch
- field-guide
owner: Maya Okafor
---
The pocket bird guide goes on sale at the library on June 14.
## This week
- [ ] Confirm the print run with Harbor Press
- [x] Sign off the final proof of the map pages
Quotes are in [[Printer quotes]].
```
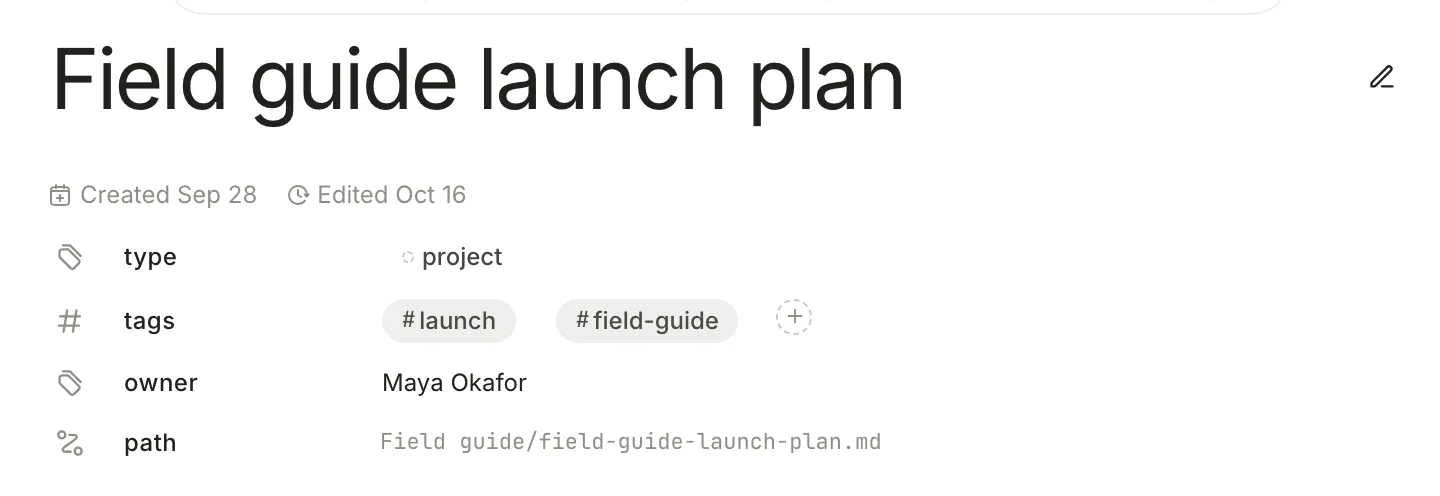
In Terra, the header becomes the properties under the title, and the rest is the note:
| Line | What it is |
| --- | --- |
| `---` | Starts and ends the header. Everything after the second `---` is the note's text. |
| `id` | A permanent identifier Terra gives each note. It stays the same when you rename or move the note, so databases, favorites collections and the note's sidecar can keep track of it. Leave it alone. |
| `title` | The title, exactly as you typed it. The file name is a simplified copy. |
| `type` | What kind of note this is, if you've set one. See [Properties](https://terramd.io/docs/properties). |
| `created`, `updated` | When the note was made and last changed, in UTC. Terra keeps these up to date. |
| `tags` | The note's [tags](https://terramd.io/docs/tags), one per line. |
| `owner` | Any property of your own. Yours come after Terra's, in alphabetical order. |
The text is standard Markdown; [Formatting syntax](https://terramd.io/docs/formatting-syntax) covers it, and links to other notes are written `[[Title]]`. To see a note's file without leaving Terra, point at the mode icon to the right of the title (a pencil while you're editing) and choose **Markdown source**. You can edit the file there too, header included.
## Where the pieces live
A Library holds your folders and notes, plus a few things Terra adds:
```text
Field Notes/ ← the Library
├── Field guide/
│ ├── field-guide-launch-plan.md
│ ├── printer-quotes.md
│ ├── printer-quotes.terra.json ← a sidecar
│ └── attachments/
│ └── printer-quotes/
│ └── harbor-press-proof.png
├── Inbox/ ← new notes
├── Trash/ ← deleted notes
├── Themes/
│ └── default.css
├── .terra/ ← hidden: Terra's data
└── .terra-library.toml ← hidden: format marker
```
**Attachments.** Images and files you paste or drag into a note are copied into an `attachments` folder beside it, in a subfolder named after the note's file. The note points at them with a relative path such as `attachments/printer-quotes/harbor-press-proof.png`. When you move or duplicate the note in Terra, its attachments go too.
**Files with their own note.** A PDF, book, spreadsheet or image you add to the Library gets a note of its own beside it, which holds its title and your notes about it. The note records the file in its header as `attachment`, with an `attachment_hash` so Terra can find the file again if it's moved. [Accepted file formats](https://terramd.io/docs/file-formats) lists them.
**Sidecars.** Some things don't fit in Markdown: a book's highlights and reading position, a table's formulas, comments, a cover's framing, a Sprout's properties, the results of code you've run. Terra keeps those in a [sidecar](https://terramd.io/docs/glossary#sidecar), a JSON file next to the note with the same name and the ending `.terra.json`. Most notes don't have one. [Annotate and keep every mark](https://terramd.io/docs/annotate-in-the-sidecar) shows a sidecar from the inside.
A few Terra-only blocks, such as side-by-side columns or a database inside a note, are written into the Markdown as HTML comments, for example ``. Markdown apps that hide HTML comments skip them and show the text around them.
## The hidden .terra folder
Each Library has a `.terra` folder of Terra's own data. Finder hides it; press ⇧ ⌘ . in a Finder window to see it.
| Item | What it holds |
| --- | --- |
| `index.sqlite` | The search index: a cache built from your notes, rebuilt when needed |
| `preferences.toml` | This Library's settings |
| `databases/`, `database-views/` | Your [databases](https://terramd.io/docs/databases), favorites collections and their saved views |
| `templates/notes/` | Your [templates](https://terramd.io/docs/templates) |
| `property_types.toml` | Property definitions: types, options and colours |
| `views/` | Saved pane layouts, the sidebar's **Views** |
| `conversations/` | Your chats with [Terra Agent](https://terramd.io/docs/ask-your-library) |
| `library.json` | The Library's own identifier |
You'll also find smaller files and caches that come and go. The `.terra` folder isn't only a cache: your databases, templates and settings live there, so back it up with the rest of the Library.
## What Terra changes when it saves
Terra saves a note's whole file in one consistent style each time the note changes. Your words stay the same; the punctuation around them can be tidied:
- `_italic_` becomes `*italic*`, and `__bold__` becomes `**bold**`.
- Headings underlined with `===` or `---` become `#` headings, and every divider becomes `---`.
- Indented code becomes a fenced code block.
- Bullet lists you make in Terra use `*`; lists already in the file keep their `-`, `*` or `+`. Task lists use `- [ ]`.
- Table column alignment (`:---:`) is dropped.
- Characters Markdown would misread, such as a lone `*` or `[`, get a backslash in front.
- The header is written in Terra's order: `id`, `title`, `type`, `created`, `updated`, `tags`, then your own properties alphabetically.
HTML typed into a note shows as plain text rather than being drawn. Terra writes a note's file when the note changes, through your edits or something that changes many notes at once such as renaming a tag, and now and then to correct its `created` or `updated` date.
## Editing outside Terra
Your notes are yours to open with anything. Terra watches the Library folder and picks up changes as they happen.
- **Safe:** creating, editing, renaming, moving and deleting `.md` files and folders with Finder, another editor or a script. A Markdown file without a header still appears, titled after its file name.
- **Keep a note's pieces together:** if you move or rename a note in Finder, move or rename its `.terra.json` sidecar and its `attachments` subfolder the same way. Terra pairs them by name.
- **Don't duplicate a note by copying its file:** the copy has the same `id`, and Terra shows only one of the two. Use **Duplicate** in Terra, which gives the copy a new one.
- **Leave `id` alone**, and let Terra manage `created` and `updated`. If you change them by hand, Terra may set them back; for instance, `created` can't be later than the day the file was made.
- **Leave `.terra` to Terra.** Back it up with your Library, but change settings, databases and templates in the app.
## Related
- [Files and folders](https://terramd.io/docs/files-and-folders) — create, move and delete notes from Terra.
- [Properties](https://terramd.io/docs/properties) — everything the header can hold.
- [Annotate and keep every mark](https://terramd.io/docs/annotate-in-the-sidecar) — sidecars in depth.
- [Sync and back up your Library](https://terramd.io/docs/sync-and-back-up) — keep a copy of all of this.
---
# Basic formatting syntax
> The Markdown you type in Terra for headings, bold and italic, highlights, links, images, quotes, lists, to-dos and code, with the shortcut for each.
Source: https://terramd.io/docs/formatting-syntax
Every Terra note is a Markdown file, so its formatting is plain text that any app can open. This page covers the basics: what you type, what you get, and the shortcut for each. In the editor, type the syntax and Terra formats it as you go, or use the shortcuts and the editor toolbar. To see or edit the raw text, switch the note to **Markdown source** with the switcher beside its title. Tables, math, diagrams, embeds and the rest are in [Advanced formatting](https://terramd.io/docs/advanced-formatting).
| Style | Syntax | Example | Shortcut |
| --- | --- | --- | --- |
| Bold | `** **` or `__ __` | `**May 20**` | ⌘ B |
| Italic | `* *` or `_ _` | `*Harbor Press*` | ⌘ I |
| Bold and italic | `*** ***` | `***Never***` | |
| Strikethrough | `~~ ~~` | `~~800~~` | ⇧ ⌘ S |
| Highlight | `== ==` | `==trail names==` | ⇧ ⌘ H |
| Inline code | `` ` ` `` | `` `valley-map.png` `` | ⌘ E |
| Heading | `#` to `######` | `## This week` | ⌥ ⌘ 1 to ⌥ ⌘ 3 |
| Link | `[text](address)` | `[Harbor Press](https://harborpress.example)` | ⌘ K with text selected |
| Note link | `[[ ]]` | `[[Printer quotes]]` | Type `@` |
| Image | `` | `` | |
| Quote | `> ` | `> Small enough for a pocket` | ⇧ ⌘ B |
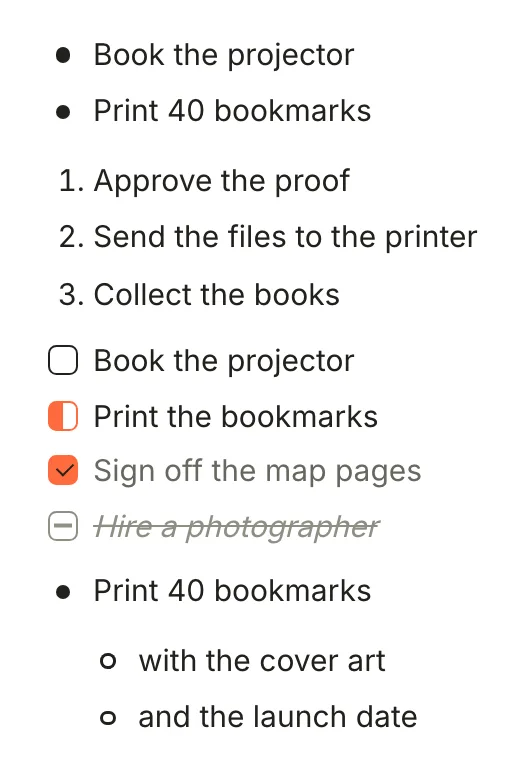
| Bulleted list | `- ` | `- Book the projector` | ⌥ ⌘ 5 |
| Numbered list | `1. ` | `1. Approve the proof` | ⌥ ⌘ 6 |
| To-do | `- [ ] ` | `- [ ] Book the projector` | ⌥ ⌘ 4, or type `[]` |
| Divider | `---` | `---` | |
| Code block | `` ``` `` | `` ```python `` | ⌥ ⌘ 8 |
## Paragraphs and line breaks
Press Return to start a new paragraph. In the file, a blank line separates paragraphs. For a line break inside a paragraph, press ⇧ Return: Terra saves it as a backslash at the end of the line.
```md
Saturday June 14, 2 pm.\
Community room, second floor.
Coffee, a short slideshow and a signing table.
```
Saturday June 14, 2 pm.\
Community room, second floor.
Coffee, a short slideshow and a signing table.
- A single line break inside a paragraph joins the two lines, as standard Markdown does. Obsidian shows it as a new line.
- Two spaces at the end of a line also make a line break; Terra saves them as a backslash.
- Extra blank lines between paragraphs are dropped when Terra saves.
## Headings
Type one to six `#` signs and a space at the start of a line.
```md
# Field guide launch
## This week
### Printing
#### Paper stock
##### Cover
###### Spine
```
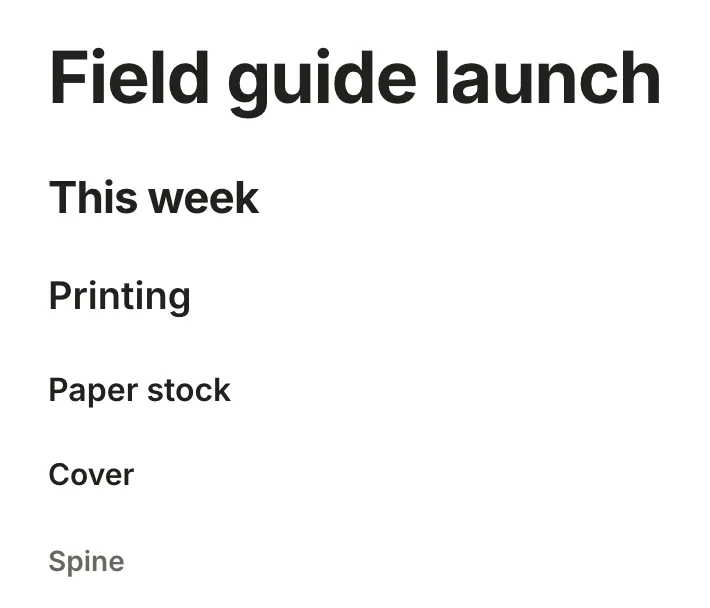
**Shortcut:** ⌥ ⌘ 1 to ⌥ ⌘ 3 turn the block into Heading 1 to 3, and ⌥ ⌘ 0 turns it back into text. The slash menu has **Heading 1** to **Heading 3** (`/h2`).
- The note's title is already its top heading, so start the body at `##`. Terra's lint flags `#` headings in the body.
- Without the space, `#launch` is a [tag](https://terramd.io/docs/tags), not a heading.
- Underlined headings (a line of `===` or `---` under the text) are read, and saved as `#` headings.
## Bold, italics and highlights
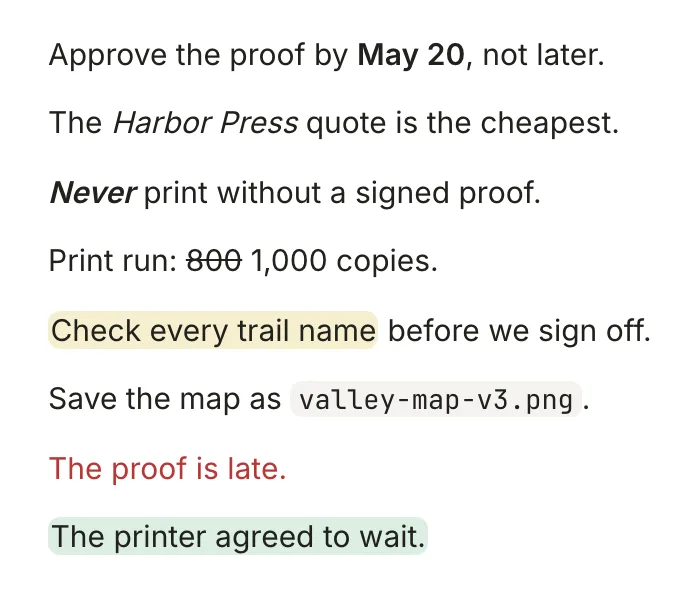
```md
Approve the proof by **May 20**, not later.
The *Harbor Press* quote is the cheapest.
***Never*** print without a signed proof.
Print run: ~~800~~ 1,000 copies.
==Check every trail name== before we sign off.
Save the map as `valley-map-v3.png`.
```
- **Bold:** ⌘ B with text selected, or type `**text**`. Terra saves `__text__` as `**text**`.
- **Italic:** ⌘ I, or type `*text*` or `_text_`. Terra saves both as `*text*`.
- **Bold and italic:** `***text***` in Markdown source; in the editor, press ⌘ B and ⌘ I.
- **Strikethrough:** ⇧ ⌘ S, or type `~~text~~`.
- **Highlight:** ⇧ ⌘ H, or type `==text==`.
- **Inline code:** ⌘ E, or type `` `text` ``. Markdown inside it stays as typed.
The editor toolbar has **Bold**, **Italic**, **Strikethrough** and **Inline code** buttons too. Markdown has no underline: ⌘ U underlines text on screen, but Terra can't save it, so the underline is gone once the note saves.
### Colour
The toolbar's **Text color** and **Highlight** buttons colour text, or the background behind it, with your theme's colours. Choose **None** to clear it. Markdown has no colour either, so Terra saves an HTML tag:
```md
The proof is late.
The printer agreed to wait.
```
## Links
Link to a web page with `[text](address)`, or type a web address followed by a space. To link text you've already written, select it, press ⌘ K and enter the address. Click a link to open it in Terra; ⌥-click opens it in your web browser.
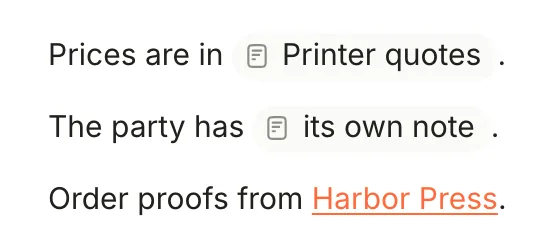
Link to another note with its title in double brackets, and add `|` and some text to show that text instead. In the editor, type `@`, a few letters of the title and press Return: Terra writes the link for you. Typing `[[` and the brackets by hand doesn't make a working link in this version.
```md
Prices are in [[Printer quotes]].
The party has [[Launch party at the library|its own note]].
Order proofs from [Harbor Press](https://harborpress.example).
```
Links to headings and single paragraphs, backlinks and renaming are in [Links and backlinks](https://terramd.io/docs/links-and-backlinks).
## Images
```md

```
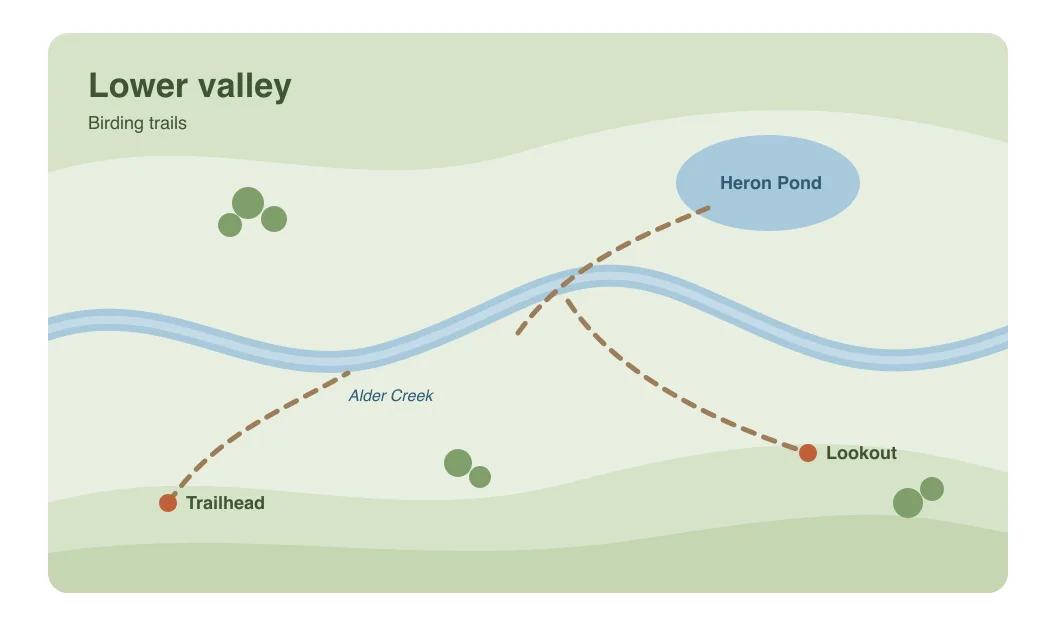
An image is `!`, alt text in brackets and the file's path in parentheses. A `|` and a number after the alt text set the width in pixels; `|480x300` sets the height too.
- **Add one:** type `/image` to open **Insert image** (**Library**, **Upload** or **Link**), or paste or drag an image into the note. Terra copies it into an `attachments` folder next to the note.
- **Images from the web** show **Load image** and the site's name until you click, so a note never contacts a website on its own.
Resizing and note covers are in [Advanced formatting](https://terramd.io/docs/advanced-formatting#images).
## Quotes
Type `>` and a space at the start of a line, or press ⇧ ⌘ B.
```md
> Small enough for a coat pocket,
> which is the whole point.
```
> Small enough for a coat pocket,
> which is the whole point.
For a coloured box with a title, use a [Sprout](https://terramd.io/docs/sprouts).
## Lists
### Bulleted lists
Type `-`, `*` or `+` and a space, or press ⌥ ⌘ 5.
```md
- Book the projector
- Print 40 bookmarks
```
Terra saves new lists with `*`. A list that already uses `-` or `+` keeps its marker.
### Numbered lists
Type a number, then `.` and a space, or press ⌥ ⌘ 6. The list starts at the number you type.
```md
1. Approve the proof
2. Send the files to the printer
3. Collect the books
```
### To-dos
Type `[]` or `[ ]` and a space at the start of a line, or press ⌥ ⌘ 4. (Typing `- [ ]` gives you a bullet that holds the brackets.)
```md
- [ ] Book the projector
- [/] Print the bookmarks
- [x] Sign off the map pages
- [-] Hire a photographer
```
Click the box to step through open, in progress, done and cancelled, or press ⌘ Return to check or uncheck the to-do you're in. Every to-do also shows up in [Tasks](https://terramd.io/docs/tasks); dates and other fields are in [Task syntax](https://terramd.io/docs/task-syntax).
### Nested lists
Press Tab to nest an item under the one above, and ⇧ Tab to bring it back. In Markdown, indent it: Terra uses two spaces under a bullet and three under a number.
```md
- Print 40 bookmarks
- with the cover art
- and the launch date
```
## Horizontal rule
Type `---` at the start of a line; it turns into a rule as you type the third dash. `***` or `___` followed by a space work too, and so does `/divider`.
```md
Launch day
---
After the launch
```
Launch day
---
After the launch
In Markdown, keep a blank line above `---`. Directly under a line of text, it turns that line into a heading.
## Code
Wrap text in backticks for inline code, or press ⌘ E.
```md
Save the map as `valley-map-v3.png`.
```
Save the map as `valley-map-v3.png`.
For a code block, type three backticks, a language if you like, then a space or Return. ⌥ ⌘ 8 and `/code` work too. To leave the block, press ⇧ Return or ⌘ Return.
````md
```python
copies = 1000
print(f"{copies} copies")
```
````
```python
copies = 1000
print(f"{copies} copies")
```
Code indented by four spaces is read too, and saved as a fenced block. Languages, line numbers and running code are in [Advanced formatting](https://terramd.io/docs/advanced-formatting#code-blocks).
## Escaping
To show a Markdown character as itself, put a backslash before it in Markdown source. In the editor you don't need to: type the character, and Terra adds the backslash when it saves.
```md
Print run: 2 \* 500 copies, in \*full\* colour.
\# Not a heading
1\. Not a list item
```
Print run: 2 \* 500 copies, in \*full\* colour.
\# Not a heading
1\. Not a list item
A backslash doesn't stop a tag or a note link: `\#launch` is still a tag. To show those as text, put them in inline code: `` `#launch` ``.
## Not supported
- **Footnotes.** `[^1]` shows as plain text, and Terra escapes it when it saves.
- **Obsidian comments.** `%% … %%` shows as text. Terra's comments sit beside the note: see [Advanced formatting](https://terramd.io/docs/advanced-formatting#comments).
- **HTML.** Tags such as `` or `
` show as text, apart from the colour tags Terra writes itself.
- **Underline.** Markdown can't store it.
## Related
- [Advanced formatting](https://terramd.io/docs/advanced-formatting): tables, math, code, diagrams, embeds, columns and the slash menu.
- [Sprouts](https://terramd.io/docs/sprouts): coloured blocks with a title, properties and attachments.
- [Links and backlinks](https://terramd.io/docs/links-and-backlinks): note links in depth.
- [Keyboard shortcuts](https://terramd.io/docs/keyboard-shortcuts): every key in one place.
---
# Advanced formatting
> Tables that add themselves up, math, code you can run, Mermaid diagrams, embeds, columns, tabs, toggles, comments and dates, plus everything in the slash menu.
Source: https://terramd.io/docs/advanced-formatting
Beyond the [basics](https://terramd.io/docs/formatting-syntax), a Terra note can hold tables that add themselves up, math, code that runs, diagrams, live views of other notes and [databases](https://terramd.io/docs/databases), and layouts with columns and tabs. Most of it is plain Markdown that other apps can read. Where Markdown has no syntax, Terra writes an HTML comment, which other apps hide, or keeps the details in the note's sidecar file, `.terra.json`.
## Insert a block
Type `/` at the start of a line or after a space, then a few letters to narrow the list: `/table`, `/mer`, `/sprout`. Press Return or click. The **Insert block** button in the editor toolbar types the `/` for you, and Esc closes the menu. Every entry is listed in [the slash menu reference](#everything-in-the-slash-menu) at the end of this page.
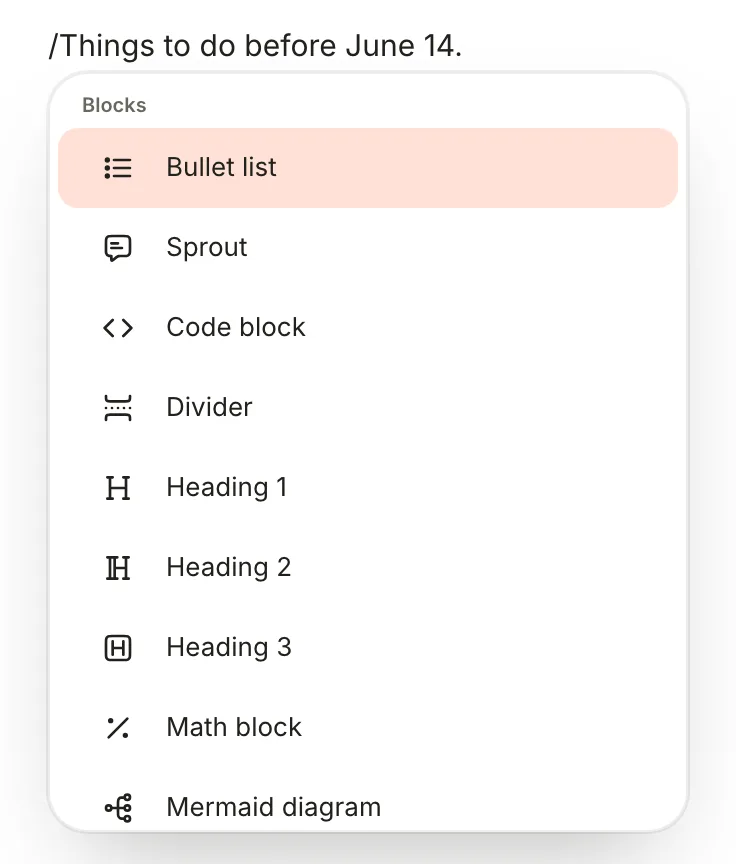
## Tables
Type `/table` and pick a size in the grid (up to 8 by 8). The first row is the header. In Markdown, a table is rows of cells between pipes:
```md
| Item | Cost |
| --- | --- |
| Printing | $4,850 |
| Bookmarks | $30 |
| Launch party | $300 |
| Total | $5,180.00 |
```
- Tab moves to the next cell; in the last cell it adds a row.
- Hover the table for its handles: grips select a column or row, dots between cells insert one, and the dashed edges add one at the end. Drag the dot at a cell's corner to fill the cells beside it, holding ⇧ to continue a series.
- Right-click a cell to add or delete rows and columns, **Rename column** or **Delete table**.
- Alignment (`:---:`) isn't kept: Terra writes `---`. Cells can't be merged.
### Formulas
Start a cell with `=` to calculate. `=SUM(above)` adds up the numbers above the cell; `below`, `left` and `right` work too, and so do references such as `=B2*C2` or `=SUM(B2:B4)`, where row 1 is the header. Click away to see the result, and click the cell again to see its formula. Functions include SUM, AVERAGE, MIN, MAX, MEDIAN, COUNT, ROUND and IF.
The Total above is `=SUM(above)`. The file holds its result, `$5,180.00`, and keeps the formula in the sidecar, so other apps see plain numbers. Results take the column's format, here dollars. If someone changes the table outside Terra, Terra drops its formulas and keeps their values.
### Quick sums
At the end of any line, type a sum followed by `=`. The answer appears in grey; press Tab to keep it.
```md
Bookmarks: 40 * 0.75=
```
It converts units as well: `3 h 20 min in min=` gives `200 min`. Length, weight, time, data sizes and temperature work.
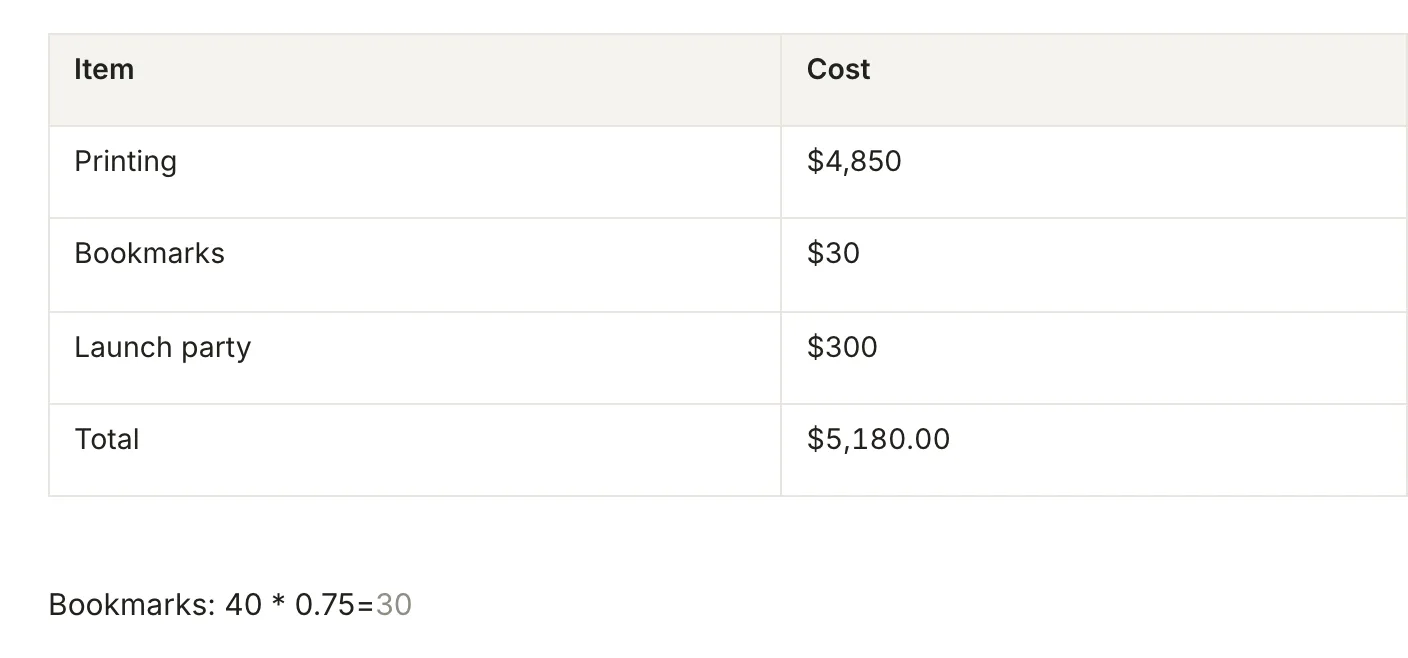
## Math
```md
A run of $n$ copies costs $4850 + 3.9(n - 1000)$ dollars.
Average sightings per walk:
$$
\bar{s} = \frac{1}{n} \sum_{i=1}^{n} s_i
$$
```
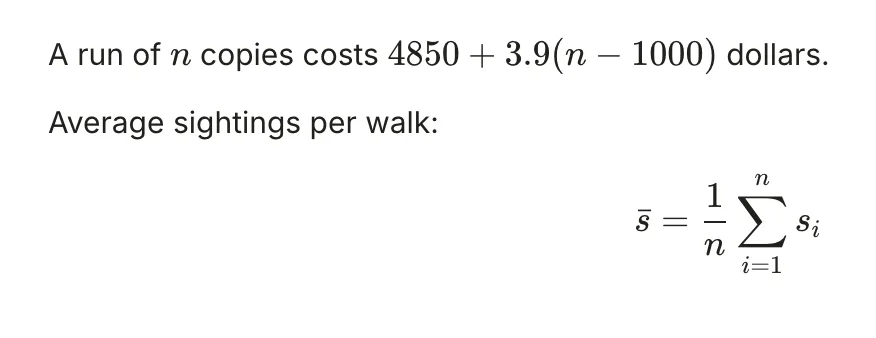
- **Inline:** type `$`, the TeX and a closing `$`; it turns into math as you type the closing one. Leave no space just inside the dollar signs. Prices such as `$5 and $6` stay text.
- **Block:** on an empty line, type `$$` and press Return.
- **From the menu:** choose **Math block** or **Math (inline)**.
- **Edit:** click the formula to edit its TeX in place. It renders again when the caret leaves.
Terra draws math with KaTeX.
## Code blocks
Code blocks start as in [Basic formatting](https://terramd.io/docs/formatting-syntax#code). Click the language badge at a block's top right to set its language: **Python**, **R**, **JavaScript**, **TypeScript**, **Rust**, **Shell**, **JSON**, **YAML**, **TOML**, **SQL**, **HTML**, **CSS**, **Markdown** or **Plain text**.
| Keys, inside a code block | What they do |
| --- | --- |
| ⌘ ; | Show or hide line numbers |
| ⇧ ⌘ I | Format the code, with a formatter installed on your Mac such as ruff or Prettier |
| ⌘ / | Comment out the line |
| ⌥ ↑ or ⌥ ↓ | Move the line up or down |
| ⌘ E | Turn the block back into text, one paragraph per line |
| ⇧ Return or ⌘ Return | Leave the block |
### Run code
Python and R blocks can run, notebook-style, and show their output under the code.
1. Click the language badge and choose **Python · runnable** or **R · runnable**. Terra rewrites the fence as `` ```{python, label=blk_…} `` so it can keep track of the cell.
2. Click **Run**. Terra saves the note, and the first time a cell runs, or after you change it, macOS asks **Run this exact saved code?**. Click **Allow**.
3. The output appears under the cell: text, plots and tables. **Stop** halts a run, and the buttons beside **Run** restart Python or R and clear the output. **Run all**, at the top of the note, runs every cell in order.
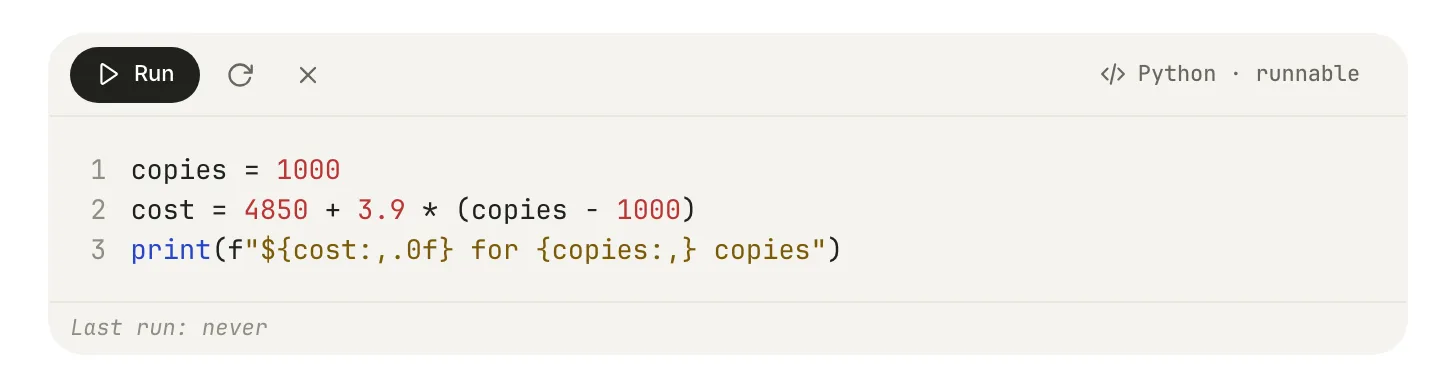
- Python needs `ipykernel` installed; R needs IRkernel. The notes in a [Library](https://terramd.io/docs/libraries) share one Python and one R session, so variables carry over between them.
- Options go after the label, as in Quarto: `echo=false` hides the code in Read mode, `eval=false` never runs the cell, and `output=false` runs it without showing output.
- **Settings › Code › Runnable code** can turn Run off, run code in an isolated sandbox (on by default) and stop asking before new code runs.
## Mermaid diagrams
````md
```mermaid
graph LR
Draft --> Proof --> Print --> Launch
```
````

Type `/mermaid` for a starter diagram, or write the diagram as a paragraph and choose **Turn into › Mermaid diagram**. To change it, hover and click the pencil (**Edit diagram source**) or double-click; ⌘ Return saves and Esc cancels. Drag its corner to resize it: Terra saves the width on the fence, as in `` ```mermaid width=480 ``. A diagram with a mistake shows Mermaid's message, with **View source**.
## Embeds
An embed shows another note, a database or an item from a connected app inside your note.
```md
![[Printer quotes]]
![[jira:https://example.atlassian.net/browse/WEB-142]]
```
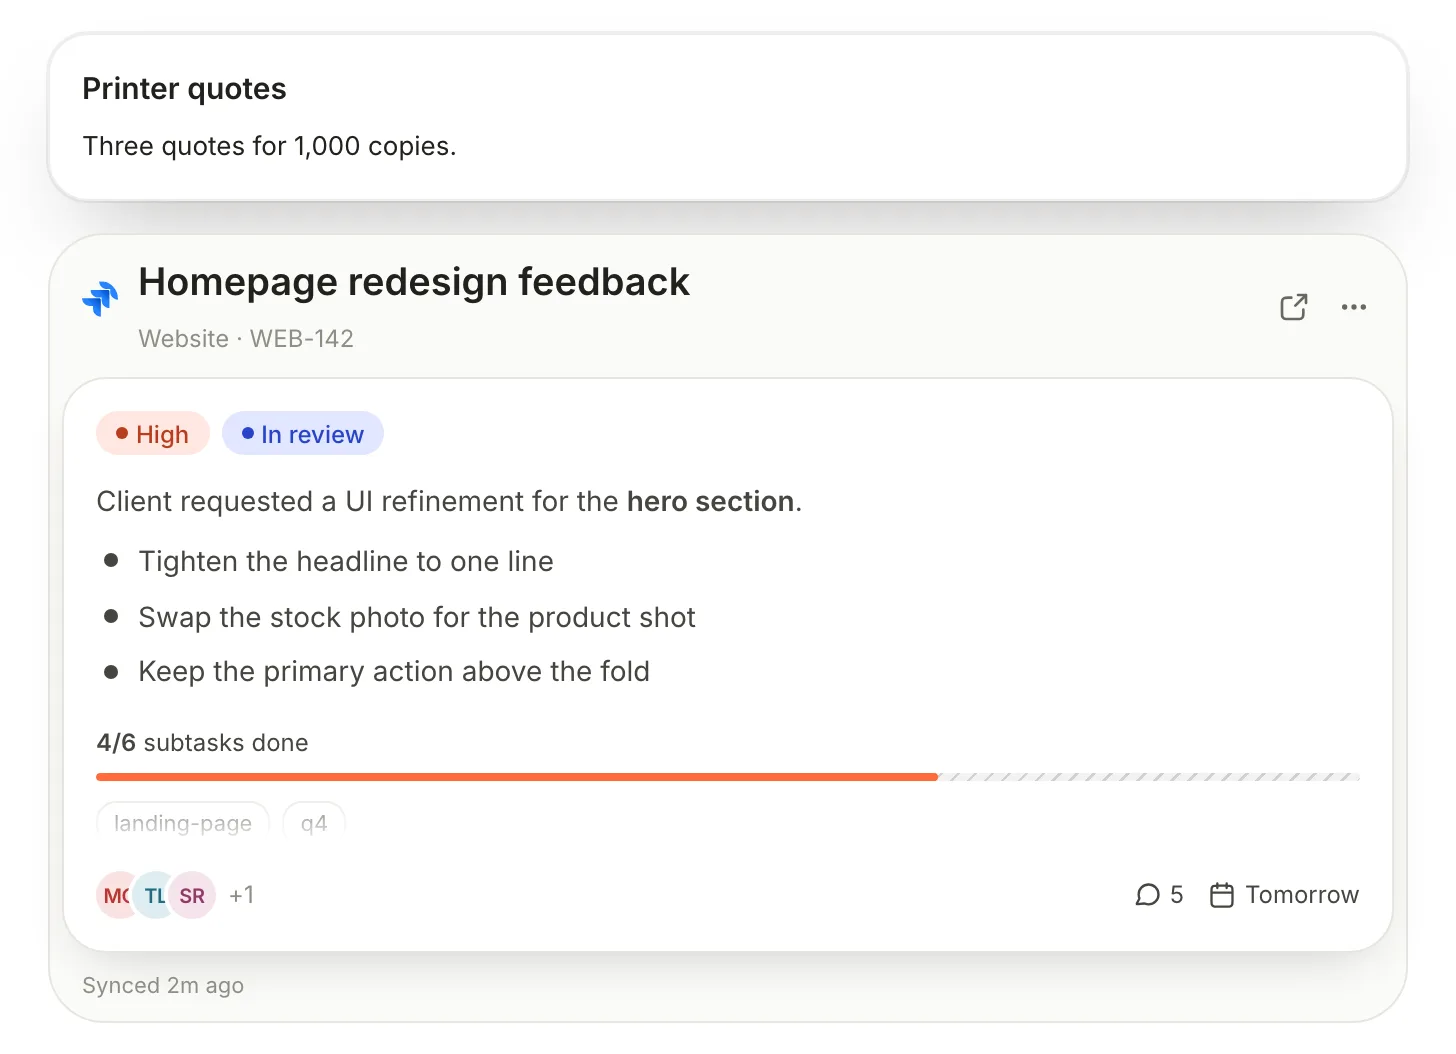
- **Another note:** in **Markdown source**, put `![[Note title]]` on a line of its own. Back in **Edit**, it shows as a card with the note's title and opening lines; click it to open the note. Typing `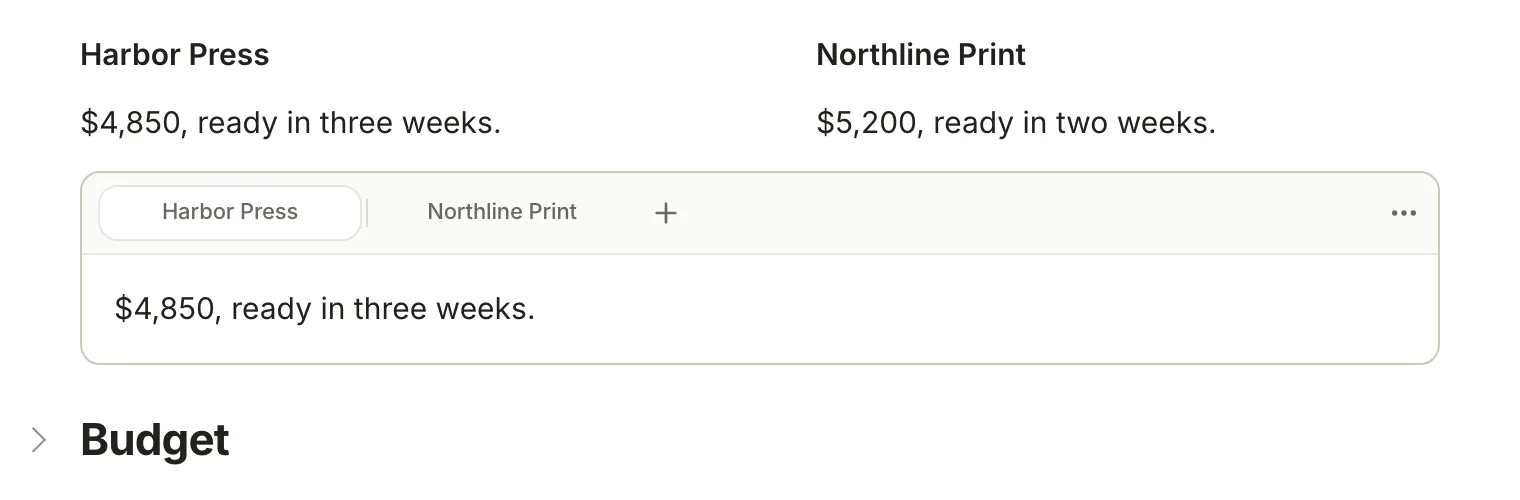
### Columns
Drag a block by its ⠿ handle onto the left or right edge of another block. When a vertical line appears, let go: the two sit side by side. Drop more blocks on a column's edge for up to four columns. Drag the gap between columns to resize them, or double-click it to even them out. Drag a column's last block out and the column goes away. Columns sit at the top level of a note, not inside a Sprout or a tab, and they stack in a narrow window.
```md
**Harbor Press**
$4,850, ready in three weeks.
**Northline Print**
$5,200, ready in two weeks.
```
### Tabs
A tab group shows one section at a time: two printers' quotes, or the same code in two languages. Type `/tabs` for a group with **Tab 1** and **Tab 2**, or select a run of headings with their text and choose **Turn into › Tabs from sections** in the toolbar. Click **+** (**Add tab**) to add one, and **Tab actions** (**⋯**) to rename, duplicate, move or **Dissolve group to sections**. Right-click a tab for its **Color** and **Glyph**. A group needs two tabs: removing one of two turns the group back into sections.
```md
### Harbor Press
$4,850, ready in three weeks.
### Northline Print
$5,200, ready in two weeks.
```
Each tab is a heading and its text, so other apps show the tabs one after another.
### Toggles
A paragraph, heading, list item, quote, code block or [Sprout](https://terramd.io/docs/sprouts) can be a *toggle* that folds away what belongs to it. A heading folds its whole section. Put the caret in the block and press ⌥ ⌘ 7, or switch on **Toggle** in its ⠿ menu. Click the chevron to fold or unfold it; ⌘ Return does the same for the toggle you're in, and ⌥ ⌘ T folds or unfolds every toggle in the note.
```md
## Budget
Printing, bookmarks and the launch party.
```
## Comments
Comments sit beside a note, never in its text. Click **Comments** in the window toolbar, or press ⇧ ⌘ M, to comment on the whole note: type in **Add comment…** and press Return. To comment on one paragraph, heading or list item, hover it, click the faint **⋯** in the right margin and choose **Comment**. A speech-bubble mark then shows the block has a thread.
Terra keeps comments in the note's sidecar file and marks the block with a `^ID` at the end of its line. You can't comment on part of a paragraph yet.
## Dates
Type `@` and pick **Today**, **Tomorrow** or **Yesterday** under **Date**, or type a date such as `@2026-06-14` and pick it there. The toolbar's **Insert date** opens a calendar instead. Terra shows a date chip, and saves plain text:
```md
Launch day is @2026-06-14.
```
Click a chip to pick another date.
## Images
Hover an image to resize it: drag the round handle at its bottom-right corner. Terra keeps its proportions and saves the width in the alt text, as in ``.
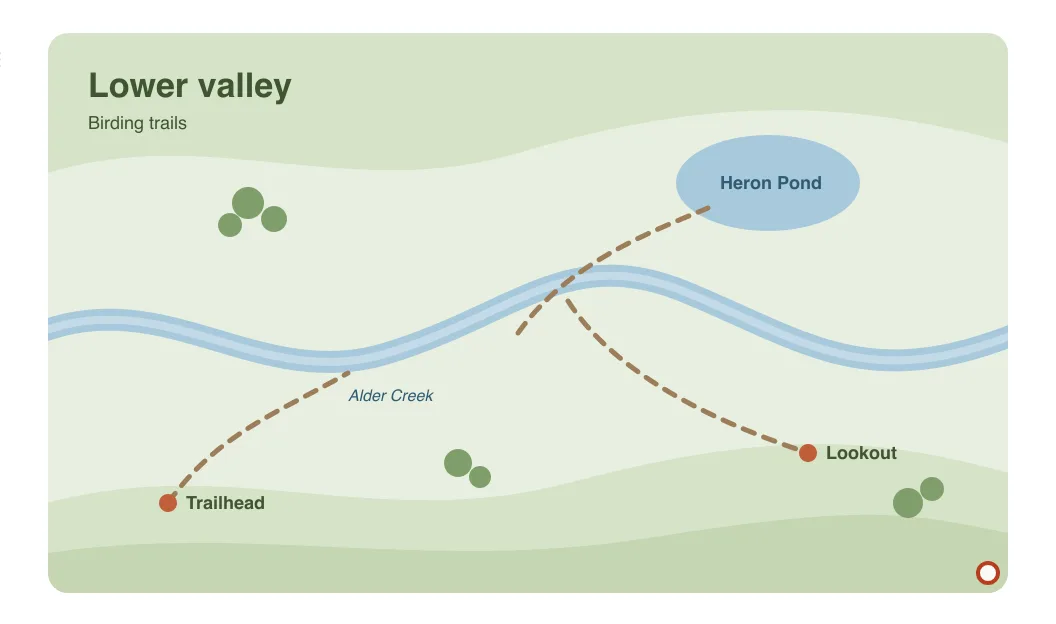
**Insert image** (`/image`) has three tabs: **Library** for images already in your Library, **Upload** for a file on your Mac, and **Link** for a web address, which you can **Save to library** (a copy in the note's attachments) or **Keep as link**.
For a cover across the top of a note, click the picture icon (**Banner image**) under the title, then **Upload cover** or **Import cover from web**. **Reposition cover** lets you drag it into place; **Apply cover position** keeps it. The cover is saved as the note's `cover` [property](https://terramd.io/docs/properties).
## Not yet in Terra
Footnotes: `[^1]` stays plain text.
## Everything in the slash menu
| Entry | Type | What you get |
| --- | --- | --- |
| **Heading 1**, **Heading 2**, **Heading 3** | `/h1`, `/h2`, `/h3` | A heading. On a heading of that level, back to text. |
| **Bullet list** | `/list` | A bulleted list |
| **Numbered list** | `/num` | A numbered list |
| **To-do** | `/todo` | A to-do |
| **Quote** | `/quote` | A quote |
| **Sprout** | `/sprout` | A Note [Sprout](https://terramd.io/docs/sprouts) |
| **Code block** | `/code` | A code block |
| **Divider** | `/hr` | A horizontal rule |
| **Math block** | `/math` | A block of math |
| **Mermaid diagram** | `/mermaid` | A starter diagram |
| **Table** | `/table` | A size picker, then a table |
| **Tabs** | `/tabs` | A tab group with two tabs |
| **Database** | `/database` | A live view of a database |
| **Bold**, **Italic**, **Strikethrough**, **Highlight**, **Inline code** | `/bold`, `/italic`, `/strike`, `/highlight`, `/inline` | That style for what you type next |
| **Math (inline)** | `/tex` | Inline math, with a placeholder `x` to type over |
| **Citation** | `/cite` | A citation picker; see [Build a research library](https://terramd.io/docs/research-library) |
| **Image** | `/image` | **Insert image** |
| **Jira issue**, **GitHub pull request** and others | `/jira`, `/github`, … | An embed, for apps you've connected |
The menu doesn't open in the middle of a word, or inside code or math. **Image** appears once you type a few letters of it.
## Related
- [Basic formatting syntax](https://terramd.io/docs/formatting-syntax): headings, emphasis, links, lists and code.
- [Sprouts](https://terramd.io/docs/sprouts): coloured blocks with properties.
- [Databases](https://terramd.io/docs/databases): the views you can embed in a note.
- [Links and backlinks](https://terramd.io/docs/links-and-backlinks): linking to notes, headings and single paragraphs.
---
# Sprouts
> Coloured blocks that hold other blocks, like tips, warnings and decisions, with their own properties, and every one in your Library on a single board.
Source: https://terramd.io/docs/sprouts
A *Sprout* is a coloured block that holds other blocks: a tip beside the steps it explains, a warning above a risky change, a decision you'll want to find again. If you've used Obsidian, it's a callout, and it's written the same way. Unlike a callout, a Sprout can carry its own [properties](https://terramd.io/docs/properties) and attachments, and every Sprout in your [Library](https://terramd.io/docs/libraries) shows up on one board, the **Sprouts** [database](https://terramd.io/docs/databases).
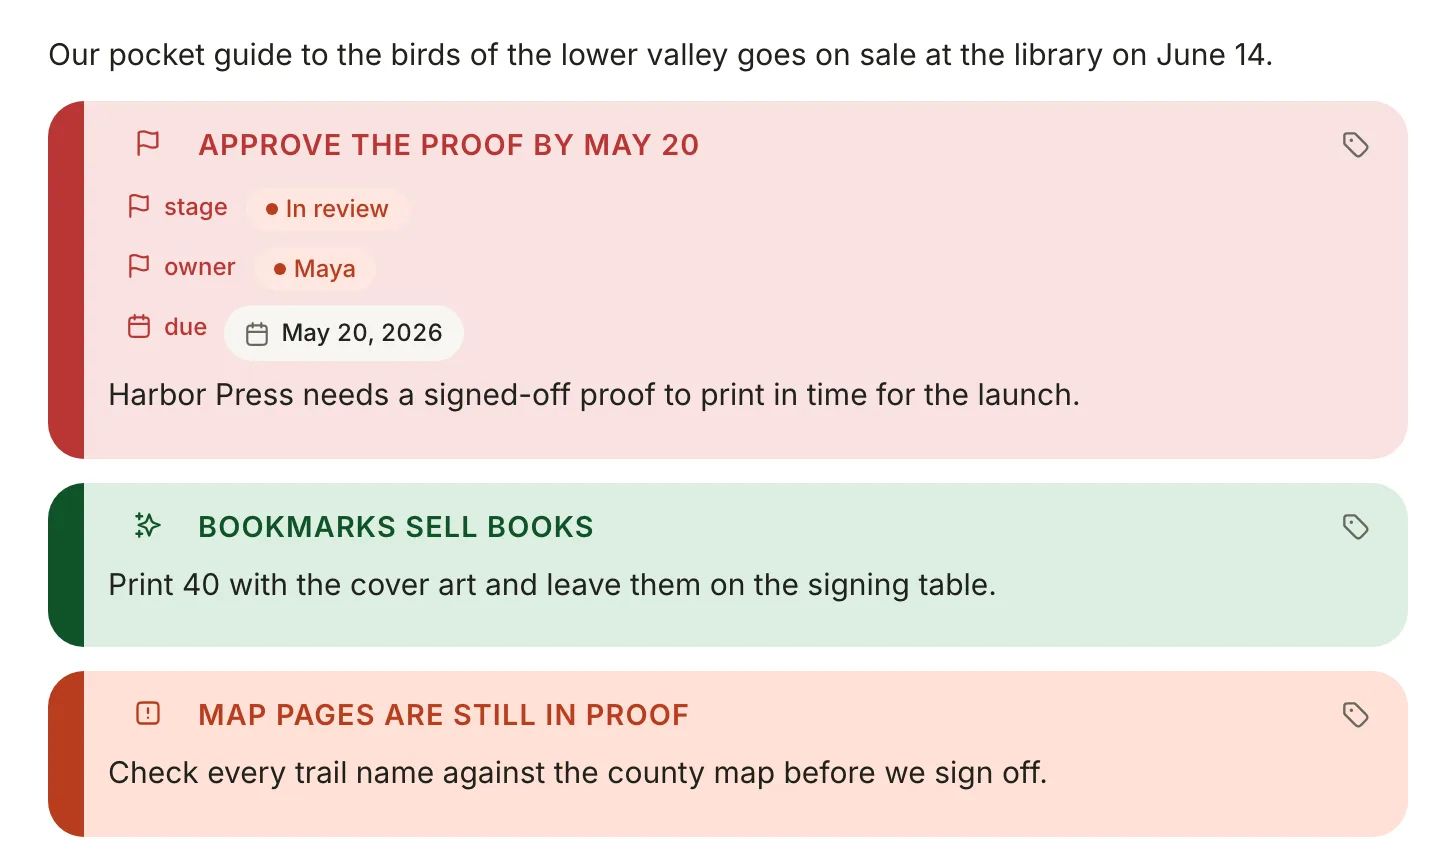
## Create a Sprout
On an empty line, type `/sprout` and press Return. A **Note** Sprout appears with the caret inside it, ready for its text. If the line already has text, `/sprout` wraps that line in a Sprout. Typing `/callout` finds it too. There's no keyboard shortcut.
In Markdown, a Sprout is a quote whose first line names its kind in brackets, followed by an optional title. Every line of the body starts with `>`:
```md
> [!tip] Bookmarks sell books
> Print 40 with the cover art and leave them on the signing table.
```
> [!tip] Bookmarks sell books
> Print 40 with the cover art and leave them on the signing table.
Write the kind in lowercase. Terra matches kinds exactly, so `[!TIP]` opens as a plain grey Sprout. To write a Sprout as Markdown, switch the note to **Markdown source** with the switcher beside its title: typing `> [!tip]` in the editor gives you an ordinary quote.
## Kinds
Every Library starts with six kinds. They can't be deleted, and you can [add your own](#make-your-own-kinds).
| Kind | Write | Colour | Use it for |
| --- | --- | --- | --- |
| `Note`{gray} | `[!note]` | Grey | Background and context. The kind `/sprout` makes. |
| `Tip`{green} | `[!tip]` | Green | Shortcuts and good ideas |
| `Warning`{orange} | `[!warning]` | Orange | Something that could go wrong |
| `Important`{red} | `[!important]` | Red | Deadlines and must-dos |
| `Quote`{sky} | `[!quote]` | Blue | Something someone said |
| `Info`{sky} | `[!info]` | Blue | Facts and reference details |
```md
> [!note] Print run
> 1,000 copies, 96 pages, full colour.
> [!tip] Bookmarks sell books
> Print 40 with the cover art for the signing table.
> [!warning] Map pages are still in proof
> Check every trail name against the county map.
> [!important] Approve the proof by May 20
> Harbor Press needs it to make the June 14 launch.
> [!quote] From the birding club
> Small enough for a coat pocket, which is the whole point.
> [!info] Launch day
> Saturday June 14, 2 pm, in the library's community room.
```
> [!note] Print run
> 1,000 copies, 96 pages, full colour.
> [!tip] Bookmarks sell books
> Print 40 with the cover art for the signing table.
> [!warning] Map pages are still in proof
> Check every trail name against the county map.
> [!important] Approve the proof by May 20
> Harbor Press needs it to make the June 14 launch.
> [!quote] From the birding club
> Small enough for a coat pocket, which is the whole point.
> [!info] Launch day
> Saturday June 14, 2 pm, in the library's community room.
A Sprout's body can hold lists, to-dos, tables, code, images, even another Sprout (`> > [!tip]`).
## Change the kind or the title
Click the icon at the Sprout's top left. The menu lists every kind, with a check beside the current one. Pick another and the colour and icon change at once.
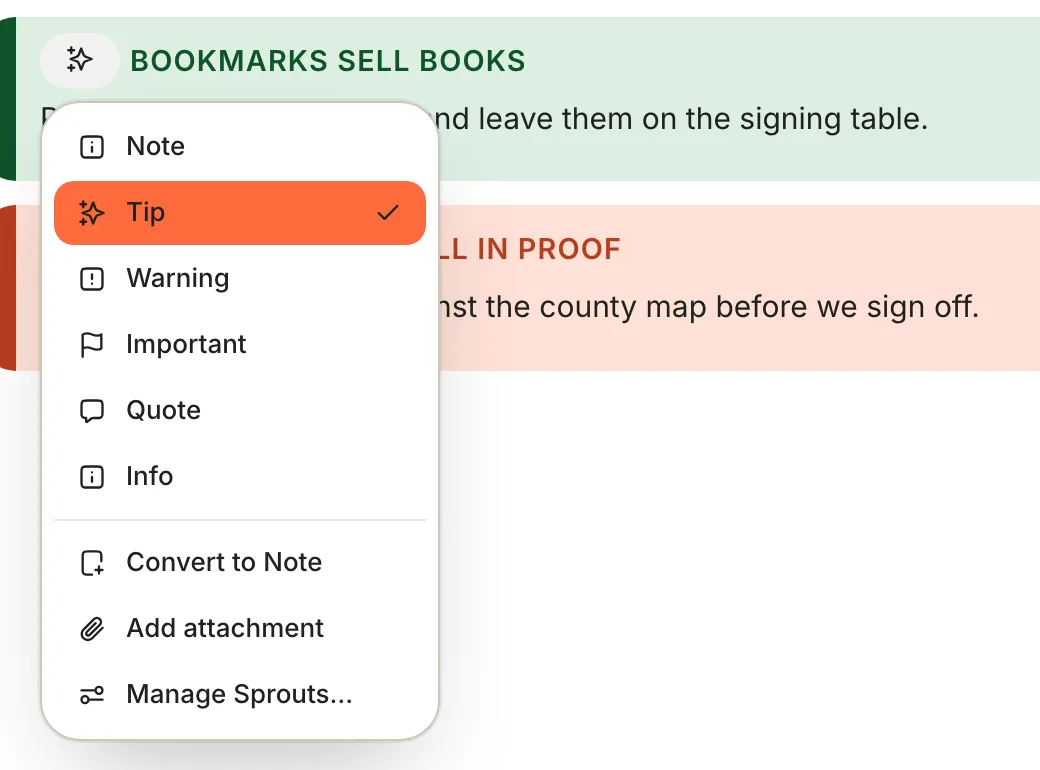
The title is the text beside the icon: click it and type. Terra shows titles in capitals but saves them as you typed them. With no title, the kind's name shows in its place and nothing is saved. Titles are plain text, so `**bold**` in a title shows its asterisks.
## Fold a Sprout
Any block can be a *toggle* that folds away, a Sprout included. Hover the Sprout, click the ⠿ handle to its left and switch on **Toggle**, then click the chevron that appears to fold the Sprout down to its title. ⌥ ⌘ T folds every toggle in the note, or unfolds them all once all are folded.
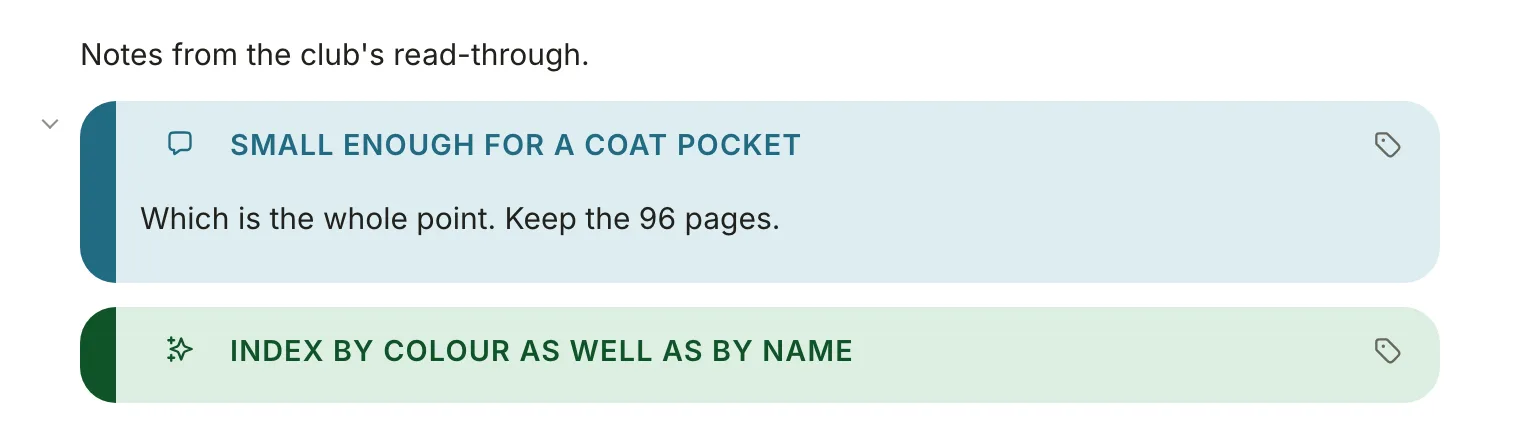
> [!NOTE] A folded Sprout hides its chevron
> In this version the chevron disappears while a Sprout is folded. Unfold it with ⌥ ⌘ T, or switch **Toggle** off in its ⠿ menu.
## Make your own kinds
Add kinds of your own, such as a *Decision* for choices you've made, each with its own icon and colour.
1. Click any Sprout's icon and choose **Manage Sprouts…** to open the list of Sprout types, one chip per kind.
2. Click **+** (**Add Sprout type**). A new chip appears, named `sprout`.
3. Click the chip, choose **Rename**, type a name such as `Decision` and press Return.
4. Click the chip again for **Set icon** and **Set color**.
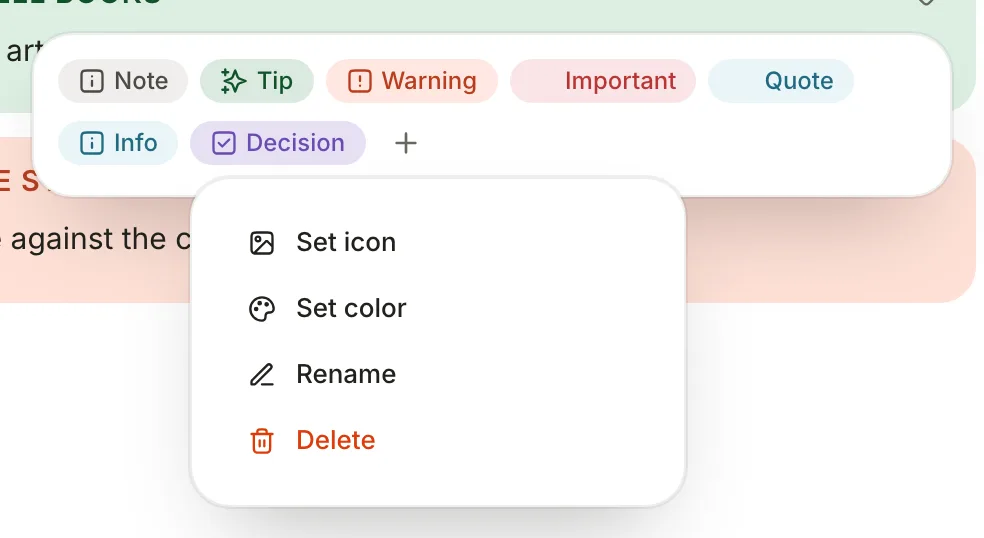
Changes save as you go, and the new kind joins every Sprout's icon menu. In Markdown it's the name in lowercase, with spaces turned into hyphens: `> [!decision]`. The same list is in **Settings › Editor › Sprouts** and in the Sprouts database's **View preferences**. Types belong to the Library and are saved in `.terra/callout_types.toml`.
> [!WARNING] Renaming a custom type changes its kind
> A custom kind follows its name. Rename **Decision** to **Choice** and Sprouts already written `[!decision]` turn plain grey, as they do when you delete a type, though they keep their text. The six built-in kinds keep their kind when renamed.
## Give a Sprout properties
A Sprout can carry the same [properties](https://terramd.io/docs/properties) as a note, such as an owner, a due date or a stage, so you can filter and group Sprouts across your Library.
1. Hover the Sprout and click the tag icon (**Properties**) at its top right.
2. Switch on a property. Type in **Find property** to narrow the list, which holds your Library's existing properties.
3. The property appears under the title. Click its value to set it.
Switch a property off in the same list to take it off the Sprout.
The first time you add a property, Terra writes a permanent ID at the end of the Sprout's first line:
```md
> [!important] Approve the proof by May 20 ^01JFGPR00F7M3K9QWXYZ2ABCDE
> Harbor Press needs a signed-off proof to print in time for the launch.
```
The values live in the note's sidecar file, `.terra.json`, under that ID. Leave the `^…` in place: it ties the Sprout to its properties and attachments.
## Attach files
Click the Sprout's icon and choose **Add attachment**, then pick a file in the **Attach a file to this sprout** dialog. Terra copies it into the note's attachments folder (`attachments//`, next to the note) and shows it as a chip under the title. Click **×** on the chip to detach it; the file stays in the folder.
## Turn a Sprout into a note
When a Sprout outgrows its note, like a tip that turned into a whole checklist, promote it.
1. Click the Sprout's icon and choose **Convert to Note**.
2. Terra creates a note in the same folder, titled after the Sprout (or its first line), with the Sprout's body as its text and its properties as the note's properties. A message confirms: **Converted to "Bookmarks sell books"**.
3. In the original note, `![[Bookmarks sell books]] ^…` takes the Sprout's place and keeps its ID, so links to the Sprout still lead somewhere.
The kind and the attachment chips don't carry over. In this version the leftover line shows as `!` and a link to the new note, not as a preview.
## Find every Sprout
Click **Sprouts** in the sidebar. The Sprouts database puts every Sprout in your Library on a board, in columns by kind. Each card shows the Sprout's title (or first line) and its note, plus any properties you pick in **View preferences**.
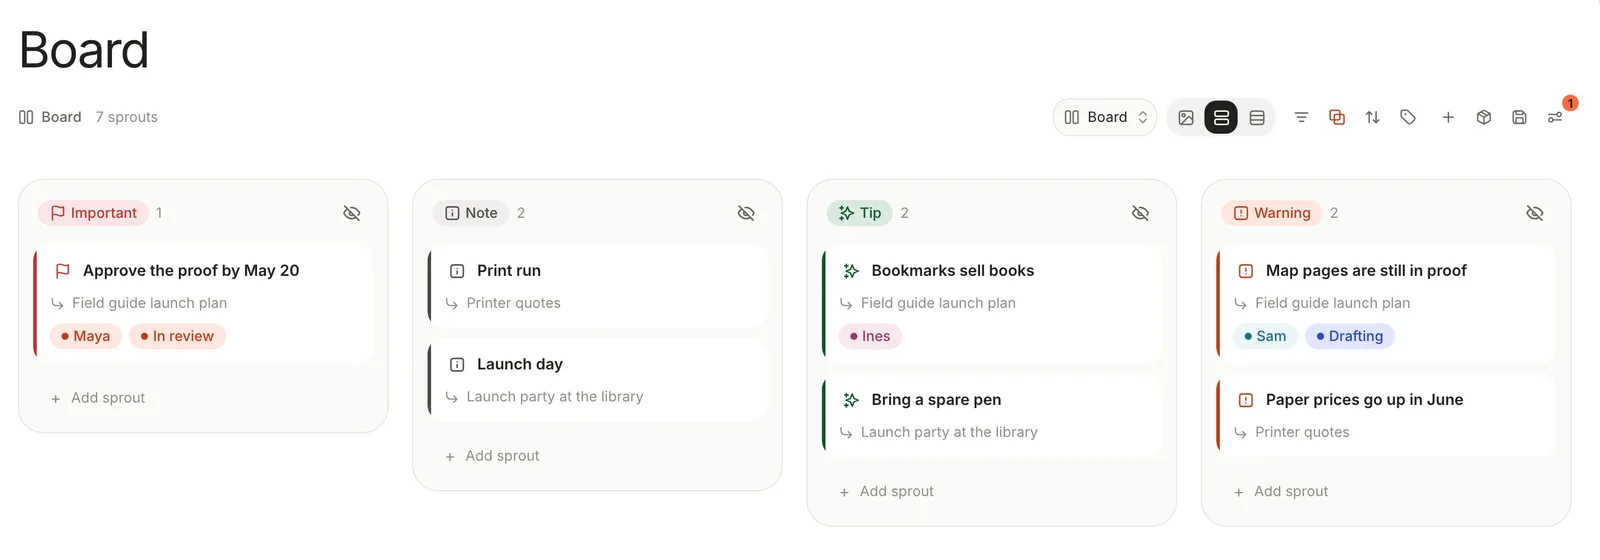
- **Open a Sprout:** click its card. The note opens at that Sprout.
- **Add one from the board:** click **Add sprout** at the foot of a column and type a title. Terra writes `> [!kind] Title` at the end of `Inbox/sprouts`, or of the note you pick with the button beside the title.
- **Narrow it down:** filter, sort, group and save views as in any [database](https://terramd.io/docs/databases), say only the Sprouts Maya owns. **View preferences › Sources** keeps Sprouts from chosen folders, databases or notes only.
- **Start another board:** right-click **Sprouts** in the sidebar, choose **New sprout database**, name it and set its **Sources**, such as the `Field guide` folder. It's listed under **Sprouts**.
## How a Sprout is saved
A Sprout is plain Markdown in the note's file, so other apps show it as a quote or a callout.
- Every line starts with `>`. The first holds `[!kind]`, the title and, once the Sprout has properties or attachments, its `^ID`.
- Properties and attachment chips live in the note's sidecar file, which other apps don't read.
- A toggle Sprout has `` on the line above it (`` when folded). Other apps hide HTML comments.
## Coming from Obsidian or GitHub
- **Kinds are case-sensitive.** `[!TIP]` and GitHub's alerts (`> [!NOTE]`, `> [!WARNING]`) open as plain grey Sprouts. Lowercase the kind in Markdown source.
- **No fold markers.** `> [!tip]-` and `> [!tip]+` open as ordinary quotes; make the Sprout a [toggle](#fold-a-sprout) instead.
- **Six kinds, not Obsidian's set.** Kinds Terra doesn't know, such as `[!question]`, keep their name and show grey. Add a type called *Question* and they take its colour.
- **Titles are plain text**, with no Markdown formatting.
- **Start at the beginning of a line.** A callout indented inside a list item opens as an ordinary quote.
- **Custom types need no CSS.** Add them in **Manage Sprouts…**, with an icon and a colour each.
## Related
- [Basic formatting syntax](https://terramd.io/docs/formatting-syntax): everything else you can type in a note.
- [Advanced formatting](https://terramd.io/docs/advanced-formatting): toggles, columns, tables and the full slash menu.
- [Properties](https://terramd.io/docs/properties): the property types a Sprout can carry.
- [Databases](https://terramd.io/docs/databases): filtering, grouping and views, for the Sprouts board too.
---
# Links and backlinks
> Link notes with wiki-links, point at one paragraph with a block link, add web links, and see every note that links back to the one you're in.
Source: https://terramd.io/docs/links-and-backlinks
A link joins two notes: write one and the other note is a click away. Open the note at the other end and its **Backlinks** list shows every note that links to it, so your reading notes, meeting notes and projects find each other without folders.
Terra saves links as [wiki-links](https://terramd.io/docs/glossary#wiki-link), the note's title in double brackets: `[[The Left Hand of Darkness]]`. Obsidian and many other Markdown apps read the same syntax.
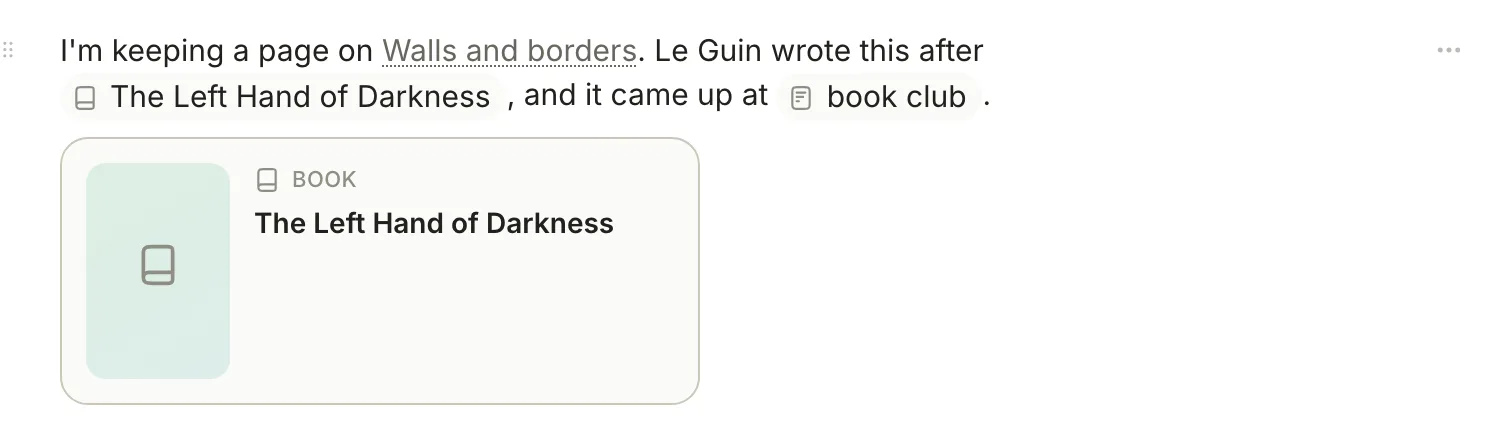
## Link to a note
The reliable way to make a link is the `@` menu:
1. Type `@` at the start of a line or after a space.
2. Type part of the note's title. Matching notes appear under **Note**, up to eight at a time.
3. Press Return or Tab, or click the note. Terra puts a link in its place.
In the file, that's:
```md
Le Guin wrote this after [[The Left Hand of Darkness]].
```
Point at a link to preview the note, and click it to open the note. A link finds its note by title, ignoring capitals; if no title matches, Terra tries file names, so `[[the-left-hand-of-darkness]]` works too.
> [!WARNING] Don't type the brackets in the editor yet
> In the editor, typing `[[The Left Hand of Darkness]]` leaves the brackets around the link and saves broken Markdown, and picking a note from the list that `[[` opens inserts plain text. Use `@` instead. Brackets typed in **Markdown source** work, as do links in files you bring in from other apps.
## Show different text
To show other words than the note's title, add `|` and the text you want. Write it in **Markdown source** (point at the icon to the right of the title and click **Markdown source**):
```md
It came up at [[Book club: October|book club]].
```
The chip reads "book club" and opens **Book club: October**.
## Link to one paragraph
A block link opens a note scrolled to one paragraph, heading or list item, and highlights it for a moment.
1. Point at the paragraph and click the ⠿ handle that appears on its left.
2. Click **Copy link to block**.
3. Paste in another note. The link shows the note's title.
To link with your own words, select some text, right-click it and choose **Copy link to selection** instead; the link shows the first words you selected.
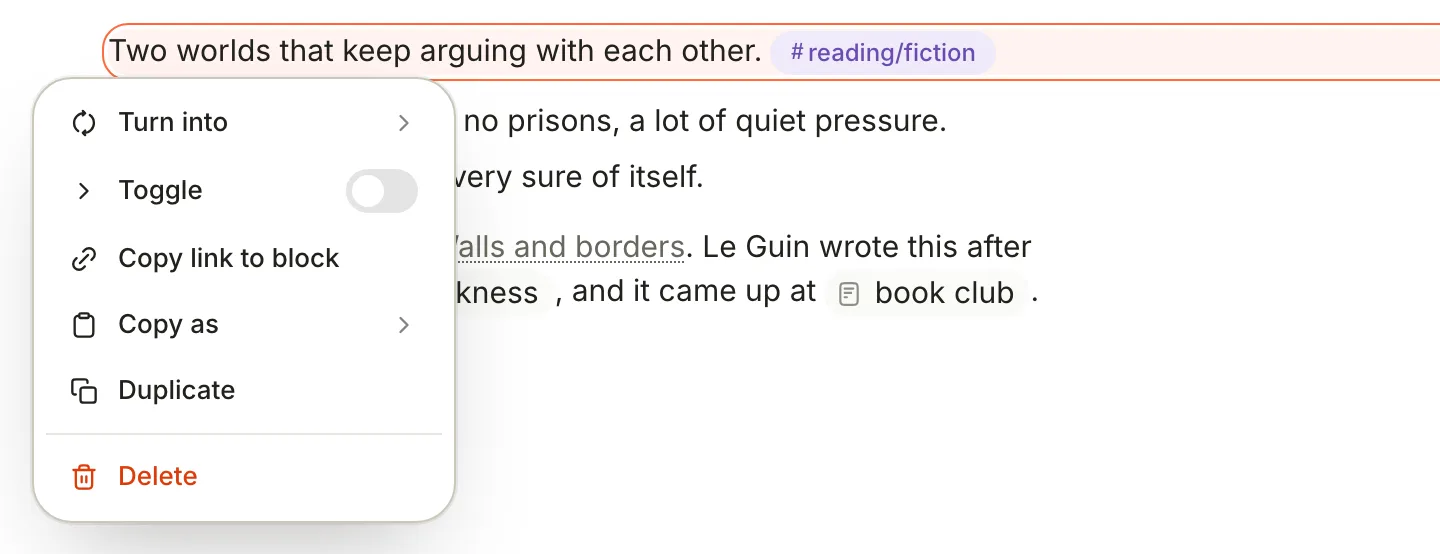
The first time you link to a block, Terra adds an ID to the end of its line, and the link points at that ID:
```md
Two worlds that keep arguing with each other. ^01K7C4M1Q8ZJ3V6T9B2N5R0WHD
[[The Dispossessed#^01K7C4M1Q8ZJ3V6T9B2N5R0WHD|The Dispossessed]]
```
The ID is hidden in the editor. Terra also reads IDs you write yourself, the way Obsidian does: end a paragraph with a space and `^shevek-quote`, then link to `[[The Dispossessed#^shevek-quote]]`. IDs can use letters, digits, `-` and `_`.
A link to a heading, `[[The Dispossessed#First impressions]]`, opens the note at the top: Terra doesn't scroll to the heading yet.
## Web links
Type or paste a web address and add a space, and it becomes a link. Paste an address on its own, empty line and Terra offers a few ways to show it; choose **Link** for a plain link.
To give a web link its own text, write it in **Markdown source**:
```md
[On Wikipedia](https://en.wikipedia.org/wiki/The_Dispossessed)
```
Click a web link to open it in Terra's browser, or ⌥-click to open it in your default browser. (**Settings › Open With › Web links** decides which one a plain click uses.) Right-click it for **Open in Terra**, **Open in system browser** and **Copy link**.
## See what links here
When other notes link to the one you're in, a **Backlinks** button with a count appears under the properties. Click it for the list, and click a note to open it.
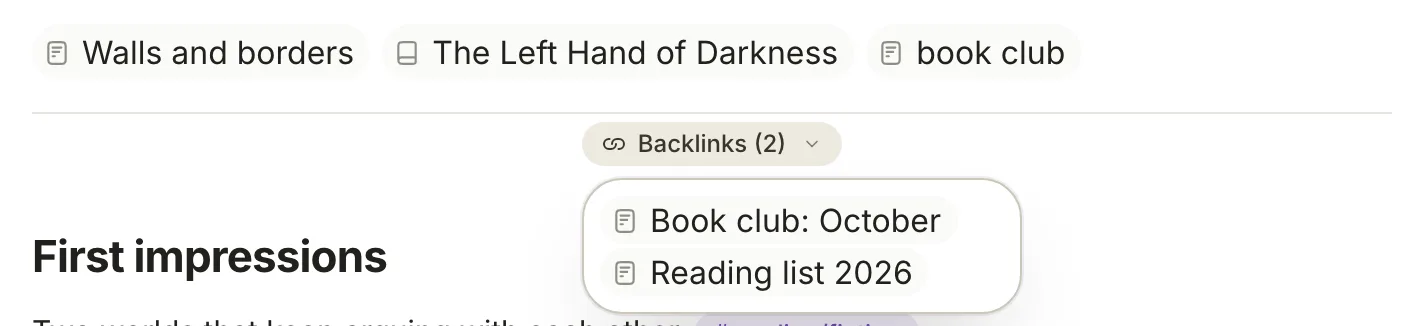
Just above it, a row of chips lists the links in this note: every note and web page it links to, and the address a captured note came from.
For a fuller view, click **Properties** in the toolbar (⌘ R), then **Show References** at the bottom of the panel. The **References** panel lists the same notes; when they reach this one in different ways, it groups them under **Cited by**, **Linked from** and **Embedded in**. **Export** › **Copy as Markdown** copies the list as links, and **Create reference note** saves it as a new note.
Backlinks count wiki-links, block links, [embeds](https://terramd.io/docs/glossary#embed) and citations. Mentions of a note's title in plain text aren't listed.
## Rename a note safely
Rename a note by clicking its title, typing the new one and pressing Return. Terra renames the file and rewrites every link that pointed at the old title, keeping display text and block IDs, then shows a message such as **Updated 3 links in 2 notes** with **Undo**. **Undo** changes those links back; it doesn't undo the rename.
Change the title only this way. Editing `title:` in Markdown source, or the title in the Properties panel, doesn't rename the file or update links, so links that used the old title stop finding the note.
## Change or remove a link
Right-click a link in the editor:
| Item | What it does |
| --- | --- |
| **Open** | Opens the linked note |
| **Edit link…** | Changes which note it points to, in **Link target**; the display text stays |
| **Unlink** | Turns the link back into plain text |
| **Copy link** | Copies `[[Title]]`, without any display text |
| **Copy text** | Copies the words the link shows |
## Troubleshooting
> [!NOTE]- A link is dimmed with a dotted underline
> No note has that title or file name, so clicking it does nothing. Create a note with exactly that title, or right-click the link and use **Edit link…** to point it at the right one.
> [!NOTE]- A link opens the wrong note
> Two notes share the title, and Terra opens the first it finds. Rename one of them.
> [!NOTE]- There are two Backlinks buttons
> When a note links to more than ten notes and pages, the row of link chips folds into a single button. That button is also labelled **Backlinks**, but it lists this note's own links. The **Backlinks** button below it is the one that lists notes linking here.
## Related
- [Tags](https://terramd.io/docs/tags): group notes by label instead of linking them one by one.
- [Properties](https://terramd.io/docs/properties): what's stored above the links in each note.
- [Search syntax](https://terramd.io/docs/search-syntax): find notes by words, tags and properties.
- [Basic formatting](https://terramd.io/docs/formatting-syntax): the rest of the Markdown Terra reads and writes.
---
# Properties
> Structured fields at the top of a note, like a status or a start date, saved as YAML frontmatter that databases can sort, filter and group.
Source: https://terramd.io/docs/properties
Properties are the facts about a note that you'll want to sort and filter by: how far you've got with a book, when you started it, what format you own it in. They sit under the note's title, one per row, and Terra saves them at the top of the Markdown file as YAML [frontmatter](https://terramd.io/docs/glossary#frontmatter), where other apps can read them too.
A property's name and type belong to the whole [Library](https://terramd.io/docs/libraries): once `status` is a Status property, it's one on every note. That's what lets a [database](https://terramd.io/docs/databases) sort, filter and group notes by it.
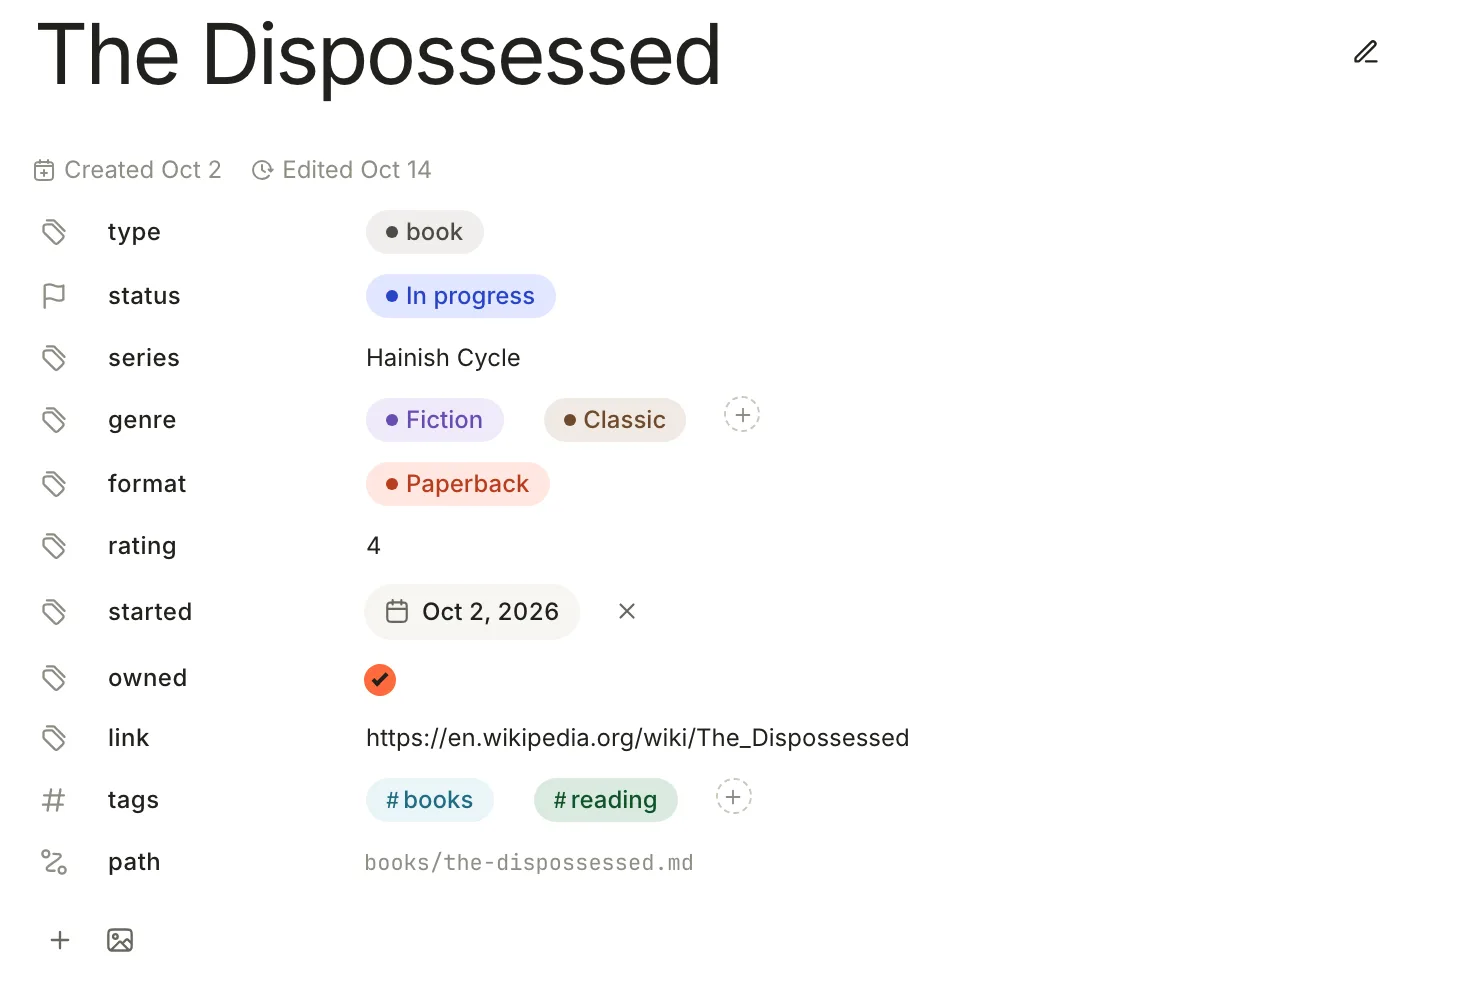
## Add a property
1. Under the note's title, click **+** (**Add property**) below the last row.
2. Click **New property**, type a name in **Property name**, then click a type. To reuse a property the Library already has, click **Existing property** and pick it instead.
3. The new row appears with no value. Click it to fill it in.
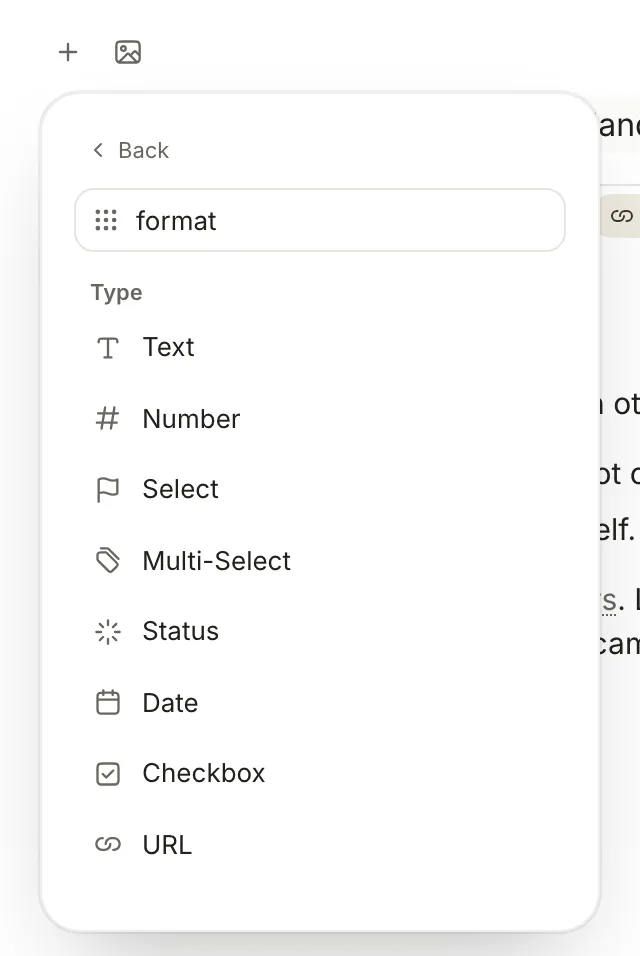
Names are saved in lowercase, so **Format** becomes `format`. If the Library already has a property with that name, Terra says `'format' already exists`; add it with **Existing property** instead.
## Edit a value
Click a value to change it. Text, numbers and web addresses are edited in place and saved when you click away or press Tab. A date opens a calendar, and a checkbox ticks on and off.
Select, Multi-Select and Status values open a list of their options:
- Click an option to choose it. In a Multi-Select, click **+** to add another and **×** on a pill to remove it.
- To make a new option, type it in **Add option...** and press Return.
- Point at an option and click **⋯** for **Rename option...**, **Merge into...**, **Change color**, **Change icon** and **Delete option**. Renaming or merging changes the value in every note that uses it; Terra says how many notes first and asks you to confirm a merge.
- A value that isn't one of the options, such as one typed into the file by hand, appears outlined under **Not an option yet**. Rename it to make it an option, or merge it into one.
## Property types
| Type | What it holds | In the file |
| --- | --- | --- |
| **Text** | Any text | `series: Hainish Cycle` |
| **Number** | A number | `rating: 4` |
| **Select** | One option from a list | `format: paperback` |
| **Multi-Select** | Several options from a list | a list, one option per line |
| **Status** | One option, in a group: To do, In progress or Done | `status: In progress` |
| **Date** | A day, or a day and a time | `started: 2026-10-02`, or `2026-10-02T19:30` with a time |
| **Checkbox** | Yes or no | `owned: true` or `owned: false` |
| **URL** | A web address | `link: https://en.wikipedia.org/wiki/The_Dispossessed` |
| **Email** | An email address. Terra won't save one that doesn't look like an address. | `email: priya@example.com` |
| **Phone** | A phone number, checked the same way | `phone: +1 503 555 0142` |
| **Unique ID** | A number Terra hands out, shown with a prefix such as `BOOK-12`. You can't edit it. | `ref: 12` |
| **Files & media** | Files you attach with **Add** or by dropping them on the row | a list of file paths |
| **Button** | A button that runs actions on the note when you click it | no value |
| **Location** | An address | `bought_at: Powell's Books, Portland` |
A new Status property starts with three options: `Not started`{gray} in To do, `In progress`{blue} in In progress and `Done`{green} in Done. Add your own to any group in the [Property Manager](#manage-properties-for-the-whole-library).
Here is the note from the screenshot as Terra saves it:
```yaml
---
id: 01K7B3X9M2QF8T4N6V0WYZ5R01
title: The Dispossessed
type: book
created: 2026-10-02T19:12:44Z
updated: 2026-10-14T08:03:10Z
tags:
- books
- reading
format: paperback
genre:
- fiction
- classic
link: https://en.wikipedia.org/wiki/The_Dispossessed
owned: true
rating: 4
series: Hainish Cycle
started: 2026-10-02
status: In progress
---
```
Select, Multi-Select and Status save an option's id rather than its label. An option you add from a note gets an id in lowercase with hyphens, so **Paperback** is saved as `paperback` and **Science fiction** as `science-fiction`; the three starting Status options are saved by name. When you type a value into the file yourself, either the name or the id works, in any capitals.
Unique IDs are handed out the first time a note appears in a database view that shows the property. Set the prefix, a Button's label and actions, a date's time format and a number's decimal places in the [Properties panel](#change-a-propertys-settings).
## Hide, reorder and remove
Point at a row to see a grip on its left and an eye on its right.
- **Reorder:** drag the grip. The order is the same on every note.
- **Hide:** click the eye. The property is hidden under every note's title, not only this one, and notes keep their values. A link below the rows, such as **1 hidden — show**, brings hidden ones back into view.
- **Remove from one note:** emptying a value leaves the row in place, shown as **Empty**. To take a property off a single note, delete its line in the file (see [Edit properties in the file](#edit-properties-in-the-file)). There's no menu command for this yet.
Right-click a row for the rest: **Edit property name**, **Open in Property Manager**, **Change data type**, **Hide property**, **Duplicate property**, **Edit value**, **Change icon…**, **Pin to top**, **Delete property** and **Show hidden fields…**. The last row, **path**, shows where the note's file is; it isn't a property and isn't saved in the file.
> [!WARNING] Delete property doesn't clear notes
> **Delete property** removes the property from the Library: its type, options and colours. Notes keep their values, whatever the confirmation says, and the next time you open a note that still has the key, Terra adds it back as a Text property.
## Change a property's settings
Some types have settings of their own. Click **Properties** in the toolbar (⌘ R), then **Show Properties** at the bottom of the panel that opens. Click a property's name in the panel to see its settings:
- **Type** and **Sort**, for every property
- **Format** for a Date: **Date** or **Date + time**
- **Decimal places** for a Number: **Auto**, or 0 to 3
- **Prefix** for a Unique ID, such as `BOOK-`
- **Label** and **Actions** for a Button: **Set property**, **Add tags**, **Remove tags**, **Create linked note** or **Open URL**, run in order
- **Options** for a Select or Multi-Select, and one list per group for a Status
## Manage properties for the whole Library
The Property Manager lists every property in the Library with its type and the databases that show it. Open it with **Tools › Property Manager…**, or right-click a property row and choose **Open in Property Manager**.
Select a property to edit it on the right:
- **Type.** Terra asks **Change property type?** first, because values that don't fit the new type may be blanked. Click **Change type** to go ahead.
- **Color**, and the **Options** of a Select or Multi-Select. A Status lists its options under **To do**, **In progress** and **Done**; click **+** to add one to a group.
- **Description**: a sentence on what the property is for.
- **Auto-classify** (Select and Multi-select only) lets captures fill the property in for you. See [Capture and classify](https://terramd.io/docs/capture-and-classify).
- **Show in note properties**: switch it off to hide the property under every note's title.
The switcher at the top left moves between **Properties**, **Types** (the values of the `type` property, such as `book`, and what their cards show) and **Tags**, the [Tag Manager](https://terramd.io/docs/tags#manage-tags). Next to it are **New property**, **Delete property**, and buttons to filter, sort and group the list.
## Properties in databases
Properties become a database's columns, filters and sorts, and a board can group its cards by one. A Status property makes a natural board: one column per option.
In a database table, the **+** at the end of the header row adds a property: **New property** and **Existing property** as above, plus, in databases you made yourself, **Computed** properties (**Formula**, **Thread**, **Gather** and **Person**) whose values the database works out. **New property** also offers **Created time** and **Last edited time** under **Timestamp**. See [Databases](https://terramd.io/docs/databases), [Filter, sort and group](https://terramd.io/docs/filter-sort-and-group) and [Formulas, threads and gathers](https://terramd.io/docs/formulas-threads-and-gathers).
## Properties Terra writes for you
Some keys in the frontmatter are Terra's own. You'll see them in the file but not all of them as rows.
| Key | What it is | How to change it |
| --- | --- | --- |
| `id` | The note's permanent ID | Never change it. |
| `title` | The note's title | Click the title. Editing `title:` in the file doesn't rename the file or update links to it. |
| `type` | What the note is, such as `book` | The **type** row |
| `created`, `updated` | When the note was made and last changed, shown as **Created** and **Edited** under the title | Terra keeps these itself. |
| `tags` | The note's [tags](https://terramd.io/docs/tags) | The **tags** row |
| `cover` | The banner image | **Banner image** under the properties |
| `source` | Where a captured note came from | Set by captures |
| `icon` | The note's icon | Right-click the title › **Change icon** |
| `relations` | The note's threads to other notes | A [Thread](https://terramd.io/docs/formulas-threads-and-gathers) property in a database |
Notes you save as references also get citation fields such as `doi` and `citation_key`; see [Research library](https://terramd.io/docs/research-library).
## Edit properties in the file
Editing the frontmatter yourself is the quickest way to change several values at once, and the only way to remove a property from one note.
1. Point at the icon to the right of the note's title and click **Markdown source**.
2. Edit the lines between the two `---` lines. Each property is its name, a colon, a space and the value; a list puts each item on its own line, starting with `- `.
3. Switch back to **Edit**. Changes in Markdown source are saved 600 milliseconds after you stop typing, and Terra tidies the frontmatter into its own order as it saves.
- A name Terra hasn't seen before becomes a Text property when you next open the note. Change its type with right-click › **Change data type**. Three names start with a type of their own: `author` is a Multi-select, `date` a Date and `url` a URL.
- Write checkboxes as `true` and `false`, and dates as `2026-10-02`.
- If a value doesn't fit its property's type, such as `rating: four` for a Number, the file keeps it but the row shows it as empty.
- If the YAML can't be read, Terra shows **Not saved:** and the reason, and keeps your text so you can fix it.
## Troubleshooting
> [!NOTE]- I renamed a property and the old name came back
> Renaming a property changes its name in the Library, and when you rename it under a note's title, copies that note's value to the new name. The files still hold the old name, so the old property comes back the next time you open a note that has it. To rename it everywhere, change the key in each note's frontmatter.
## Related
- [Databases](https://terramd.io/docs/databases): put properties to work as columns, boards and filters.
- [Tags](https://terramd.io/docs/tags): the `tags` property, and tags written in the text.
- [Templates](https://terramd.io/docs/templates): start notes with properties already in place.
- [How Terra stores your notes](https://terramd.io/docs/how-terra-stores-your-notes): what else is in the file.
---
# Tags
> Label notes with #tags in the text or in the tags property, nest and colour them, and find every note that carries one.
Source: https://terramd.io/docs/tags
A tag is a short label, like `#reading`, that you can put on any note to gather it with others. You can write a tag in the text, right where it applies, or add it to the note's **tags** [property](https://terramd.io/docs/properties). Either way the note appears on the tag's page and in tag searches. The one exception is a [database](https://terramd.io/docs/databases) filter on **Tags**, which only reads the **tags** property.
## Write a tag in the text
Type `#`, the tag's name and a space. Terra turns it into a tag, and a list of matching tags appears as you type, so you can pick an existing one with the arrow keys and Return.
```md
We picked The Dispossessed for November. #reading/fiction
```
We picked The Dispossessed for November. `#reading/fiction`
| Rule | Example |
| --- | --- |
| Letters, digits, `_`, `-` and `/` are allowed | `#to-read`, `#q4_goals` |
| A tag needs at least one letter | `#books-2026` is a tag; #2026 on its own isn't |
| A tag ends at a space or any other character | in `#reading, #books` the comma isn't part of the tag |
| `#` stuck to the end of a word isn't a tag | `C#`, `issue#4` |
| Capitals count | `#Reading` and `#reading` are two tags |
A `#` followed by a space at the start of a line makes a heading, not a tag, and text in code isn't read for tags.
## Add tags with the tags property
The **tags** row under a note's title is a list of tags that belong to the note as a whole, without appearing in its text.
- Click **+** at the end of the **tags** row. Pick tags from the list, or type a new one in **Add option...** and press Return. Click **×** on a tag to remove it.
- Or click **Tag note** (**#**) in the editor toolbar, then click a tag in the list. To make a new one, type it in **Search or create tag** and click **Create tag** with its name; pressing Return doesn't create it. Terra confirms with **Tagged: #reading**. This list only adds tags; remove them in the **tags** row.
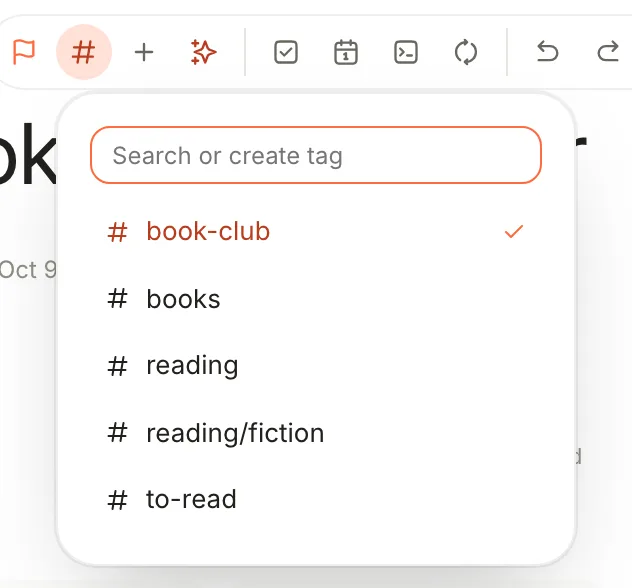
In the file, the property is a list of names without the `#`, while tags in the text stay exactly where you wrote them (other properties left out here):
```md
---
title: The Dispossessed
tags:
- books
- reading
---
## First impressions
Two worlds that keep arguing with each other. #reading/fiction
```
A tag in the text isn't copied into the **tags** property, or the other way round. Terra also reads a list written on one line, such as `tags: [books, reading]`.
## Nested tags
Put a `/` in a tag to file it under another: `#reading/fiction` and `#reading/nonfiction` sit under `#reading` in the Tag Manager, as long as `#reading` is a tag too. Nesting is only for organising the list. A note tagged `#reading/fiction` isn't on the `#reading` page and doesn't match a search for `tag:reading`; search for the full name, `tag:"reading/fiction"`.
## Colour a tag
Right-click a tag, in the text or in the **tags** row, and click a colour. The menu also has **Open tag page**, **Search tag** and **Copy tag**. A tag's colour is the same everywhere in the Library.
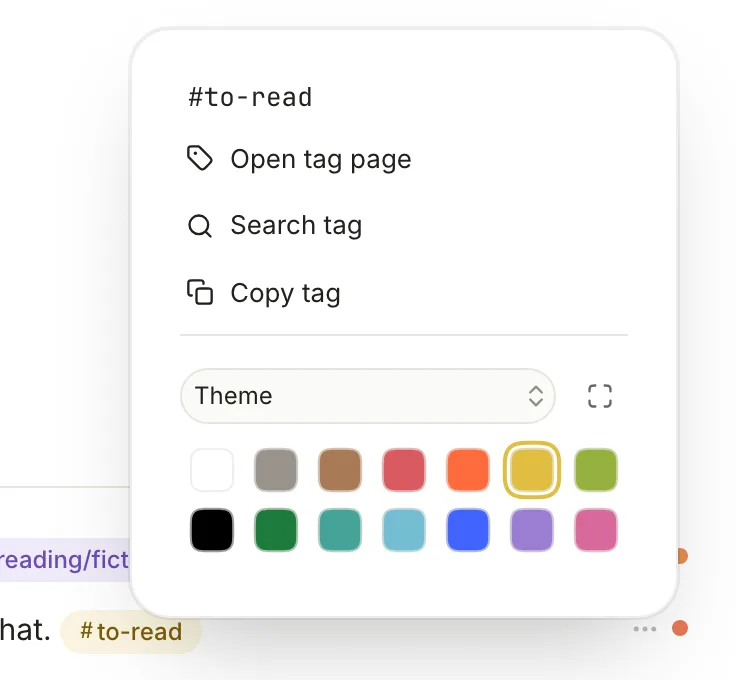
## Find notes with a tag
- **Click a tag in the text** to open its page: every note with that tag, listed like a database.
- **⌘-click it**, or right-click it and choose **Search tag**, to open the search window with `tag:to-read` filled in.
- **Search** with `tag:` yourself to combine tags and other filters: `tag:reading -tag:abandoned` finds notes tagged `#reading` but not `#abandoned`. The tag must match exactly, capitals included. See [Search syntax](https://terramd.io/docs/search-syntax#filters).
- **In a database**, filter or group on **Tags**. This reads the **tags** property only, not tags in the text. See [Filter, sort and group](https://terramd.io/docs/filter-sort-and-group).
## Manage tags
The Tag Manager lists every tag in the Library and whether it's in use. Open it with the **Tag manager** button in the toolbar, or **Tools › Tag Manager…**. Nested tags appear under their parent.
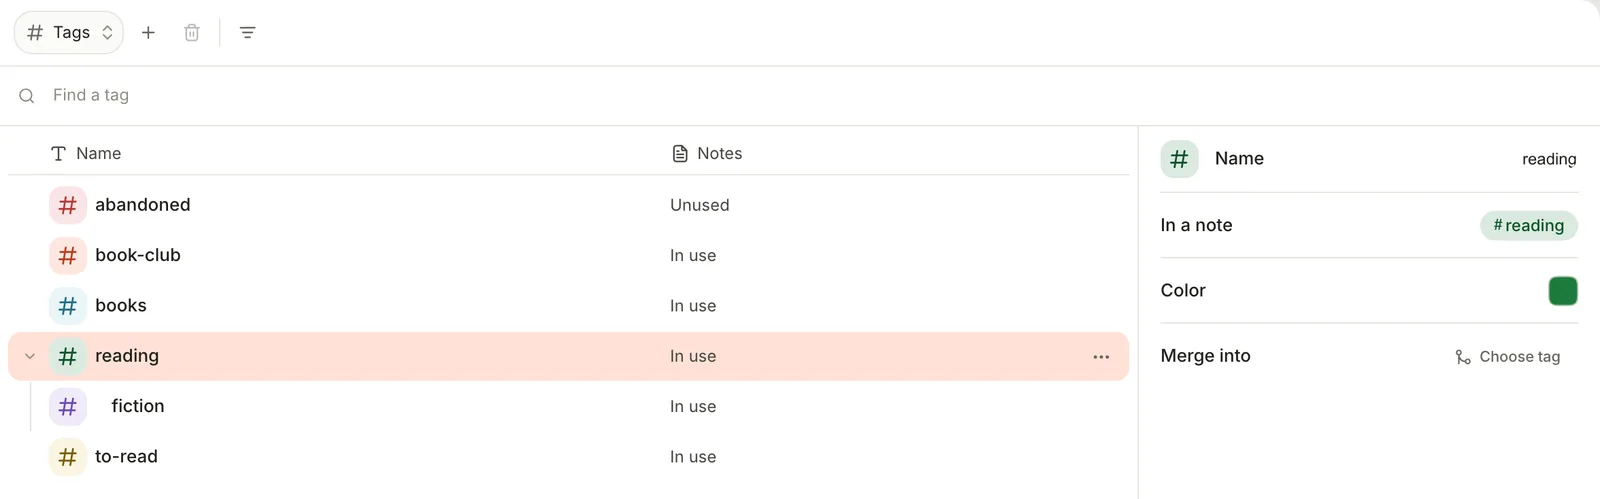
Select a tag, or click **⋯** on its row, to:
- **Rename** it: choose **Rename** from the **⋯** menu, type the new name and press Return. There's no confirmation.
- **Merge into** another tag. Terra asks **Merge options?**, says how many notes will change and warns that it can't be undone. Click **Merge**. Renaming a tag to a name that already exists merges the two the same way.
- Change its **Color** or **Glyph**.
- **Open tag page** to see its notes.
- **Delete tag**, for tags no note uses. To find them, click the filter button and choose **Unused**.
> [!WARNING] Renaming and merging skip tags in the text
> Rename and merge change the **tags** property of every note, but not tags written in the text. A note with `#reading` in a sentence keeps it, so after renaming `reading` the old tag still shows as in use. Find those notes with a `tag:` search and edit them by hand.
## Related
- [Properties](https://terramd.io/docs/properties): the **tags** row is one of a note's properties.
- [Search syntax](https://terramd.io/docs/search-syntax): `tag:` and every other filter.
- [Databases](https://terramd.io/docs/databases): collect every note with a tag in one view.
---
# Templates
> Start notes with your headings, tags and properties already in place, fill in placeholders like the date, and make templates of your own.
Source: https://terramd.io/docs/templates
A template is a note you start other notes from: the headings you always write, the tags and [properties](https://terramd.io/docs/properties) you always add, and placeholders such as `{{ date }}` that Terra fills in when you use it. Terra comes with a few, and you can make your own from scratch or from any note.
Templates belong to the [Library](https://terramd.io/docs/libraries). Click **Templates** in the sidebar to see them all.
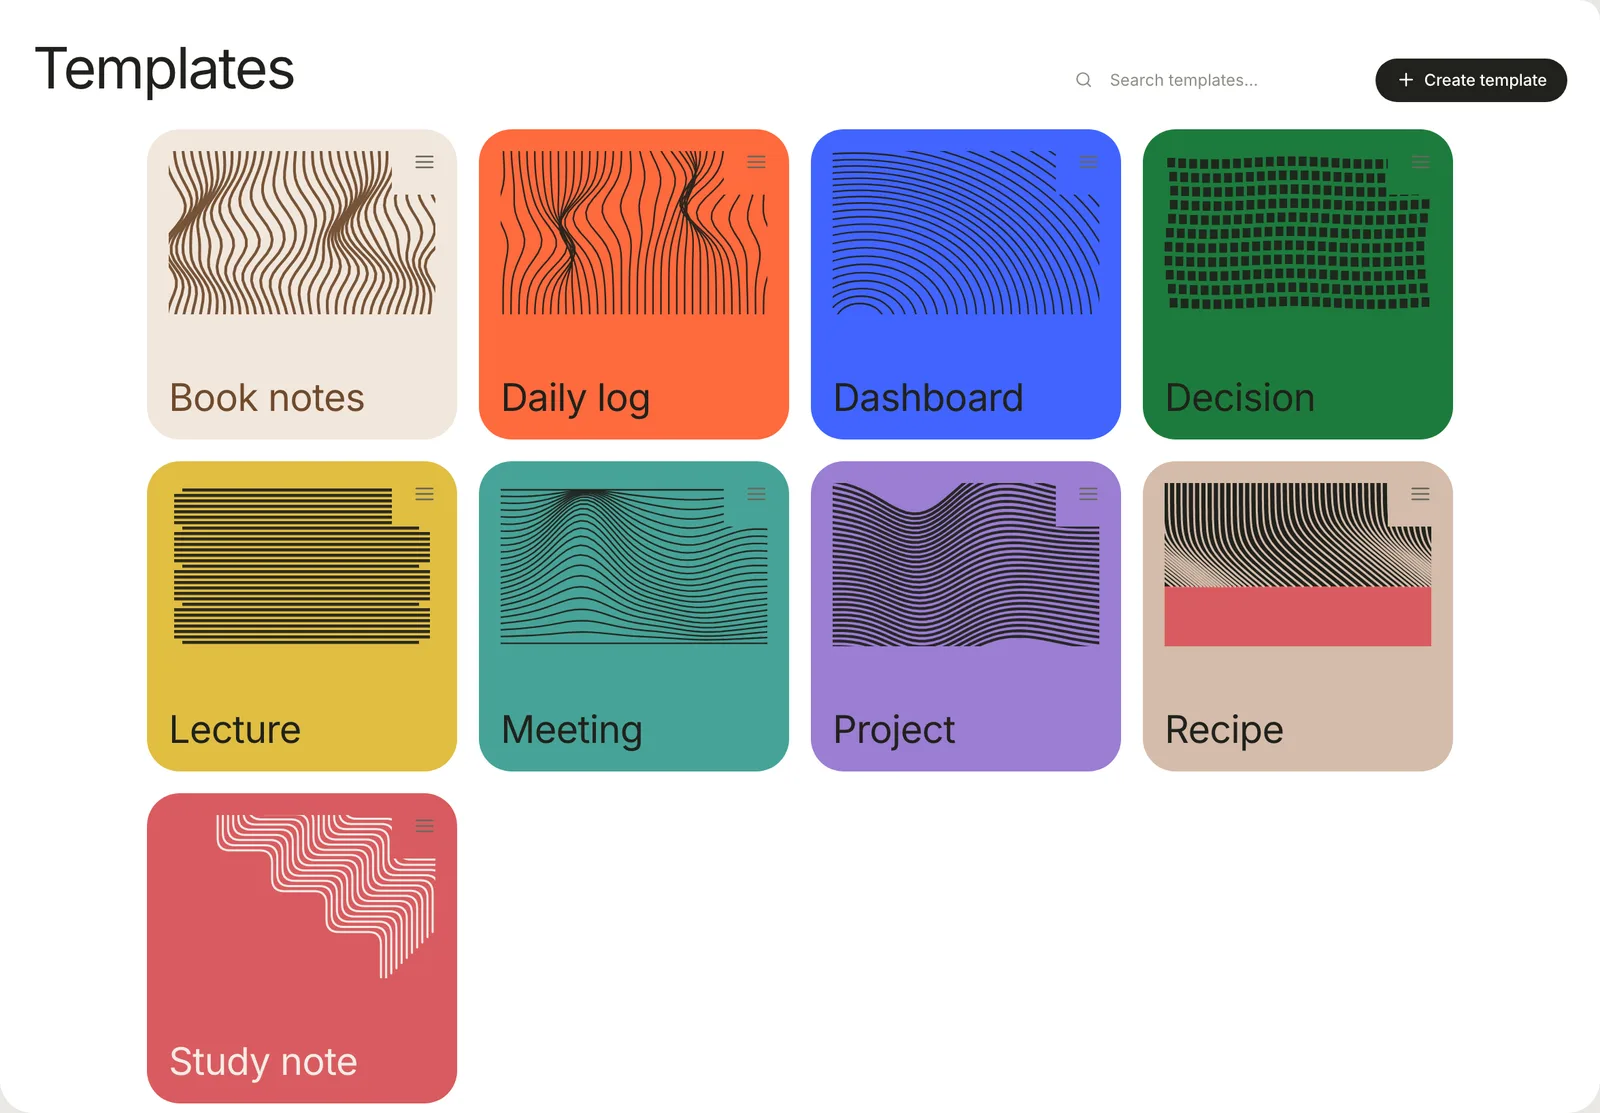
## Start a note from a template
1. Choose **File › New from Template…** (⇧ ⌘ N), or click **New…** in the toolbar and choose **New from template…**.
2. Click a template. To find one, type in **Search templates…**, or use the arrow keys and Return. **Group** sorts the cards by category.
3. If the template asks for values, fill in **Template arguments** and click **Apply template**. A field marked **Required** must be filled in first.
4. The new note opens.
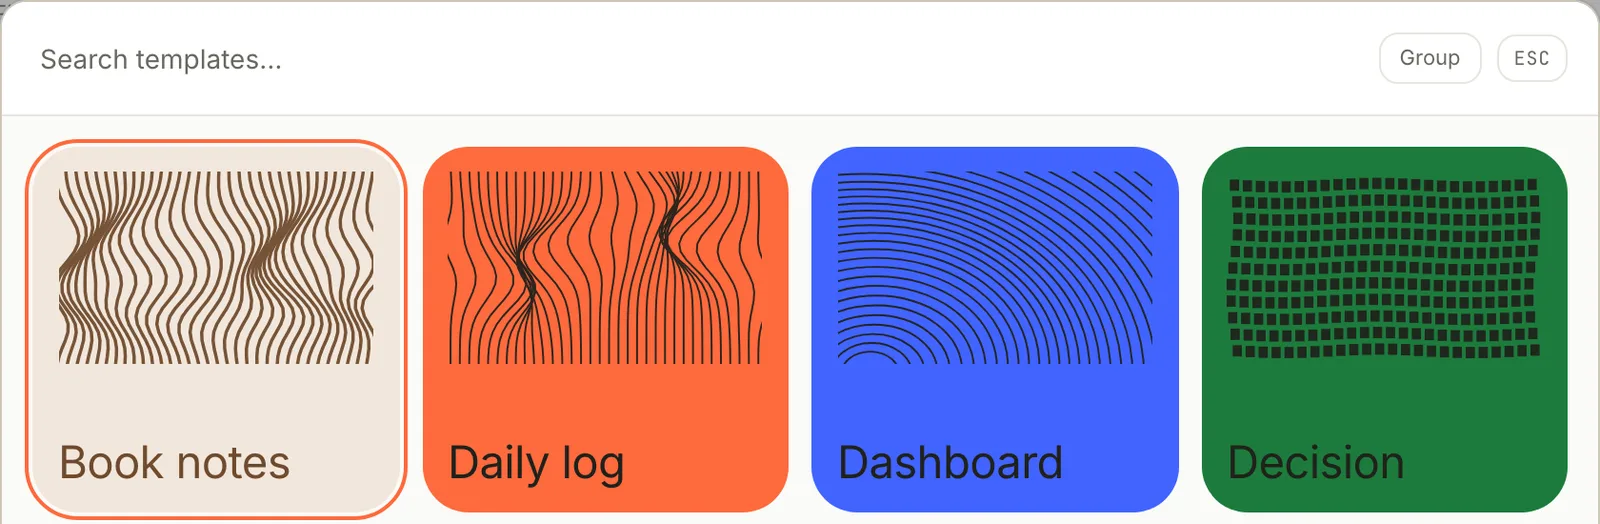
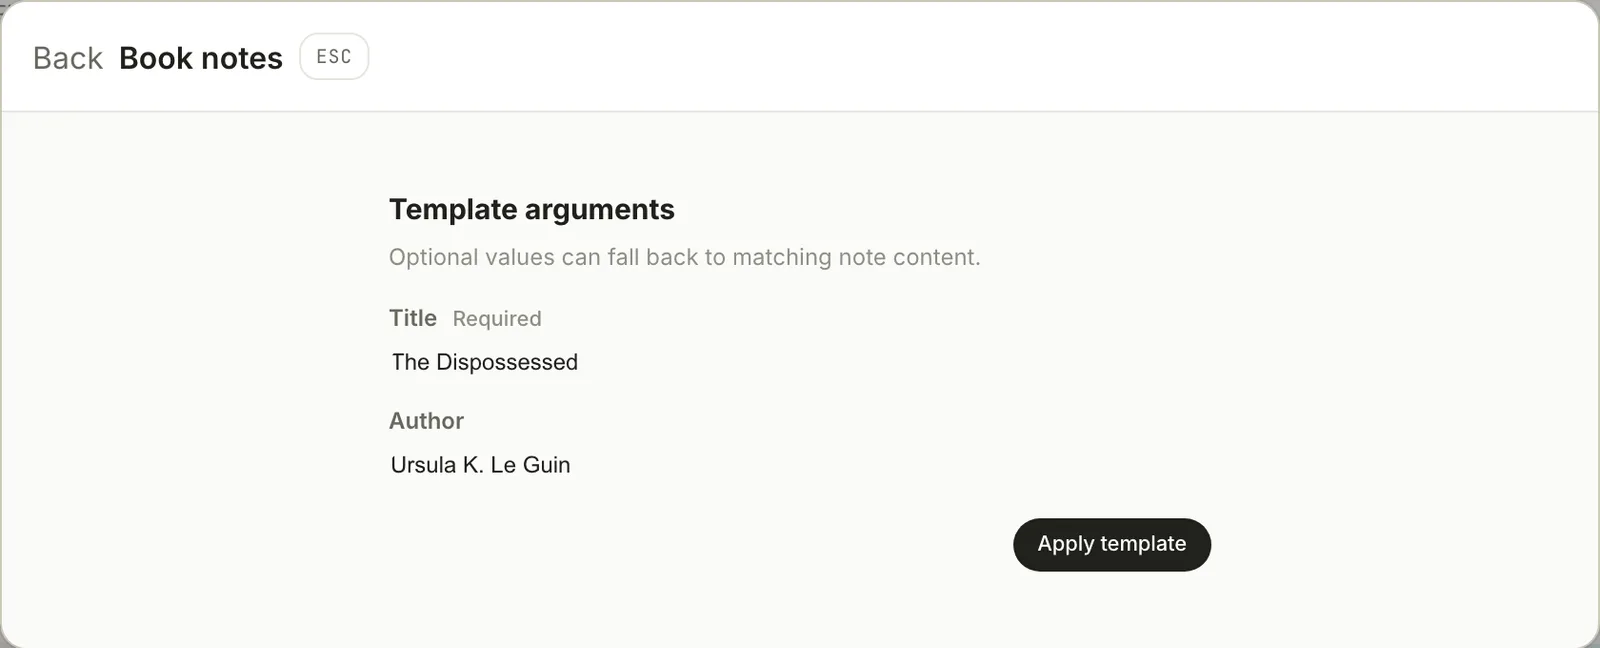
Where the note goes depends on where you started:
| Started from | The note goes in |
| --- | --- |
| **File › New from Template…** | The folder of the note you have open, or the top of the Library |
| **New…** › **New from template…** | Inbox |
| Right-click a folder in the sidebar › **New from template…** | That folder |
| Right-click a database in the sidebar › **New from template…** | The database's folder, if it collects one folder; otherwise Inbox |
If the template asks for a value named `title`, that becomes the note's title; otherwise the note is named after the template, so a note from **Meeting** starts out called "Meeting". Click the title to rename it.
## Make a template
To start from scratch:
1. Click **Templates** in the sidebar, then **Create template**.
2. Type a **Name**. **Path**, the template's file name, fills itself in; add a folder to it, such as `reading/book-notes`, to keep templates in folders. **Description**, **Category** and **Aliases** (other names to search by, separated by commas) are optional.
3. Click **Create**. The template starts as a heading, `# {{title}}`, and `{{cursor}}`.
4. Click the menu button (**≡**) in the corner of the template's card and choose **Edit template** to write the rest.
To turn a note you've already written into a template, right-click it in the note list and choose **Save as template…**. Type a file name in **Slug or path**, click **Next**, then type a **Template name** and click **Save**. The template keeps the note's text and properties, except its `id`, `created` and `updated`.
## Placeholders
Anything in double braces is filled in when the note is made. Spaces inside the braces are optional.
| Write | You get |
| --- | --- |
| `{{ title }}` | The new note's title |
| `{{ date }}` | Today's date: `2026-10-16` |
| `{{ time }}` | The time: `14:30` |
| `{{ datetime }}` | Both: `2026-10-16T14:30` |
| `{{ "now" \| date:"dddd, MMMM D, YYYY" }}` | Today in your own format: Friday, October 16, 2026 |
| `{{ folder }}` | The folder the note is made in |
| `{{ file }}` | The note's file name, such as `the-dispossessed` |
| `{{ uuid }}` | A new unique ID |
| `{{ cursor }}` | Nothing. It marks where you'll start writing. |
| `{{ author }}` | The value of a [template property](#ask-for-values-template-properties) named `author` |
The `date` format is made of these codes, shown here for Friday, March 6, 2026 at 14:30. Put other words in square brackets, as in `"D MMM [at] h:mm A"`.
| Code | Gives | Code | Gives |
| --- | --- | --- | --- |
| `YYYY` | 2026 | `D`, `DD`, `Do` | 6, 06, 6th |
| `M`, `MM` | 3, 03 | `ddd`, `dddd` | Fri, Friday |
| `MMM`, `MMMM` | Mar, March | `HH:mm`, `h:mm A` | 14:30, 2:30 PM |
To include text only when a value is filled in, wrap it in `{% if %}` and `{% endif %}`; `{% else %}` gives the alternative:
```md
{% if author %}By {{ author }}. {% endif %}Started {{ date }}.
```
If a template has a mistake, **Edit template** marks it, and using the template shows a message such as **This template has an error on line 3:** with what's wrong.
## Ask for values: template properties
A template can declare template properties: named values that fill its placeholders, separate from the properties a note shows under its title. Edit them in the **Properties** panel of **Edit template**. Click **+** (**Add template property**), fill in its fields, then click **Save properties**.
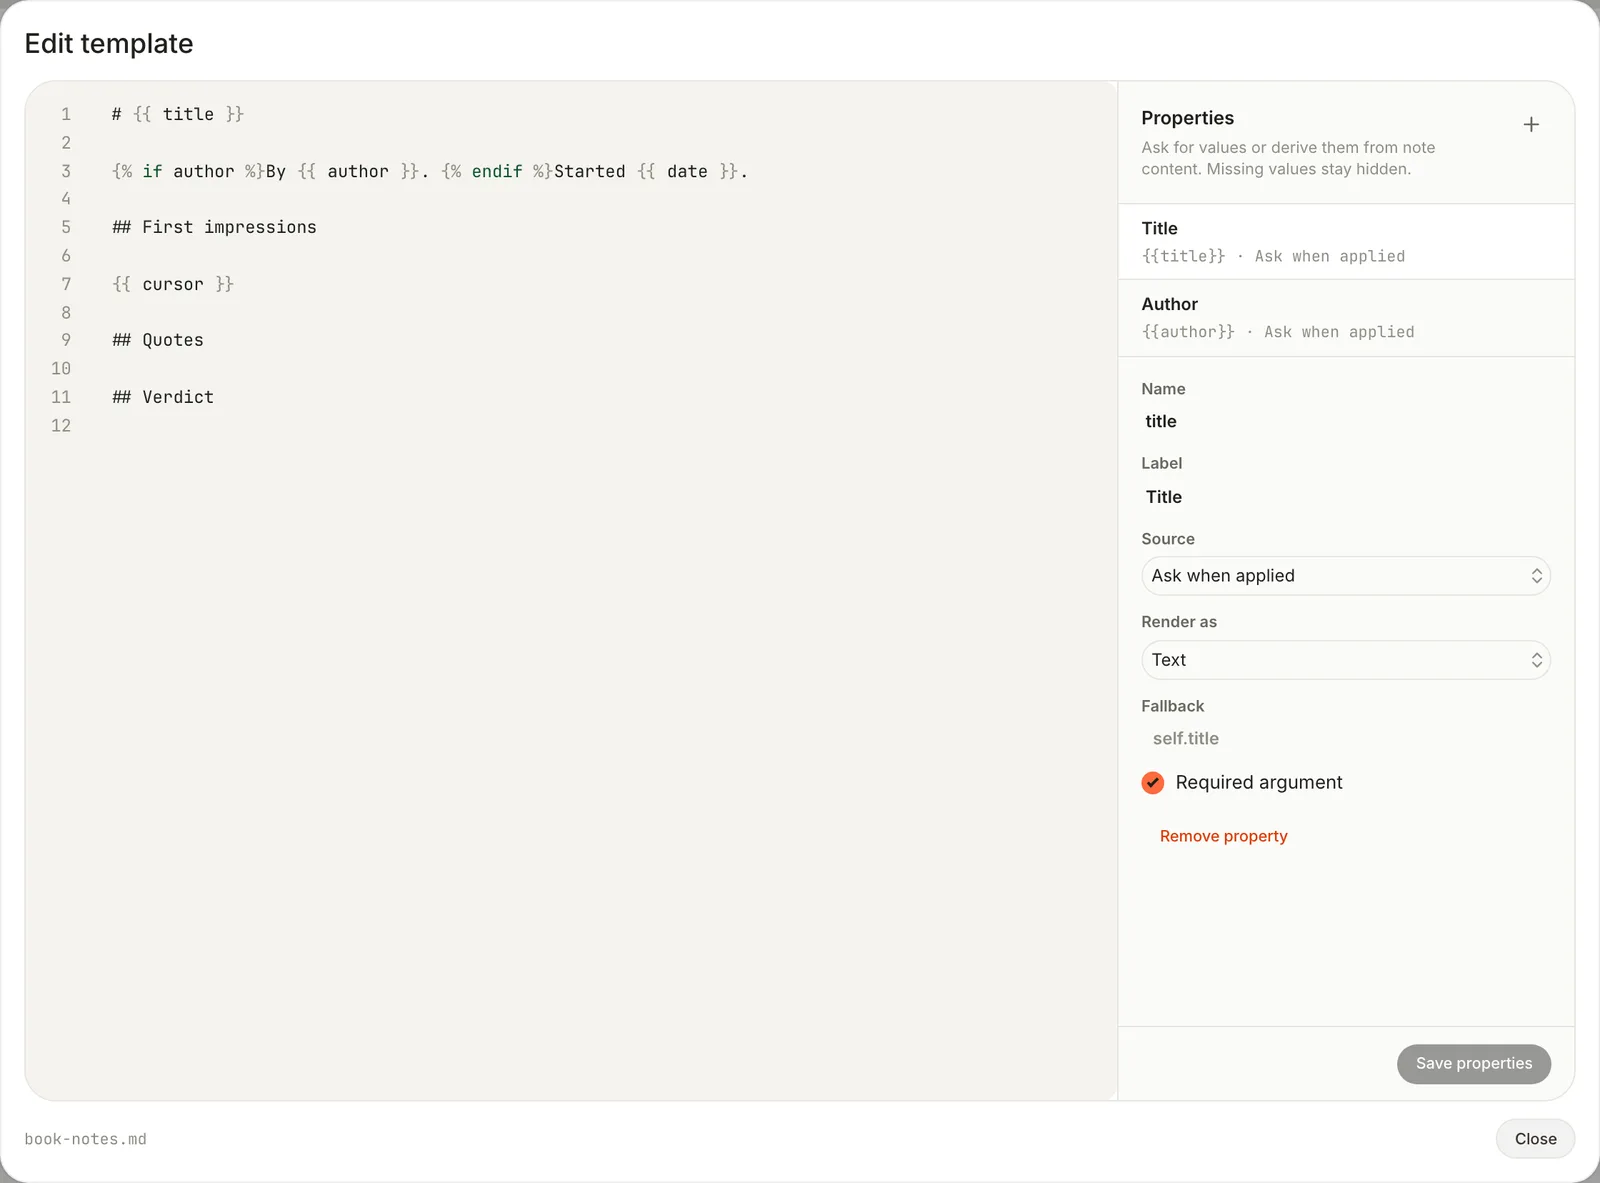
| Field | What it does |
| --- | --- |
| **Name** | The placeholder it fills: `author` fills `{{ author }}` |
| **Label** | What Terra calls it when asking |
| **Source** | Where the value comes from: see below |
| **Render as** | How it's written: **Text** as it is, **Link** as a Markdown link, **Callout** as a [Sprout](https://terramd.io/docs/sprouts) titled with the label, **Numbered section** as a heading over a numbered list, **Centered image** |
| **Fallback** | What to use when it's empty: another property, or `self.title` for the note's title |
| **Required argument** | The note can't be made until it's filled in |
| Source | The value comes from |
| --- | --- |
| **Ask when applied** | You, under **Template arguments**, when you start a note |
| **Note property** | A property of the note being tidied, under the property's name or one of the **Names to try** |
| **Body section** | A section of that note whose heading matches one of the **Section words** |
| **First image** | That note's first image |
**Note property**, **Body section** and **First image** read an existing note, so they fill in only when Terra tidies a capture into the template (see [below](#templates-in-captures)). When you start a new note, only **Ask when applied** values and fallbacks are filled, and an empty property leaves nothing behind.
Here is the **Book notes** template's file, `.terra/templates/notes/book-notes.md` in the Library folder:
```md
---
title: Book notes
description: One page per book, from first impressions to a verdict.
category: Reading
tags:
- books
template:
properties:
- name: title
label: Title
source: argument
render: text
required: true
- name: author
label: Author
source: argument
render: text
---
# {{ title }}
{% if author %}By {{ author }}. {% endif %}Started {{ date }}.
## First impressions
{{ cursor }}
## Quotes
## Verdict
```
With the arguments in the screenshot above, it makes this note (with its `id`, `created` and `updated` left out here):
```md
---
title: The Dispossessed
tags:
- books
category: Reading
description: One page per book, from first impressions to a verdict.
---
# The Dispossessed
By Ursula K. Le Guin. Started 2026-10-16.
## First impressions
## Quotes
## Verdict
```
Everything else in the template's frontmatter is copied into the note, tags included, except `title`, `type` and the `template:` block. That means a template's own `description` and `category` land in each note too, and a note's type has to be set by hand.
## Templates in captures
Quick capture can shape a capture with a template: choose one under **Template** in the Quick capture card and switch **Enrich** on. Terra fills the template from what you captured (an AI model writes the **Body section** parts), adds the template's tags, and appends the result to the note. See [Capture and classify](https://terramd.io/docs/capture-and-classify).
## Starter templates
Terra adds these to a Library the first time it opens one that has no templates.
| Template | What's in it |
| --- | --- |
| **Daily log** | Today's date as a heading, then Wins, Blockers and Tomorrow |
| **Dashboard** | Four database blocks to point at your data: a count, a chart, a table and a board. See [Dashboards](https://terramd.io/docs/dashboards). |
| **Decision** | Date, a Proposed status, Context, Options considered, Decision, Rationale and Follow-ups |
| **Lecture** | A source link, Summary and Highlights, filled in from a capture |
| **Meeting** | Date and time, Attendees, Agenda, Discussion, Decisions and Action items |
| **Project** | Start date, an Active status, Goals, Milestones, Risks and Links |
| **Recipe** | A picture, a source link, Ingredients and Directions, filled in from a capture |
| **Study note** | Source, date, Key concepts, Important details, Examples, Questions, Summary and Related |
They're yours to change or delete. If you delete every template, Terra adds the starter set again the next time you open the Library.
## Edit or delete a template
On the **Templates** page, click the menu button (**≡**) in the corner of a template's card:
- **Edit template** opens the template's text, with the **Properties** panel beside it. Changes save as you type; click **Close** when you're done.
- **Edit details** changes its name, description, category and aliases.
- **Change cover** picks the card's pattern or a photo.
- **Delete** asks **Delete Book notes?** Click **Delete**. This can't be undone, and version history doesn't cover templates.
**Edit template** shows the template's text, not its frontmatter. To change the properties a template copies into notes, edit its file in another app, or save a new template from a note that has the properties you want.
Below your own templates, **Connectors and imports** lists the templates Terra uses for notes it makes for you, such as **Saved article** for pages saved from the web and **Granola meeting** for meetings from Granola. **Edit template** changes them, and **Reset to default** appears once you have.
## Troubleshooting
> [!NOTE]- The caret doesn't start where `{{ cursor }}` was
> Terra removes `{{ cursor }}` but doesn't move the caret there yet. Click where you want to write.
> [!NOTE]- Inserting a template with /template adds one plain paragraph
> Adding a template to a note you've already started doesn't work yet: the template's Markdown arrives as one paragraph of plain text. Start a new note from the template instead.
> [!NOTE]- New notes in a folder ignore its default template
> **Set default template…** on a folder's right-click menu is saved, but **New note** doesn't use it yet. Terra Agent does when it makes notes in that folder. Right-click the folder and choose **New from template…** instead.
## Related
- [Properties](https://terramd.io/docs/properties): the fields a template can set up for each note.
- [Capture and classify](https://terramd.io/docs/capture-and-classify): tidy captures into a template.
- [Dashboards](https://terramd.io/docs/dashboards): build on the Dashboard template.
- [Meeting notes](https://terramd.io/docs/meeting-notes): a guide to running meetings from a template.
---
# Databases
> A database is a live collection of the notes that match its conditions. Each note is a row, its properties are the columns, and nothing is copied.
Source: https://terramd.io/docs/databases
In Terra, a *database* is a set of conditions, such as "every note in `projects/field-guide`" or "every note tagged `#recipe`", and the live list of notes that match them. Each note is a row and its [properties](https://terramd.io/docs/properties) are the columns. Nothing is copied: edit a cell and you've edited the note; move a note out of the folder and it leaves the database. A note belongs to every database whose conditions it matches.
If you know Obsidian Bases, it's the same idea. Unlike a Notion database, the rows aren't stored inside the database: they're ordinary Markdown notes in your folders. For a worked example, see [Run a project](https://terramd.io/docs/project-suite).
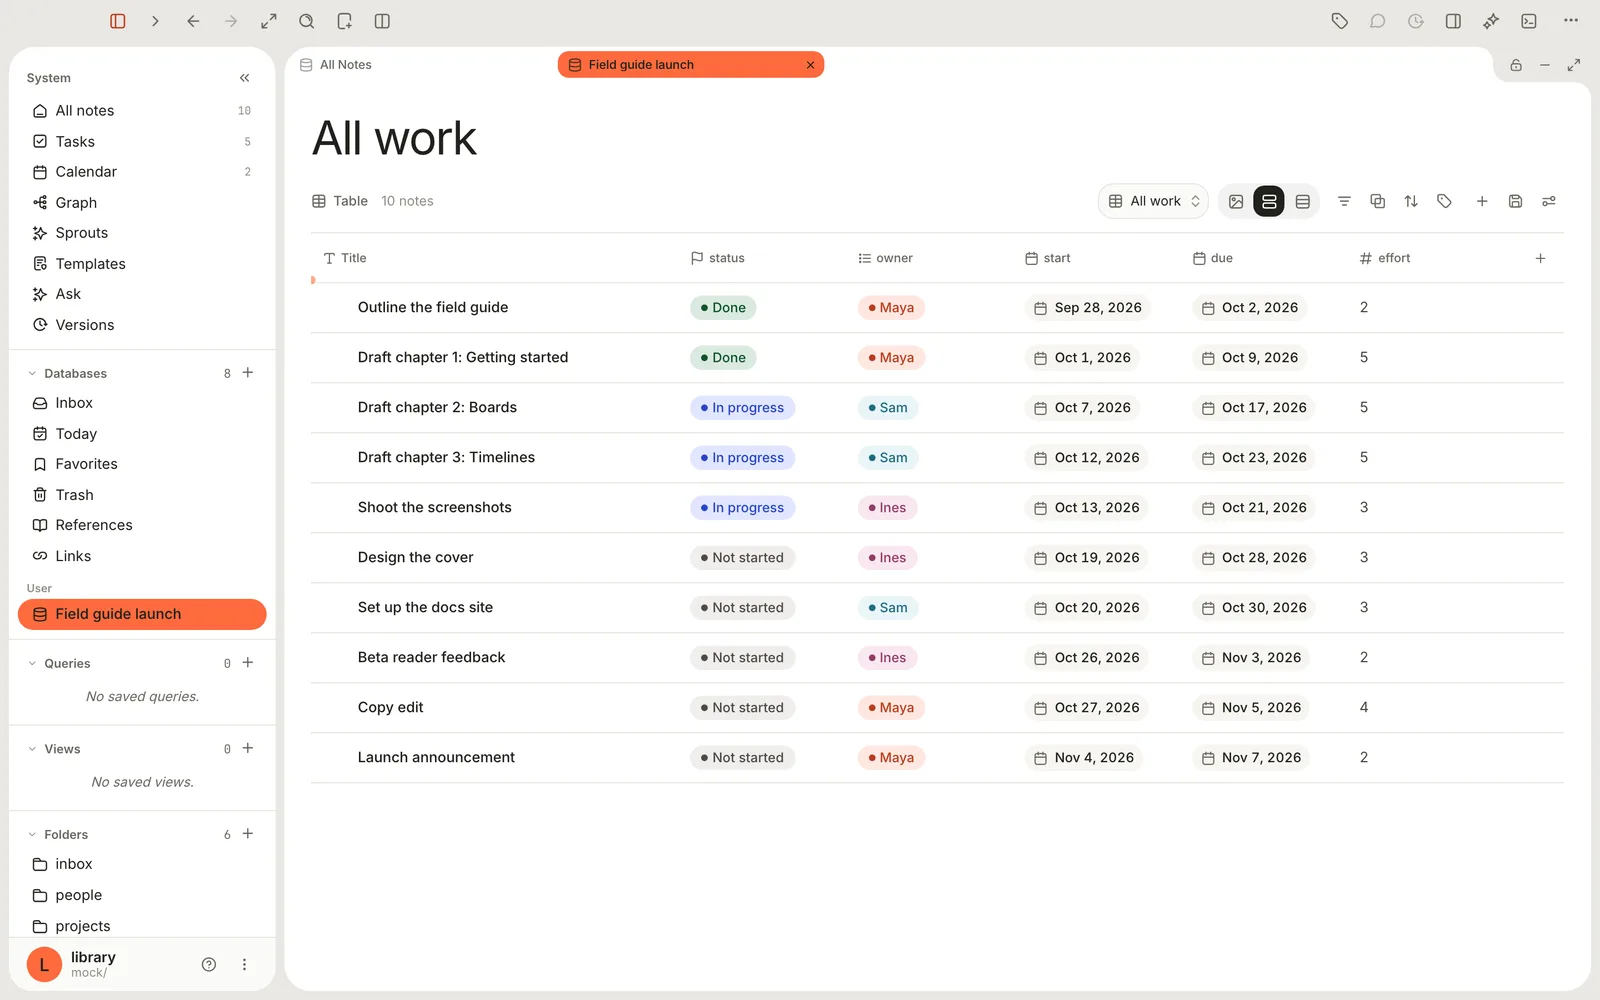
## How a database works
| Part | What it is | Where you change it |
| --- | --- | --- |
| Conditions | The rule for which notes belong: a folder, a tag, a property value and so on | **View preferences › Database** |
| Rows | The notes that match, kept up to date as your notes change | In the notes themselves |
| Columns | The notes' properties, plus any [computed properties](https://terramd.io/docs/formulas-threads-and-gathers) you add | The table header, or a note's properties |
| [Views](https://terramd.io/docs/views-and-layouts) | Saved ways to look at the rows: a table, a board, a calendar, a chart | The view menu in the database's header |
A database you make is one small file, `.terra/databases/.json` in your Library, holding its name, conditions and views. Your notes stay where they are. Conditions skip notes in the Trash; only **Trash** shows those.
## Built-in databases
Every Library comes with these. You can give each one its own views, pin it to the rail or change its icon, but you can't rename or delete it. To tidy the sidebar, right-click one and choose **Hide**; **Hidden** in the same menu brings it back.
| Database | Sidebar section | What it collects |
| --- | --- | --- |
| **All notes** | System | Every note in the Library |
| **Tasks** | System | Every checkbox task in your notes, as a board by status. Its rows are tasks, not notes. See [Tasks](https://terramd.io/docs/tasks). |
| **Calendar** | System | Notes placed on a calendar by date, with task due dates and events from connected calendars. See [Calendar](https://terramd.io/docs/calendar). |
| **Sprouts** | System | Every [Sprout](https://terramd.io/docs/sprouts) in your notes, as a board grouped by kind |
| **Inbox** | Databases | Notes in the `Inbox` folder, where new notes and captures land |
| **Today** | Databases | Notes edited today |
| **Favorites** | Databases | Notes tagged `#favorite` |
| **Trash** | Databases | Deleted notes, waiting in the `Trash` folder |
| **References** | Databases | Notes with bibliographic details, such as the papers and books you cite |
| **Links** | Databases | Web pages you've saved |
**Graph** in the System section is a view of All notes. **Templates** and **Ask** sit there too, but they aren't databases. **Today** starts its day at midnight UTC, so west of Greenwich it turns over during your evening.
### Folders, tags and options open as databases
Click a folder under **Folders** and it opens as a database of the notes in that folder and its subfolders, with saved views like any other: a folder can be a board or a calendar. Two more things open the same way:
- A `#tag` in a note: click it to open its tag page, every note with that tag.
- An option of a select or status property: in **Tools › Property Manager…**, click the option and choose **Open database** to see every note that has it.
You can't change what these collect, and [computed properties](https://terramd.io/docs/formulas-threads-and-gathers) need a database you made.
## Make a database
1. In the sidebar, point at **Databases** and click **+** (**New database**).
2. Type a name.
3. Click **+** (**Add condition**) and build a condition from a field, a test and a value, such as **Folder** · **starts with** · `projects/field-guide`.
4. Add more conditions if you need them. Once there are two, click the **And** beside them to switch to **Or** or **Not**. Click **{ }** (**Add group**) for a nested set.
5. Click **Save**, or press Return in the name field.
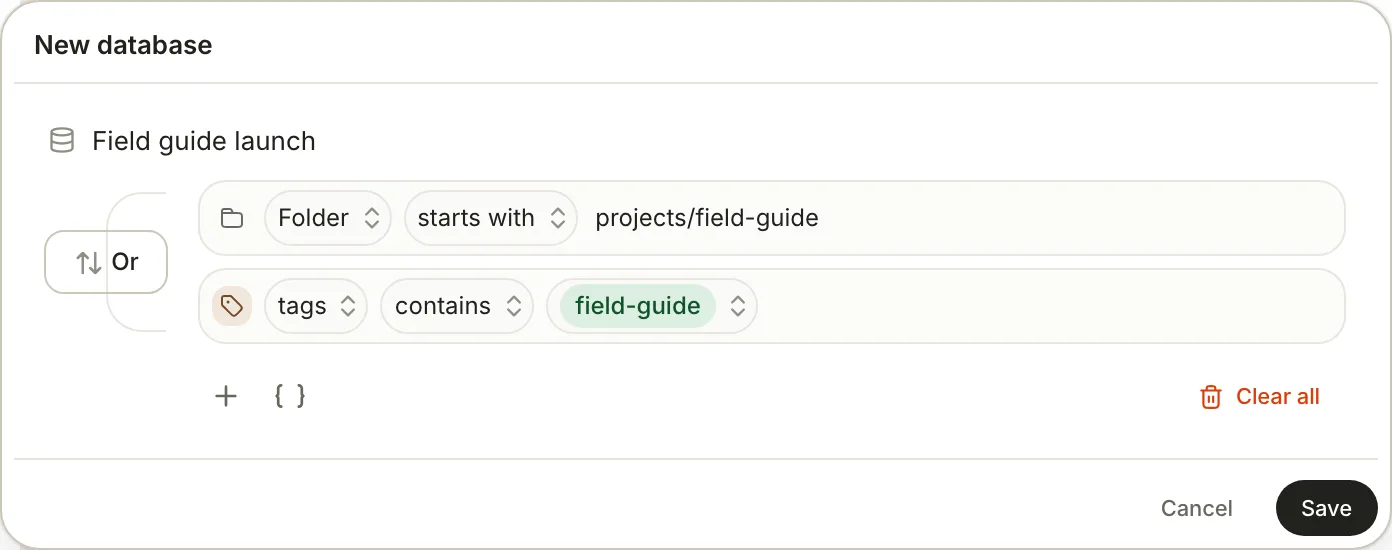
The database opens as a table with **View preferences** beside it, ready for its first [view](https://terramd.io/docs/views-and-layouts), and it's listed under **Databases › User**. A database with no conditions collects every note.
**File › New Database** and **New… › New database** in the toolbar skip the popover. They make a database called *Untitled* that collects every note; rename it from the sidebar and add conditions on its **Database** tab.
Conditions can use **Title**, **Status**, **Tags**, **Folder**, **Type**, **Source**, **Updated**, **Created**, every property in your Library, and **Note Body**, the text of the note. The tests depend on the field's type; [Filter, sort and group](https://terramd.io/docs/filter-sort-and-group#tests-by-property-type) lists them. Good to know:
- Tests ignore capitals.
- A note's **Folder** is the folder that holds it, such as `projects/field-guide`. **is** matches that folder only; **starts with** takes in its subfolders too. Notes at the top of the Library have no folder.
- **Note Body** reads every note's text, so it's the slowest test. Terra reads at most 5,000 notes for it.
## Change what a database collects
Open the database, click **View preferences** at the right end of its header, and choose the **Database** tab.
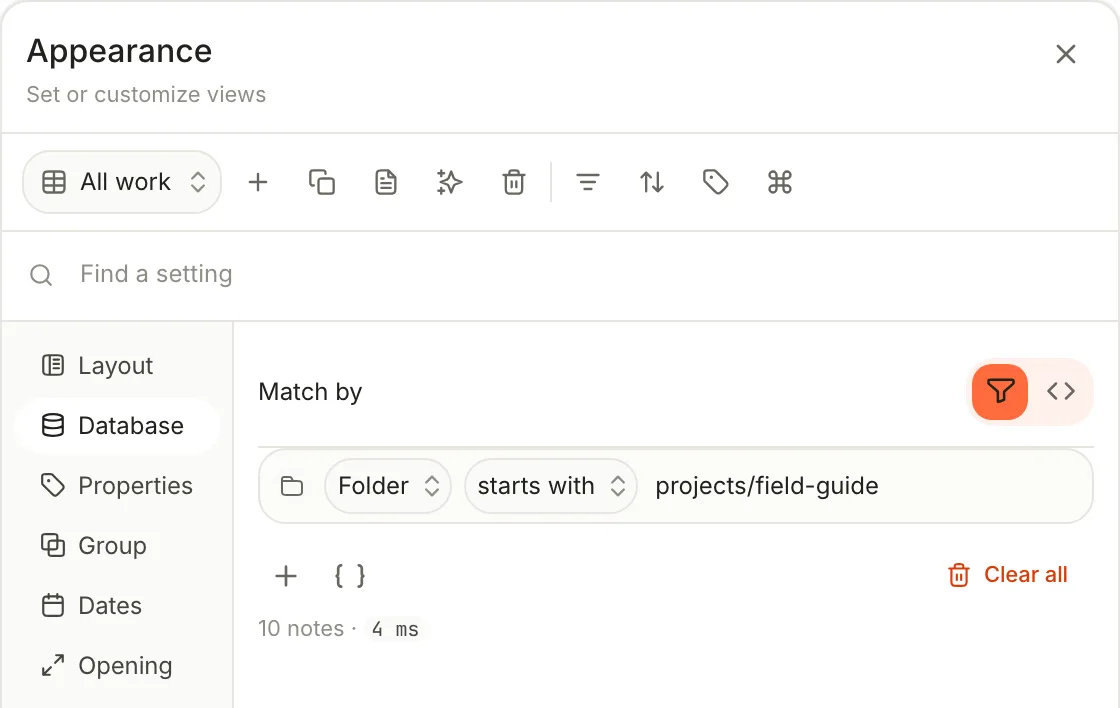
- **Match by** switches between **Filter**, the conditions, and **SQL**, a `SELECT` statement that picks the notes. See [Queries](https://terramd.io/docs/queries#make-a-database-from-sql).
- Changes save themselves after a moment. They aren't part of **Save view**.
- These conditions decide which notes belong. A view's **Filters** only hide rows in that one view; see [Filter, sort and group](https://terramd.io/docs/filter-sort-and-group).
The **Database** tab appears only on databases you made. Built-ins and folders keep their fixed rules.
## Child databases
Some built-ins can hold databases of their own: a narrower slice that opens like its parent and keeps its own views.
1. Right-click **Tasks**, **Calendar** or **Sprouts** under System, or **Links** or **References** under Databases.
2. Choose the first item: **New task database**, **New calendar database**, **New sprout database**, **New link database** or **New reference database**.
3. Type a **Database name** and click **Create**. The new database sits under its parent in the sidebar.
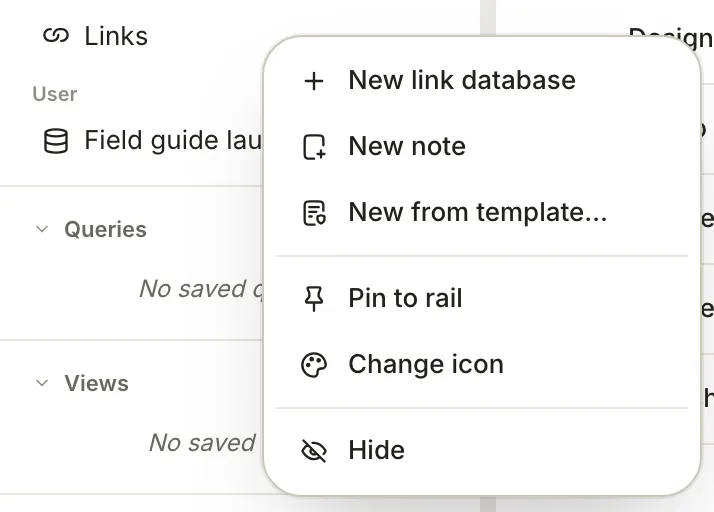
- A child of **Calendar**, **Links** or **References** starts with all of its parent's notes. Narrow it with conditions on its **Database** tab: a *To read* child of Links that keeps pages tagged `#to-read`, for example.
- A child of **Tasks** or **Sprouts** opens as a board. Pick the notes it reads with **Sources** in its header. See [Tasks](https://terramd.io/docs/tasks).
- Children go one level deep, and databases you make can't have children.
**Favorites** works differently. Right-click it and choose **New favorites collection** for a hand-picked list instead of a rule, then add notes from a note's right-click **Favorite** menu. Collections can hold collections.
## Add a note to a database
To add a note you already have, give it what the database collects: move it into the folder, add the tag or set the property. It appears straight away.
To start a new note from a database:
- Point at a database you made in the sidebar and click **New note here**, or right-click it and choose **New note**.
- On a Board view, click **+ Add note** at the foot of a column. The note takes that column's value.
| Starting from | The new note goes to |
| --- | --- |
| A folder | That folder |
| A database you made | Your `Inbox` folder, with the column's value if you used a board |
> [!WARNING] A new note can miss the database you started it from
> Terra doesn't fill in your conditions for you. If the database collects a folder, a note made from it waits in `Inbox` and stays out of the database until you move it into that folder or give it the tag or property the conditions ask for. To add work to a folder-based database, use **New note here** on the folder itself.
## Rename or delete a database
Right-click a database you made and choose **Rename** (type the new **Database name**, then click **Rename**) or **Delete**. Deleting asks first and reminds you: "Notes are kept; only the database is removed." Deleting a database's last view deletes the database too, with an **Undo** in the message that follows. Built-ins can only be hidden.
## Put a database in a note
A database can sit inside any note, such as a weekly review, a project page or a [dashboard](https://terramd.io/docs/dashboards), and it stays live there.
1. On an empty line, type `/database` and press Return.
2. In **Insert database**, pick a database, or click **New database** to make one.
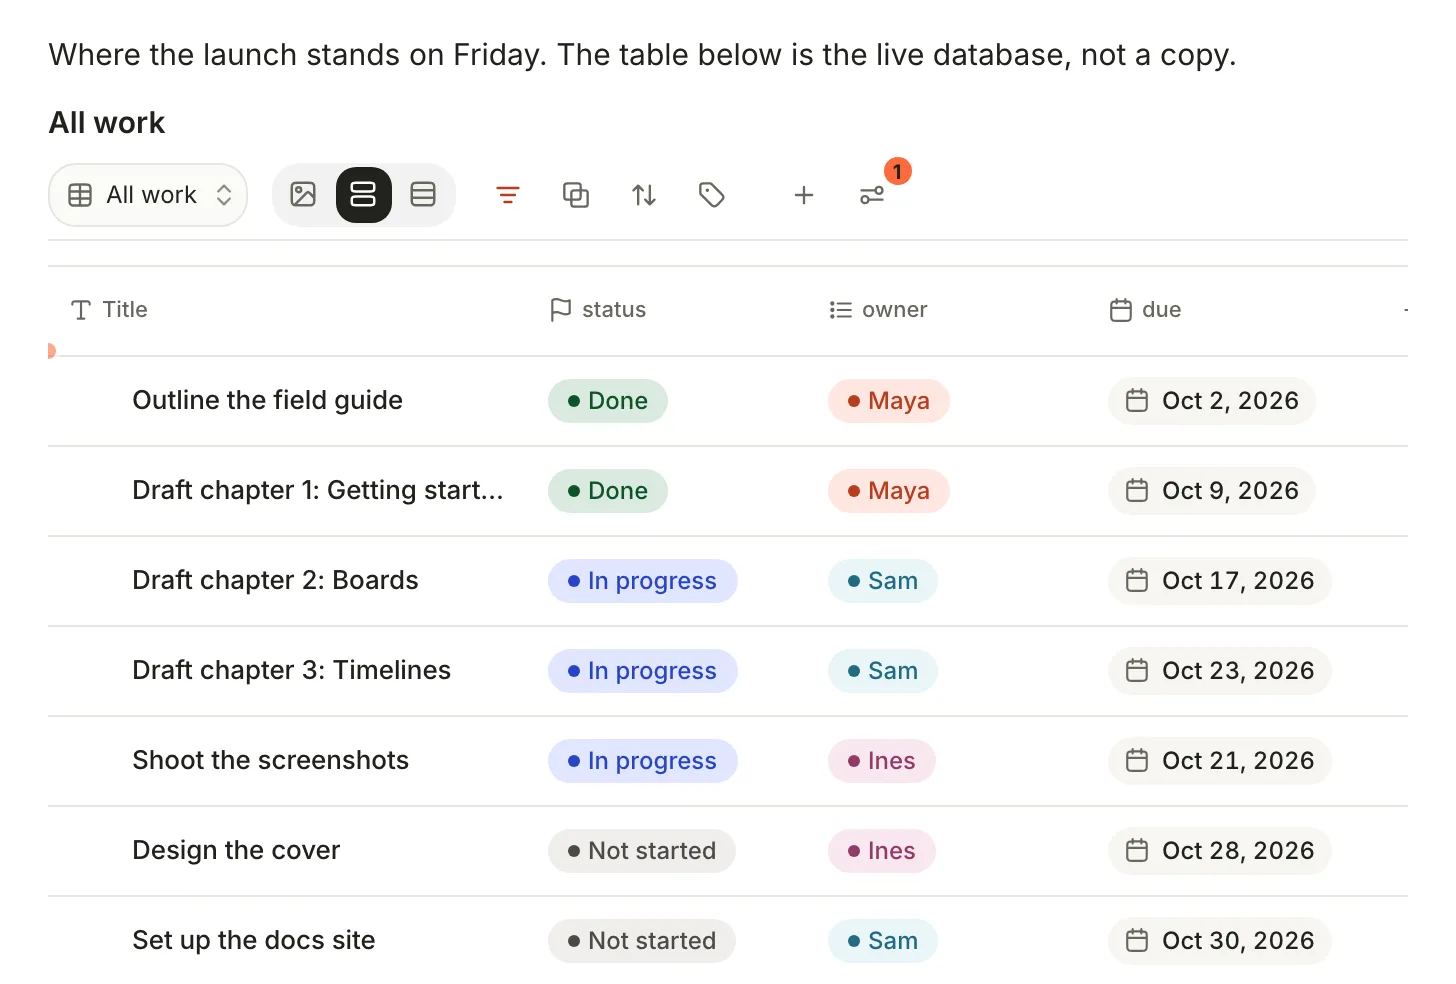
The block is the database, not a copy: change a status in it and the note changes; change the view's filters or sorting and the database's view changes too. In the note's file, the block is one line that points at the database by its id:
```markdown
Where the launch stands on Friday. The table below is the live database, not a copy.
```
Other Markdown apps, Obsidian included, show nothing for that comment. If the database is deleted, the block reads **Database not found** with **Pick another** and **Remove**.
## Related
- [Views and layouts](https://terramd.io/docs/views-and-layouts) — tables, boards, calendars, timelines and charts of the same notes.
- [Filter, sort and group](https://terramd.io/docs/filter-sort-and-group) — every test, sort and grouping a view can use.
- [Properties](https://terramd.io/docs/properties) — the values that become a database's columns.
- [Run a project with boards, timelines and burndowns](https://terramd.io/docs/project-suite) — a database built end to end.
---
# Views and layouts
> A view is a saved way to look at a database, with its own layout, filters, sort, grouping and visible properties. Terra has twelve layouts.
Source: https://terramd.io/docs/views-and-layouts
A *view* is a saved way to look at a [database](https://terramd.io/docs/databases): a layout, such as a table or a board, plus the filters, sort, grouping and visible properties that go with it. One database can have many views, and they all show the same notes. Drag a card to **Done** on the board and the table and the calendar say *Done* too, because the value lives in the note.
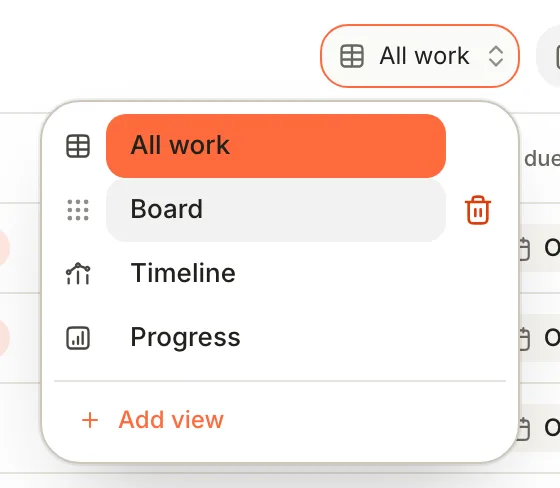
## Switch and add views
The view menu at the left of the database's header shows the current view. Click it to switch to another.
1. Open the view menu and choose **Add view**, or click **+** (**Add view**) in the header.
2. Terra adds a table called *New view* and opens **View preferences** on the **Layout** tab.
3. Pick a **Layout**, type a **Name**, and click **Save view**.
A new view starts clean, with no filters, sort or grouping. To start from a view you already have, click **Duplicate view** in **View preferences**; the copy is named after it, with "copy" on the end.
- **Rename a view:** change its **Name** on the **Layout** tab and click **Save view**.
- **Reorder views:** drag a view by its icon in the view menu.
- **Delete a view:** point at it in the view menu and click the trash (Terra asks *Delete view “Board”?* first), or click **Delete view** in **View preferences**. Either way, the message that follows offers **Undo**. The menu won't delete a database's last view; **View preferences** will, and that deletes the whole database, after asking.
- **Change layout fast:** ⇧ ⌘ V moves the current view to the next layout and saves it.
A view keeps its settings for each layout, so switching a view to a board and back to a table brings the table's settings back.
## Layouts
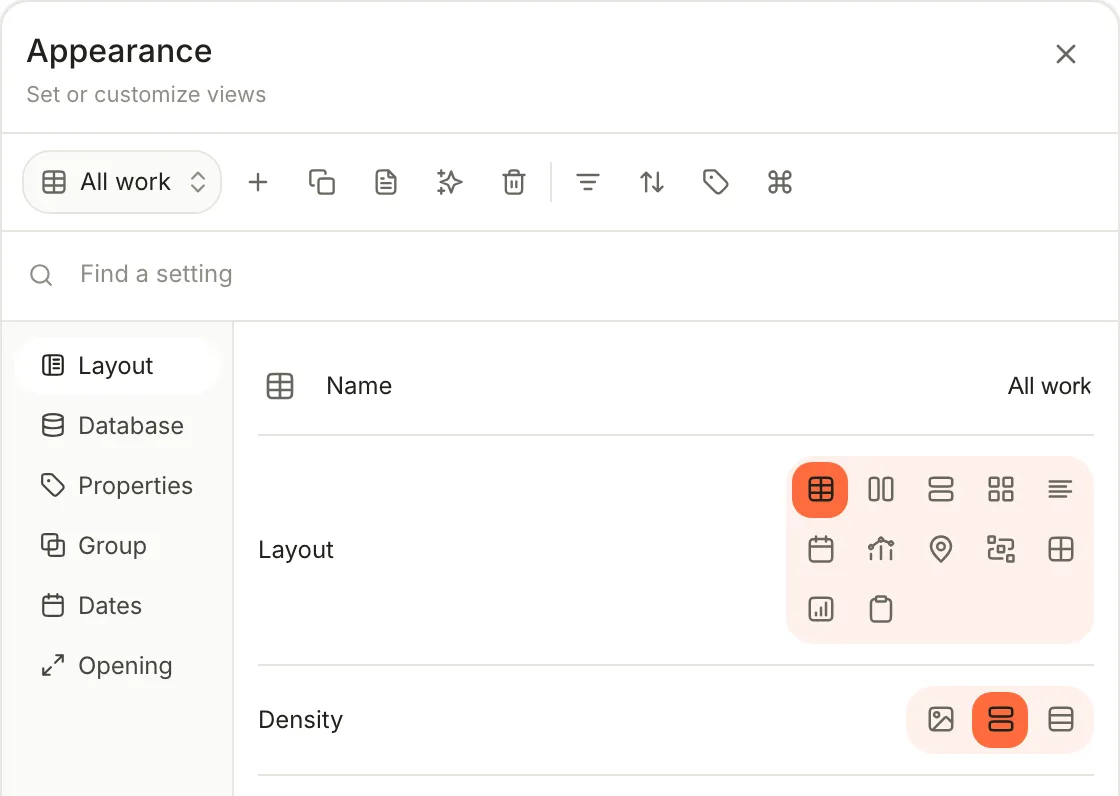
| Layout | Shows notes as | What it needs |
| --- | --- | --- |
| **Table** | Rows and columns you can edit in place | Nothing |
| **Board** | Cards in columns, one per value. Drag a card to change the value. | A property to group by. Terra starts with your first **Status** property. |
| **List** | Compact rows with a few properties | Nothing |
| **Cards** | A grid of cards, with cover images when notes have them | Nothing |
| **Feed** | A column of larger cards with a preview of each note | Nothing |
| **Calendar** | Notes on a month, week, day or agenda | A **Start** date on the **Dates** tab. Add an **End** for ranges. |
| **Timeline** | Bars across time, Gantt-style | **Start** and **End** dates on the **Dates** tab |
| **Map** | Pins on a map | **Map** turned on, then a **Location** property or **Latitude** and **Longitude** numbers. Fetches map tiles from the internet. |
| **Graph** | Dots joined by lines | Sources for the lines on the **Relationships** tab. New graphs start with wiki-links, embeds and citations. |
| **Canvas** | Cards you arrange freely, with connections between them | Nothing |
| **Chart** | A bar, horizontal bar, line or donut chart, or one big number | An **X axis** and a **Y axis** on the **Chart** tab |
| **Form** | An entry form; each submission becomes a new note | The fields to ask for, on the **Form** tab |
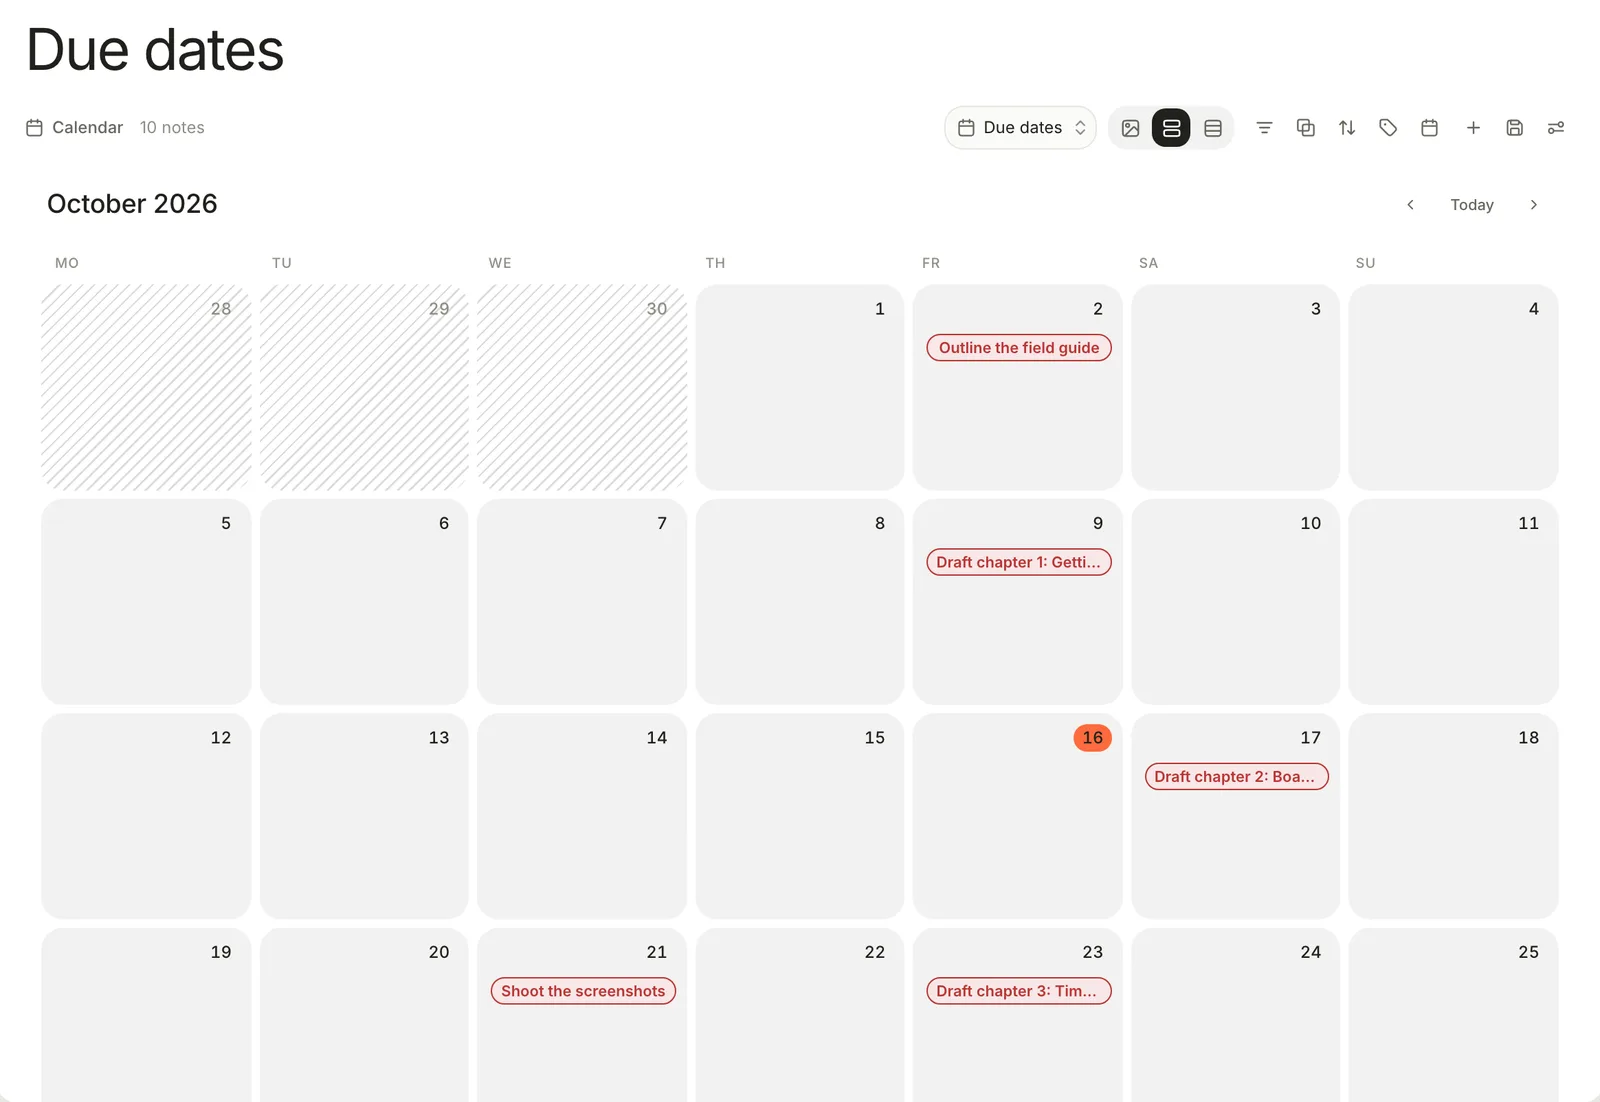
On [task databases](https://terramd.io/docs/tasks), **Calendar** and **Timeline** can't place tasks by their due or start dates; the built-in **Calendar** shows task due dates instead. For boards, timelines and charts built step by step, see [Run a project](https://terramd.io/docs/project-suite).
## View preferences
Click **View preferences** at the right end of a database's header. The panel, titled **Appearance**, holds everything about the current view:
- **Top row:** the view switcher, **Add view from** (pick a layout first), **Duplicate view**, **Save as Markdown note**, **Classify notes** (see [Capture and classify](https://terramd.io/docs/capture-and-classify)), **Delete view**, then **Filters**, **Sort**, **Properties** and **Arrange header actions**.
- **Find a setting** searches every tab at once.
- **Footer:** **Reset**, **Save as view** and **Save view**.
| Tab | What's on it | Shown |
| --- | --- | --- |
| **Layout** | **Name** and icon, **Layout**, **Density**, **Show note glyph**, and the layout's own options, such as **Row lines** for tables or **Column width** for boards | Always |
| **Database** | What the database collects. See [Databases](https://terramd.io/docs/databases#change-what-a-database-collects). | Databases you made |
| **Properties** | **Wrapping** and **Freeze header** for tables; **Property labels** for boards, cards and feeds | When the layout has them |
| **Group** | **Primary group**, **Subgroup**, date periods, **Group status by**, **Show empty groups**, **Hidden groups** | Always |
| **Dates** | **Start** and **End** for calendars and timelines, timeline progress settings, **Date labels** | Always |
| **Relationships** | What draws the lines between notes | Graph and Canvas |
| **Chart**, **Form**, **Map**, **Graph**, **Canvas** | That layout's own settings | On that layout |
| **Opening** | **Open notes** as a **Peek**, a **Pane**, **Full** page or just their **Properties**, and where a peek or pane appears | Always |
| **Sources**, **Statuses** | Where tasks come from, and task statuses | Task databases |
While the panel is open, your changes are a draft. A dot marks the view, and nothing is saved until you click **Save view**. **Reset** throws the draft away; **Save as view** keeps the original and saves the draft as a new view named after it, with "copy" on the end. Leave with a draft unsaved and Terra asks **Unsaved database views**, with **Save**, **Discard** and **Cancel**. With the panel closed, the header's controls save as soon as you use them.
**Arrange header actions** decides which controls sit in the header, which go in its **More menu**, and which stay in the panel. It can also put one of your saved views in the header as a one-click button.
## Save a view as a note
To keep a record of where things stood, such as for a status report, freeze a view into a note.
1. Open the view and click **View preferences**.
2. Save any changes first. While the view has unsaved changes, the button is greyed out and labelled **Save the view to snapshot it**.
3. Click **Save as Markdown note**. Terra says **Saved “All work” as a note**; click **Open** to see it.
The note lands in your `Inbox` folder, titled with the database, the view and the day, such as *Field guide launch · All work · 2026-10-16*. Its body is a Markdown table of the view's rows in their order, with the view's visible columns. The first rows look like this:
```markdown
| Title | Status | Owner | Start | Due | Effort |
| - | - | - | - | - | - |
| [[Outline the field guide]] | Done | Maya | 2026-09-28 | 2026-10-02 | 2 |
| [[Draft chapter 1: Getting started]] | Done | Maya | 2026-10-01 | 2026-10-09 | 5 |
| [[Draft chapter 2: Boards]] | In progress | Sam | 2026-10-07 | 2026-10-17 | 5 |
```
Each title is a [link](https://terramd.io/docs/links-and-backlinks) to its note. The table holds up to 1,000 rows; past that, a line above it says how many of the total it shows. The note doesn't change when the database does.
## Put a view in a note
Type `/database` on an empty line to place a live database in any note, with its view menu and controls. See [Put a database in a note](https://terramd.io/docs/databases#put-a-database-in-a-note), and [Build a personal dashboard](https://terramd.io/docs/dashboards) for a page of counts, charts and boards.
## Related
- [Databases](https://terramd.io/docs/databases) — what a database collects, and the built-in ones.
- [Filter, sort and group](https://terramd.io/docs/filter-sort-and-group) — narrow and arrange the rows in a view.
- [Formulas, threads and gathers](https://terramd.io/docs/formulas-threads-and-gathers) — computed columns for any view.
- [Run a project](https://terramd.io/docs/project-suite) — boards, timelines and charts, step by step.
---
# Filter, sort and group
> Narrow a view to the notes you need, put them in order, and group them into sections or board columns. Every filter test, by property type.
Source: https://terramd.io/docs/filter-sort-and-group
Filters, sorts and groups belong to a [view](https://terramd.io/docs/views-and-layouts). They decide which of a [database](https://terramd.io/docs/databases)'s notes the view shows, in what order and under which headings, without touching the notes or what the database collects. Every view keeps its own, so a *This week* view can hide what an *Everything* view shows.
## Filter a view
1. Click **Filters** in the database's header. The **Filter** popover opens.
2. Click **+** (**Add condition**) and set the field, the test and the value: **status** · **is not in group** · **Done**.
3. Add more conditions. Once there are two, click the **And** beside them to cycle it to **Or** or **Not**.
4. For a mix, click **{ }** (**Add group**) and build a set of conditions inside it with its own **And**, **Or** or **Not**. A group can hold one more level, a subgroup.
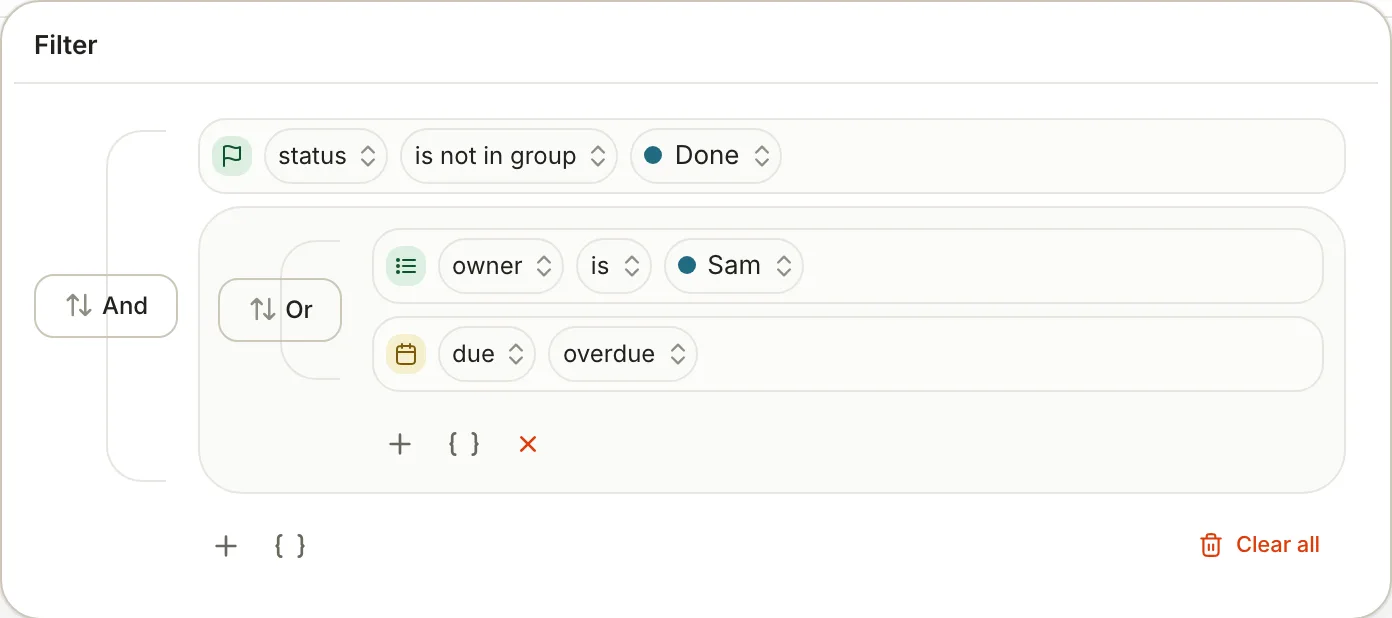
| Joined by | A note is shown when |
| --- | --- |
| **And** | Every condition in the group matches |
| **Or** | At least one condition matches |
| **Not** | None of the conditions match |
Drag a condition by its handle to move it, click its trash to remove it, or click **Clear all** to start again. With the panel closed, filters save to the view as you change them, and the **Filters** button's label counts them: **Filters · 3 active**. Inside **View preferences**, the same builder edits a draft until you click **Save view**.
A view's filters only hide rows. To change which notes belong to the database, edit its conditions on the **Database** tab: see [Databases](https://terramd.io/docs/databases#change-what-a-database-collects). The conditions there use the same tests.
## Tests by property type
The tests on offer depend on the property's [type](https://terramd.io/docs/properties). Text tests ignore capitals.
| Property type | Tests |
| --- | --- |
| Text, **Title**, **Folder**, **Type**, **Note Body** | **is**, **is not**, **contains**, **starts with**, **is empty**, **is not empty** |
| Number, Unique ID | `=`, `≠`, `>`, `<`, `>=`, `<=` |
| Select | **is**, **is not**, **is any of**, **is empty**, **is not empty** |
| Multi-select | **is any of**, **is all of**, **is empty**, **is not empty** |
| Status | **is**, **is not**, **is in group**, **is not in group**, **is empty**, **is not empty** |
| Tags | **contains**, **is any of**, **is empty**, **is not empty** |
| Date, Created time, Last edited time, **Created**, **Updated** | **is**, **is within**, **before**, **after**, **is empty**, **is not empty** |
| A date property named `due` | All the date tests, plus **overdue** |
| Checkbox | **is**, with **Checked** or **Unchecked** |
| URL, Email, Phone, **Source** | **is**, **contains**, **starts with**, **is empty**, **is not empty** |
| Location | **is**, **is not**, **contains**, **starts with**, **is empty**, **is not empty** |
| Files & media | **contains**, **is empty**, **is not empty** |
What the less obvious ones do:
- **is not** also matches notes where the property is empty. To leave those out, add **is not empty**.
- **contains** matches part of a value, so **tags** · **contains** · `book` finds `#bookshelf` too. For one exact tag, use **is any of** with a single tag.
- **is in group** and **is not in group** test a status's group, **To do**, **In progress** or **Done**, rather than its option. `status` **is not in group** **Done** keeps working when you rename or add options.
- **is within** takes **Today**, **Past 7 days** (today and the six days before) or **This month**.
- **before** and **after** leave out the day itself. For a date value, pick a day, or click **Today** to use whatever today is when the view opens.
- **overdue** matches a `due` date before today on a note whose status is anything but *Done*, *Cancelled*, *Completed* or *Closed*, so a finished option called *Shipped* still counts as open. Notes with no status are never overdue.
> [!WARNING] Two tests don't work yet
> With two or more values ticked, **is any of** and **is all of** hide every row; add one **is** condition per value and join them with **Or** instead. And a Checkbox condition matches no notes, whether you pick **Checked** or **Unchecked**.
## Sort a view
**Sort by** in the header sorts by one field. Pick the field, then **Ascending** or **Descending**; pick the same field again to flip the direction, or **None** to stop sorting.
For several sort keys, open **View preferences** and click **Sort** in its top row:
1. Click **Add sort** for each key.
2. For each rule, choose the field, **Ascending** or **Descending**, and **Empty first** or **Empty last** for notes without a value.
3. Drag the rules by their handles: the first rule wins, the next breaks ties.
4. Click **Save view**.
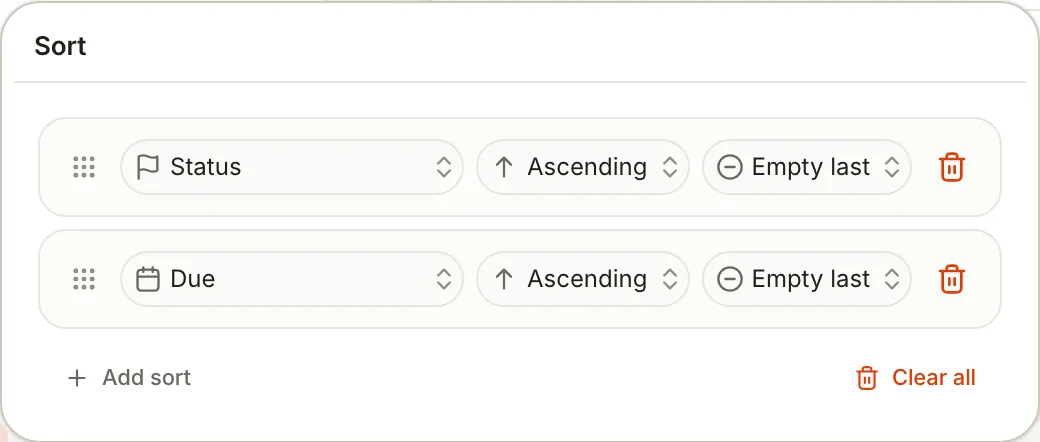
How values sort:
- Numbers sort as numbers and come before text. Text ignores capitals.
- A Status property sorts by its groups, **To do**, then **In progress**, then **Done**, and by the order of its options within each group.
- In a grouped view, the grouping field is always the first sort key, and its direction orders the groups.
- On a board, dragging a card up or down its column saves a hand-made order. The sort then shows **Manual**.
With no rules, the **Sort** popover says "Notes keep database order."
## Group a view
Click **Group by** in the header and pick a field. On a board the button reads **Show boards as**, and the field you pick makes the columns.
- **Group by** offers **None**, **Folder**, **Type**, **Tag**, **Updated** and **Created**, then your properties.
- **Show boards as** lists your properties only. **Add group** at the bottom creates or adds a property to group by.
- A note with several values, such as tags, appears under each of them.
- Notes without a value gather under **No value**, or **No** plus the property's name on a board.
- Click the eye in a group's header to hide the group. **View preferences › Group › Hidden groups** shows how many notes are hidden and **Restore** brings them back.
The **Group** tab in **View preferences** has the rest:
| Setting | What it does |
| --- | --- |
| **Primary group** | The field to group by, the same as the header button |
| **Primary period** | For a date: **Day**, **Week**, **Month**, **Quarter** or **Year** |
| **Group status by** | For a Status property: **Option** gives one group per option; **Group** gives three, **To do**, **In progress** and **Done** |
| **Subgroup**, **Subgroup period** | A second level of grouping inside each group |
| **Show empty groups** | Keeps groups that have no notes |
| **Hidden groups** | Brings back groups you hid |
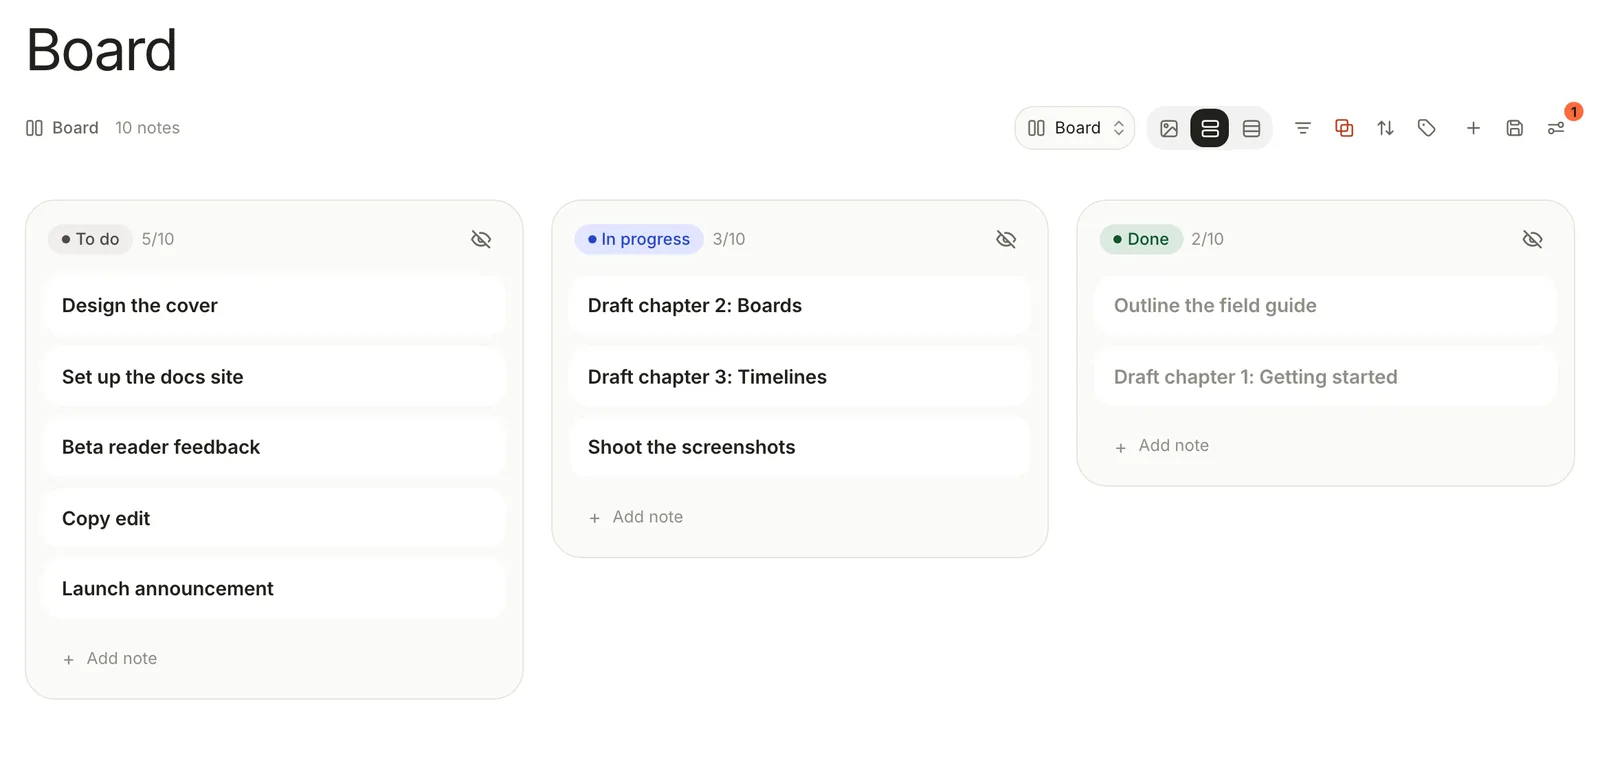
Date groups have relative names, such as *This week* or *Last week*, until you set **Date labels** to **Absolute** on the **Dates** tab.
## Show or hide properties
Click **Properties** in the header (it shows how many are visible, as in **Properties · 6 visible**). Tick a property to show it and untick it to hide it; drag to change the order. In a table these are the columns; on boards, lists, cards and feeds they're the details on each card. **Manage properties** at the bottom opens the Property Manager.
## Find a note in a database
There's no search box inside a view. To find one note quickly, use **Find notes** at the top of the note list beside the sidebar (click **Database drawer** in the toolbar if the list is hidden). It narrows the list to notes whose title, or a property the list shows, contains what you type. To search the whole Library, with filters like `path:` and `[status:Done]`, see [Search syntax](https://terramd.io/docs/search-syntax).
## Related
- [Databases](https://terramd.io/docs/databases) — conditions that decide which notes belong.
- [Views and layouts](https://terramd.io/docs/views-and-layouts) — boards, calendars and the View preferences panel.
- [Properties](https://terramd.io/docs/properties) — the types behind each set of tests.
- [Search syntax](https://terramd.io/docs/search-syntax) — filters for the search window.
---
# Formulas, threads and gathers
> Computed properties for your databases. Formulas calculate a value for each note, threads link notes to other notes, and gathers roll values up across a thread.
Source: https://terramd.io/docs/formulas-threads-and-gathers
A *computed property* is a column that a [database](https://terramd.io/docs/databases) works out for you instead of one you type. There are four kinds:
| Kind | What it is | Also known as |
| --- | --- | --- |
| **Formula** | A value calculated for each note from its other properties | A formula column |
| **Thread** | Links from each note to other notes | A relation |
| **Gather** | A value rolled up across a thread, such as a total or the latest date | A rollup |
| **Person** | A thread to notes about people | A person property |
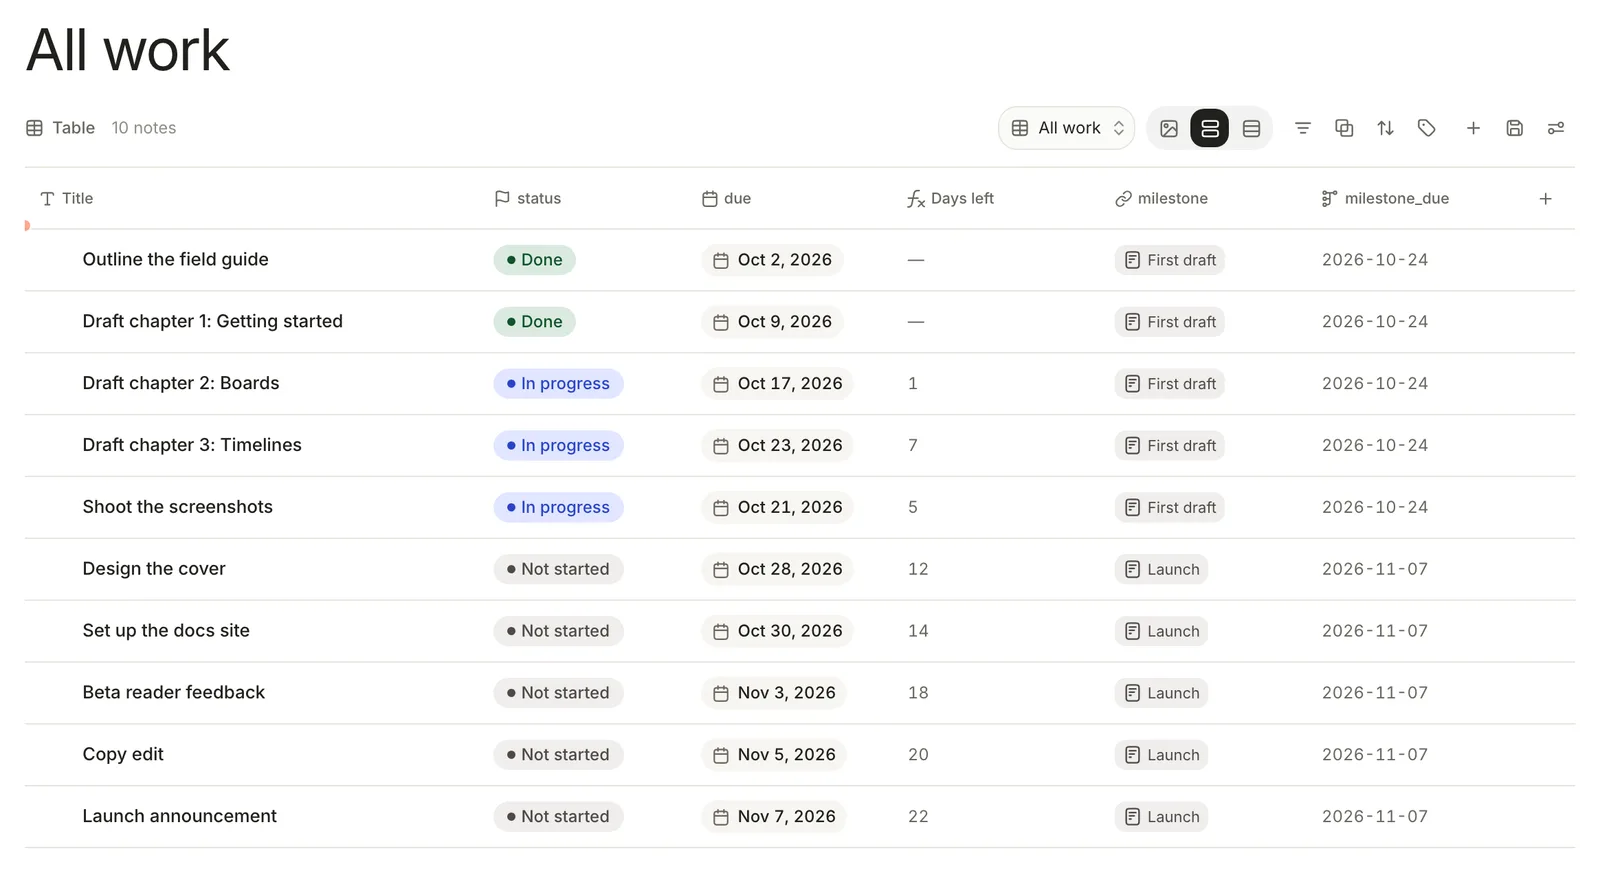
## Add a computed property
1. Open a database you made, in a Table view.
2. Click **+** (**Add property**) at the right end of the header row.
3. Under **Computed**, choose **Formula**, **Thread**, **Gather** or **Person**.
4. Type a name where it says `field_name`, fill in the definition, and click the check (**Add field**).
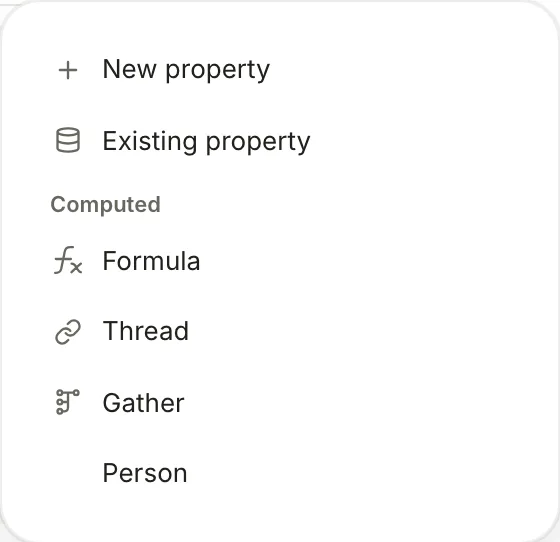
Names are stored in lower case with underscores, so *Days left* is `days_left` in formulas. To change a computed property, click its column header; the editor opens with **Apply** and **Remove field**. **Save to library** keeps a copy to reuse in another database, and **Load preexisting** brings one back.
Computed properties need a database you made; built-ins, folders and tag pages don't offer them. Filters don't offer them yet either, but a [chart](https://terramd.io/docs/views-and-layouts#layouts) can add up or average a formula or a gather.
## Formulas
A formula is an expression worked out for each row, much like a spreadsheet formula. Refer to a property with `@`:
```text
if @status == "Done" then null else diff_days(@due, today())
```
For *Draft chapter 2: Boards*, due 2026-10-17, that gives `1` on October 16; for finished items it's empty.
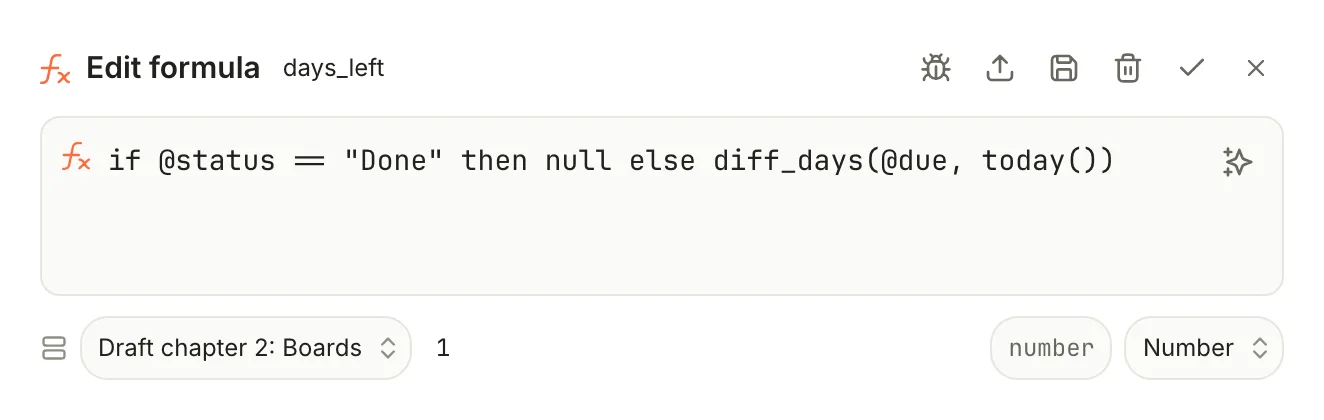
The pieces:
| Write | Means |
| --- | --- |
| `@effort` | The note's `effort` property. Use quotes for names with spaces: `@"due date"`. |
| `@title`, `@type`, `@tags`, `@created`, `@updated` | The note's built-in fields. `@tags` is a list. |
| `@days_left` | Another computed property on the same database |
| `@milestone.@due` | The `due` property of every note the `milestone` thread links to, as a list |
| `12`, `"late"`, `true`, `false`, `null` | A number, text, yes or no, nothing. Text can't contain a `"`. |
| `+` `-` `*` `/` `%` `^` | Arithmetic on numbers. `%` is the remainder, `^` a power. |
| `++` | Joins two pieces of text: `@owner ++ " (owner)"` |
| `==` `!=` | Equal, not equal. Text must match exactly, capitals included. |
| `<` `<=` `>` `>=` | Compare numbers, dates or text |
| `&&` `\|\|` `!` | And, or, not |
| `a ?? b` | `a`, or `b` when `a` is empty |
| `if … then … else …` | Choose between two results. Write it in lower case. |
| `let x = … in …` | Name part of a formula to use it more than once |
Things that trip people up:
- If a property a formula uses is empty, the result is empty, unless you use `==`, `!=`, `??` or `coalesce()`.
- Dates written as `YYYY-MM-DD` in a property are read as dates, so `@due < today()` works. Do arithmetic on dates with `add_days()` and `diff_days()`; `+` and `-` only take numbers.
- `today()` and `now()` use UTC.
- Function names ignore capitals, except `if`: a lower-case `if` starts `if … then … else`, so write the function form as `IF(@effort > 3, "big", "small")`.
- A formula that can't be worked out for one note shows an error in that cell only.
- **Ask AI** in the editor writes or fixes a formula from a description, once an AI provider is connected.
### Functions
| Kind | Functions |
| --- | --- |
| Numbers | `abs(x)`, `ceil(x)`, `floor(x)`, `round(x)` or `round(x, places)`, `min(…)`, `max(…)`, `sum(…)`, `average(…)`, `avg(list)`, `median(…)` |
| Text | `length(t)`, `upper(t)`, `lower(t)`, `slice(t, start, end)`, `contains(t, part)`, `replace(t, find, with)`, `split(t, separator)`, `join(list, separator)`, `regex_match(t, pattern)`, `concat(…)` |
| Dates | `today()`, `now()`, `year(d)`, `month(d)`, `day(d)`, `weekday(d)` (Monday is 1), `add_days(d, n)`, `diff_days(a, b)` (a minus b, in whole days), `format(d, pattern)`, `date(t)` |
| Logic | `IF(test, a, b)`, `not(x)`, `and(…)`, `or(…)`, `coalesce(a, b, …)` |
| Conversion | `to_number(x)`, `to_string(x)`, `to_date(t)`, `to_bool(x)` |
| Lists | `count(list)`, `counta(…)`, `unique(list)`, `any(list)`, `all(list)` |
`contains()` and `replace()` respect capitals. `format()` takes patterns like `"MMM D"` (*Oct 17*) or `"YYYY-MM-DD"`. `date()` and `to_date()` need a full timestamp, such as `"2026-11-01T00:00:00Z"`. `vlookup`, `index` and `match` exist for sheets and have nothing to look up in a database.
## Threads
A thread links each note to other notes: work items to their milestone, papers to their authors, meetings to a project. Choose how it finds those notes:
- **Linked**: you pick them. Set **Link to** **one** or **many**, and the notes **from** **anywhere** or from one database. A thread that picks from a database gets a picker in its table cells.
- **Matched**: conditions pick them. Choose the database to **Match from**, then add conditions as in a [filter](https://terramd.io/docs/filter-sort-and-group). In a text condition's value, `@title` stands for the note's own title and `@id` for its id, so a *Projects* database can match every task whose `project` **is** `@title`. Switch **notes** to **blocks** to match Sprouts, headings and other blocks inside notes instead of whole notes.
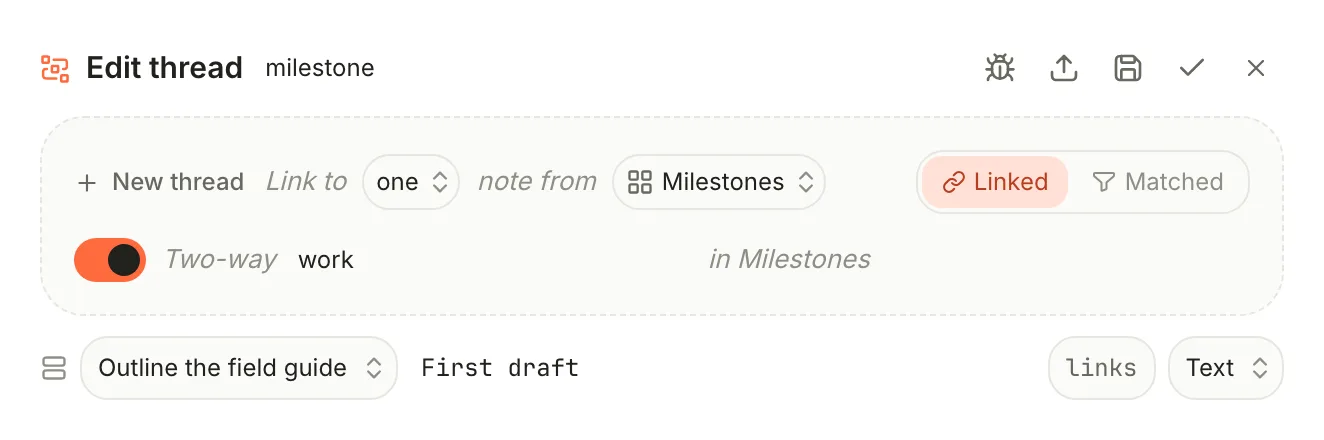
**Two-way** appears once a thread draws on a database. Switch it on and name the other side: that database gets a column of the notes that point at each of its notes. For a Linked thread you can edit the link from either side; for a Matched one the other side is read-only.
Threads live in your notes. Each note keeps its links under `relations:` in its [properties](https://terramd.io/docs/properties), by title:
```yaml
relations:
milestone: '[[First draft]]'
```
For a thread to notes anywhere, type the links there yourself. Matched threads write their matches into the same block, refreshed when you open or save the note. The other side of a two-way thread is never written into the other notes; Terra works it out from the links.
## Gathers
A gather reads through a thread and sums, counts or picks from the linked notes. It needs a thread on the same database first. Write it as one function around a thread and a field:
```text
LATEST(@milestone.@due)
```
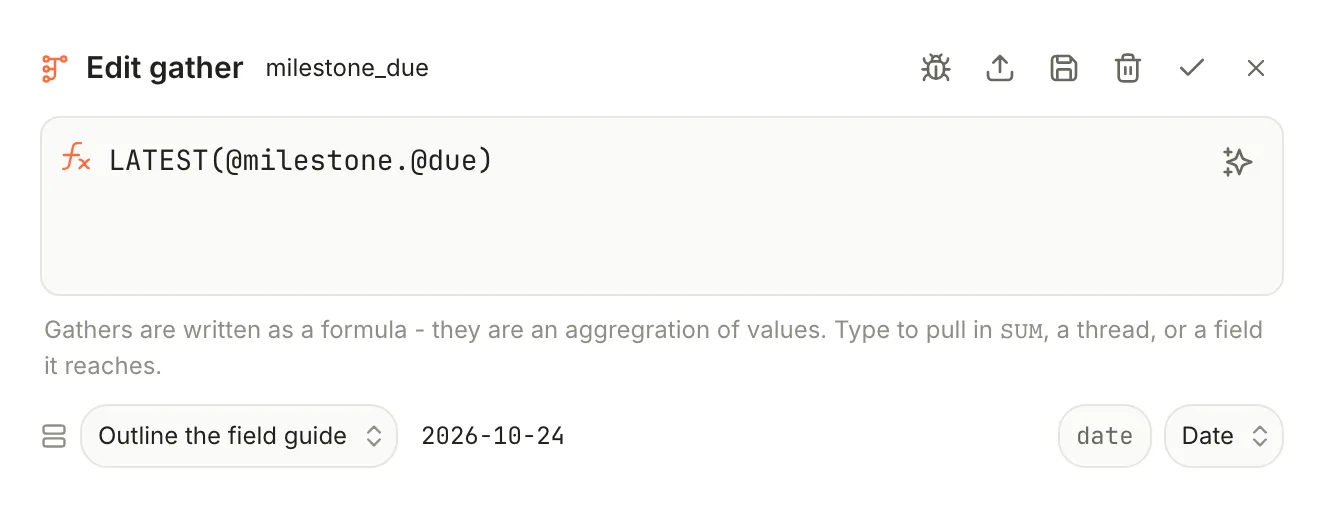
| Function | Gives |
| --- | --- |
| `SUM(@thread.@field)`, `AVG(…)`, `MIN(…)`, `MAX(…)` | A total, average, smallest or largest number |
| `COUNT(@thread)` | How many notes the thread links to |
| `EARLIEST(@thread.@field)`, `LATEST(…)` | The first or last date |
| `UNIQUE(@thread.@field)` | Each value once, as a list |
| `CONCAT(@thread.@field)` | The values joined with commas |
The field can be any property of the linked notes, or a built-in such as `title`, `created` or `updated`. Notes without a value are skipped. On a *Milestones* database with a `work` thread, `SUM(@work.@effort)` totals each milestone's effort. For anything more, use a formula: `@work.@effort` there is the list of values, so `round(avg(@work.@effort), 1)` works.
## Person
**Person** adds a thread called `people` (then `people_2`, and so on) to notes whose type is `person`. Pick people in its table cells; they show as chips with their photos. Click the column header to rename it.
## How they're stored
| Kind | Its definition | Its values |
| --- | --- | --- |
| Formula, gather | In the database's file, `.terra/databases/.json` | Worked out when the view opens; never written to notes |
| Thread, Person | In the database's file | In each note's `relations:` |
So formulas and gathers belong to their database, and a note shows them only there. For a note that isn't in any database, open its properties, click **+**, and choose **Formula**, **Thread**, **Gather** or **Person**: Terra asks which database to **Evaluate against**, adds the definition to that database, and records the link in the note:
```yaml
computed:
days_left: 01JQ8ZB4K2M7X9T3R5V6W8Y0C1
```
## Related
- [Databases](https://terramd.io/docs/databases) — where computed properties live.
- [Properties](https://terramd.io/docs/properties) — the typed values formulas read.
- [Views and layouts](https://terramd.io/docs/views-and-layouts) — charts that sum a formula or a gather.
- [Run a project](https://terramd.io/docs/project-suite) — threads that roll milestone progress up a timeline.
---
# Queries
> Ask your Library questions in SQL. Write a read-only SELECT over Terra's public views, see the answer as a table, a sheet or a chart, and save it.
Source: https://terramd.io/docs/queries
A *query* asks your Library a question in SQL: how many notes have each status, which notes nobody links to, how much work each person has open. Terra keeps an index of your notes in a small SQLite database, and a query reads it through a few public views. Queries only read; they can't change a note. For questions you can answer with conditions, a [database](https://terramd.io/docs/databases) is simpler; reach for a query when you need counts, sums, joins or a chart over time.
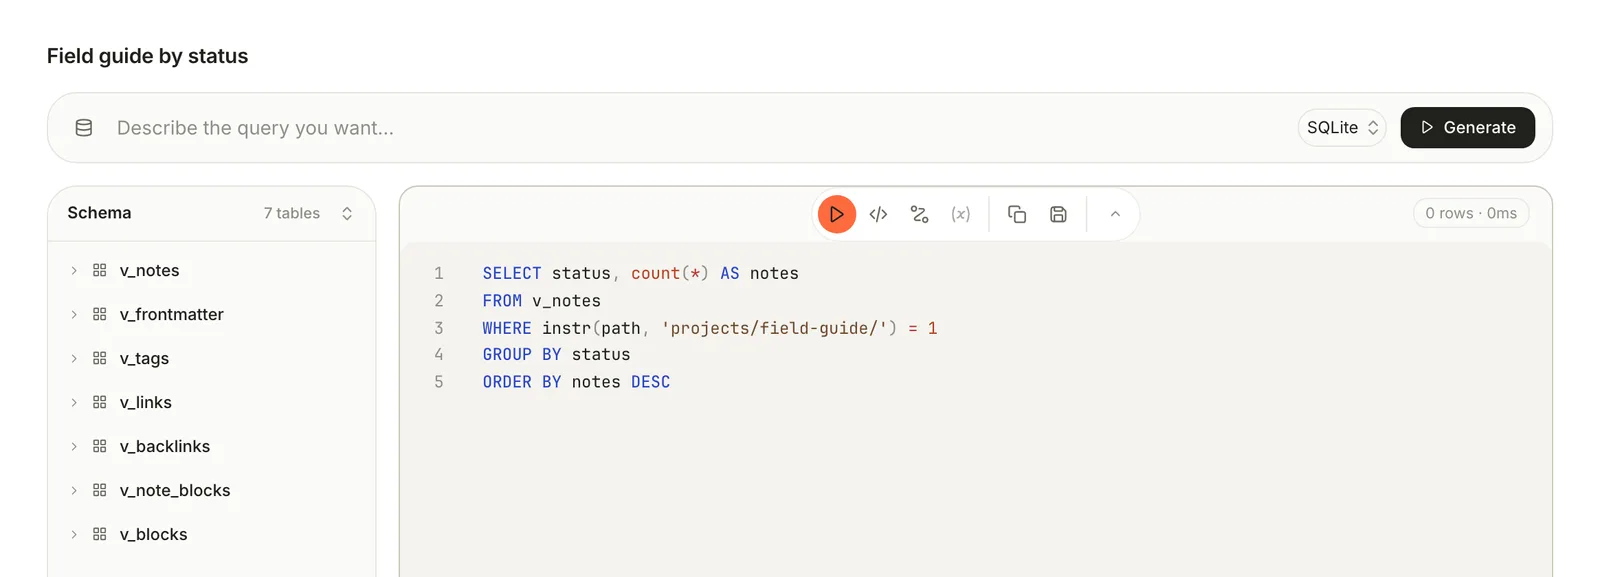
## Write and run a query
1. Choose **File › New Query**, or click **+** (**New query**) beside **Queries** in the sidebar.
2. Type a name over **Untitled query**.
3. Write a `SELECT` in the editor. The **Schema** list shows the views and their columns; click a view to see its columns.
4. Press ⌘ Return, or click **Run query** in the tools above the editor.
```sql
SELECT status, count(*) AS notes
FROM v_notes
WHERE instr(path, 'projects/field-guide/') = 1
GROUP BY status
ORDER BY notes DESC
```
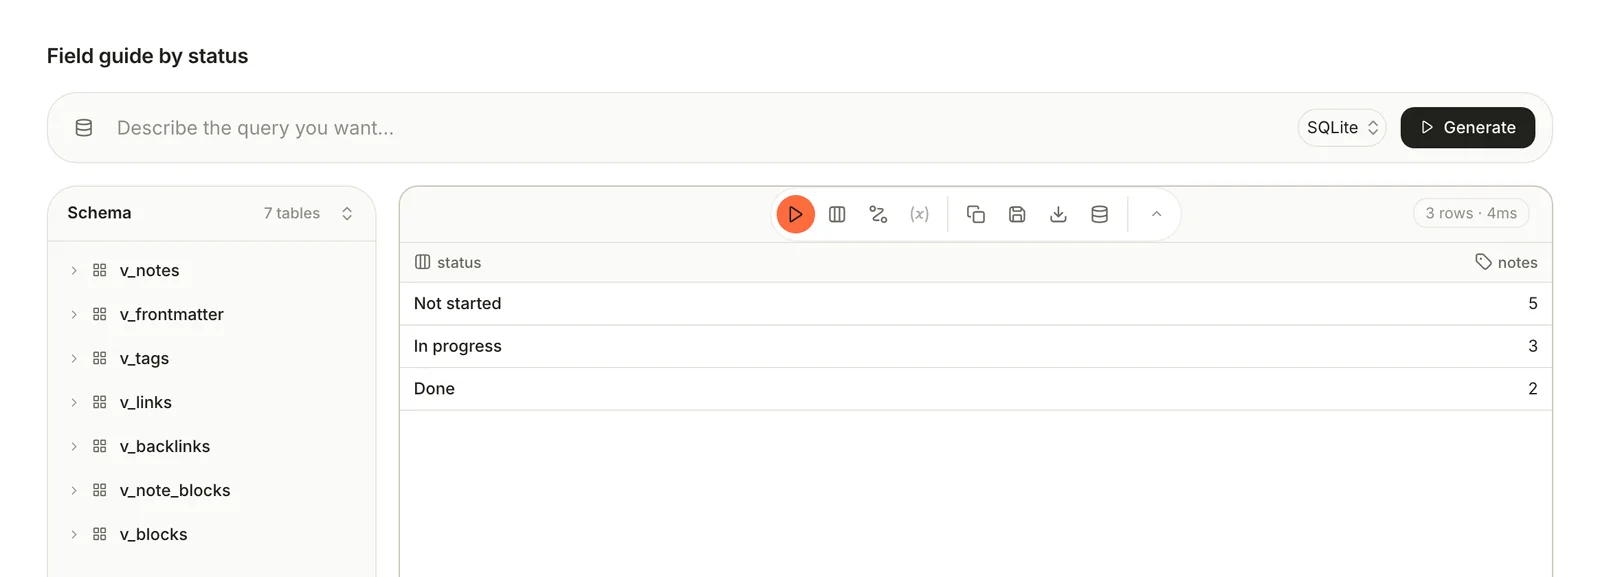
**Tools › Run Query** runs the query in the focused pane. If a result has an `id`, `note_id` or `note` column, click a row to open that note.
To have the SQL written for you, describe what you want in **Describe the query you want…** and click **Generate**, or press ⌘ Return in that line. It needs an AI provider (see [Ask your Library](https://terramd.io/docs/ask-your-library)), sends only the list of views and columns, and checks the statement before it reaches the editor. Read it before you run it. Queries are always SQLite; the dialect menu beside **Generate** doesn't change that.
## What you can read
| View | One row per | Columns |
| --- | --- | --- |
| `v_notes` | Note | `id`, `path`, `title`, `type`, `status`, `created`, `updated`, `word_count`, `has_sidecar` |
| `v_frontmatter` | Property on a note | `note_id`, `key`, `value_text`, `value_number`, `value_bool`, `value_json` |
| `v_tags` | Tag on a note, written in its properties or as `#tag` in its text | `note_id`, `tag` |
| `v_links` | Link from a note | `src_id`, `dst_id`, `dst_raw`, `resolved` |
| `v_backlinks` | Link into a note | `note_id`, `source_id`, `source_title` |
| `v_note_blocks` | Kind of block in a note's [Sidecar](https://terramd.io/docs/annotate-in-the-sidecar), such as its highlights, with a count | `note_id`, `block_type`, `block_count` |
| `v_blocks` | Block in a note: heading, paragraph, list item, Sprout… | `note_id`, `block_id`, `anchor`, `parent_id`, `kind`, `level`, `callout_kind`, `title`, `ordinal`, `text`, `char_start`, `char_end`, `child_count` |
- `created` and `updated` are timestamps such as `2026-10-16T09:00:00Z`; wrap them in `date()` to group by day.
- In `v_frontmatter`, text and dates are in `value_text`, numbers in `value_number`, checkboxes in `value_bool` (1 or 0), and lists such as tags in `value_json`.
- `word_count` is always 0 for now.
- In `v_blocks`, `kind` is `heading`, `paragraph`, `callout`, `list`, `listItem`, `quote`, `codeBlock`, `table`, `embed`, `image` or `hr`. For a Sprout, `callout_kind` holds its kind, such as `tip`.
## The rules
A query is one SQLite `SELECT`, optionally starting with `WITH`. Everything else is refused before it runs:
- Only the views above. Notes' own files and Terra's other tables are out of reach.
- One statement, with no `INSERT`, `UPDATE`, `DELETE`, `CREATE` or `PRAGMA`.
- Functions from this list only:
| Kind | Allowed |
| --- | --- |
| Text | `lower`, `upper`, `length`, `substr`, `substring`, `trim`, `ltrim`, `rtrim`, `replace`, `instr`, `printf`, `format`, `quote`, `char`, `unicode`, `hex` |
| Numbers and totals | `abs`, `round`, `ceil`, `ceiling`, `floor`, `min`, `max`, `sum`, `avg`, `count`, `total`, `group_concat`, `coalesce`, `nullif`, `ifnull`, `iif`, `cast` |
| Dates | `date`, `time`, `datetime`, `julianday`, `strftime`, `unixepoch` |
| JSON | `json`, `json_array`, `json_array_length`, `json_extract`, `json_insert`, `json_object`, `json_patch`, `json_quote`, `json_remove`, `json_replace`, `json_set`, `json_type`, `json_valid` |
| Rankings | `row_number`, `rank`, `dense_rank`, `ntile`, `lag`, `lead`, `first_value`, `last_value`, `cume_dist`, `percent_rank`, `nth_value` |
| Other | `typeof`, `likelihood`, `likely`, `unlikely` |
`LIKE` and `GLOB` count as functions and aren't on the list, so they fail with an error such as *not authorized to use function: like*. Match text with `instr()` instead:
```sql
SELECT id, title
FROM v_notes
WHERE instr(lower(title), 'pricing') > 0
```
A query in the Query surface stops after 3 seconds and returns at most 10,000 rows.
## See the results as a table, sheet or chart
Click **View: Results** in the tools and choose **Query** (the SQL), **Results**, **Sheet** or **Chart**.
- **Sheet** opens the results as a spreadsheet, with **Save sheet to Library** and **Download sheet as XLSX**.
- **Chart** draws a **Line**, **Bar**, **Area**, **Scatter** or **Heatmap** chart. It starts with the first text column across and the first number column up; change them with **Chart settings** (the gear). **Cumulative** turns each value into a running total, which is how you draw a burndown: see [Chart a burndown](https://terramd.io/docs/project-suite#chart-a-burndown).
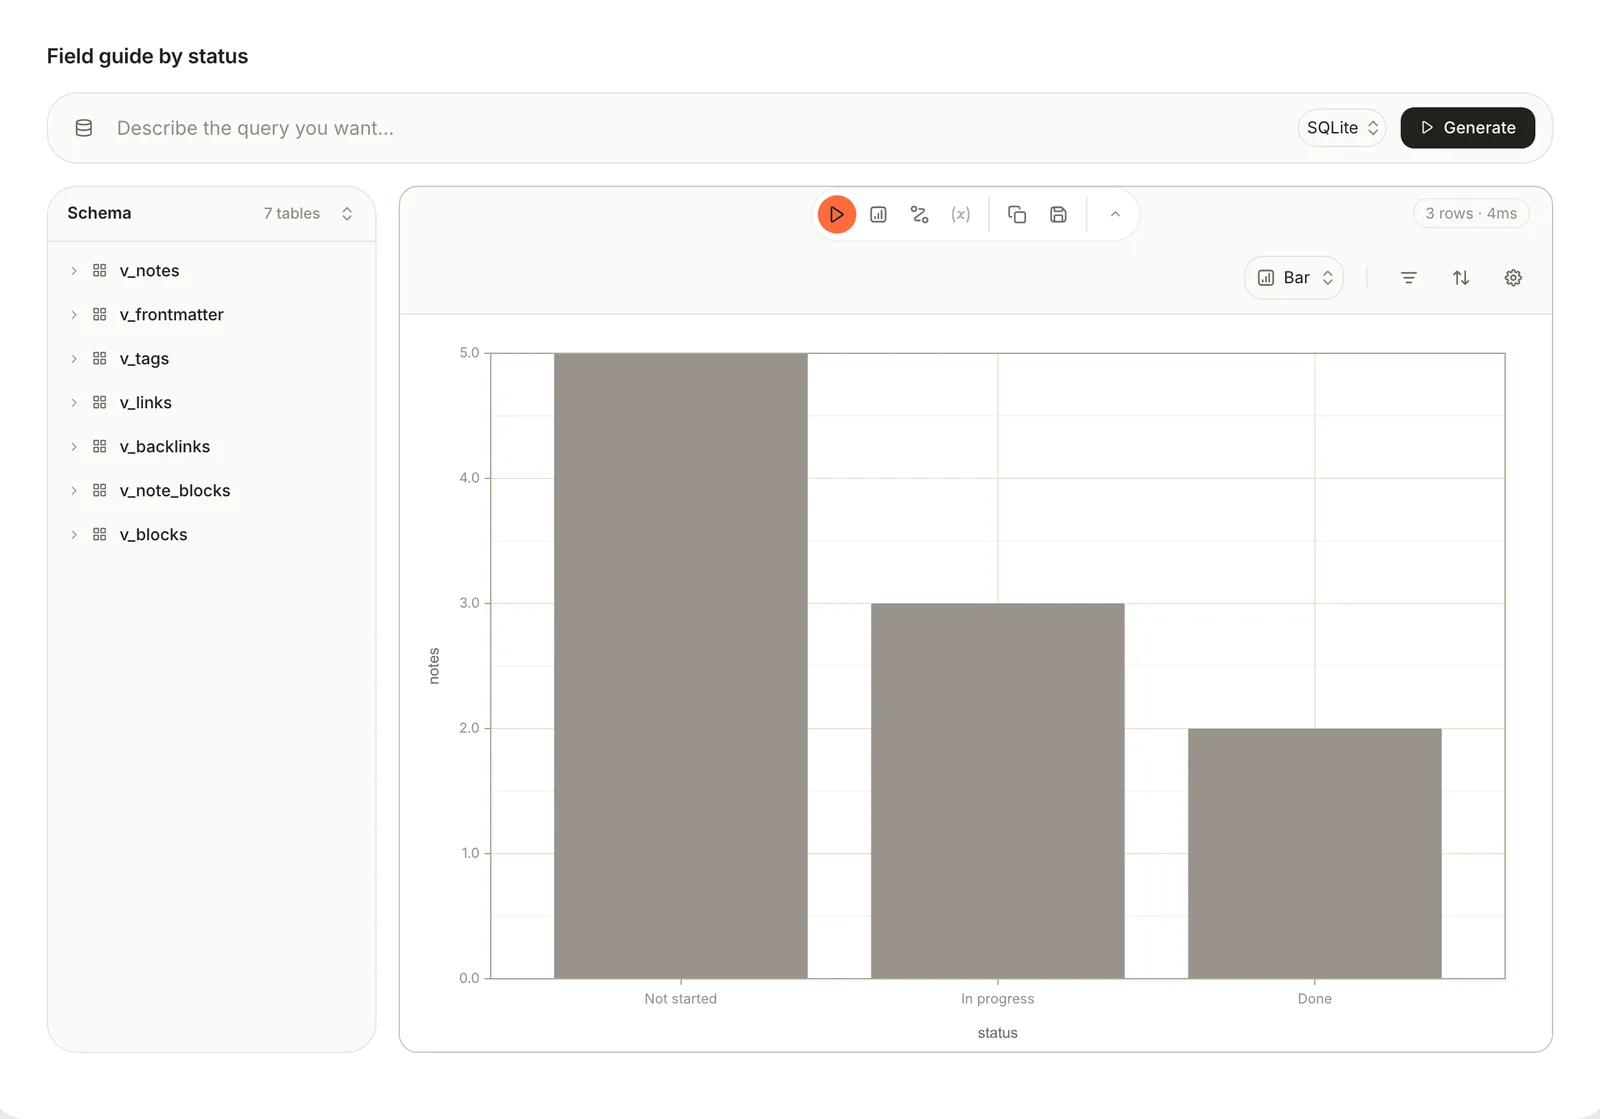
The chart's type and settings aren't saved with the query yet, so set them again after you reopen it.
## Save and reuse queries
Click **Save query** in the tools. Terra checks the statement first, then lists the query under **Queries** in the sidebar and stores it in your Library as `.terra/queries/.json`. To rename it, change the name at the top and save again. The sidebar can change a query's icon and copy its id, but can't rename or delete it yet.
The other tools:
| Tool | What it does |
| --- | --- |
| **Copy SQL** | Copies the statement |
| **Export results as Markdown** | Copies the results as a Markdown table, ready to paste into a note |
| **Open as Database** | Makes a database of the notes the query found, named *Query:* plus the query's name. Save the query first; the results need an `id` or `note_id` column. |
| **Steps** | Splits a long query into steps. A new step starts as `SELECT * FROM {{prev}}`; `{{prev}}` is the step before, and `{{step:}}` any earlier one. |
| **Variables** | Values you can change without editing the SQL. Click **Add variable**, give it a name, a type and a **Value**, and write `:name` in the SQL. |
**Open as Database** captures the notes as they are now; the database doesn't follow the query afterwards. A live query in a note isn't possible yet: export the results, or embed the database. Every variable you add must appear in the SQL, or the run stops with *Invalid parameter name*.
## Make a database from SQL
A database can collect its notes with SQL instead of conditions, and stays live. Open the database's **View preferences**, choose the **Database** tab, and switch **Match by** to **SQL** (the `<>` button). Write a `SELECT` that returns an `id` or `note_id` column:
```sql
SELECT n.id
FROM v_notes n
JOIN v_tags t ON t.note_id = n.id
WHERE t.tag = 'field-guide'
```
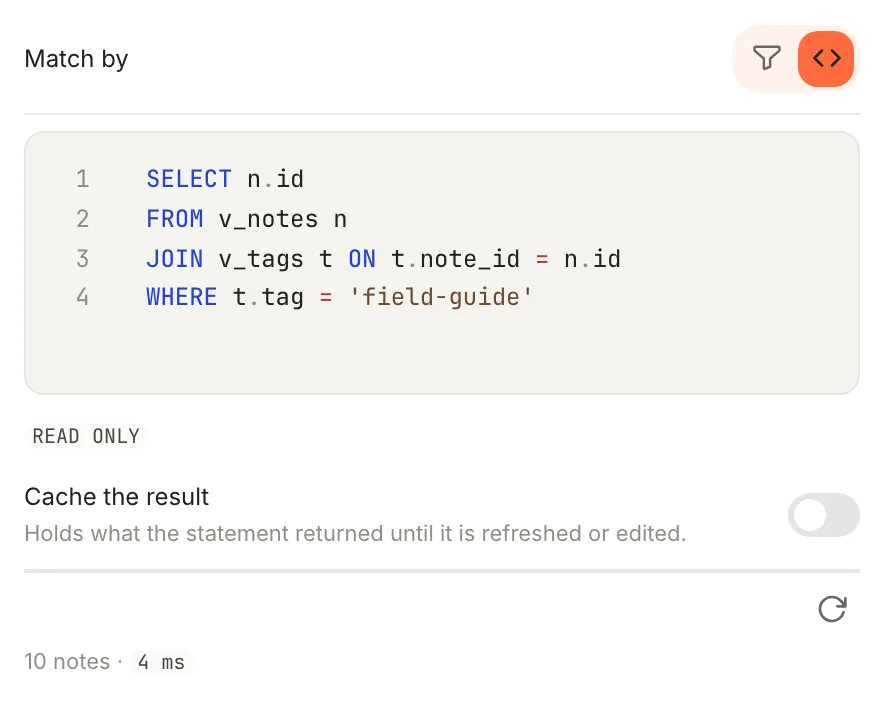
Any other columns the statement returns show up as columns in the database. The same rules apply, with a 5-second limit. Turn on **Cache the result** to keep the last answer until you click **Refresh now** or edit the statement, which helps when the line under it says the query is slow.
## Examples
Notes edited this month, newest first:
```sql
SELECT id, title, updated
FROM v_notes
WHERE updated >= date('now', 'start of month')
ORDER BY updated DESC
```
The 20 most used tags:
```sql
SELECT tag, count(*) AS notes
FROM v_tags
GROUP BY tag
ORDER BY notes DESC
LIMIT 20
```
Notes nothing links to:
```sql
SELECT n.id, n.title
FROM v_notes n
WHERE NOT EXISTS (SELECT 1 FROM v_backlinks b WHERE b.note_id = n.id)
```
Open effort per owner, from three properties:
```sql
SELECT o.value_text AS owner, sum(e.value_number) AS effort
FROM v_frontmatter o
JOIN v_frontmatter e ON e.note_id = o.note_id AND e.key = 'effort'
JOIN v_frontmatter s ON s.note_id = o.note_id AND s.key = 'status'
WHERE o.key = 'owner' AND s.value_text != 'Done'
GROUP BY owner
```
Sprouts by kind:
```sql
SELECT callout_kind, count(*) AS sprouts
FROM v_blocks
WHERE kind = 'callout'
GROUP BY callout_kind
```
## Related
- [Databases](https://terramd.io/docs/databases) — live collections built from conditions, or from SQL.
- [Run a project](https://terramd.io/docs/project-suite#chart-a-burndown) — a burndown chart from a query.
- [Search syntax](https://terramd.io/docs/search-syntax) — find notes without writing SQL.
- [Build a personal dashboard](https://terramd.io/docs/dashboards) — counts and charts on one page.
---
# Tasks
> A task is a checkbox line in any note. Terra gathers every task into Tasks, a board where you set due dates, change status and track progress.
Source: https://terramd.io/docs/tasks
A [task](https://terramd.io/docs/glossary#task) is a checkbox line in a note: `- [ ] Book the copy editor`. There's no separate to-do list to keep in sync. You write a task wherever it comes up, in a meeting note, a project plan or a quick list, and Terra gathers every task from every note into **Tasks**, a built-in [database](https://terramd.io/docs/databases) that opens as a board. Change a task on the board and the line in its note changes too.
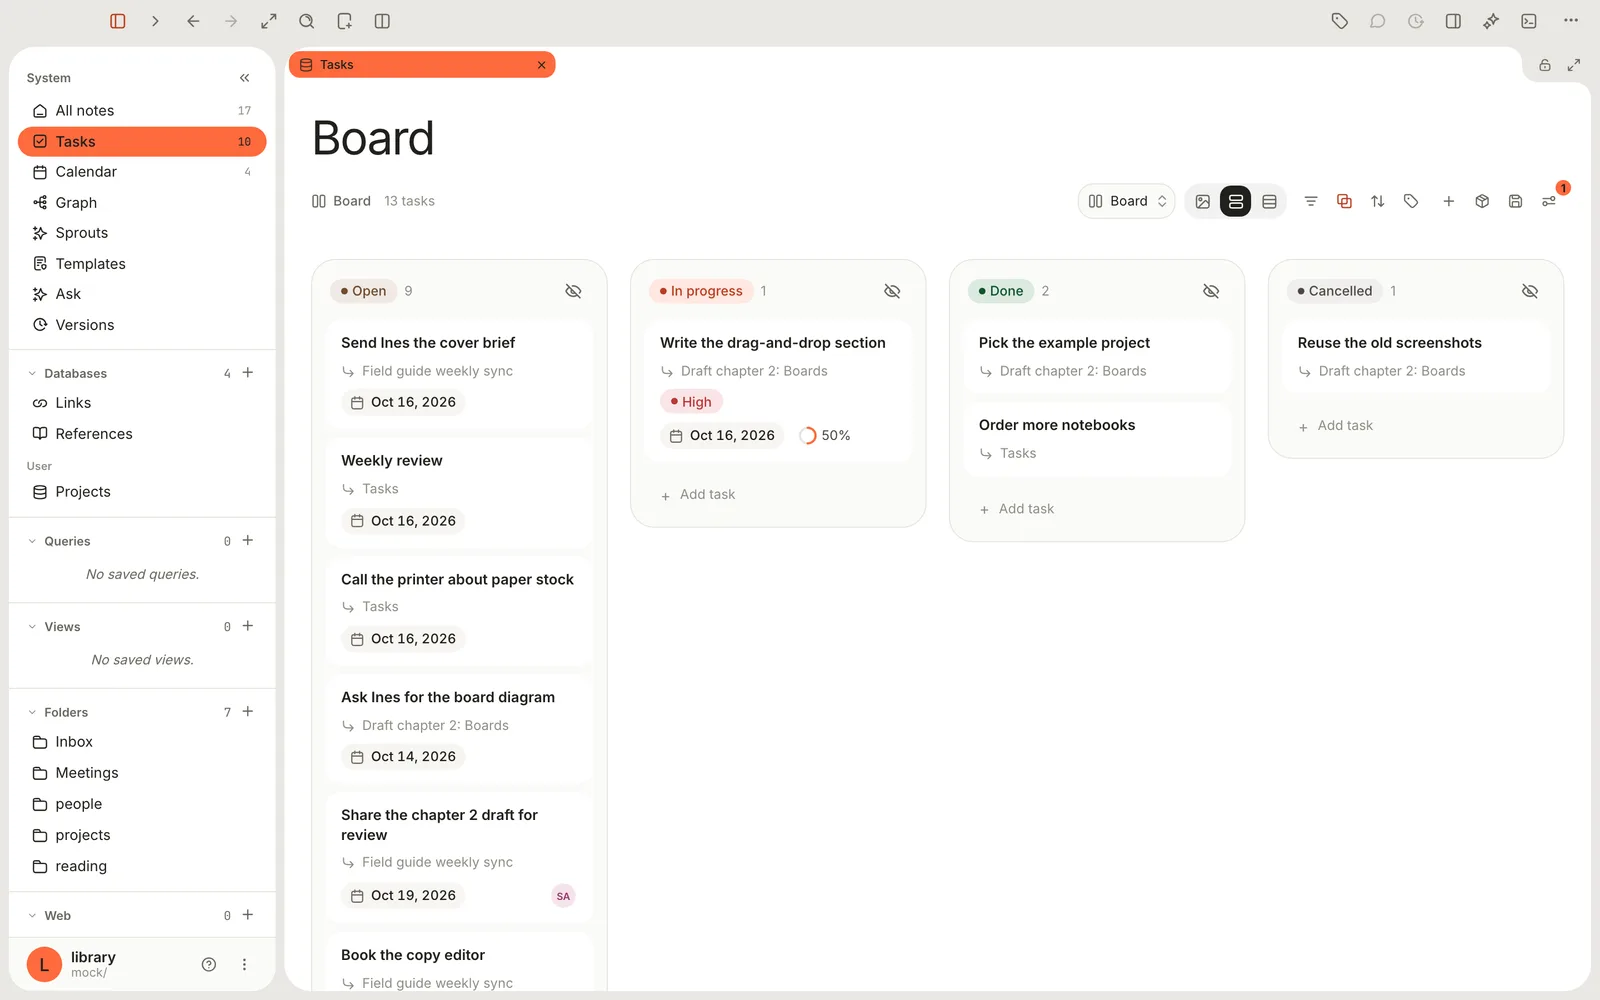
## Write a task
Start a line with `[ ]` and a space, and it becomes a checkbox. You can also type `/todo` and choose **To-do**, click **Task** in the editor toolbar, or choose **Turn into › Task list**. Press Return for the next task and Tab to indent it under the one above as a subtask.
This is what the note holds on disk:
```md
- [/] Write the drag-and-drop section ::: due=2026-10-16 priority=high
- [x] Outline the steps
- [ ] Capture the screenshots
- [ ] Ask Ines for the board diagram ::: due=2026-10-14
- [x] Pick the example project
- [-] Reuse the old screenshots
```
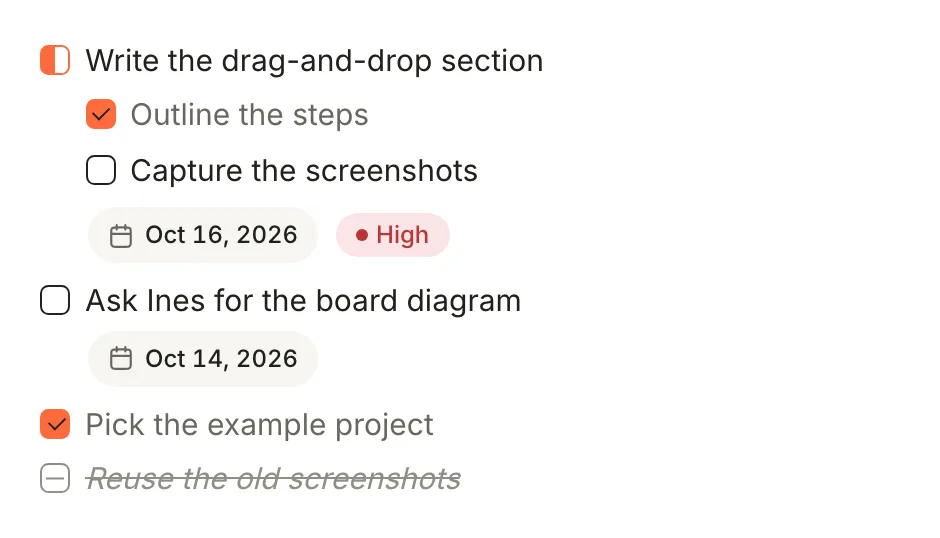
A task has to be a bulleted list item (`-`, `*` or `+`). Numbered items such as `1. [ ] Call Ana` and checkboxes inside code blocks aren't tasks. [Task syntax](https://terramd.io/docs/task-syntax) has every rule.
## Statuses
The character between the brackets is the task's [status](https://terramd.io/docs/glossary#status). Clicking a checkbox in a note steps through all four in turn: Open, In progress, Done, Cancelled, then Open again. So from Open, click twice to tick a task off.
| Type | Status | Use it for |
| --- | --- | --- |
| `- [ ]` | `Open`{gray} | Not started |
| `- [/]` | `In progress`{orange} | Started |
| `- [x]` | `Done`{green} | Finished. `[X]` works too. |
| `- [-]` | `Cancelled`{sky} | Dropped. It stays in the note, struck through. |
### Custom statuses
Add your own statuses when four aren't enough, such as `[?]` for *Needs review*.
1. Open **Settings** (⌘ ,), click **Editor** and scroll to **Task statuses**. (In **Tasks**, the same list is under **View preferences › Statuses**.)
2. Click **+** (**Add status**). The new status gets a free marker, such as `*`.
3. Click its chip and use **Rename**, **Set color**, **Set icon**, **Set marker** and **Set status** (which built-in status it belongs with). **Delete** removes it. Changes save on their own.

A marker is 1 to 4 characters: letters, digits or punctuation, with no spaces or brackets. Two limits: clicking the checkbox of a custom-status task in a note sets it back to Open, and a custom status doesn't create the next copy of a [recurring task](#recurring-tasks).
## Add properties
Properties are extra details on a task: a due date, a priority, who it's for. They live on the same line, after a space, three colons and a space (` ::: `).
- **Type them.** At the end of the task, type ` ::: due=2026-10-20`. When you type a space after it, it becomes a pill. Type ` ::: ` again before each further property.
- **Pick them.** Click in the task, then click **⋯** at the right end of its line and choose **Properties**. Switch on what you need and fill in the pill that appears under the task. Click **×** on a pill to remove it.
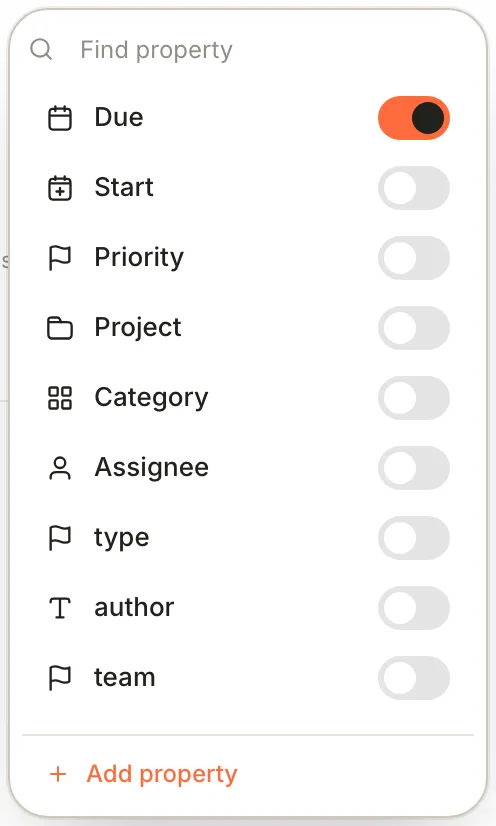
| Property | Type this | What it's for |
| --- | --- | --- |
| **Due** | `due=2026-10-20` or `due=2026-10-20T14:30` | Puts the task on the [Calendar](https://terramd.io/docs/calendar) and makes it overdue after that day |
| **Start** | `start=2026-10-19` | When work should begin |
| **Priority** | `priority=high`, `priority=med` or `priority=low` | Shows as `High`{red}, `Medium`{yellow} or `Low`{sky} |
| **Project** | `project=field-guide` | Groups related tasks |
| **Category** | `category=admin` | Any label you like |
| **Assignee** | `assignee=Sam` | Shows as a person on board cards |
You can invent other keys too, such as `effort=2`. Values can't contain spaces: write `assignee=Sam` or `project=field-guide`.
## The Tasks board
Click **Tasks** in the sidebar. The number beside it counts the tasks that aren't done or cancelled. The board has a column for each status, and each card shows the task, the note it lives in, and its due date, priority, assignee and subtask progress.
- **Change status:** drag a card to another column. Terra rewrites the checkbox in the note.
- **Add a task:** click **Add task** at the foot of a column, type and press Return. The task is written to `Inbox/tasks.md` with that column's status. To write it into another note, click the note name under the field (or press Tab) and pick one.
- **Edit a task:** click its card (see the next section).
- **Rearrange:** **Filters**, **Show boards as** (group by due date, priority, project, assignee or note instead of status), **Sort**, **Properties** (what cards show) and **Add view** work as in any database. **Show boards as** has no entry for status; to get the status columns back, use **View preferences › Group › Primary group**. See [Filter, sort and group](https://terramd.io/docs/filter-sort-and-group) and [Views and layouts](https://terramd.io/docs/views-and-layouts). **Add task** is only in the Board layout.
Done and cancelled tasks stay on the board. To hide them, add two filters: **Status** › **is not** › **done**, and the same for **cancelled**.
## Edit task
Clicking a card opens **Edit task**: the title, the note it's in, a status pill, its property pills and its subtasks.
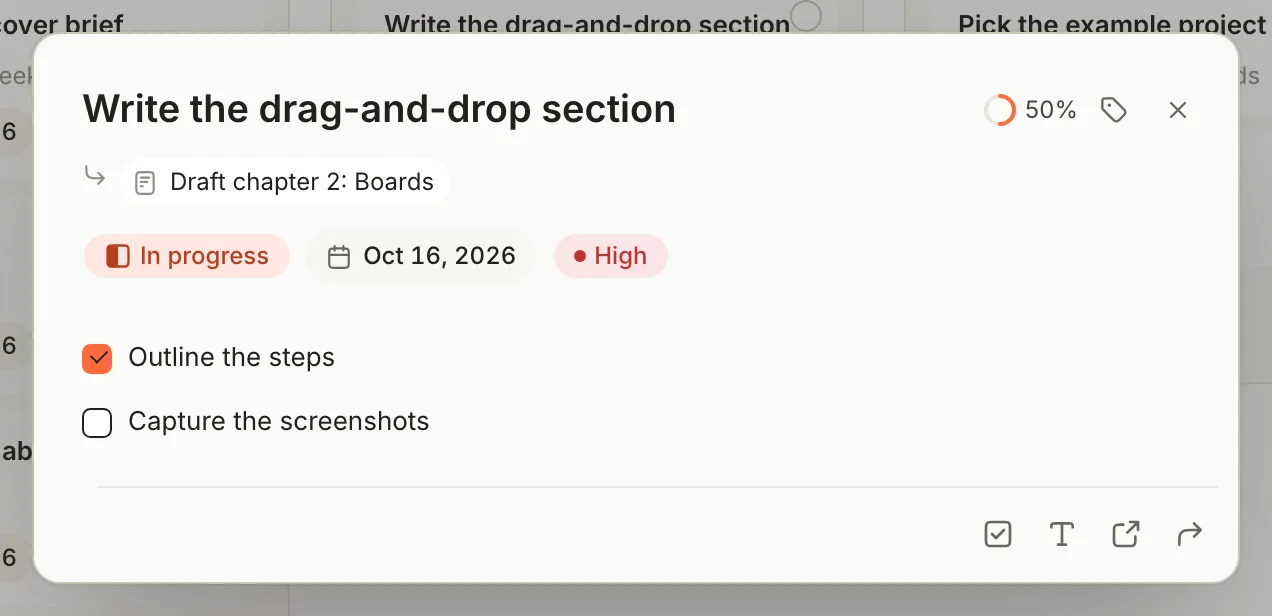
- Click the status pill to pick a status, or the tag button at the top to choose which properties the task has.
- Click the note name to jump to the task in its note. The title can't be edited here; change it in the note.
- The buttons along the bottom are **Add subtask**, **Add description**, **Open task in note** and **Move task to note**.
- **Move task to note** moves the task, with its subtasks and description, under a `## Tasks` heading in the note you pick. **New note: …** at the top of the list gives the task a note of its own, in `Inbox`.
Each new subtask goes in above the existing ones. Drag the handles to reorder them. Press Esc to close the dialog.
## Recurring tasks
A task with a due date and a `repeat=` rule comes back after you finish it:
```md
- [ ] Weekly review ::: due=2026-10-16 repeat=weekly
```
When you mark it **Done** or **Cancelled** on the board, in **Edit task**, on the Calendar or in the Tasks drawer, Terra updates the line and adds the next one straight below it:
```md
- [x] Weekly review ::: due=2026-10-16 repeat=weekly
- [ ] Weekly review ::: due=2026-10-23 repeat=weekly
```
Rules include `daily`, `weekly:mon,wed,fri`, `monthly:1` and `every:2w`, with optional end dates and counts; the full list is in [Task syntax](https://terramd.io/docs/task-syntax#repeating-tasks). There's no menu for rules yet: you type them.
> [!IMPORTANT] Ticking the box in the note doesn't repeat
> Clicking the checkbox in a note changes the status but doesn't add the next copy. Finish repeating tasks on the board, in Edit task, on the Calendar or in the Tasks drawer.
## The Tasks drawer
The Tasks drawer keeps a note's tasks beside it while you write. Click **Properties** in the toolbar (⌘ R) to open the panel on the right, then click **Show Tasks** in the row of buttons along its bottom. See [Drawers](https://terramd.io/docs/find-your-way-around#drawers) for the rest of the panel.
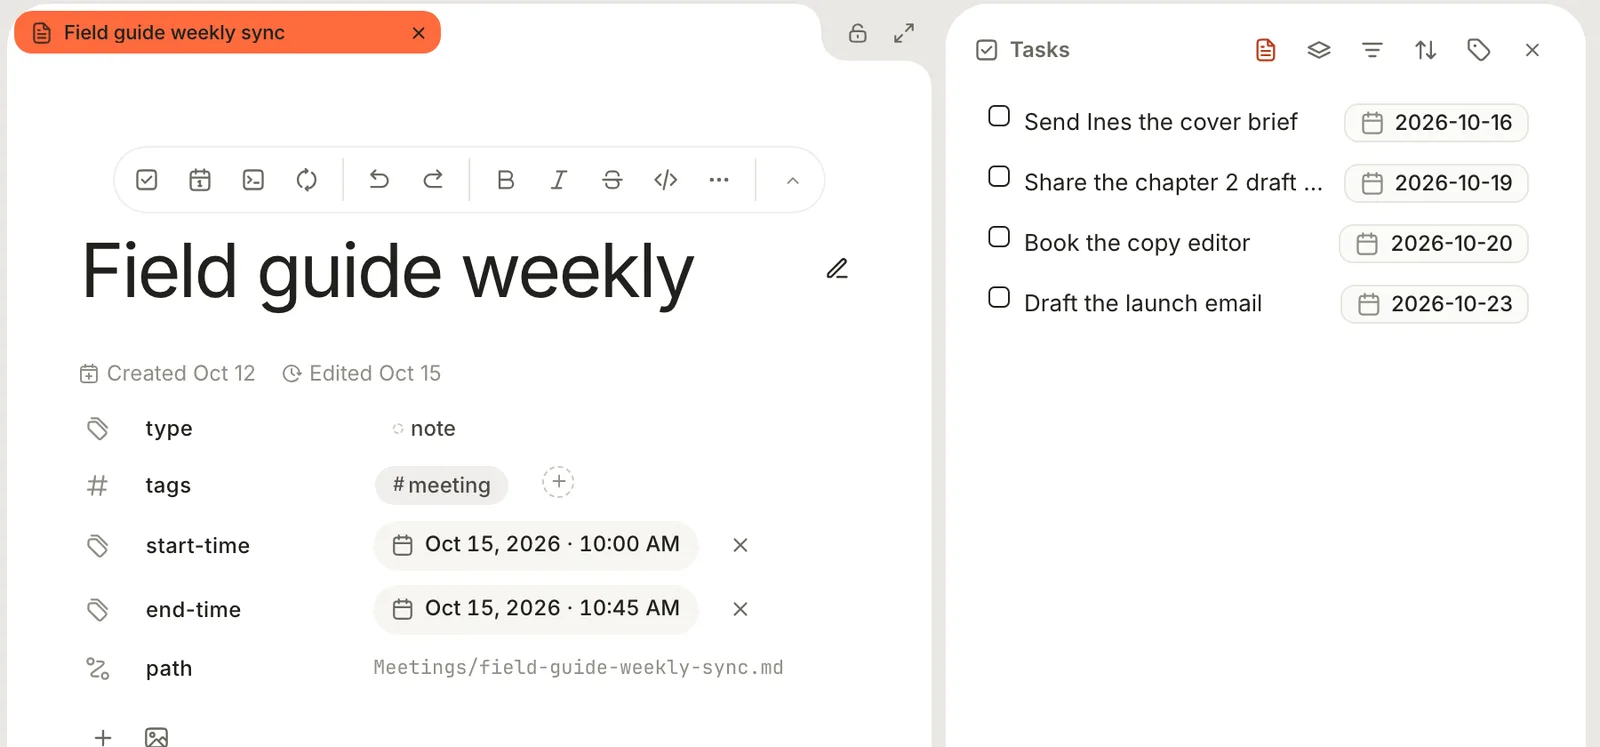
The drawer lists the open note's tasks. Switch to **Library** to see every task. Click a task to open its note, click its marker to move to the next status, or right-click the marker to pick one. The note's footer has a ring showing how many of its tasks are done; click it to jump to any of them.
## Delete and restore a task
To delete a task, delete its line in the note, or click it on the [Calendar](https://terramd.io/docs/calendar) and choose **Delete**. The board has no delete.
Tasks deleted from the Calendar can be brought back. In **Tasks**, click **Sources** and choose **Deleted tasks**, then click **Restore** beside the task. **⋯** › **Delete permanently** removes it for good. Lines you delete by editing a note aren't listed there; use undo instead.
## Tasks for one project
The built-in **Tasks** always shows every task. For a board of one project's tasks, right-click **Tasks** in the sidebar, choose **New task database**, name it and click **Create**. In its header, click **Sources** and pick the project's folder or notes. Tasks you add on that board go into a note named after the database, inside the project's folder. [Run a project](https://terramd.io/docs/project-suite) builds one step by step.
## Troubleshooting
> [!NOTE]- A task doesn't show up in Tasks
> Check that the line is a bulleted list item, not a numbered one, with a space between the `-` and the `[`. Checkboxes inside code blocks are ignored, and so are markers longer than four characters.
> [!NOTE]- The properties show as plain text instead of pills
> Usually a value contains a space, such as `assignee=Sam Lee`, and Terra then reads the whole property list as part of the title. Remove the space. The older `due:2026-10-20` form without ` ::: ` is plain text too. In this version, a task with a description (indented lines under it) also shows its properties as text in the note, although Tasks still reads them.
> [!NOTE]- My repeating task didn't come back
> It was probably ticked in the note. Mark it done on the board or in **Edit task**. A repeat also needs a `due=` date, unless the rule includes `repeat-on=completion`.
## Related
- [Task syntax](https://terramd.io/docs/task-syntax) — every marker, property and repeat rule.
- [Calendar](https://terramd.io/docs/calendar) — tasks by due date, beside your meetings.
- [Run your week with tasks and the calendar](https://terramd.io/docs/run-your-week-with-tasks) — a weekly routine built on this page.
- [Views and layouts](https://terramd.io/docs/views-and-layouts) — more ways to look at Tasks.
---
# Calendar
> The Calendar lays your Library out by date. Meetings appear by their start time and tasks by their due date, and dragging one reschedules it.
Source: https://terramd.io/docs/calendar
The Calendar is a built-in view of your [Library](https://terramd.io/docs/libraries) by date. A [note](https://terramd.io/docs/glossary#note) appears on the day in its `start-time` [property](https://terramd.io/docs/properties), which suits meetings and appointments, and a [task](https://terramd.io/docs/tasks) appears on its due date. Nothing is copied: each item on the Calendar *is* the note or the task line, so moving it to another day changes the date in the note.
Click **Calendar** in the sidebar to open it.
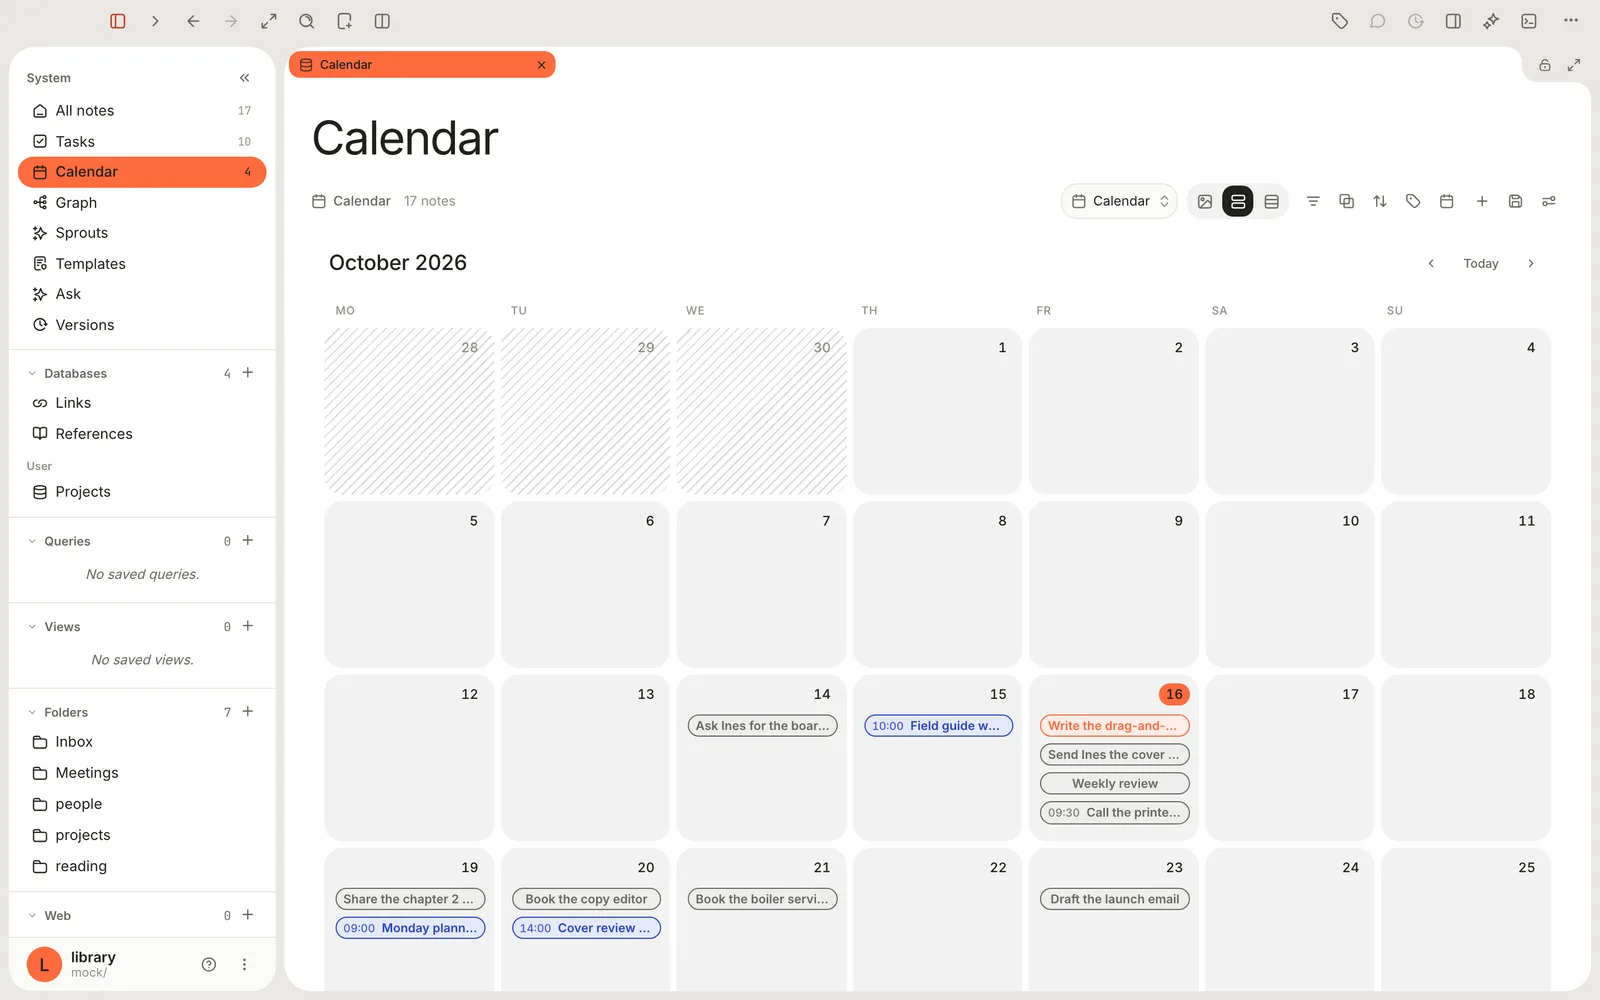
## What shows up
| Item | What puts it on the Calendar | How it looks |
| --- | --- | --- |
| A note | A date in its `start-time` property | The title, after the start time. A date with no time makes it an all-day item. |
| A task | A `due=` date on its line | The title, outlined in its [status](https://terramd.io/docs/tasks#statuses) colour, after the time if the due date has one |
Everything else stays off the Calendar: notes without `start-time`, tasks without a due date. Tasks appear whatever their status, so finished ones stay on their day as a record.
Events from Google Calendar can't be shown yet. **Settings › Integrations** lists Google Calendar as **Coming soon**.
## Put a note on the Calendar
There's no button for creating an event on the Calendar itself. A meeting is a note with a start time:
1. Open the note, or create one. The **Meeting** template is a good start (see [Take meeting notes](https://terramd.io/docs/meeting-notes)).
2. Under the note's properties, click **+** (**Add property**), choose **Existing property**, then `start-time`.
3. Pick the date and time.
4. For a meeting with a length, add `end-time` the same way, then set the Calendar's **End** as described in [Choose the dates it uses](#choose-the-dates-it-uses).
In the note's file they're ordinary properties, with values such as `2026-10-20T14:00`.
To put a task on the Calendar, give it a due date: `::: due=2026-10-20`. See [Task syntax](https://terramd.io/docs/task-syntax#dates).
## Open, change and reschedule
- **Click an item** for a small card. A task's card has its status colours, **Low**, **Medium** and **High** priority buttons, **Open note** and **Delete**. A note's card shows its start and end, a few lines of the note, **Open note** and **Delete**.
- **Drag an item to another day** to reschedule it. A task gets a new `due=`; a note gets a new `start-time` (and `end-time`, moved by the same amount). The time of day stays the same.
- **Move between months** with the arrows beside **Today**, and click **Today** to come back.
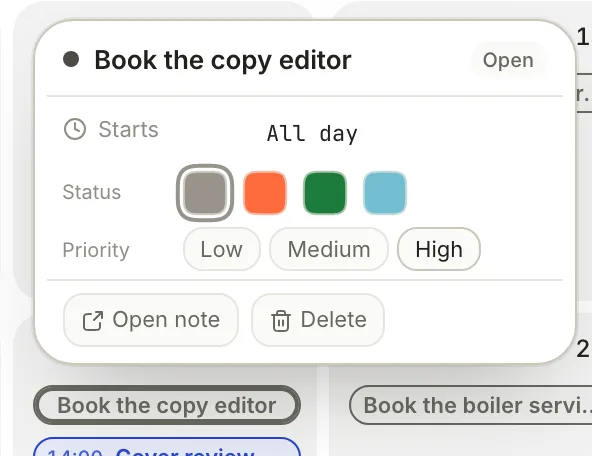
> [!WARNING] Delete on a note deletes the note
> On a task's card, **Delete** removes only that task line, and you can restore it from **Tasks › Sources › Deleted tasks**. On a note's card, **Delete** moves the whole note, meeting minutes and all, to the Trash.
A day shows up to four items. When there are more, it says **+2 more** (or however many); open the day's notes from **Tasks** or the Calendar drawer instead, because the label can't be clicked yet.
## Display modes
The **Display mode** menu in the header lists **Month**, **Week**, **Day** and **Agenda**. In this version the built-in Calendar always shows the month grid: picking another mode there doesn't change it. The other modes work in calendars you make yourself; see [Calendars of your own](#calendars-of-your-own).
## Choose the dates it uses
By default the Calendar places notes by `start-time` and gives them no end. To use other properties, or to show meeting lengths:
1. In the Calendar's header, click **View preferences** (the sliders at the far right).
2. Click **Dates**.
3. Pick a property for **Start** and one for **End**. Most people only set **End** to `end-time`.
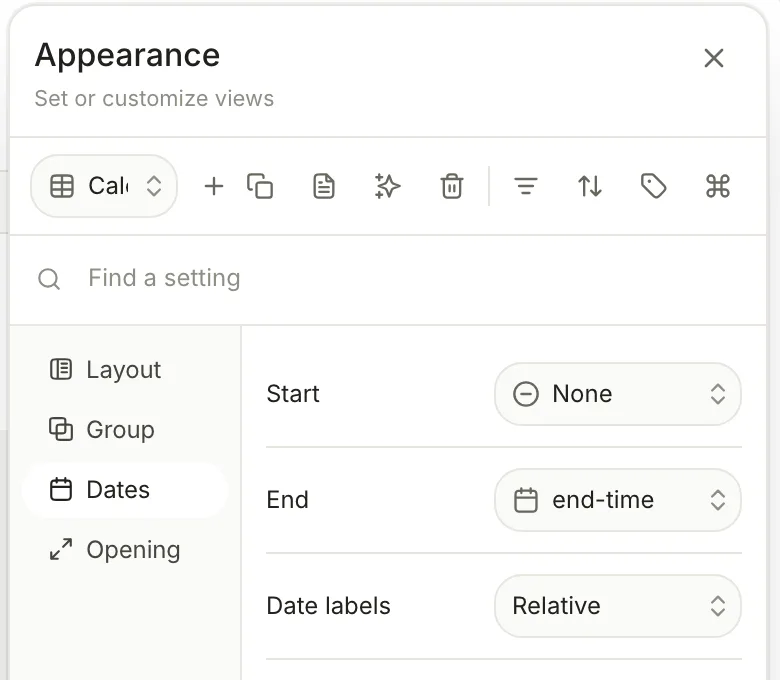
Any date property works, for example a `deadline` property on your project notes. These choices are saved for the whole Library.
## The Calendar drawer
To see one day beside whatever you're working on, click **Properties** in the toolbar (⌘ R) to open the panel on the right, then click **Show Calendar** in the row of buttons along its bottom. The drawer has a small month with a dot under each busy day. Click a day to list its **Events** (notes with both a `start-time` and an `end-time`) and its **Tasks**.
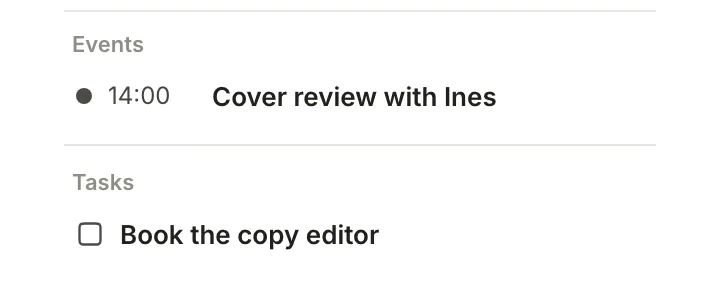
You can also hover the number beside **Calendar** in the sidebar to list the events for **Today**, **This week** or **This month**.
## Calendars of your own
The built-in Calendar shows the whole Library. For a calendar of your own, right-click **Calendar** in the sidebar, choose **New calendar database**, give it a name and click **Create**. It appears under **Calendar**, uses the same start and end properties, and starts with every note; use **Filters** in its header to narrow it, for example to the `Meetings` folder (see [Filter, sort and group](https://terramd.io/docs/filter-sort-and-group)). Here, **Display mode** switches between **Month**, **Week**, **Day** and **Agenda**, which lists the next two weeks.
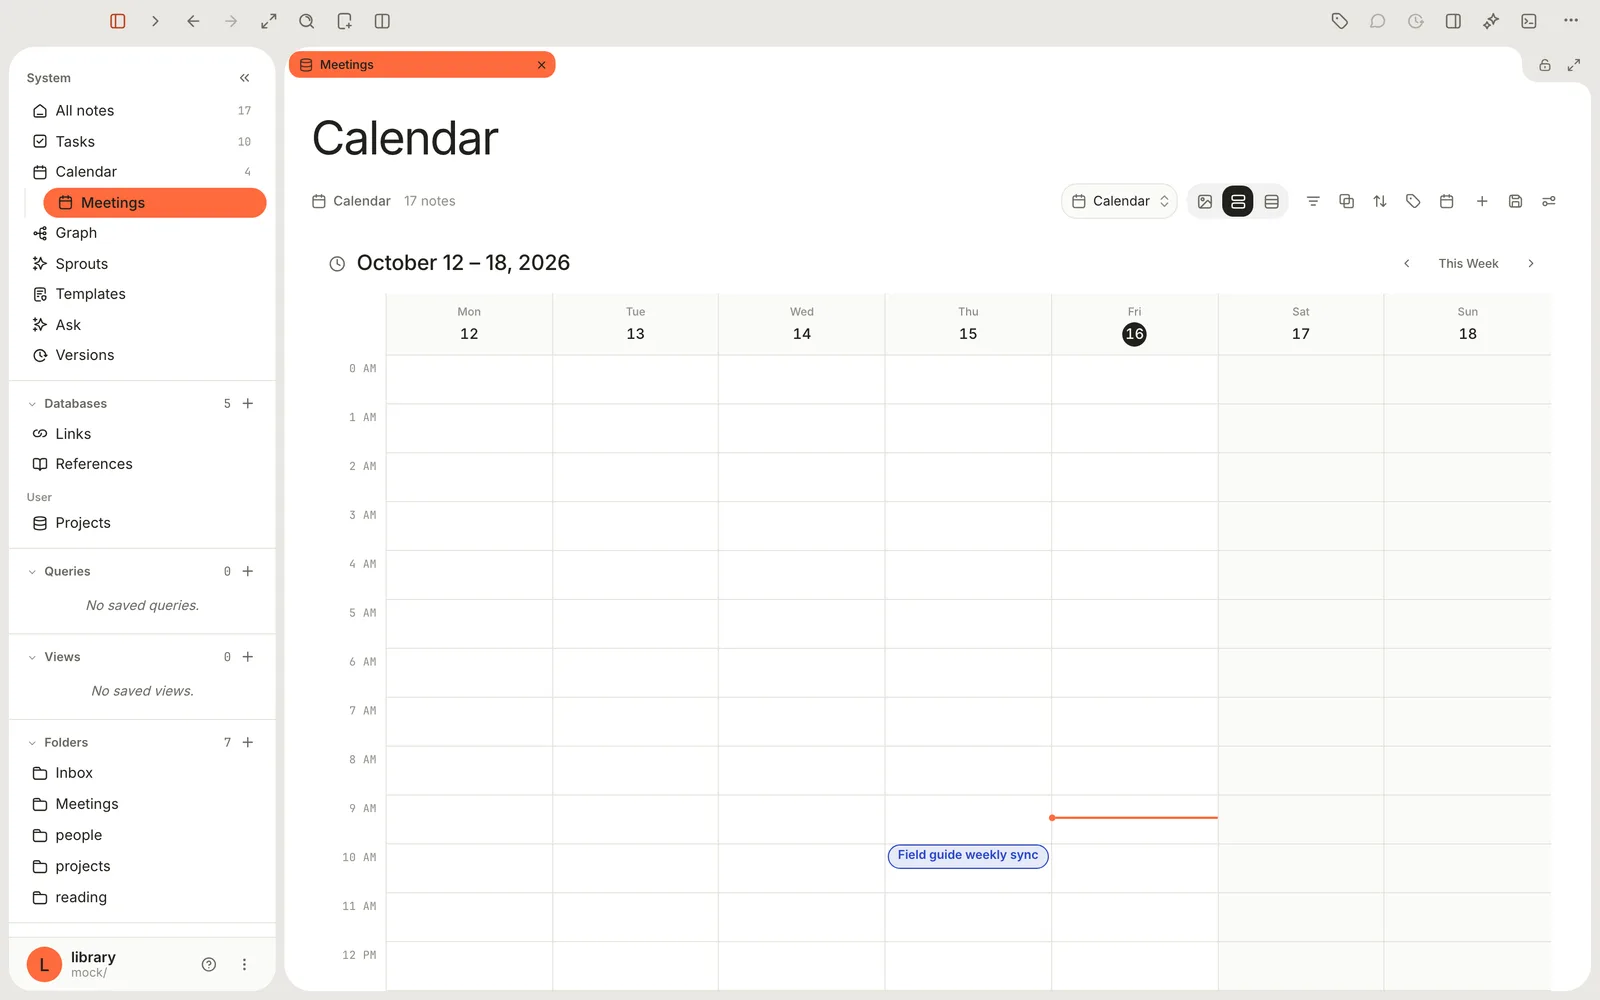
A calendar of your own shows notes only: tasks appear on the built-in Calendar. Any database can also be shown as a calendar by choosing the **Calendar** layout for one of its views; see [Views and layouts](https://terramd.io/docs/views-and-layouts).
## Week start and time zone
The Calendar's weeks always start on Monday, and times are shown in your Mac's time zone. **Settings › General** has **Week starts** and **Timezone**, but they don't change the Calendar: they're for weekly groups in databases, date pickers, scheduled reports and logs.
## Daily notes
Terra has no daily-note button that opens today's page. The **Daily log** template (**File › New from Template…**, ⇧ ⌘ N) makes a page headed with today's date, with **Wins**, **Blockers** and **Tomorrow** sections. Like any note, it appears on the Calendar only if you give it a `start-time`.
## Troubleshooting
> [!NOTE]- My meeting note isn't on the Calendar
> It needs a `start-time` property. Writing the date in the text, as the **Meeting** template does, isn't enough. If you've changed **View preferences › Dates › Start**, the note needs that property instead.
> [!NOTE]- My meetings show as a single time, not a block
> Set **End** to `end-time` under **View preferences › Dates**, and give the note an `end-time` later than its `start-time`.
> [!NOTE]- A note without a time shows up a day early
> In this version, a note whose start is a date with no time can land on the day before in time zones behind UTC, such as the Americas. Tasks aren't affected. Give the note a time, even 09:00, and it lands on the right day.
> [!NOTE]- I picked Week but still see the month
> On the built-in Calendar, **Display mode** has no effect in this version. Use the Calendar drawer for one day, or make a calendar database of your own for Week, Day and Agenda.
## Related
- [Tasks](https://terramd.io/docs/tasks) — due dates, statuses and the board.
- [Take meeting notes that turn into tasks](https://terramd.io/docs/meeting-notes) — meetings on the Calendar, action items in Tasks.
- [Run your week with tasks and the calendar](https://terramd.io/docs/run-your-week-with-tasks) — a weekly routine.
- [Views and layouts](https://terramd.io/docs/views-and-layouts) — the Calendar layout for any database.
---
# Read comfortably in the e-reader
> Add EPUBs, PDFs and images to your Library, then read with your own theme, font and layout. Terra remembers your place in every book.
Source: https://terramd.io/docs/read-in-the-e-reader
Most of us read in one app and think in another. The book lives in an ebook app, the ideas it sparks end up in a notes app, and the two never meet again.
In Terra, a book is part of your Library. You drop in an EPUB and it opens in Terra's own reader — your theme, your font, one column or two — with a note of its own for your thoughts. Close it mid-sentence and it reopens on the same paragraph, weeks later.
> [!SUMMARY]
> - Add books, PDFs and images to your Library
> - Find your way around the reader and move through a book quickly
> - Make the page comfortable: theme, font, size, spacing, columns
> - Read with your notes open beside the book
> - Use the keyboard for everything
> [!BEFORE]
> - Terra open with a Library. New to Terra? Start with the [Quickstart](https://terramd.io/docs/quickstart).
> - An `.epub` file without DRM. Books from stores that lock their files (copy protection) won't open; publishers and libraries that sell DRM-free EPUBs work fine.
> - About 10 minutes.
## How it fits together
When you add a book, Terra keeps three things together in the folder you chose:
- **The book itself** — the `.epub` file. Terra never changes it.
- **The book's note** — an ordinary note with the title, author, publisher and cover filled in for you. Its body is empty and yours to write in.
- **A small data file** — where Terra keeps your place, your highlights and bookmarks, and this book's display settings. You never have to touch it. [Annotate and keep every mark](https://terramd.io/docs/annotate-in-the-sidecar) explains what's inside.
In your note list you see a single item: the book's note, with an **EPUB** label. Open it and the reader appears.
| File | Opens in | What you can do |
| --- | --- | --- |
| EPUB | The book reader | Read, change the look, highlight, bookmark, export notes |
| PDF | The PDF viewer | Read, zoom, highlight text, draw markup |
| Images (PNG, JPEG, GIF, WebP, SVG, HEIC, AVIF) | The image viewer | View, copy |
Every other kind of file Terra understands is listed in [Accepted file formats](https://terramd.io/docs/file-formats).
## Step 1: Add a book
1. In Finder, find the `.epub` file.
2. Drag it into the Terra window:
- drop it anywhere in the window to put it in your **Inbox**, or
- drop it on a folder under **Folders** in the sidebar to file it there — a `Reading` folder, say.
3. A single book opens straight away. If you dropped several files, Terra shows **Added 3 of 3 files**; click **Show** to see them.
The book appears in the note list with an **EPUB** label beside its folder.
> [!WARNING] Drag books in — don't copy them into the folder
> Terra picks up PDFs and images that you copy into your Library folder in Finder the next time the Library opens, but not EPUBs. Always drag books into the Terra window. Dropping the same book twice makes a second copy.
## Step 2: Find your way around the reader
Open the book by clicking it in the note list.
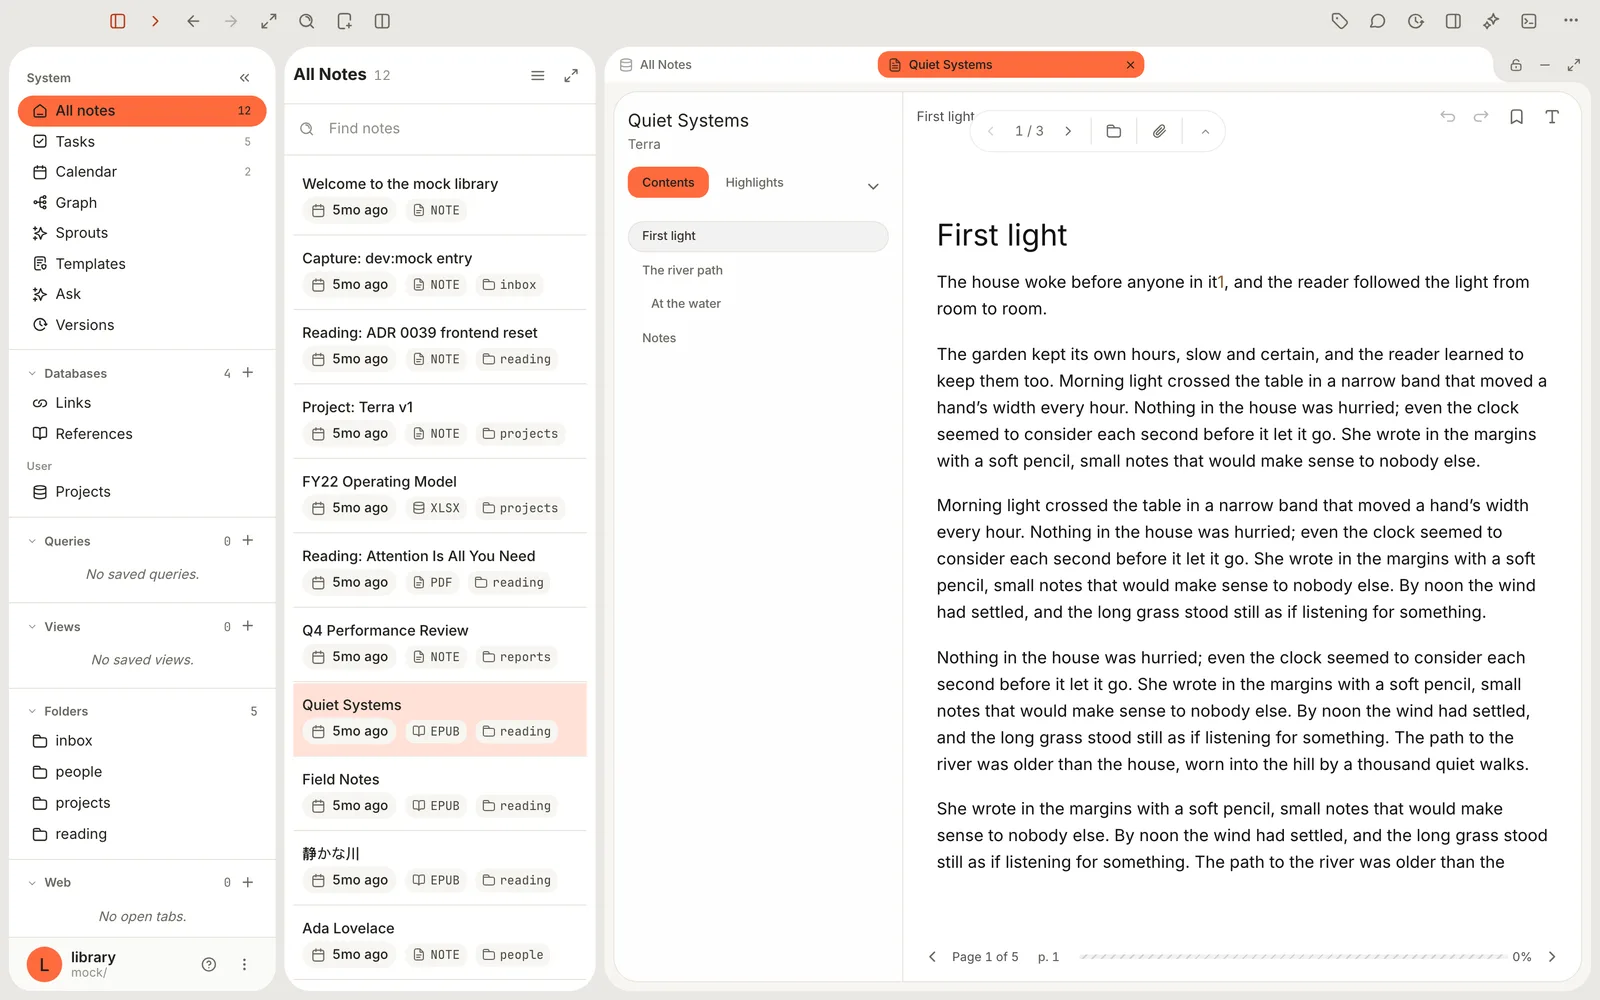
Here's what you're looking at:
- **Left column.** The title and author, then three tabs: **Contents** (the table of contents), **Highlights** and **Bookmarks**. In a narrow pane, **Bookmarks** hides behind the small arrow beside the tabs.
- **Top of the page.** The chapter you're in, **Back** and **Forward** (for jumps within the book), **Bookmark this page**, and **Reader appearance** — the **T** icon at the top right, where every display setting lives.
- **Floating tools.** The pill near the top steps from chapter to chapter (it reads **1 / 3** in a three-chapter book). Beside it are **Reveal in Finder**, **Show note** (the paperclip) and **Hide tools**. Drag the pill to move it out of your way.
- **Bottom of the page.** **Page 1 of 5** is your page *within this chapter*. The bar and the percentage at the right are your progress through the whole book.
## Step 3: Move through the book
Click once on the page first, so the reader has your keyboard. Then:
| To | Press | Or |
| --- | --- | --- |
| Turn to the next page | →, Space or Page Down | Click **Next page** at the bottom right |
| Turn back a page | ←, ⇧ Space or Page Up | Click **Previous page** at the bottom left |
| Go to the next or previous chapter | ⇧ ⌘ → / ⇧ ⌘ ← | Use the arrows in the floating pill |
| Jump to the start or end of the book | ⌘ Home / ⌘ End | |
| Go to a printed page number | ⇧ ⌘ P | Click **Go to page** at the bottom |
| Return to where you were before a jump | ⌘ ⌫ | Click **Back** at the top of the page |
Turning past the last page of a chapter takes you into the next one, so you can read straight through with the arrow keys.
### Jump with the table of contents
Click a chapter in **Contents**. The reader jumps there and briefly outlines where you landed, and the progress bar catches up.
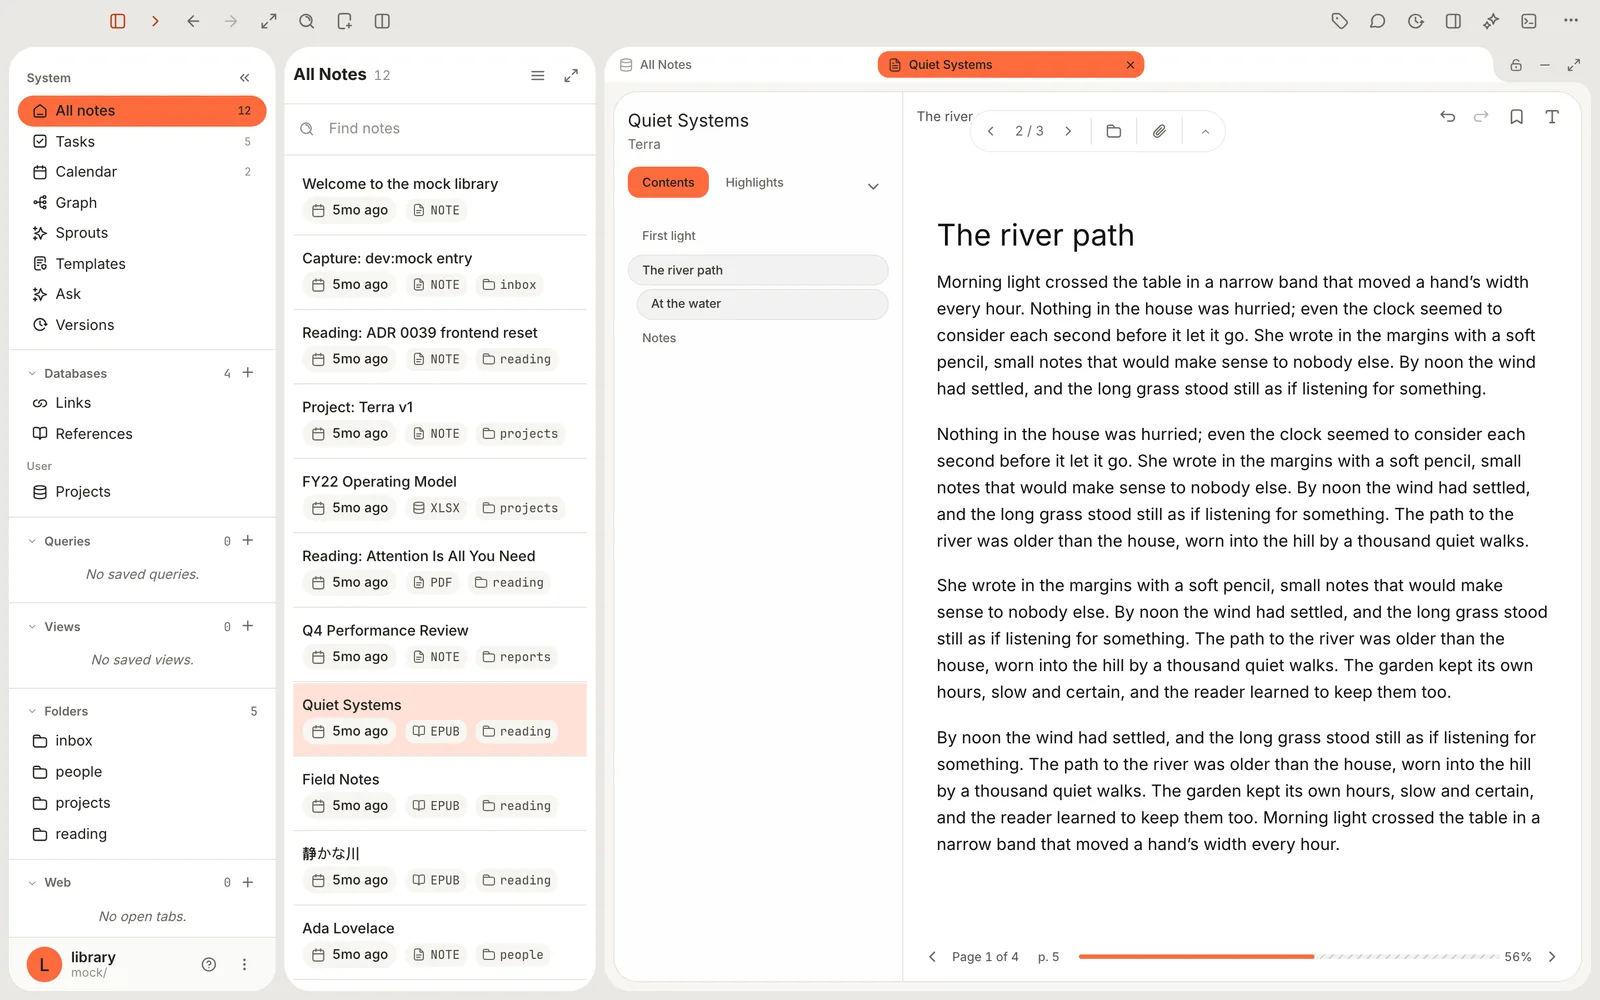
### Go to a page number from the printed edition
Many EPUBs carry the page numbers of the printed book, which is handy when a class or a citation says "see page 112". Click **Go to page** (it shows **p. 1** once Terra knows where you are) or press ⇧ ⌘ P, then type a page label and press Return, or click one in the list. Roman numerals like `xii` work.
### Read footnotes without losing your place
Click a footnote number and the note opens in a small window over the page. Press Esc to close it. If you followed a link somewhere else in the book instead, ⌘ ⌫ brings you back.
### Pick up where you left off
You don't need to do anything. Close the book, quit Terra, come back next month — the book reopens on the paragraph you were reading.
## Step 4: Make the page comfortable
Every display choice lives in one menu, and each book remembers its own settings. Changing them never loses your place.
1. Click **Reader appearance** (the **T** at the top right of the page).
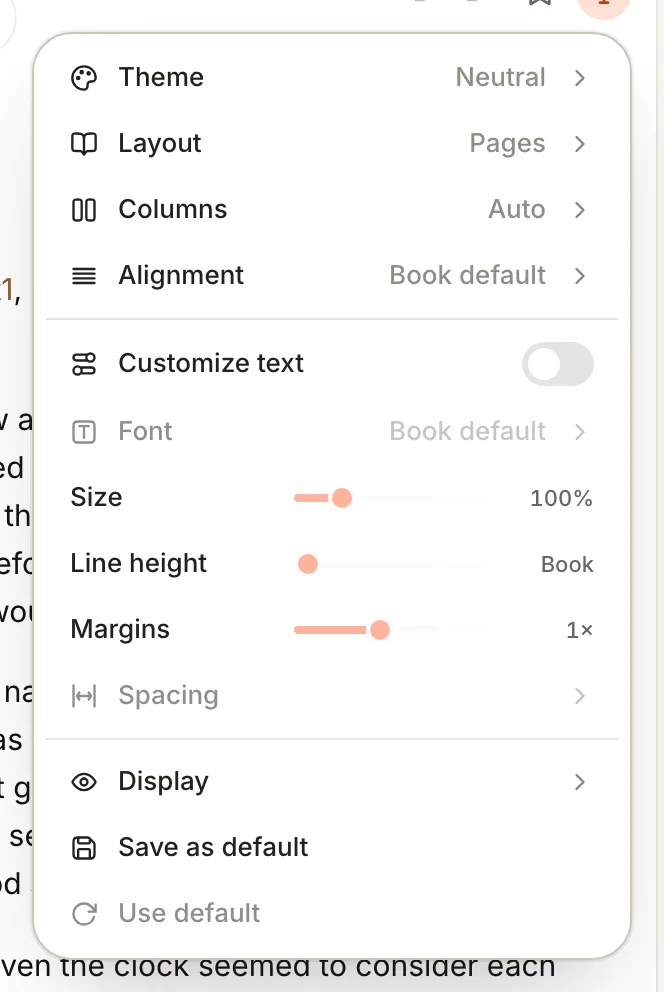
2. Choose a **Theme**: **Neutral**, **Sepia**, **Paper**, **Mint**, **Night**, **High contrast**, **Yellow on black** or **Navy**.
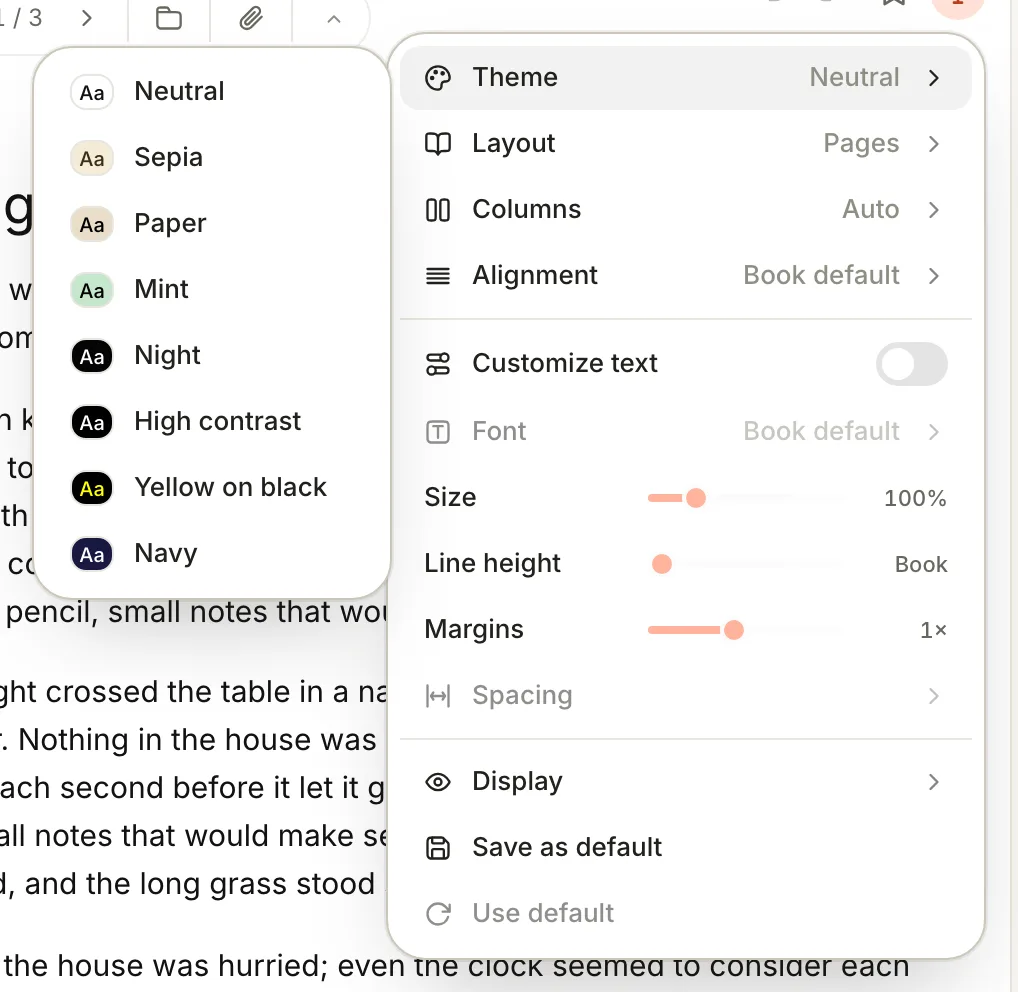
3. Choose a **Layout**: **Pages** turns pages like a book; **Scroll** gives you one long column per chapter.
4. Choose **Columns**: **Auto** shows two columns side by side when the window is wide enough, **One** never does, **Two** always does.
5. Choose **Alignment**: **Book default**, **Justified** (which also hyphenates long words) or **Left**.
6. To change the type, turn on **Customize text**. Now you can pick a **Font** — Open Runde, San Francisco, New York, Avenir Next, Athelas, Charter, Iowan, EB Garamond, Palatino, Georgia, Seravek or JetBrains Mono — and drag **Size**, **Line height** and **Margins**. **Spacing** adjusts the gaps between words, letters and paragraphs.
7. Under **Display**, switch extras on or off: **Footnote popups**, **Page numbers in margin**, **Outline jump targets**, **Reduce motion**, and — in dark themes — **Dim images** and **Invert images** for diagrams that glare.
Turn **Customize text** off any time to go back to the publisher's design. Terra remembers your custom values for when you switch back.
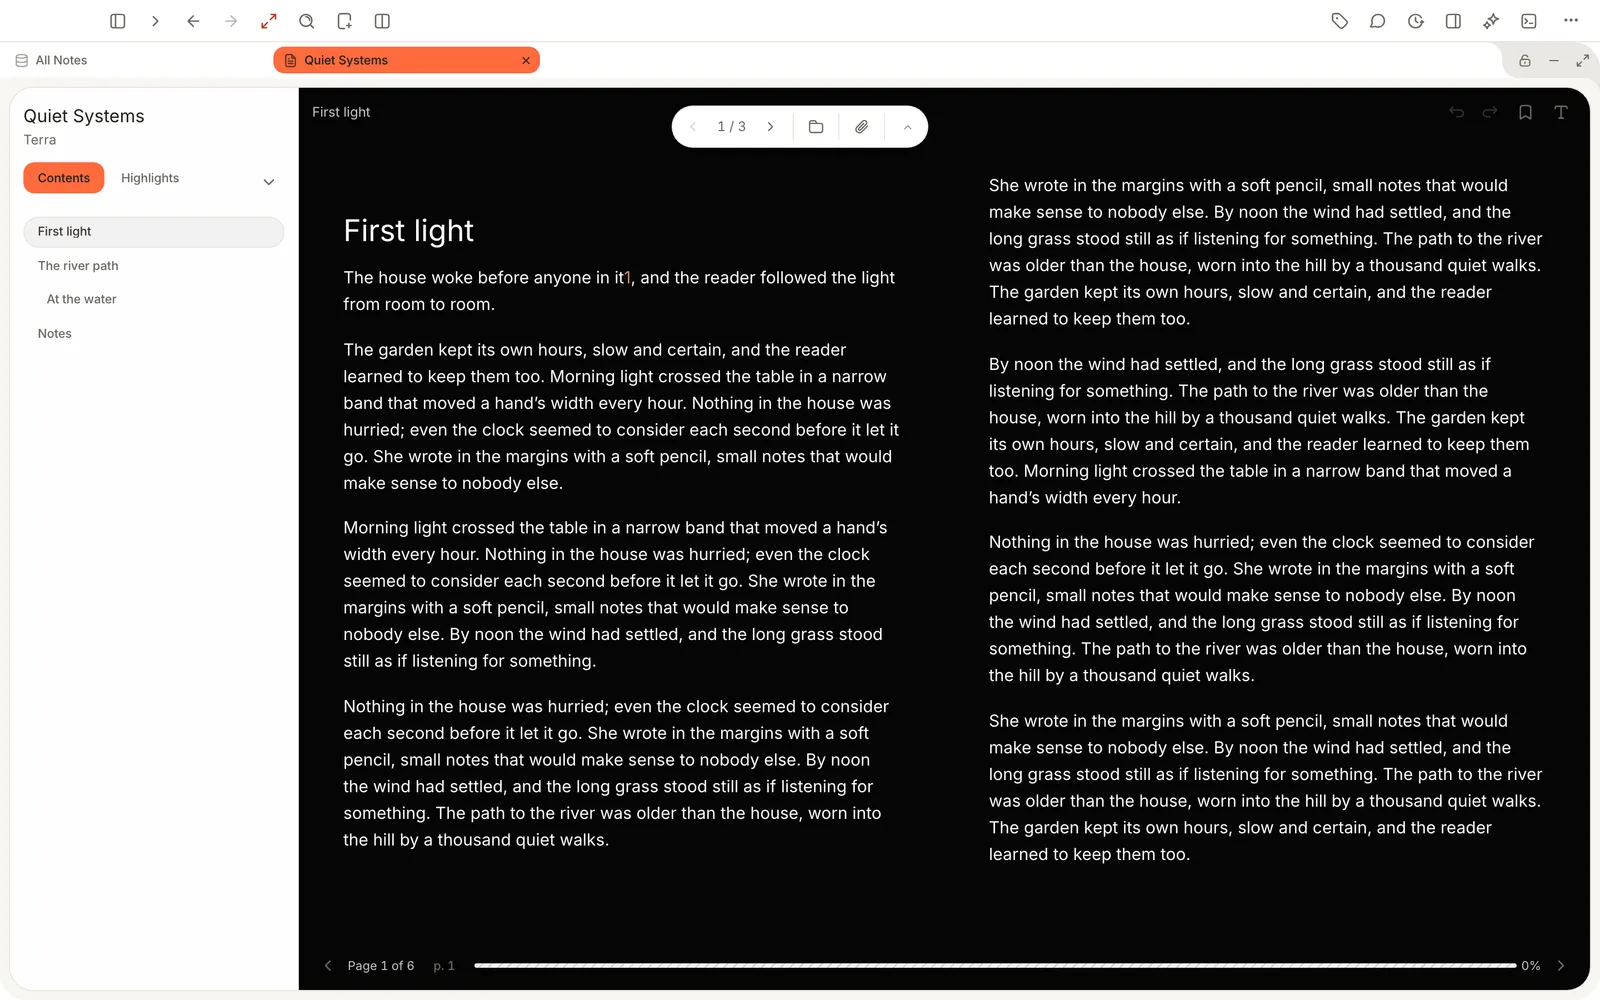
> [!TIP] Set it once for every book
> When a book looks just right, open **Reader appearance** and choose **Save as default**. Every book you open for the first time on this Mac starts that way. To bring a book you've already read in line, open it and choose **Use default**.
### Clear everything else away
Press ⌥ ⌘ Z for **Zen mode**, which hides the sidebar, the note list and the side drawers. Press it again to bring them back. For the whole screen, choose **View › Enter Full Screen**.
## Step 5: Read with your notes beside you
Reading goes further when you write as you go.
- **The book's own note.** Click **Show note** (the paperclip in the floating tools) to open the book's note next to the page. It already has the title, author and cover; add your summary, a rating, tags or a status, and it shows up in your databases like any other note.
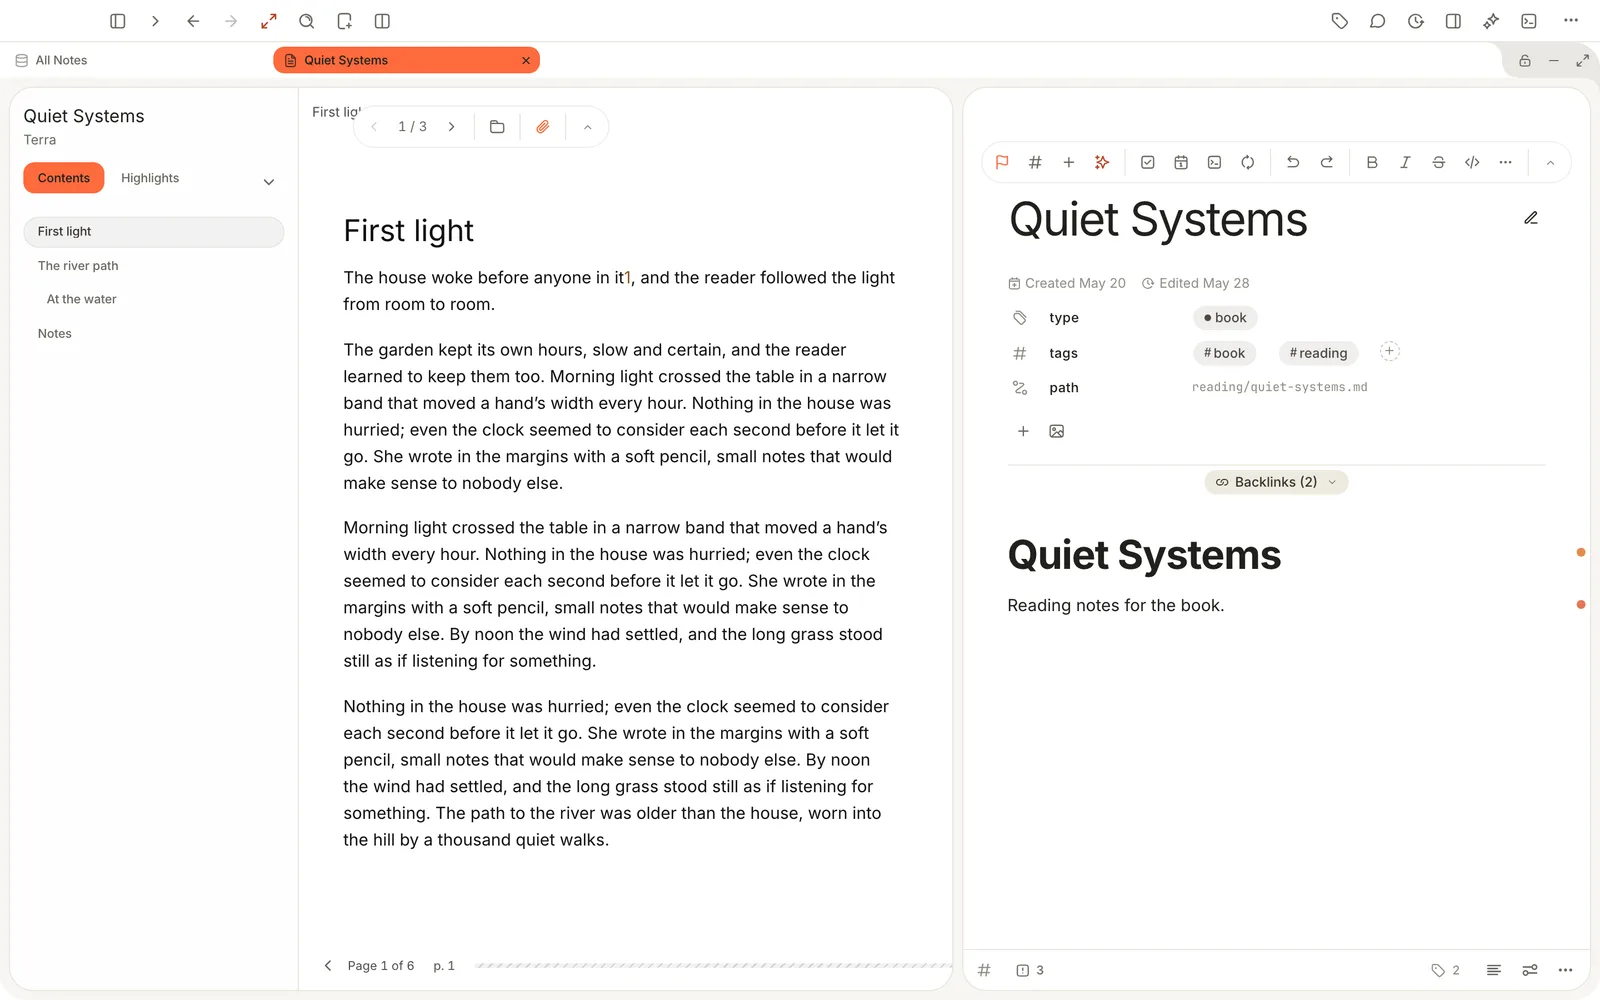
- **A separate note, side by side.** For long notes — a chapter-by-chapter summary, an essay you're drafting — open the book in one pane and your writing in another. Right-click the book in the note list and choose **Open as › Right pane** (in a database view it's **Open in side › Right**), then open your writing in the other pane. [Find your way around](https://terramd.io/docs/find-your-way-around) has more on panes.
> [!TIP] Keep long reading notes in their own note
> The book's note and the reader both save to the book's files. If you're writing a lot while also highlighting, a separate note open beside the book keeps each kind of work in its own place.
## Step 6: Bookmark your place
Press ⌘ B or click **Bookmark this page**. A small mark appears in the margin and the button changes to **Remove bookmark**. Bookmarks are listed on the **Bookmarks** tab; click one to jump back.
To give a bookmark a name — "Start of the argument", "Quote for Thursday" — press ⌥ ⇧ B instead, type a **Name** and click **Save**.
Highlights and bookmarks have a guide of their own: [Annotate and keep every mark](https://terramd.io/docs/annotate-in-the-sidecar).
## Features you might have missed
### Search inside every book at once
Press ⇧ ⌘ F and search your Library. Terra searches the text of your books too, not just their titles, so a half-remembered phrase finds the book it came from. The book opens where you last left it; there's no search within a single open book yet.
### Picture books, comics and textbooks
Some EPUBs are laid out page by page, like a magazine (a *fixed-layout* book). Terra shows these as real pages, with **Zoom in** and **Zoom out** at the top (⌘ 9 and ⌘ 8; ⌘ 0 fits the page to the window again), and **Spreads** instead of **Columns** in **Reader appearance**. You can bookmark these pages but not highlight them.
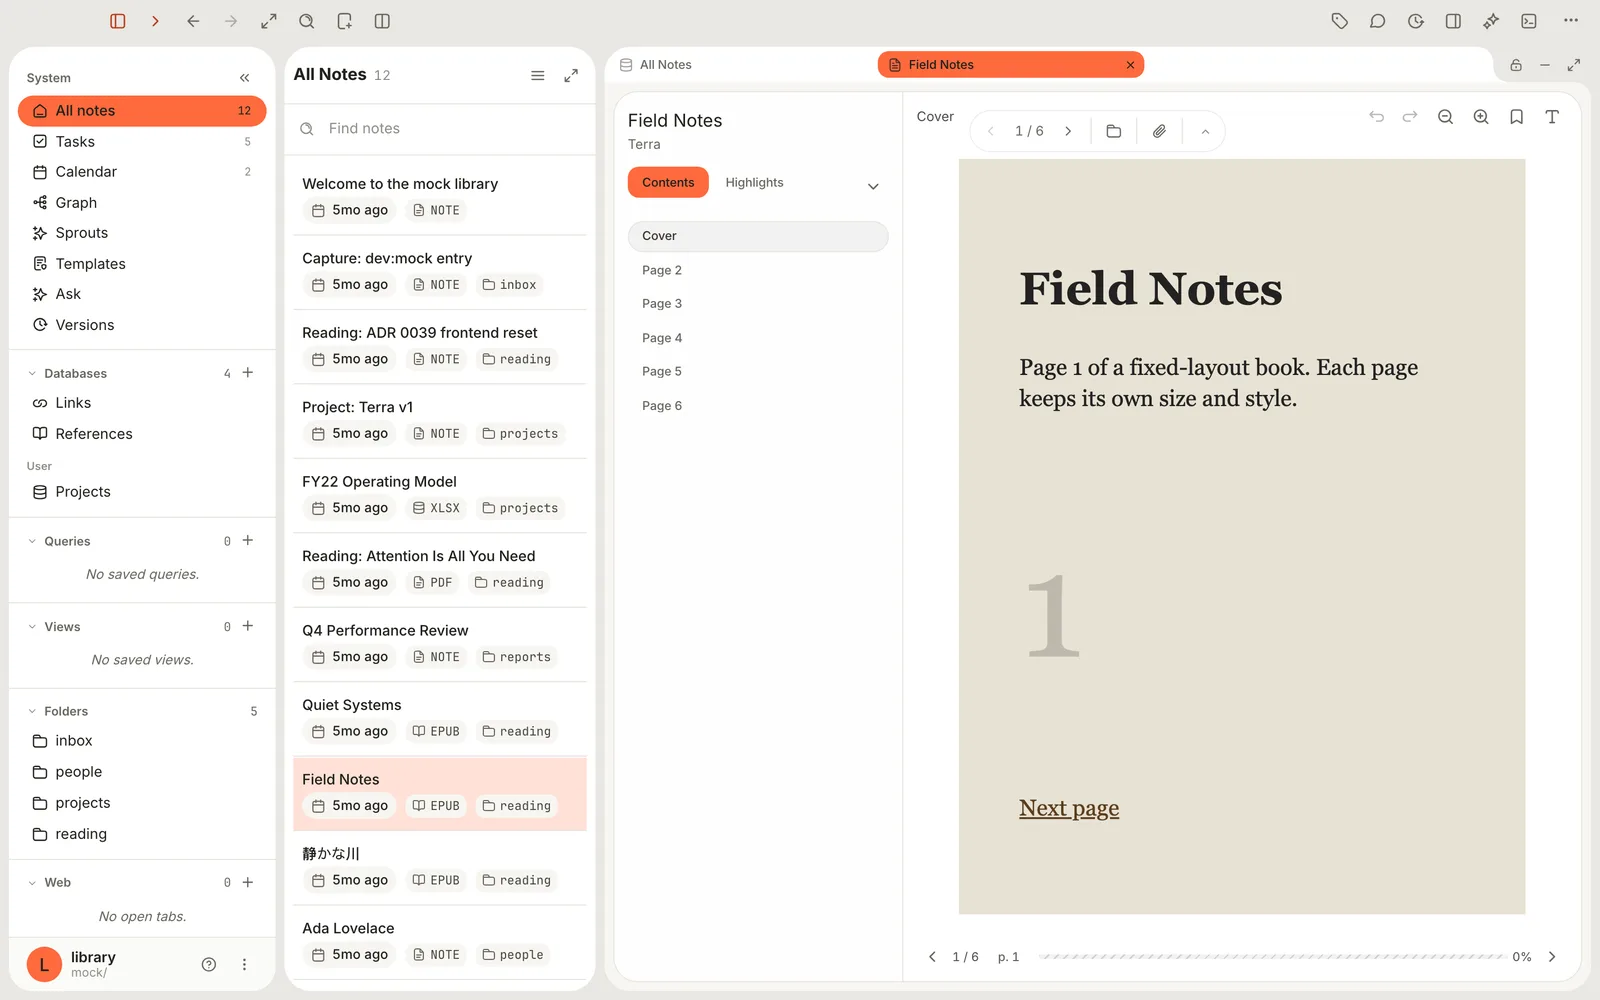
### Japanese, Chinese and right-to-left books
Vertical text reads top to bottom and right to left, just as printed. In right-to-left books the arrow keys follow the book's direction; turn off **Display › Mirror arrows in right-to-left books** if you'd rather they didn't. **Display › Hide ruby** hides the small reading guides above kanji.
### Cite the printed page
Turn on **Display › Page numbers in margin** to see the printed edition's page numbers as you read, then cite the book in your writing with the real page. Book notes are ready to cite; see [Build a research library](https://terramd.io/docs/research-library).
### Remap any reader key
Every reader shortcut can be changed in **Settings › Hotkeys**, under **Reader**. Click a shortcut, press the new keys, and you're done; the new keys replace all of the defaults for that command. **Reset to default** puts them back.
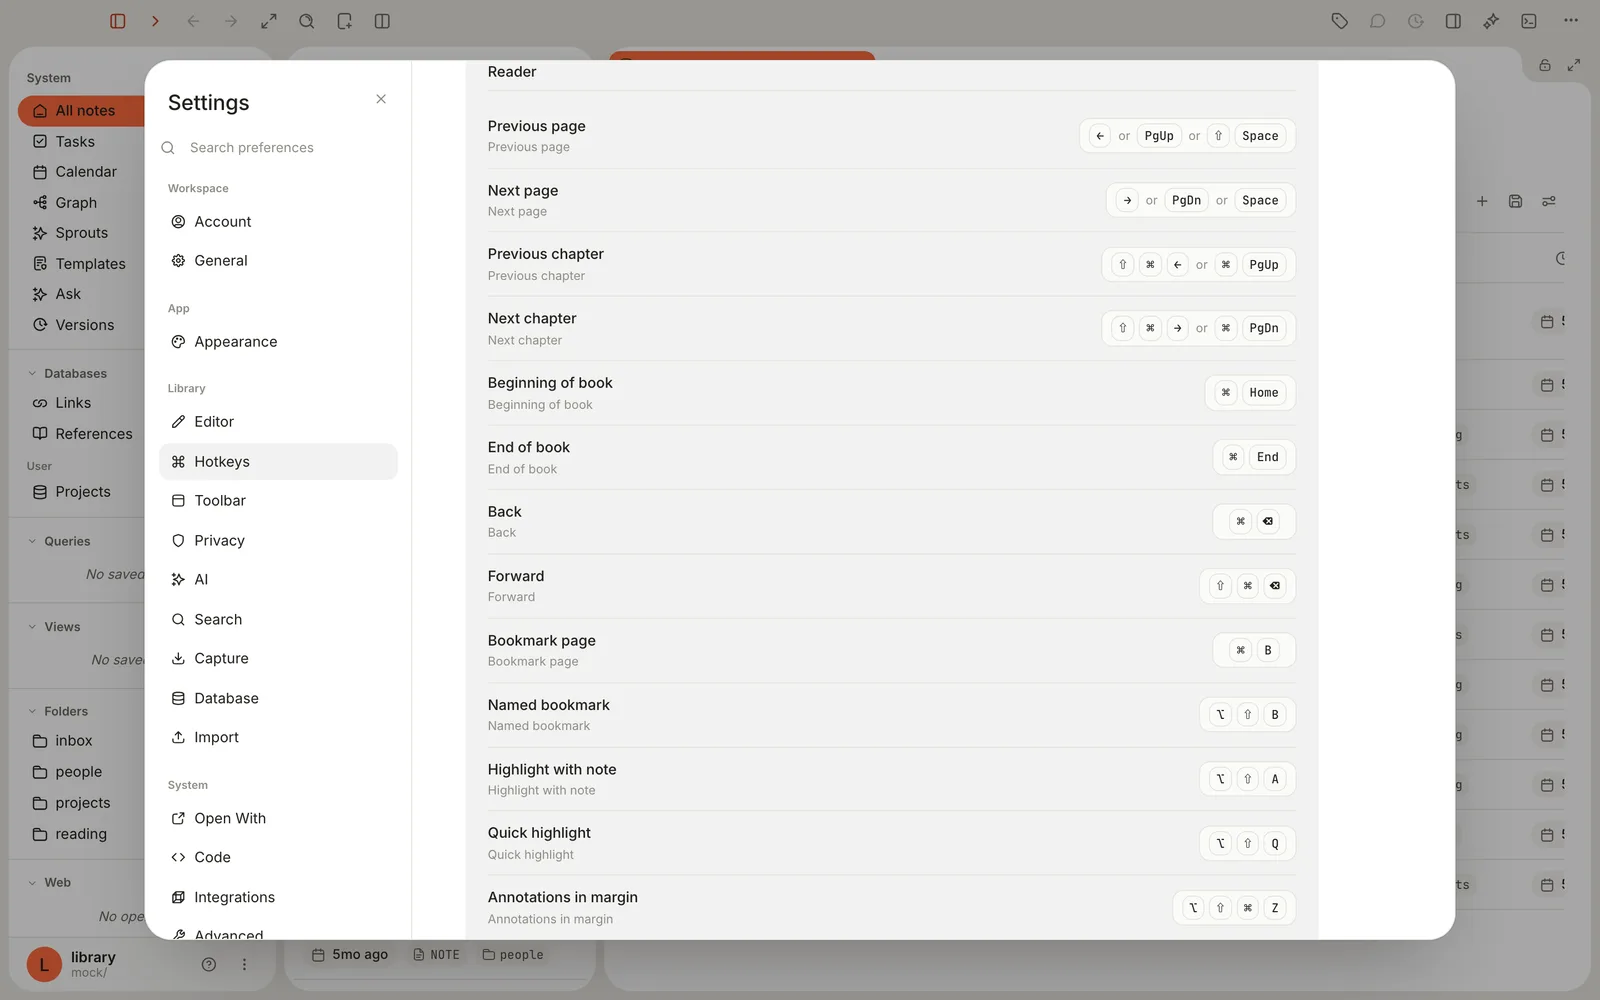
### New books follow your reading taste
The first time you open a book, it borrows the theme and font you chose for reading web pages and notes in Read mode, so everything you read in Terra looks consistent.
## PDFs and images
PDFs open in Terra's PDF viewer. The floating tools let you turn pages, zoom (**Zoom in**, **Zoom out**), choose **Page display** — **One page**, **One page continuous**, **Two pages** or **Two pages continuous** — and switch on **Highlight text** or **Markup** to mark up the page. Unlike book highlights, PDF highlights are saved into the PDF file itself, so they also show up in Preview. [Annotate and keep every mark](https://terramd.io/docs/annotate-in-the-sidecar#highlight-and-mark-up-pdfs) covers both. A PDF opens on page 1 each time; it doesn't remember your place yet.
Images open fitted to the window. Use **Copy image to clipboard** or **Reveal in Finder** in the floating tools.
## Troubleshooting
> [!NOTE]- The arrow keys don't turn the page
> Click once on the page. The reader only listens to the keyboard when it has focus, and it ignores keys while you're typing in a field or a menu is open.
> [!NOTE]- I copied a book into my Library folder and it doesn't appear
> Terra only adds EPUBs that you drag into its window. Drag the file from Finder onto the Terra window or onto a folder in the sidebar.
> [!NOTE]- "Encrypted EPUB — This book cannot be previewed"
> The book is protected by DRM. Terra can't open protected books. Look for a DRM-free edition.
> [!NOTE]- "Page 3 of 7" doesn't match the percentage
> The page count is for the current chapter. The bar and the percentage show your progress through the whole book.
> [!NOTE]- A web link in the book does nothing
> For safety, Terra removes links to websites and remote content from books. Links within the book still work.
> [!NOTE]- "Book unavailable"
> Terra couldn't read the book's data file — it may be damaged, or it was saved by a newer version of Terra. Update Terra; if that doesn't help, see [what to do with the data file](https://terramd.io/docs/annotate-in-the-sidecar#back-up-sync-and-move-books-safely).
## What's next
- [Annotate and keep every mark](https://terramd.io/docs/annotate-in-the-sidecar) — highlights, notes, tags and exports.
- [Build a research library](https://terramd.io/docs/research-library) — cite books and papers in your writing.
- [Find your way around](https://terramd.io/docs/find-your-way-around) — split panes so the book and your writing sit side by side.
---
# Highlight, annotate and keep every mark
> Highlight books in six colours, add notes and tags, find any passage again in seconds and export it all to a note. Your annotations live in a plain file beside the book.
Source: https://terramd.io/docs/annotate-in-the-sidecar
Highlights are only useful if you can find them again. In most reading apps they pile up inside the app — locked to one device, hard to search, impossible to take with you.
Terra keeps your highlights next to the book, in your [Library](https://terramd.io/docs/libraries), as a plain file you own. You can colour-code them, write a note on any passage, tag ideas as you go, filter a 400-page book down to the six passages about one theme, and turn the lot into a note you can quote from. This guide walks through all of it, then opens up the file where everything is kept.
> [!SUMMARY]
> - Highlight in six colours and four styles, with a note and tags on any passage
> - Work faster with one-key highlighting and highlight-on-select
> - Find annotations again: sort, filter by colour or tag, jump straight to the page
> - Export highlights to a Markdown note, a web page or a standard annotation file
> - Understand the sidecar — the file that keeps it all — and keep it safe
> [!BEFORE]
> - A book in your Library. If you haven't added one yet, see [Read comfortably in the e-reader](https://terramd.io/docs/read-in-the-e-reader).
> - For PDFs: a PDF with selectable text (scanned pages without a text layer can't be highlighted).
> - About 15 minutes.
## How it fits together
Every book in Terra is three files that live side by side:
```text
Reading/
├── Quiet Systems.epub ← the book. Terra never changes it.
├── quiet-systems.md ← the book's note: title, author, cover, your writing
├── quiet-systems.terra.json ← the sidecar: your place, highlights, bookmarks, settings
└── attachments/quiet-systems/cover.jpg
```
The *sidecar* is the file ending in `.terra.json`. Terra writes to it automatically, a moment after you stop reading or marking — there's no save button. Because it sits in your Library folder, it travels wherever the folder goes: your backup, your sync service, a Git repository.
Books and PDFs keep annotations differently, and it's worth knowing which is which:
| | Highlights are stored | Visible in other apps? |
| --- | --- | --- |
| **Books (EPUB)** | In the sidecar. The EPUB is never touched. | Export them as an annotation file or a note |
| **PDFs** | Written into the PDF file, and quoted in the PDF's note | Yes — Preview and Acrobat show them |
| **PDF markup** (pen, boxes, callouts) | In the sidecar. The PDF is never touched. | No |
| **Images** | Can't be annotated yet | — |
## Step 1: Make your first highlight
1. Open a book and click once on the page.
2. Drag across the words you want to keep. A small bar of colour swatches appears above your selection.
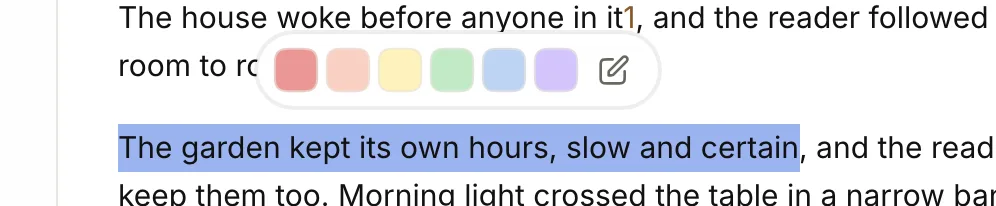
3. Click a colour. The highlight is saved straight away, in your most recent style.
That's it for a quick mark. Terra remembers the colour and style you used last and offers them first next time.
### Add a note and tags as you highlight
Often the reason you highlighted something is the interesting part. Capture it while it's fresh:
1. Select the text, then click the pencil (**Highlight with note**) instead of a colour. The **New highlight** window opens with your quote at the top.
2. Choose a colour. Pick a system and stick to it — for example, yellow for key ideas, green for evidence, blue for quotes you'll use, pink for disagreements.
3. Choose a style: **Highlight**, **Underline**, **Strikethrough** or **Outline**.
4. Type your thought in **Add a note**.
5. Add tags in **Tags, separated by commas** — `time, light`. Tags let you pull every passage on a theme together later.
6. Click **Save**.
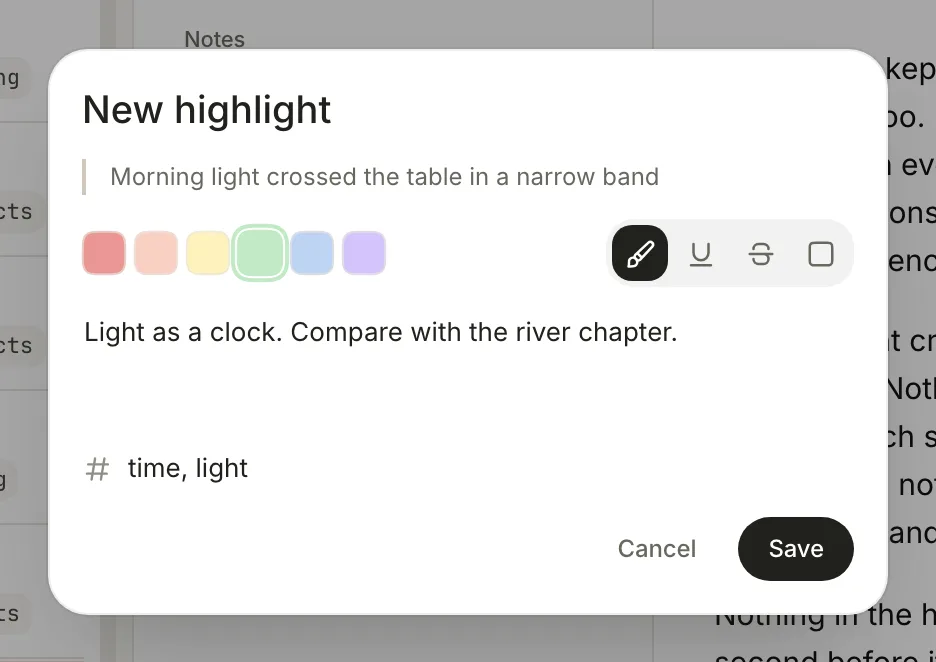
Hover over a highlight that has a note and the note appears as a tooltip — no need to open anything.
## Step 2: Highlight faster
Once you're in the rhythm of a book, every click counts. With text selected:
| To | Press |
| --- | --- |
| Highlight in your last colour and style | ⌥ ⇧ Q |
| Highlight and open the note window | ⌥ ⇧ A |
Two switches in the **Highlights** tab make it faster still. Click the **⋯** (**Highlight options**) above the list:
- **Quick highlight** — the pencil and ⌥ ⇧ A save the highlight right away instead of opening the window. Add the note later.
- **Highlight on select** — every selection becomes a highlight the moment you let go of the mouse. Ideal for a fast first pass through a chapter; it switches itself off when you quit.
## Step 3: Edit, recolour or delete
- **Edit a highlight:** hold ⇧ and click it in the text. Or, in the **Highlights** list, point at the row, click **More** (**⋯**) and choose **Edit**. Change the colour, style, note or tags and click **Save**.
- **Delete one:** click **Delete** in the edit window, or choose **More › Delete** on its row.
- **Delete many:** **Highlight options › Delete all**. If a filter is on, the item reads **Delete N shown** and only removes what's listed. Terra asks **Delete N highlights?** first.
> [!WARNING] Single deletes can't be undone
> Deleting one highlight happens immediately, with no confirmation and no undo. If you're about to tidy up a heavily marked book, [export an annotation file](#take-your-highlights-anywhere) first.
## Step 4: Find your annotations again
Open the **Highlights** tab beside the book. Every highlight is listed with its quote, your note, its tags, and a line telling you where it is — chapter, page, how far into the book, and the date.
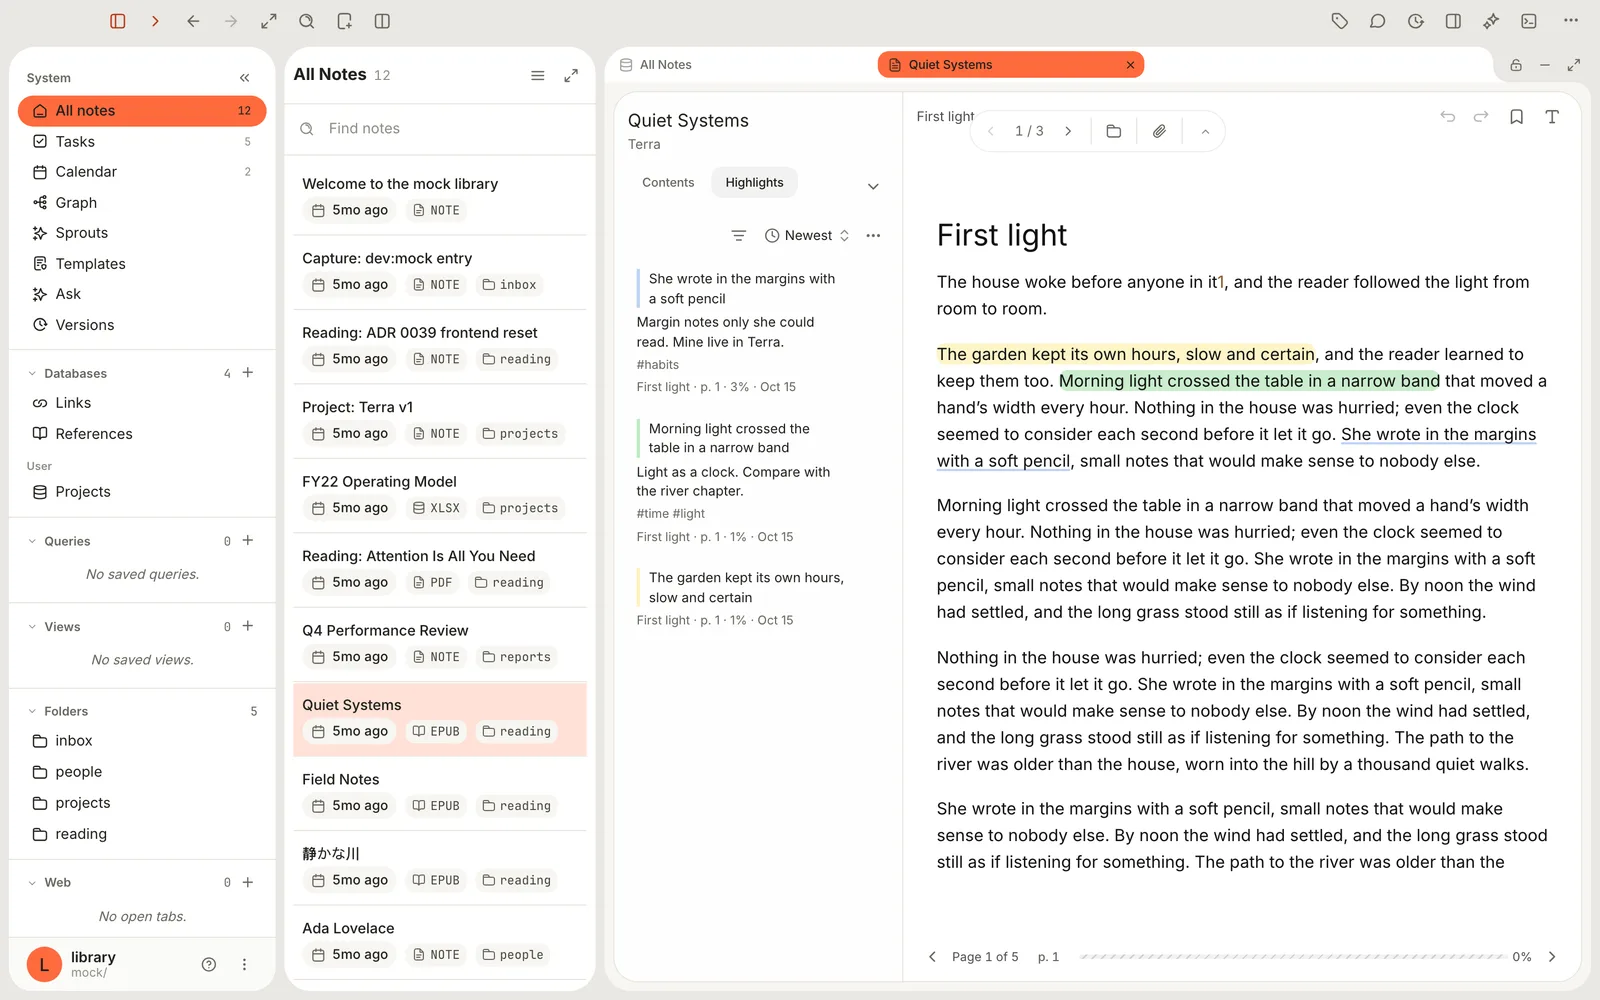
- **Jump to a passage:** click its row. The reader turns to it and outlines it.
- **Sort:** click **Newest** to choose **Newest**, **Last edited** or **Reading order**. Reading order is the one you want for reviewing a book start to finish.
- **Filter:** click the funnel (**Filter**). It lists only what the book actually has: its colours, its styles and its tags. Pick one or more; anything matching *any* of them is shown. **Clear filter** resets.
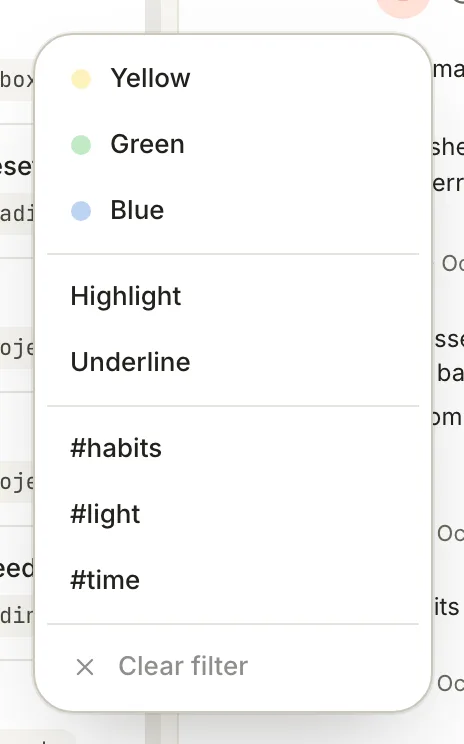
The list shows five at a time; use the page arrows below it for more.
### See highlights in the margin instead
Sometimes you want to reread without the colour. **Highlight options › Show** has three choices:
- **In text** — highlights painted on the words (the default).
- **In margin** — the text stays clean, with a coloured tick in the margin beside each highlight.
- **Hidden** — no marks at all, bookmarks included. Making a new highlight switches back to **In text**.
⌥ ⇧ ⌘ Z flips between **In text** and **In margin**.
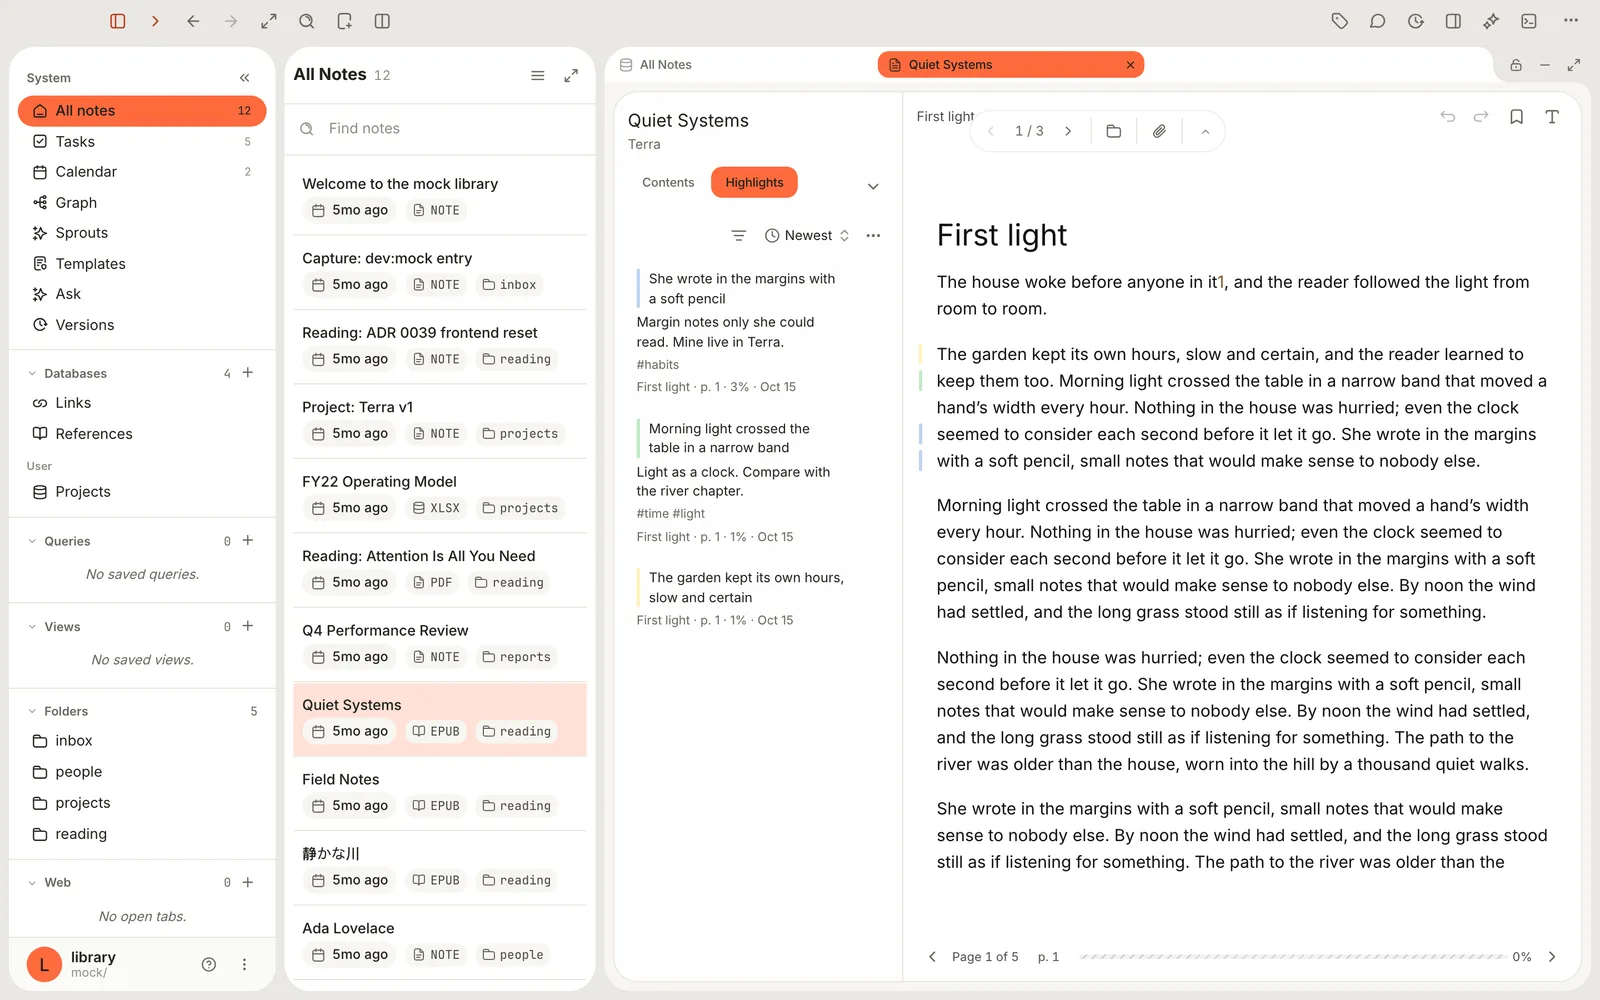
## Step 5: Bookmark pages
Bookmarks mark places rather than passages — the start of an argument, a chart you'll come back to.
1. Press ⌘ B, or click **Bookmark this page** at the top of the page. A mark appears in the margin.
2. To name it as you go, press ⌥ ⇧ B, type a **Name**, choose a colour and tags if you like, and click **Save**.
3. Find bookmarks on the **Bookmarks** tab. In a narrow pane it's behind the arrow next to **Highlights**.
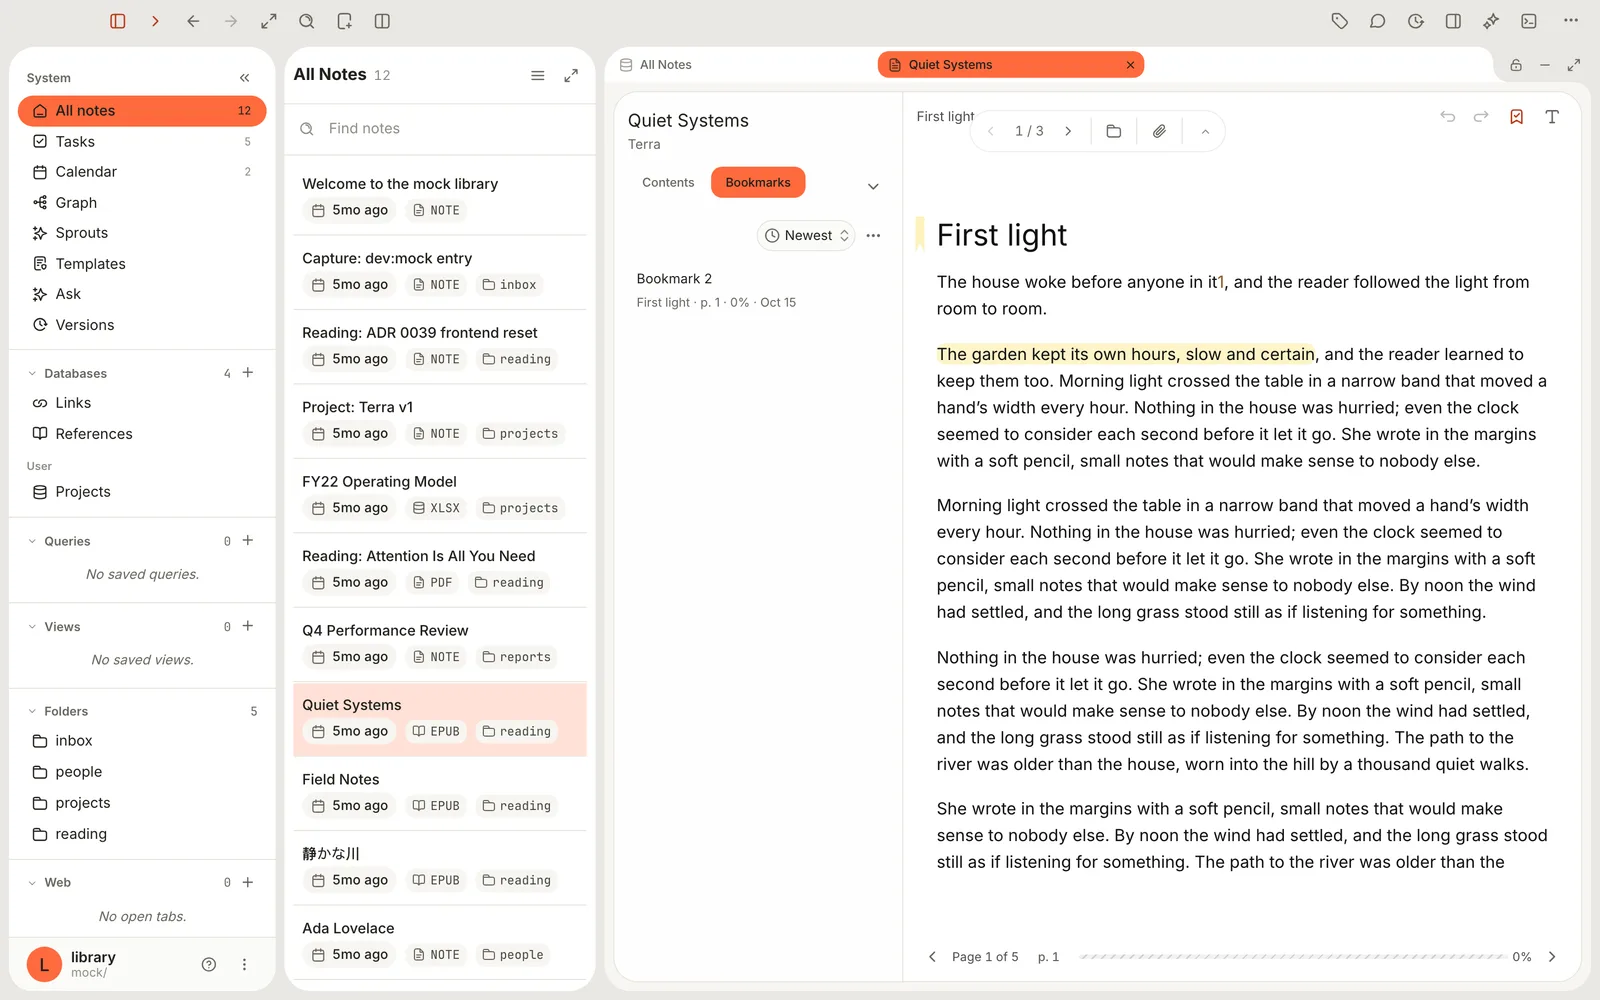
To remove a bookmark, go to its page and press ⌘ B again.
> [!NOTE]- Why is my first bookmark called "Bookmark 2"?
> Highlights and bookmarks share one counter, so if you highlighted something first, your first bookmark is numbered 2. Name bookmarks with ⌥ ⇧ B if the numbers bother you.
## Step 6: Take your highlights anywhere
Exporting turns your marks into something you can write with, share or carry to another copy of the book. What you export is exactly what the list shows, so set a filter first if you only want some — say, everything tagged `quote`.
1. On the **Highlights** tab (or **Bookmarks**), click **Highlight options**, then point at **Export**.
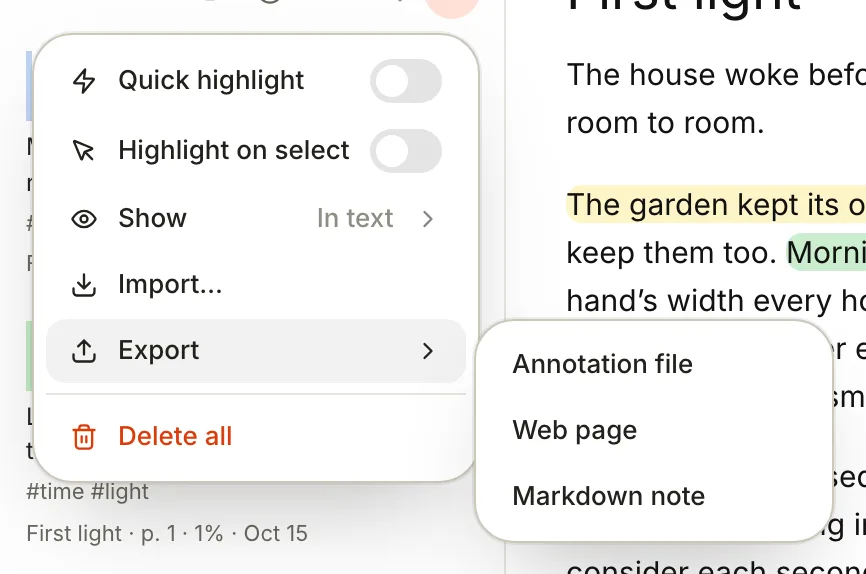
2. Choose a format:
- **Markdown note** — a new note in your Library, ready to quote from and link to.
- **Web page** — a single `.html` file to share or print.
- **Annotation file** — a `.json` file in the W3C Web Annotation standard, for backup or for moving highlights to another copy of the book.
3. Give it a **Title** (Terra suggests *Quiet Systems — annotations*) and click **Export**.
4. For a **Markdown note**, Terra shows **Created "Quiet Systems — annotations"**; click **Open**. Your highlights are grouped by chapter, in reading order, each quote followed by your note, its colour, page and tags.
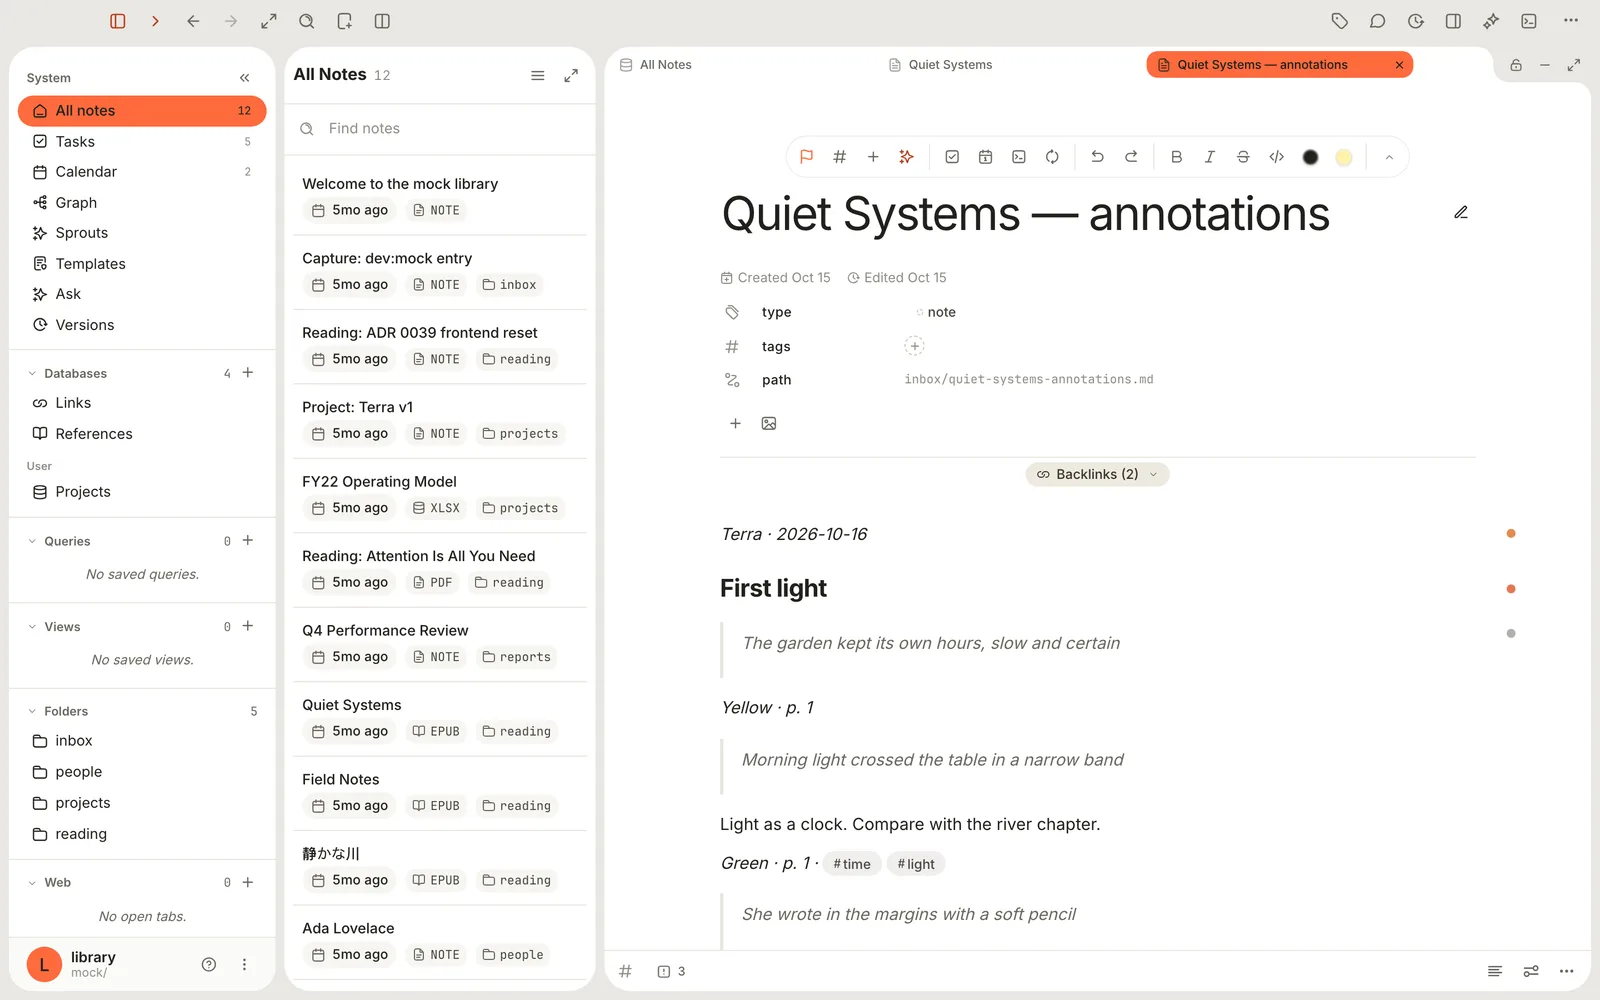
Here's what that note looks like as Markdown:
```markdown
*Terra · 2026-10-16*
## First light
> The garden kept its own hours, slow and certain
*Yellow · p. 1*
> Morning light crossed the table in a narrow band
Light as a clock. Compare with the river chapter.
*Green · p. 1 · #time #light*
```
The export is a snapshot. New highlights don't appear in it automatically; export again when you want an updated copy. The book's own note is never changed by an export.
### Move highlights to another copy of the book
Bought a new edition, or added the book to a second Library? Export an **Annotation file** from the first copy, then open the second and choose **Highlight options › Import…** and pick the file. Terra places each highlight on the same words. If some are already there, it asks whether to **Import new** ones only or **Import all**, replacing the matches with the file's versions.
## Step 7: Look inside the sidecar
You never need to open the sidecar, but it helps to know it's ordinary text. Open it in any text editor (it's the `.terra.json` file next to the book's note) and you'll find one block for the book, holding:
- **position** — where you stopped, so the book reopens there
- **highlights** — every highlight with its colour, style, your note (stored as `text`), tags, page and quote
- **bookmarks** — the same shape, with the bookmark's name in `text`
- **settings** — this book's theme, layout and text choices
Here's an abridged example:
```json
{
"schemaVersion": 1,
"noteId": "01JB4…",
"blocks": [
{
"type": "epub-reader",
"payload": {
"position": { "href": "OPS/text/ch1.xhtml", "spineIndex": 0, "progress": 0.2 },
"highlights": [
{
"id": "81e0a757-e52b-4053-babf-e96e07debbc0",
"kind": "highlight",
"color": "green",
"style": "solid",
"text": "Light as a clock. Compare with the river chapter.",
"tags": ["time", "light"],
"page": "1",
"created": 1792109100188,
"locator": {
"title": "First light",
"text": {
"before": "…from room to room. The garden kept its own hours… ",
"highlight": "Morning light crossed the table in a narrow band",
"after": " that moved a hand's width every hour."
},
"locations": { "cfi": "epubcfi(/6/2!/4/8,/1:…)" }
}
}
],
"bookmarks": [],
"settings": { "theme": "sepia", "flow": "paginated", "columns": "auto" }
}
}
]
}
```
(`"style": "solid"` is the **Highlight** style; `created` is a timestamp in milliseconds.)
### How highlights survive font changes
Change the font size, switch to two columns or resize the window, and every highlight stays on the same words. That's because Terra saves each one several ways at once: the exact spot in the chapter, the quoted words with a little text either side, and a standard EPUB location. When the page reflows, it finds the words again — and if one way fails, it tries the next.
If the book itself changes (say you replace it with a corrected edition) and Terra can't find a passage, the highlight stays in your list marked **Not found in text**. One placed only by its position in the book is marked **Approximate**. Terra never deletes a highlight just because it can't place it.
### Reading it with other tools
The sidecar is Terra's own format, but it's plain JSON, so scripts and other tools can read it. For anything that should understand highlights in a standard way, use **Export › Annotation file** instead: it follows the W3C Web Annotation format, with EPUB locations other software can resolve.
## Step 8: Back up, sync and move books safely
- **Backups and sync.** Anything that copies your Library folder — Time Machine, iCloud Drive, Dropbox — copies the sidecar with it. If you use [Versions](https://terramd.io/docs/sync-and-back-up), sidecars are saved in each version like your notes.
- **What stays on this Mac.** Your reading defaults (**Save as default**), last-used colour and style, **Quick highlight** and the **Show** setting are preferences on this Mac, not part of the Library.
- **Moving files in Finder.** Terra matches a sidecar to its note by name: `quiet-systems.md` ↔ `quiet-systems.terra.json`. If you rename or move a book's note in Finder, rename or move its `.terra.json` the same way. The EPUB itself can move freely — Terra recognises it by its contents.
- **Before a big reorganisation,** export an **Annotation file** for books you've marked heavily. It's a small file and a complete copy of your highlights.
- **Deleting the sidecar** resets the book: it reopens at the beginning with no highlights or bookmarks, and Terra creates a fresh sidecar as soon as you read again.
## Highlight and mark up PDFs
PDFs work a little differently, because the PDF format has its own annotations that other apps understand.
**Highlight text in a PDF**
1. Open the PDF and click **Highlight text** in the floating tools.
2. Drag across the words. The highlight is written into the PDF itself, and the PDF's note gains a quote under **Highlights**, with the page number:
```markdown
## Highlights
> quoted text
> — p. 3
```
3. To remove a highlight, drag across the same words again.
4. Right-click **Highlight text** to choose its ink colour.
With the note shown beside the PDF, click a highlight on the page to scroll the note to its quote, or click a quote in the note to jump to the page.
**Draw on a page**
Click **Markup** to pick up the pen. Right-click it for more: brushes (**Pen**, **Fineliner**, **Pencil**, **Marker**, **Brush**, **Highlighter**, **Dashed**, **Dotted**, **Box**), a **Width** from 1 to 24 points, an ink colour, an **Eraser** and a **Text callout**. Put the pen down and click any mark to change it, delete it, or start a comment thread with **Add a comment…**. Markup lives in the sidecar, so the PDF file is unchanged; marks with text or comments are also quoted in the note under **Annotations**.
**Cite a PDF passage**
Give the PDF's note a type such as `paper` or `book`, then in any note type `@` followed by a word from the source's title. Your highlights appear as indented choices under the source, with their page numbers; pick one to insert the quote with its citation. [Build a research library](https://terramd.io/docs/research-library) covers citations in full.
## Features you might have missed
- **Tags are filters.** Tag highlights by theme as you read (`argument`, `method`, `quote`), and the **Filter** menu turns a long book into a short list.
- **Reading order review.** Sort by **Reading order** and click down the list to reread just your marked passages, in sequence.
- **Notes on hover.** Point at any highlight with a note to read it without opening anything.
- **Margin mode for rereading.** **Show › In margin** keeps the page clean while still showing where you marked.
- **Every reader shortcut is yours.** Change any of them in **Settings › Hotkeys** under **Reader**.
## Troubleshooting
> [!NOTE]- "Select some text first"
> Quick highlight (⌥ ⇧ Q) and **Highlight with note** need a selection. Drag across some words, then press the keys again.
> [!NOTE]- I can't highlight in this book
> Books laid out page by page (fixed-layout EPUBs, like picture books and some textbooks) can be bookmarked but not highlighted yet.
> [!NOTE]- A highlight says "Not found in text" or "Approximate"
> Terra couldn't find the exact words in the current copy of the book — usually because the EPUB was replaced with a different edition. The highlight, its note and tags are kept; click it to go to the nearest place Terra can find.
> [!NOTE]- My highlights are gone after I moved or renamed the book
> The book's sidecar probably didn't come along. Look for a `.terra.json` file with the book's old name in its old folder and move it next to the book's note, renamed to match. If you exported an **Annotation file**, you can also bring everything back with **Highlight options › Import…**.
> [!NOTE]- A PDF won't highlight
> Highlighting needs a PDF with real text. Scanned pages are pictures of text; run them through an OCR tool first.
## What's next
- [Read comfortably in the e-reader](https://terramd.io/docs/read-in-the-e-reader) — themes, fonts and moving around a book.
- [Build a research library](https://terramd.io/docs/research-library) — cite books and papers, with page numbers.
- [How Terra stores your notes](https://terramd.io/docs/how-terra-stores-your-notes) — the rest of what lives in your Library folder.
---
# Build a research library
> Gather papers, books, PDFs and web pages as notes, cite them as you write with a reference list that builds itself, and see who cites what.
Source: https://terramd.io/docs/research-library
A thesis chapter rests on dozens of sources: papers found through a DOI, a book you're halfway through, PDFs from a supervisor, an article you saved at midnight. The hard part isn't collecting them. It's remembering which one said what, and citing it properly when you finally write the sentence.
In Terra every source is a [note](https://terramd.io/docs/glossary#note), so it lives alongside your writing. Cite one with `[@…]` and Terra formats the citation in APA, MLA, Chicago, IEEE or Vancouver, and builds the reference list at the end of the note. Every source knows which notes cite it, and the built-in **References** [database](https://terramd.io/docs/databases) keeps them all in one table.
This guide follows Leah, who is writing the second chapter of her thesis, on how city noise changes birdsong.
> [!SUMMARY]
> - Add papers and books by DOI or ISBN, and bring in EPUBs, PDFs and web pages
> - Cite as you write, with page numbers and a reference list that builds itself
> - Choose a citation style for the whole Library, or for one note
> - See which notes cite a source, and link your own ideas together
> - Track your reading in a Sources database
> [!BEFORE]
> - A [Library](https://terramd.io/docs/libraries) open in Terra. Reading and highlighting have guides of their own: [Read comfortably in the e-reader](https://terramd.io/docs/read-in-the-e-reader) and [Highlight, annotate and keep every mark](https://terramd.io/docs/annotate-in-the-sidecar).
> - An internet connection to look up DOIs and ISBNs. Citing and everything else work offline.
> - About 20 minutes.
## How it fits together
Sources arrive in different ways, but each one ends up as a note:
| Source | Bring it in with | It becomes | Citable |
| --- | --- | --- | --- |
| A paper or book with a DOI or ISBN | **New… › Add reference** | A reference note in `References/`, with authors, date and a citation key | Straight away |
| An EPUB book | Drag the file into the window | A book note, with type `book` | Straight away |
| A PDF | Drag the file into the window | A note for the PDF, with no type | Once you set its type to `paper` |
| A web page | **Save to Terra** in Terra's browser | A link note in your Inbox, holding the page's text | Once you set its type to `article` |
A note can be cited when its type is `paper`, `article`, `book` or `report`, or when it already has a citation key. The first time you cite a note without a key, Terra makes one from the first author, the year and the first main word of the title (`krause2012great`) and writes it into the note's [properties](https://terramd.io/docs/properties) as `citation_key`.
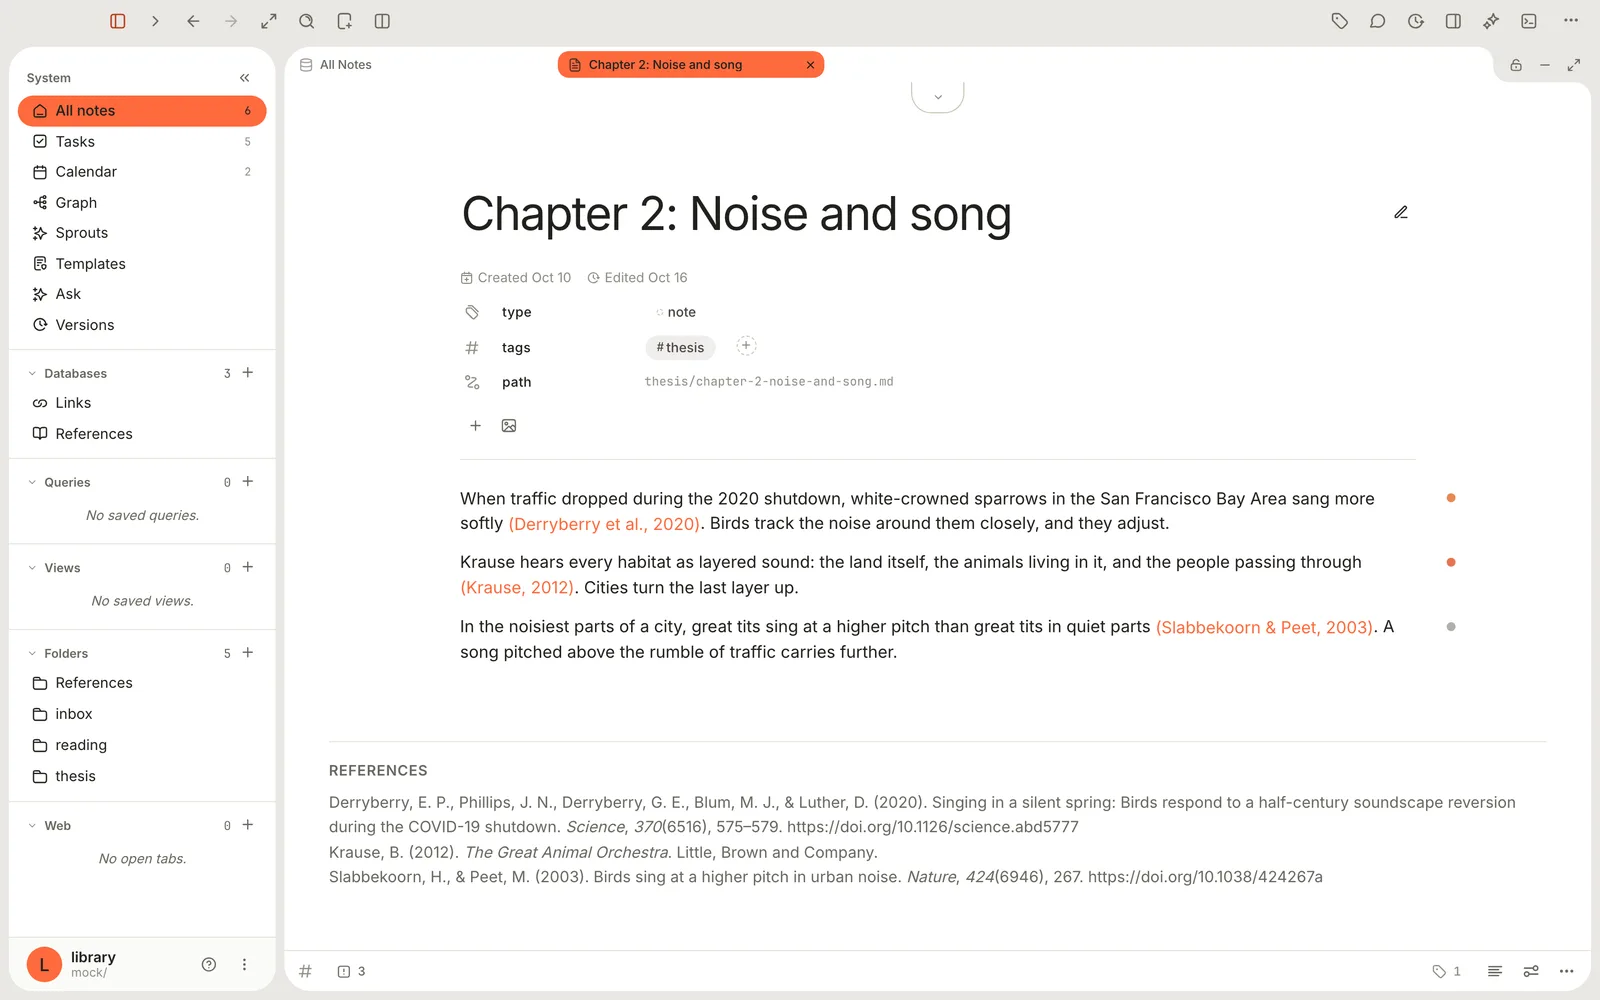
## Step 1: Add papers and books by DOI or ISBN
For anything with a DOI or an ISBN, let Terra fill in the details.
1. Click **New…** in the toolbar and choose **Add reference**.
2. Paste the DOI or ISBN into the field. A bare DOI (`10.1038/424267a`) and a `doi.org` link both work.
3. Click **Look up** (or press Return). The title, authors, journal and date appear. Edit the **Title** if you'd like it shorter.
4. Click **Add reference**. Terra shows **Reference added** and opens the new note.
The note is saved in the `References` folder, with properties such as `author`, `date`, `venue`, `doi` and `citation_key` (here `slabbekoorn2003birds`). Each author also becomes an option of your `author` property, so you can filter by author later. DOIs are looked up at doi.org and ISBNs at Open Library; your notes aren't sent anywhere.
## Step 2: Bring in books, PDFs and web pages
- **Books.** Drag an `.epub` into the Terra window. Its note arrives with type `book`, author, publisher and ISBN filled in, ready to cite. [Add a book](https://terramd.io/docs/read-in-the-e-reader#add-a-book) has the details.
- **PDFs.** Drag the PDF in. In the PDF viewer, click **Show note** (the paperclip) and set **type** to `paper` in the note's properties. Now it's citable, and the passages you highlight can be quoted with their page numbers (step 5).
- **Web pages.** Choose **View › New Webpage**, open the page, then click **Page options** (beside the address bar) and **Save to Terra**. Terra saves the article's text as Markdown, with a picture of the page, in your Inbox. To cite it, set its **type** to `article`. An `article` note with a web address opens as a split view: the live page on one side, your note on the other.
> [!TIP] File sources where you'll look for them
> Terra doesn't care which folder a source lives in, so file them however you think. Leah keeps books in `reading`, lets DOIs land in `References`, and [tags](https://terramd.io/docs/tags) everything for this thesis `#thesis`.
## Step 3: Cite as you write
Cite at the moment you use an idea, while you still know where it came from.
1. In your draft, type `[@`, or type `/citation` and press Return. A list opens with a **Cite** section. It reads **No matches** until you type something.
2. Type part of a title, an author or a key. Leah types `sing`.
3. Press Return, or click the source. A citation chip appears, such as *(Derryberry et al., 2020)*, and the source joins the **References** section at the end of the note.
Point at a chip for the source's details, or click it to open the source. The References section is rebuilt as you write and never saved into the note: the file holds only the citation itself, in the same `[@key]` form Pandoc uses. Terra reads all of these forms, so citations written in other editors keep working:
| Citation | In the file |
| --- | --- |
| A citation | `[@krause2012great]` |
| With a page number | `[@krause2012great, p. 68]` |
| With the author hidden | `[-@krause2012great]` |
| Several sources at once | `[@slabbekoorn2003birds; @derryberry2020singing]` |
| The author in your sentence | `@krause2012great` or `@krause2012great [p. 68]` |
| Brackets, parentheses or superscript | `[@krause2012great]{.bracket}`, `{.paren}`, `{.super}` |
## Step 4: Add page numbers and pick a style
Right-click a citation chip for everything you can change about it:
![A citation's menu with In-text form, Add locator…, Hide author and Open source. In-text form is open, showing Style default, Brackets [1], Parentheses (1), Superscript ¹ and Narrative.](https://terramd.io/docs/shots/guide-research-chip-menu.webp "Right-click any citation. In-text form changes how this one citation reads, whatever the style.")
- **Add locator…**: type a page or section, such as `p. 68`, and press Return. The menu then shows it as **Locator: p. 68**; clear the field to remove it.
- **In-text form**: **Style default**, **Brackets [1]**, **Parentheses (1)**, **Superscript ¹**, or **Narrative**, which puts the author in your sentence: *Krause (2012, p. 68)*.
- **Hide author**: keeps only the year, for when you've already named the author: *(2012)*.
- **Open source**: opens the source's note.
**Choose the citation style** for the whole Library in **Settings › Editor › Citation style**: **APA 7th** (the default), **MLA 9th**, **Chicago (author-date)**, **IEEE** or **Vancouver**. Every citation and reference list updates to match.
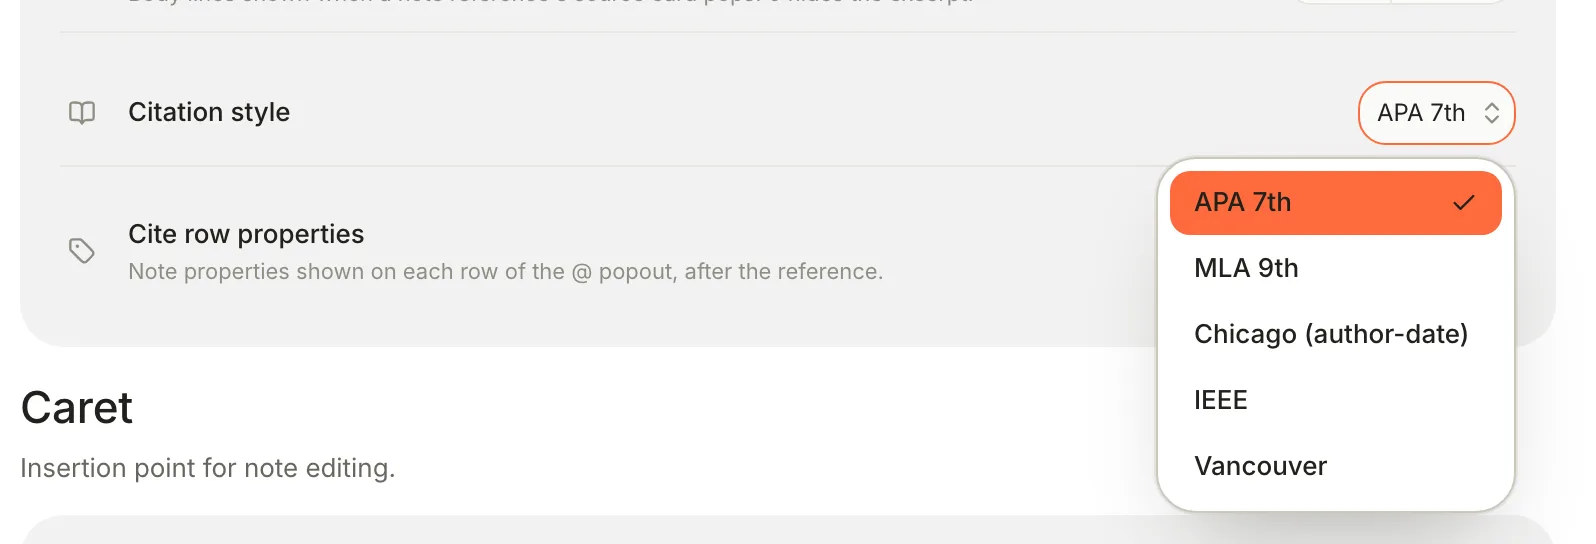
Writing one paper for a journal with a different style? Give that note a `citation_style` property with the value `ieee`, `mla`, `chicago-author-date`, `vancouver` or `apa`. It overrides the Library setting for that note only.
## Step 5: Quote what you highlighted
You'll usually read a source before citing it. Terra keeps your highlights with the source, so the quote and the citation stay together.
- **From a PDF.** Highlight passages in the PDF viewer. Then type `@` and a word that appears both in the PDF's title and in the passage: matching highlights appear indented under the source, with their page numbers. Pick one to insert the quote and its citation. See [Highlight and mark up PDFs](https://terramd.io/docs/annotate-in-the-sidecar#highlight-and-mark-up-pdfs).
- **From a book.** Book highlights aren't offered in the Cite list yet. Export them as a note (**Highlight options › Export › Markdown note**, described in [Take your highlights anywhere](https://terramd.io/docs/annotate-in-the-sidecar#take-your-highlights-anywhere)), copy the quote you need, and cite the book with a page number. With **Reader appearance › Display › Page numbers in margin** turned on in the reader, the page you cite matches the printed book.
## Step 6: Follow the connections
Citations are links, so each source knows where it's used.
1. Open a source note. Under its properties, **Backlinks** shows how many notes point to it. Click it for the list.
2. For more detail, click **Properties** in the toolbar (⌥ ⌘ I), then the **References** icon (**Show References**) at the bottom of the panel. **Cited by** lists the notes that cite this source; **Linked from** and **Embedded in** list ordinary links and embeds.
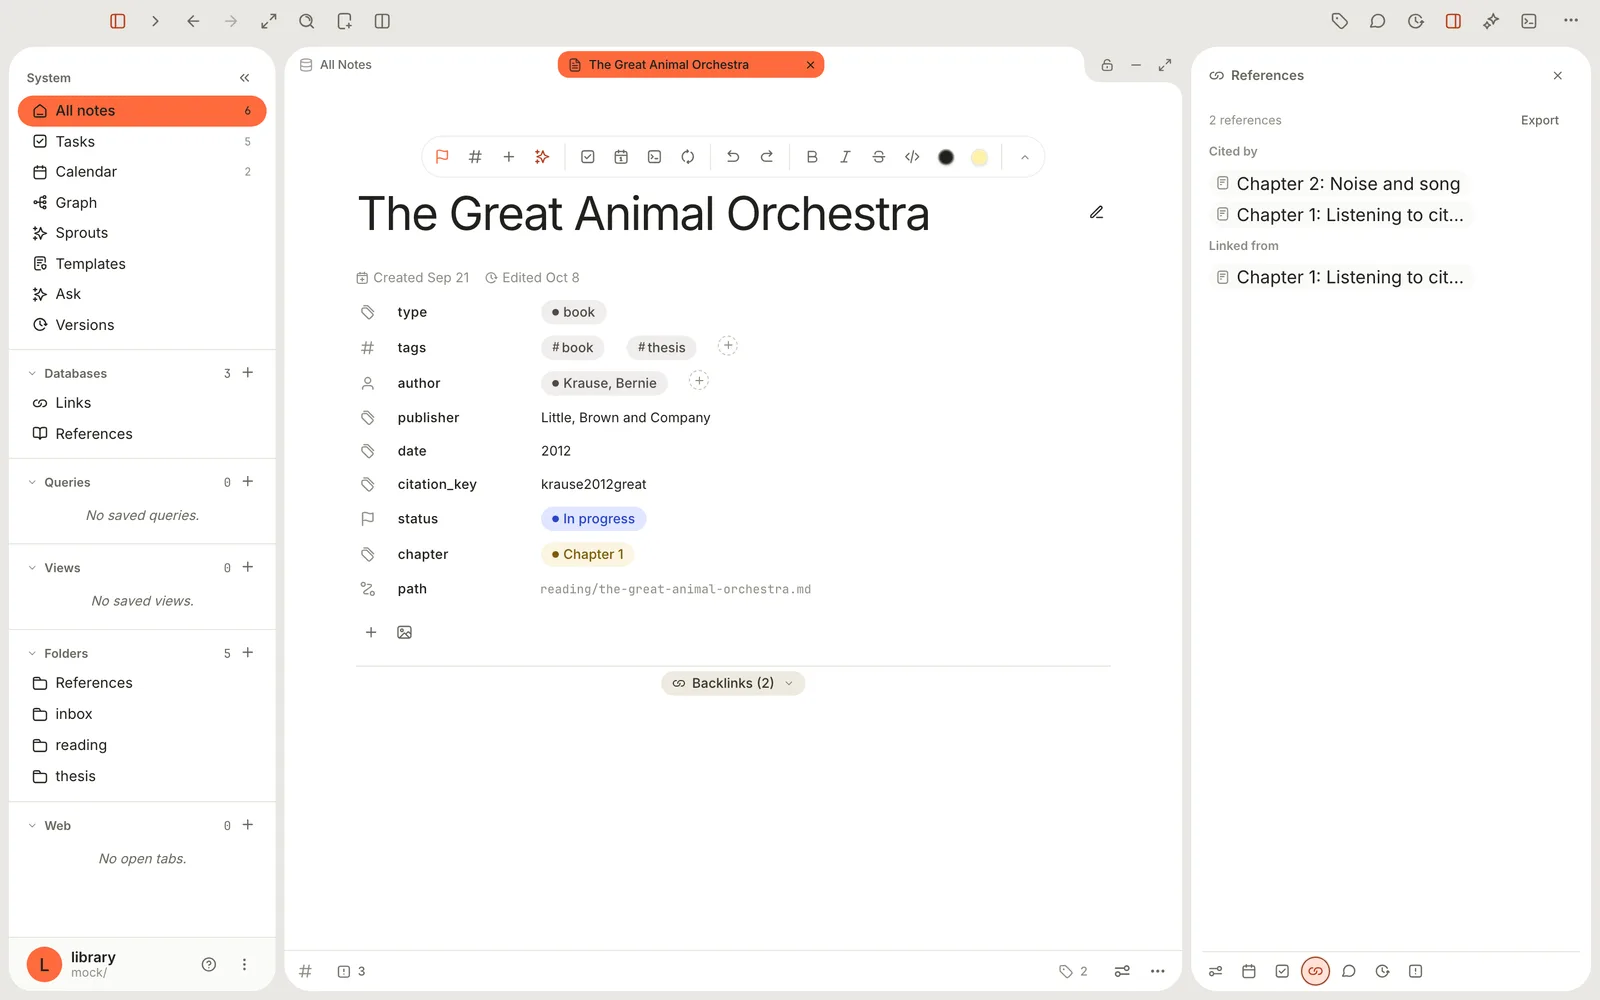
Open the same panel on a draft and it audits the draft instead: *3 cited here*, with each citation and its reference. A citation whose source Terra can't find is flagged as unresolved.
Your own ideas deserve links too. Type `@` and a few letters of a note's title, then pick it under **Note** to insert a link. Leah links each chapter to the notes that hold her arguments, so the ideas and the sources both show their connections. [Links and backlinks](https://terramd.io/docs/links-and-backlinks) covers linking in full.
## Step 7: Keep a Sources database
The built-in **References** database collects every note with a citation key, a DOI, an arXiv ID or a PubMed ID, sorted by date with the newest first. Find it in the sidebar under **Databases**.
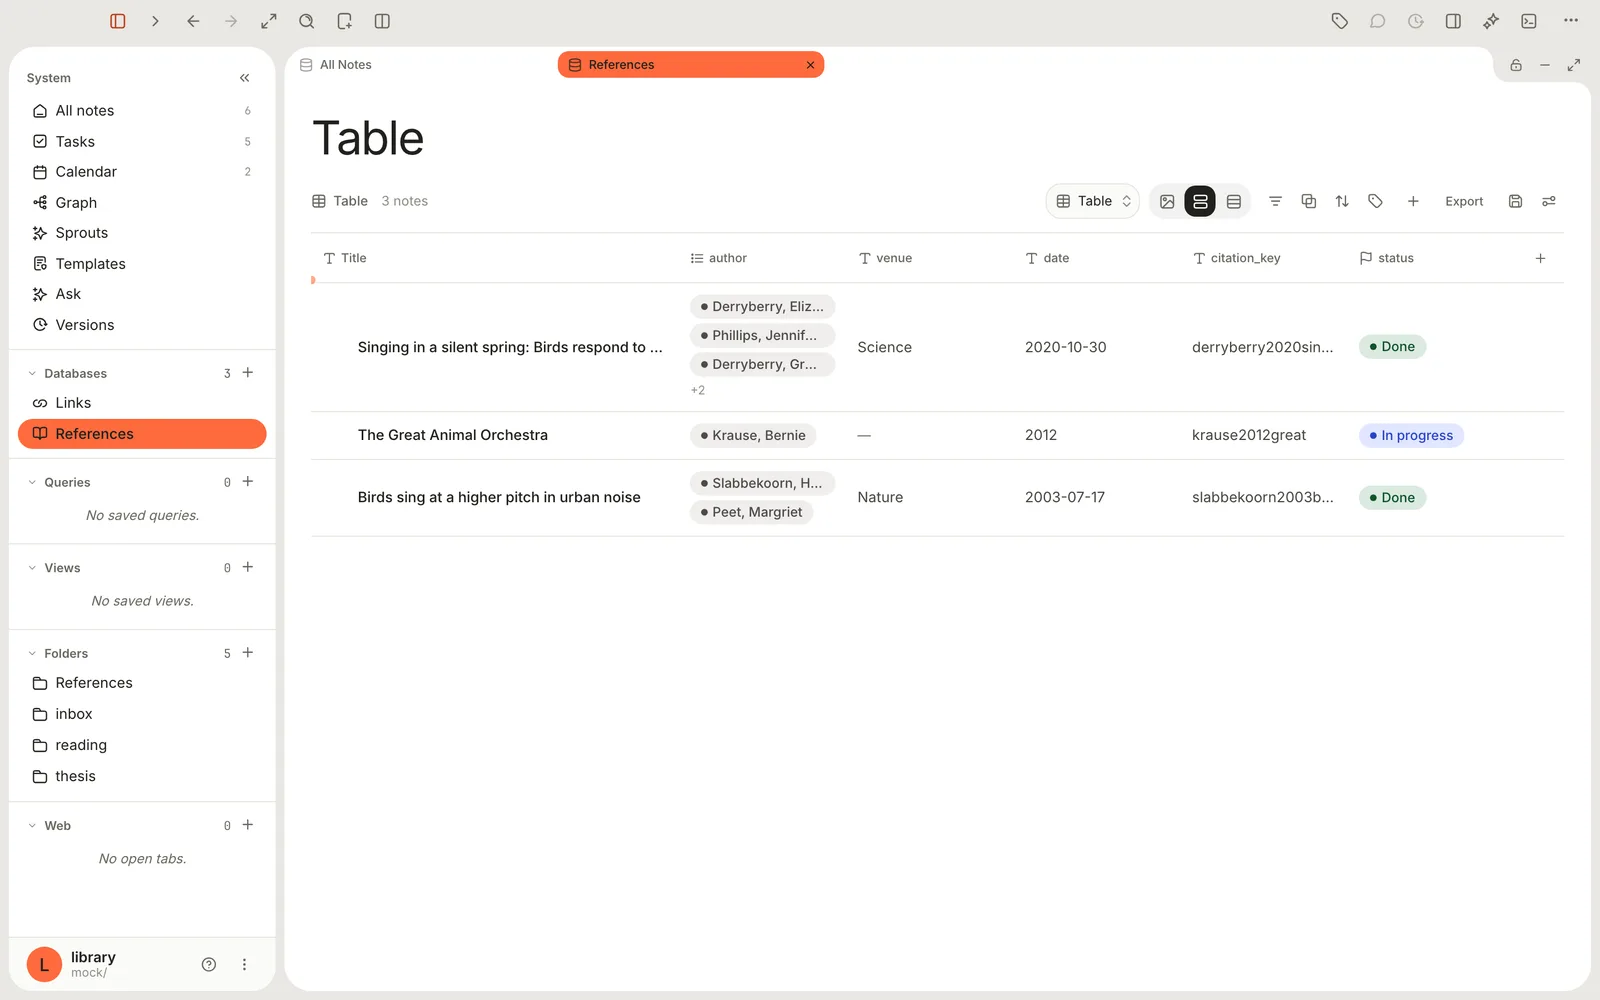
Make it work for you:
- **Track your reading.** Click **+** at the right end of the header row (**Add property**), choose **New property**, name it `status` and pick **Status**. Its options, *Not started*, *In progress* and *Done*, make a reading pipeline. Add a **Select** called `chapter` to note where each source is used.
- **Make one per project.** Right-click **References** in the sidebar and choose **New reference database**. Name it *Thesis sources* and click **Create**. It starts with every reference; open **View preferences**, click **Database** and add a condition such as **tags** · **contains** · `thesis` to narrow it.
- **See it as a board.** Add a view with the **Board** layout and your sources sort themselves into *Not started*, *In progress* and *Done* columns. [Views and layouts](https://terramd.io/docs/views-and-layouts) covers the rest.
A book or PDF joins **References** once it has a citation key, which happens the first time you cite it.
## Step 8: Ask your library
When you can't remember which source made a point, ask. Terra Agent searches your notes, reads the relevant ones and answers with links back to them. It needs an AI provider; [Get answers from your own notes](https://terramd.io/docs/ask-your-library) sets one up.
## Features you might have missed
### Show your own properties in the Cite list
**Settings › Editor › Cite row properties** adds properties of your choosing to every row in the Cite list, after the reference. Add `chapter` or `status` and you'll see at a glance whether you've read a source before citing it.
### Search inside your books
Press ⇧ ⌘ F and search: Terra searches the text of your EPUBs as well as your notes, so a half-remembered phrase finds the book it came from.
### See citations in the graph
Citations are drawn as lines in Terra's graph, alongside ordinary links. Right-click a source in the note list and choose **Graph of this note** to see every draft around it. See [See a note's connections in the graph](https://terramd.io/docs/canvas-and-mind-maps#see-a-notes-connections-in-the-graph).
### Captured links land in Links
Every web page you save, and every reference with a web address, also appears in the built-in **Links** database, newest first.
## Troubleshooting
> [!NOTE]- A source doesn't appear in the Cite list
> Check its type: only `paper`, `article`, `book` and `report` notes are offered, plus notes that already have a `citation_key`. PDFs and saved web pages start without a citable type. And type at least one letter after `[@`; the list stays empty until you do.
> [!NOTE]- The References panel says a citation is unresolved
> Terra can't find a note with that citation key, usually because the source was deleted or its `citation_key` was changed. Restore the source, or delete the citation and cite the source again from the Cite list.
> [!NOTE]- Look up fails
> Look up needs an internet connection. For books, Terra wants a 10- or 13-digit ISBN and says **Enter a valid ISBN-10 or ISBN-13** otherwise, or **No book found for ISBN …** when Open Library doesn't know it. A DOI must look like `10.1000/xyz123`.
> [!NOTE]- The reference list isn't in my Markdown file
> That's by design. The References section is drawn from your citations every time the note opens, so it's always complete and in the current style. Other apps see the `[@key]` citations.
> [!NOTE]- One note uses a different style from the rest
> It has a `citation_style` property. Delete the property's value, or change it, to bring the note back in line with **Settings › Editor › Citation style**.
> [!NOTE]- Add reference and citations are missing
> They can be switched off for a Library. Check **Settings › Features** and turn **References** back on.
## What's next
- [Read comfortably in the e-reader](https://terramd.io/docs/read-in-the-e-reader): add your books and read them in Terra.
- [Highlight, annotate and keep every mark](https://terramd.io/docs/annotate-in-the-sidecar): mark up books and PDFs as you read.
- [Get answers from your own notes](https://terramd.io/docs/ask-your-library): ask questions across everything you've collected.
- [Links and backlinks](https://terramd.io/docs/links-and-backlinks): connect your own ideas.
---
# Capture anything, and let Terra sort it for you
> Grab thoughts, links and messages from any app with Quick capture, then let enrichment tidy them into a template and the Jev classifier fill in your own categories.
Source: https://terramd.io/docs/capture-and-classify
Good ideas arrive at bad times — in the middle of a meeting, three tabs deep in a recipe site, while a video plays. The trick is to catch them in two seconds and sort them later. The trouble is that "later" rarely comes, and the pile grows.
Terra splits the job in two. **Quick capture** catches anything — a thought, a link, an email, a chat message — from any app and drops it into your Inbox. Then, if you want, **enrichment** does the sorting: it tidies the capture into a [template](https://terramd.io/docs/templates) (a recipe gets *Ingredients* and *Directions*), and a classifier model called **Jev** files it into categories you define, like *Indian*, *Italian* or *Weeknight*. Your [databases](https://terramd.io/docs/databases) pick it up from there.
This guide uses a recipe collection as the running example, because it shows every part of the pipeline. The same setup works for articles by topic, papers by method, or support requests by product.
> [!SUMMARY]
> - Capture a thought, link, email or message from any app in seconds
> - Turn on enrichment and choose the models that tidy and classify
> - Teach the classifier your categories with plain-language descriptions
> - Review what it decided, accept or dismiss its suggestions, and sort older notes the same way
> - Know what it costs and what leaves your Mac
> [!BEFORE]
> - A Library open in Terra. New to Terra? Start with the [Quickstart](https://terramd.io/docs/quickstart).
> - Capturing needs nothing else. Enrichment needs an AI provider for tidying (see [Connect an AI provider](https://terramd.io/docs/ask-your-library#connect-an-ai-provider)) and, for the classifier to file things automatically, an **OpenRouter** account — Jev runs there.
> - A few cents. Enrichment uses paid models; Terra caps the spend at a monthly budget you set (US$1 by default).
## How it fits together
Here's what happens when you save a capture with enrichment on:
1. **The capture is saved, immediately.** Terra writes a note into your `Inbox` folder before anything else happens. Whatever comes next, your capture is safe.
2. **Terra gathers context.** For a web link, it reads the page. For a video link (YouTube, Instagram, TikTok, Vimeo and others), it fetches the captions, or transcribes short videos on your Mac.
3. **The enrichment model tidies it.** If you picked a template, a language model fills in the template's sections — the ingredients list, the numbered directions — from the page, and Terra adds them to the note.
4. **Jev classifies it.** For each property you've marked **Auto-classify**, Jev picks from the options you defined. Confident picks are written into the note; less certain ones appear as suggestions for you to accept or dismiss.
5. **Your databases do the filing.** A database that shows "recipes where cuisine is Indian" picks the note up the moment the value lands.
Two things the classifier never does: it doesn't move notes out of the Inbox, and it doesn't invent categories. It only chooses among options you created, for properties you've opted in.
| Who | Does what | Set it in |
| --- | --- | --- |
| You | Capture, pick a template, switch **Enrich** on | The Quick capture card |
| The enrichment model | Fills the template's sections | **Settings › AI › Capture › Enrichment** |
| Jev, the classifier | Picks values for **Auto-classify** properties | **Settings › AI › Capture › Classifier** |
| Your databases | Show the note wherever its values belong | A database's filter |
## Step 1: Capture your first thought
1. From any app, press ⌃ ⌥ ⌘ N. (Or, in Terra, choose **File › Quick Capture…**.) Terra comes to the front with the Quick capture card, with the cursor in **Title**.
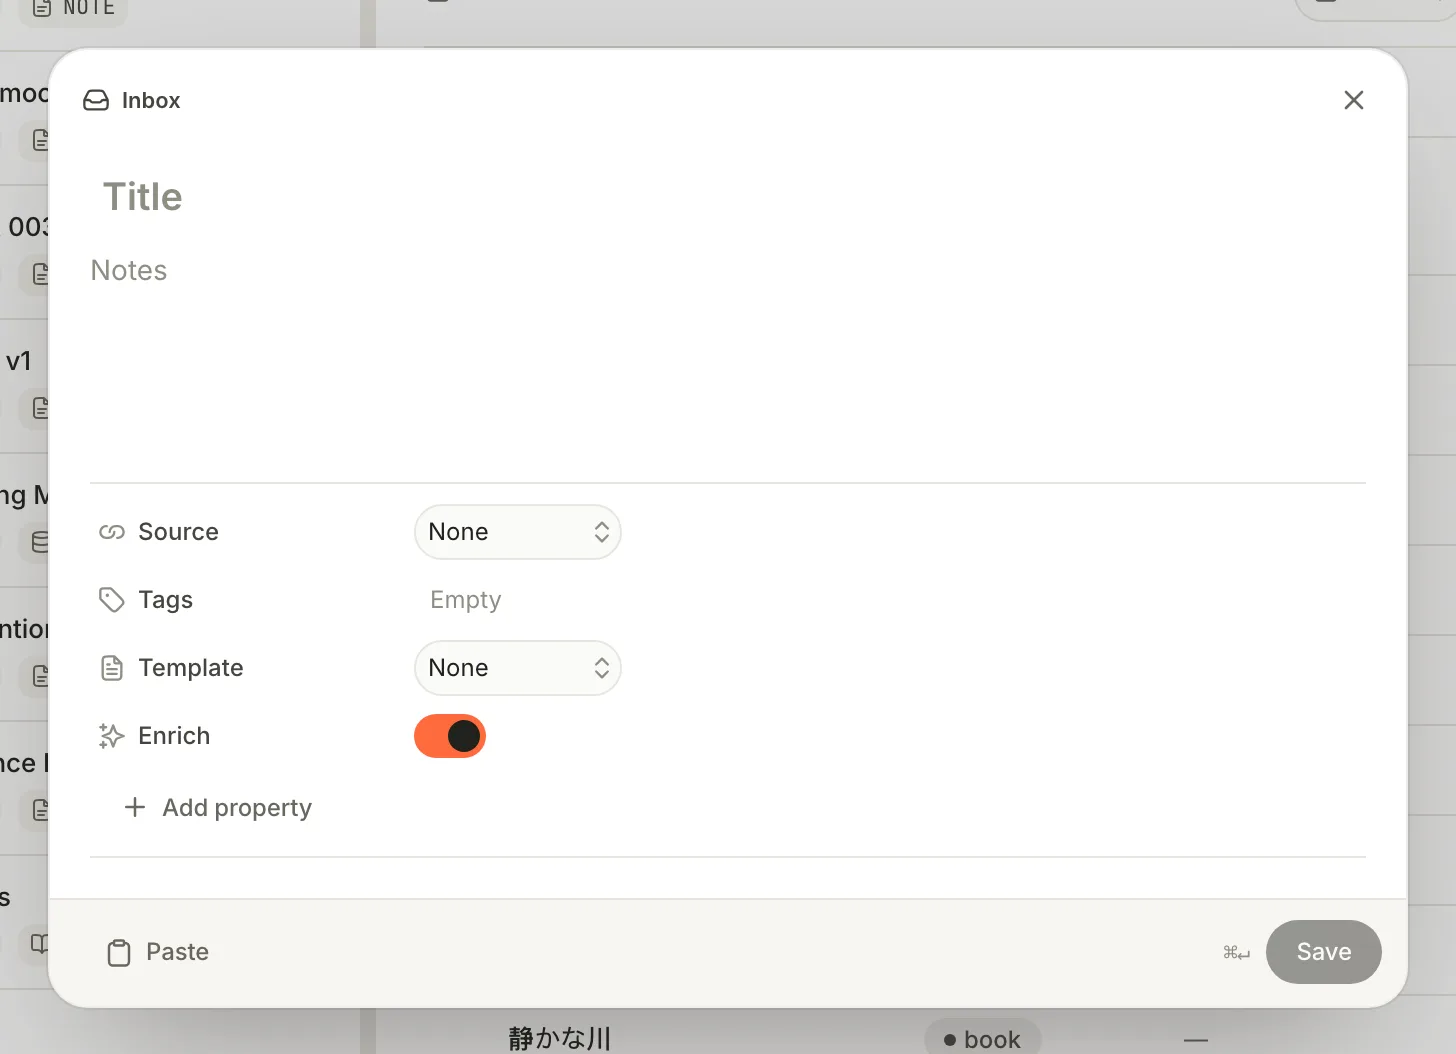
2. Type a **Title**, some **Notes**, or both.
3. Add **Tags** if you like, separated by commas.
4. Press ⌘ Return, or click **Save**. The card closes and Terra confirms: **Captured "…" to Inbox**.
Your capture is now a note in the `Inbox` folder. Find it under **Folders › Inbox** in the sidebar.
> [!WARNING] Esc throws the draft away
> Pressing Esc or clicking outside the card closes it without saving, and there's no undo. Press ⌘ Return before you look away.
## Step 2: Capture a link, an email or a message
The **Source** row says where the thing came from, and adds the right fields.
1. Copy the link in your browser.
2. Open Quick capture and click **Paste** at the bottom left. Terra fills **URL** and switches **Source** to **Link**. (A Slack message link switches it to **Message** instead.)
3. Give it a **Title** — *Dal makhani in 5 minutes*.
4. Click **Save**.
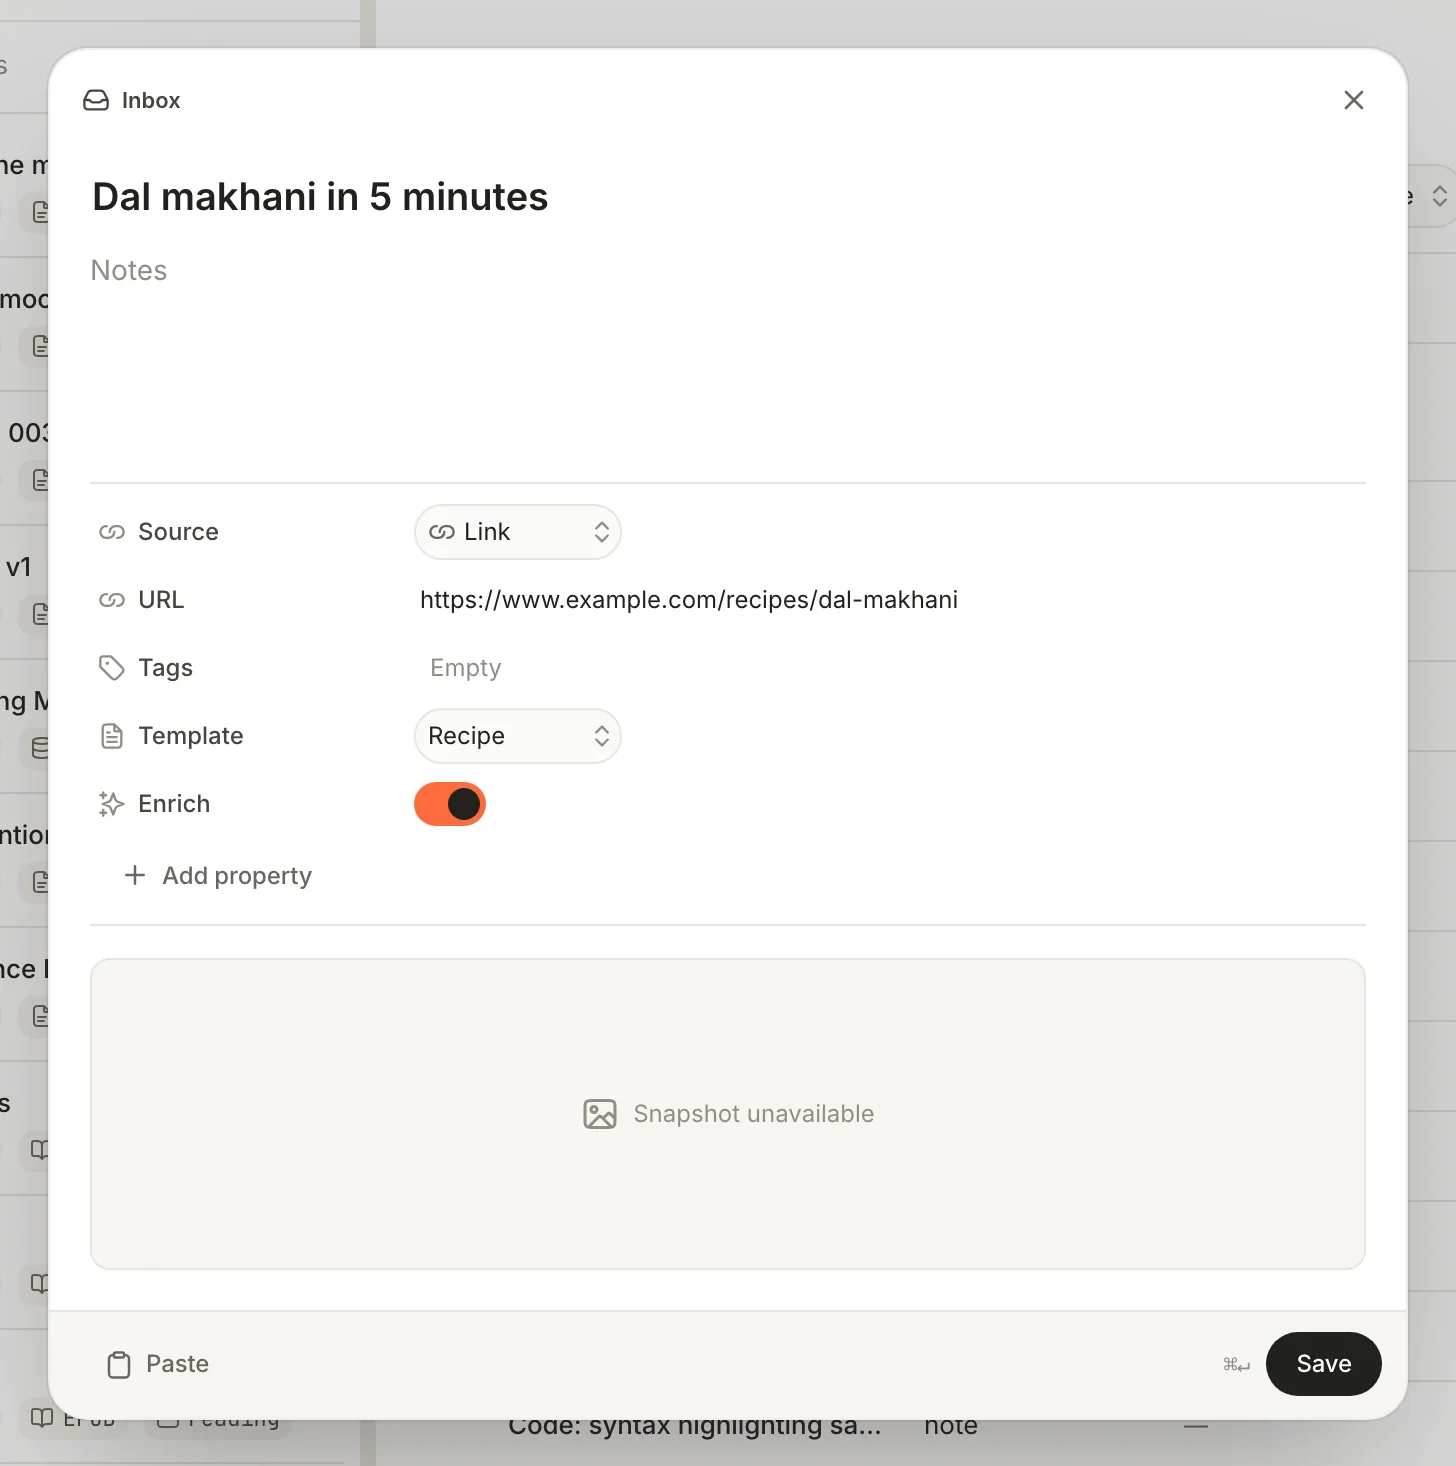
You can also set the source by hand: click **Source** and choose **Link**, **Email** or **Message**.
- **Email** adds a **From** field — who sent it.
- **Message** adds **From** and **Conversation** — say, the channel name.
- **Add property** adds any field of your own, such as *Rating*.
Every capture with a URL also appears in the built-in **Links** database.
> [!NOTE] A link capture keeps the address, not the page
> Without enrichment, Terra saves the link, not the article's text. To keep the full text of a page, open it in Terra's browser and use **Save to Terra** (see [features you might have missed](#features-you-might-have-missed)).
## Step 3: Turn on enrichment
Enrichment is off until you set it up. You'll choose two models — one to tidy, one to classify — and a budget.
1. Open **Settings** (⌘ ,) and click **AI** under **Library**.
2. Make sure you have the providers you need under **Providers**. For the full experience, connect **OpenRouter** (it runs Jev) plus the provider you want for tidying — it can be OpenRouter too. [Connecting a provider](https://terramd.io/docs/ask-your-library#connect-an-ai-provider) takes a minute.
3. Scroll to the **Capture** section and turn on **Enrich captures**. This switches **Enrich** on by default in every new capture.
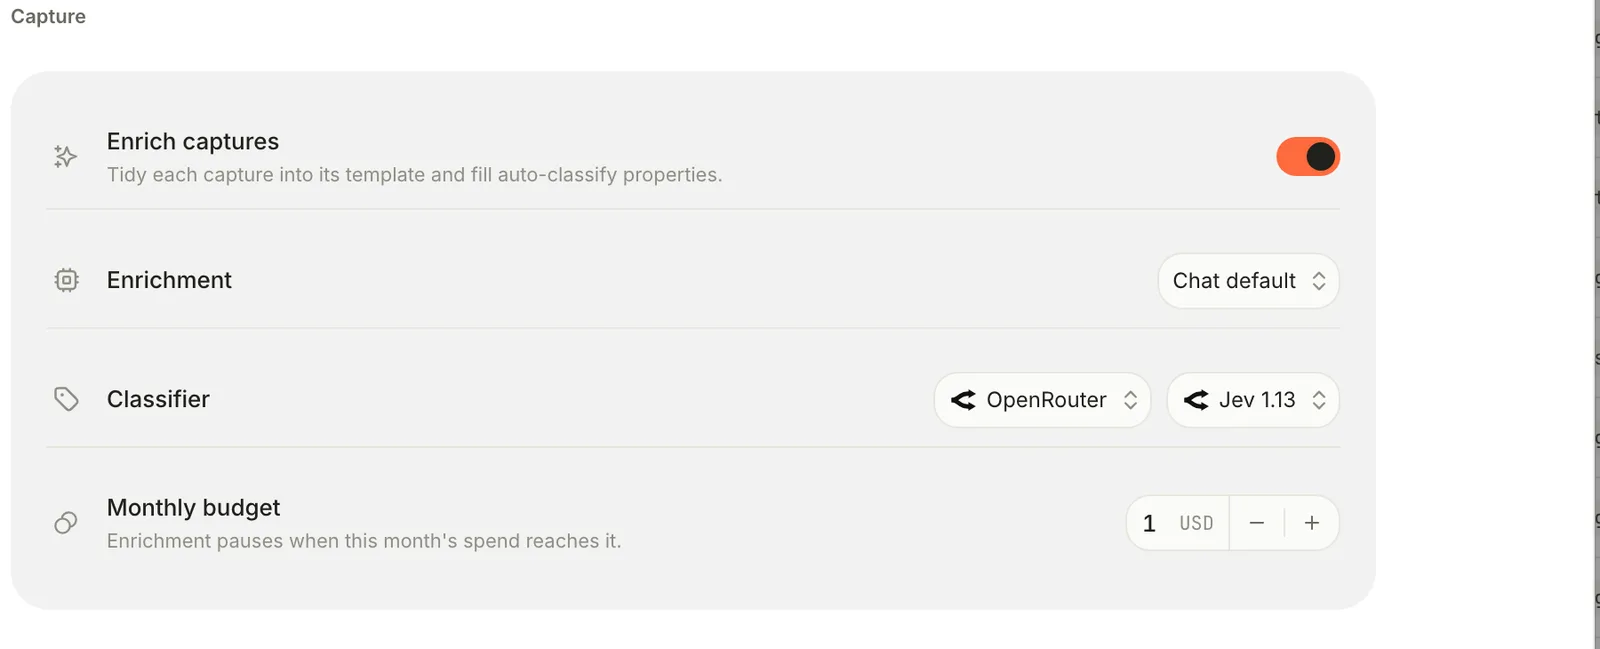
4. In **Enrichment**, choose a provider — for example **Claude** or **OpenRouter** — and then choose a **Model**. Pick both explicitly rather than leaving **Chat default**.
5. In **Classifier**, leave **OpenRouter** and **Jev 1.13** selected. Click the model name to see newer Jev versions when they're available.
6. Set a **Monthly budget** in US dollars. Enrichment stops for the rest of the month when spending reaches it.
Changes save as you make them.
> [!NOTE] Why OpenRouter matters for the classifier
> Jev gives each pick a calibrated confidence score, and Terra only fills in a value automatically when that score clears your threshold. Without an OpenRouter connection — or with **Classifier** set to **Enrichment model** — Terra falls back to the tidying model, which can't score its picks, so *every* pick becomes a suggestion for you to review. Nothing warns you about this, so it's worth checking.
## Step 4: Teach the classifier your categories
The classifier only works on properties you've opted in, and only chooses among their options. The better you describe them, the better it chooses.
1. Choose **Tools › Property Manager…**. The **Property manager** opens with your **Properties**.
2. Click **+** (**New property**). Name it `cuisine` and set **Type** to **Multi-select** — a dish can be *Indian* and a *Weeknight* meal at once. (Use **Select** when exactly one value fits.)
3. Under **Options**, click **+** to add each option: *Indian*, *Italian*, *Mexican*, *Weeknight*.
4. In **Description**, write the question the classifier should answer: *Which cuisine does this dish come from?*
5. Turn on **Auto-classify**. Three more settings appear:
- **Apply at confidence** — picks scoring at least this much are written automatically; lower ones become suggestions. Start at **80 %**.
- **Most values** (multi-select only) — the most options it may pick. **2** suits cuisine.
- **Option meanings** — one line per option saying what belongs there.
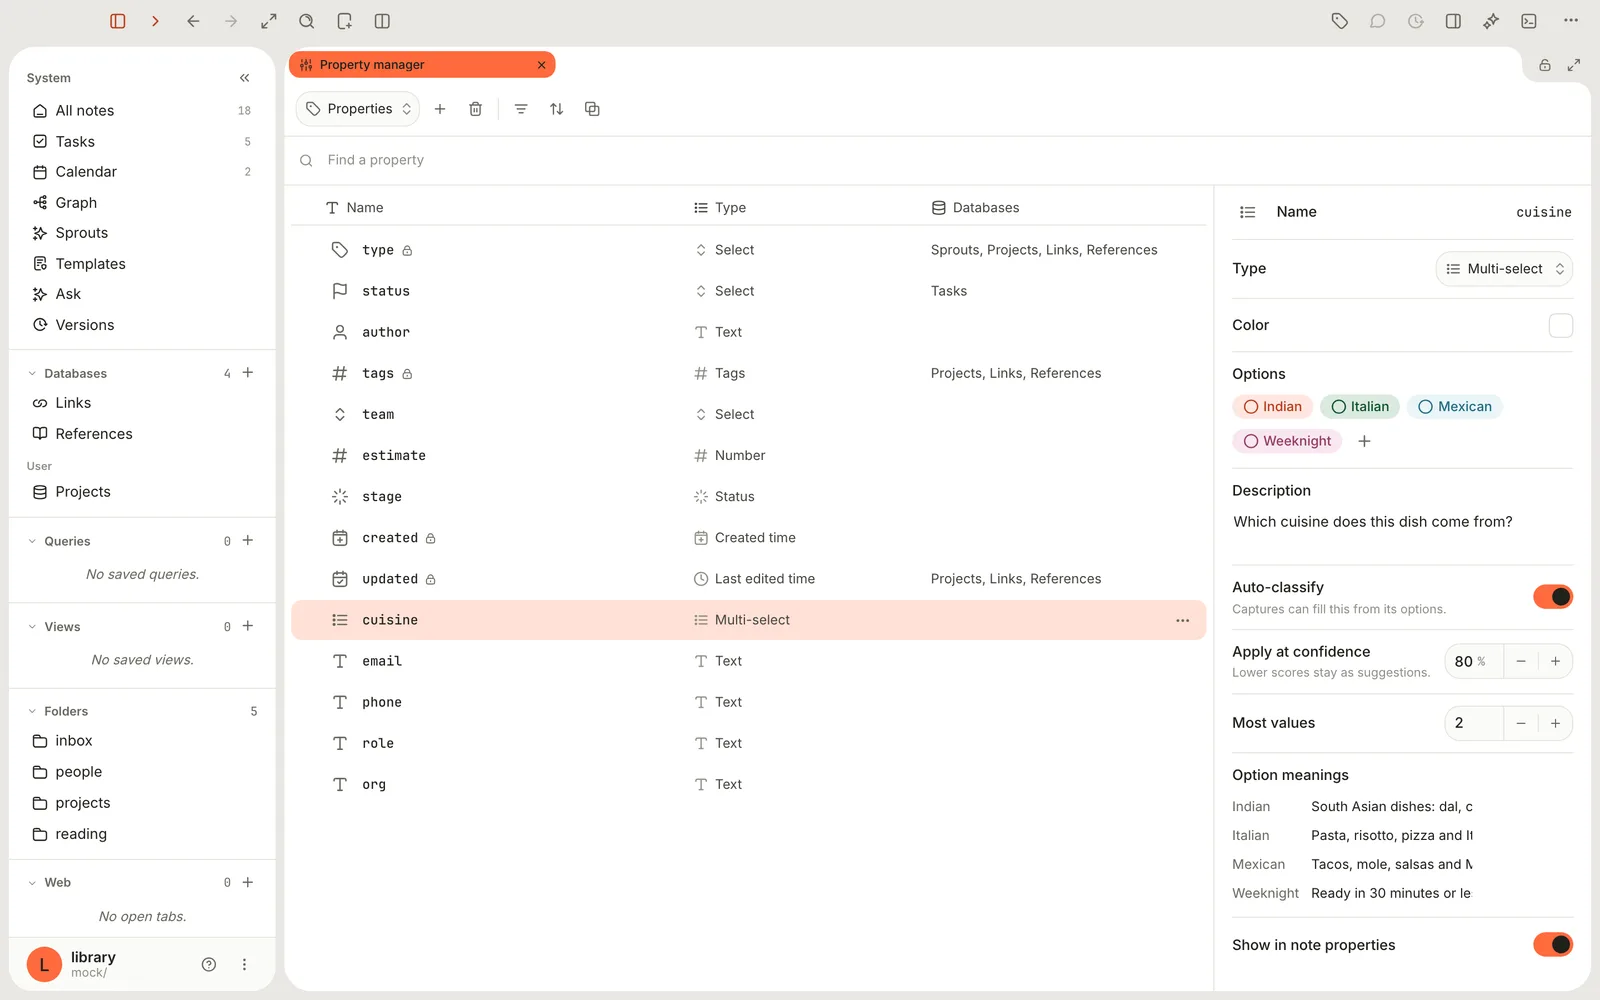
Write option meanings the way you'd brief a new assistant: *South Asian dishes: dal, curry, biryani, dosa* works better than *Indian food*, and *Ready in 30 minutes or less* turns a vague *Weeknight* into a rule.
> [!TIP] Keep the classifier focused
> Every property with **Auto-classify** on is considered for every enriched capture. A handful of well-described properties gives better results — and costs less — than a dozen vague ones.
## Step 5: Capture with a template and Enrich
Now put it together.
1. Copy a recipe link and press ⌃ ⌥ ⌘ N.
2. Click **Paste**, and add a **Title** if the page title isn't what you want.
3. Click **Template** (it says **None**) and choose **Recipe**.
4. Check that **Enrich** is on, then press ⌘ Return.
The capture is saved at once. Enrichment then runs in the background — there's no progress bar, and it can take a little while for long pages or videos. When it's done, the note has changed:
```markdown
---
title: Dal makhani in 5 minutes
nav: Capture and classify
type: link
tags:
- recipe
source:
kind: link
url: https://www.example.com/recipes/dal-makhani
cuisine:
- indian
---
# Dal makhani in 5 minutes
[Dal makhani in 5 minutes](https://www.example.com/recipes/dal-makhani)
> [!note] Ingredients
> - 1 cup black lentils
> - …
## Directions
1. …
2. …
```
The template's sections are added after anything you wrote, the template's tags (here `recipe`) are merged into the note's tags, and `cuisine` holds Jev's confident pick. If something goes wrong, Terra shows **Couldn't enrich capture:** and the reason — and your capture is still there, exactly as you saved it.
> [!NOTE]- What exactly gets sent, and where?
> To tidy: the title and the capture's text (plus the page or transcript Terra fetched) go to your **Enrichment** provider. To classify: the title and text, with your property descriptions and option meanings, go to OpenRouter for Jev. Your other notes, properties and tags aren't sent. Video transcription happens on your Mac using macOS speech recognition, and downloaded audio is deleted afterwards.
## Step 6: Review what the classifier decided
1. Open the note from your Inbox.
2. Look at the properties under the title:
- Values shown normally were confident enough to be **applied**.
- Faded values are **suggestions**. Point at one to see **Suggested — click to apply**.
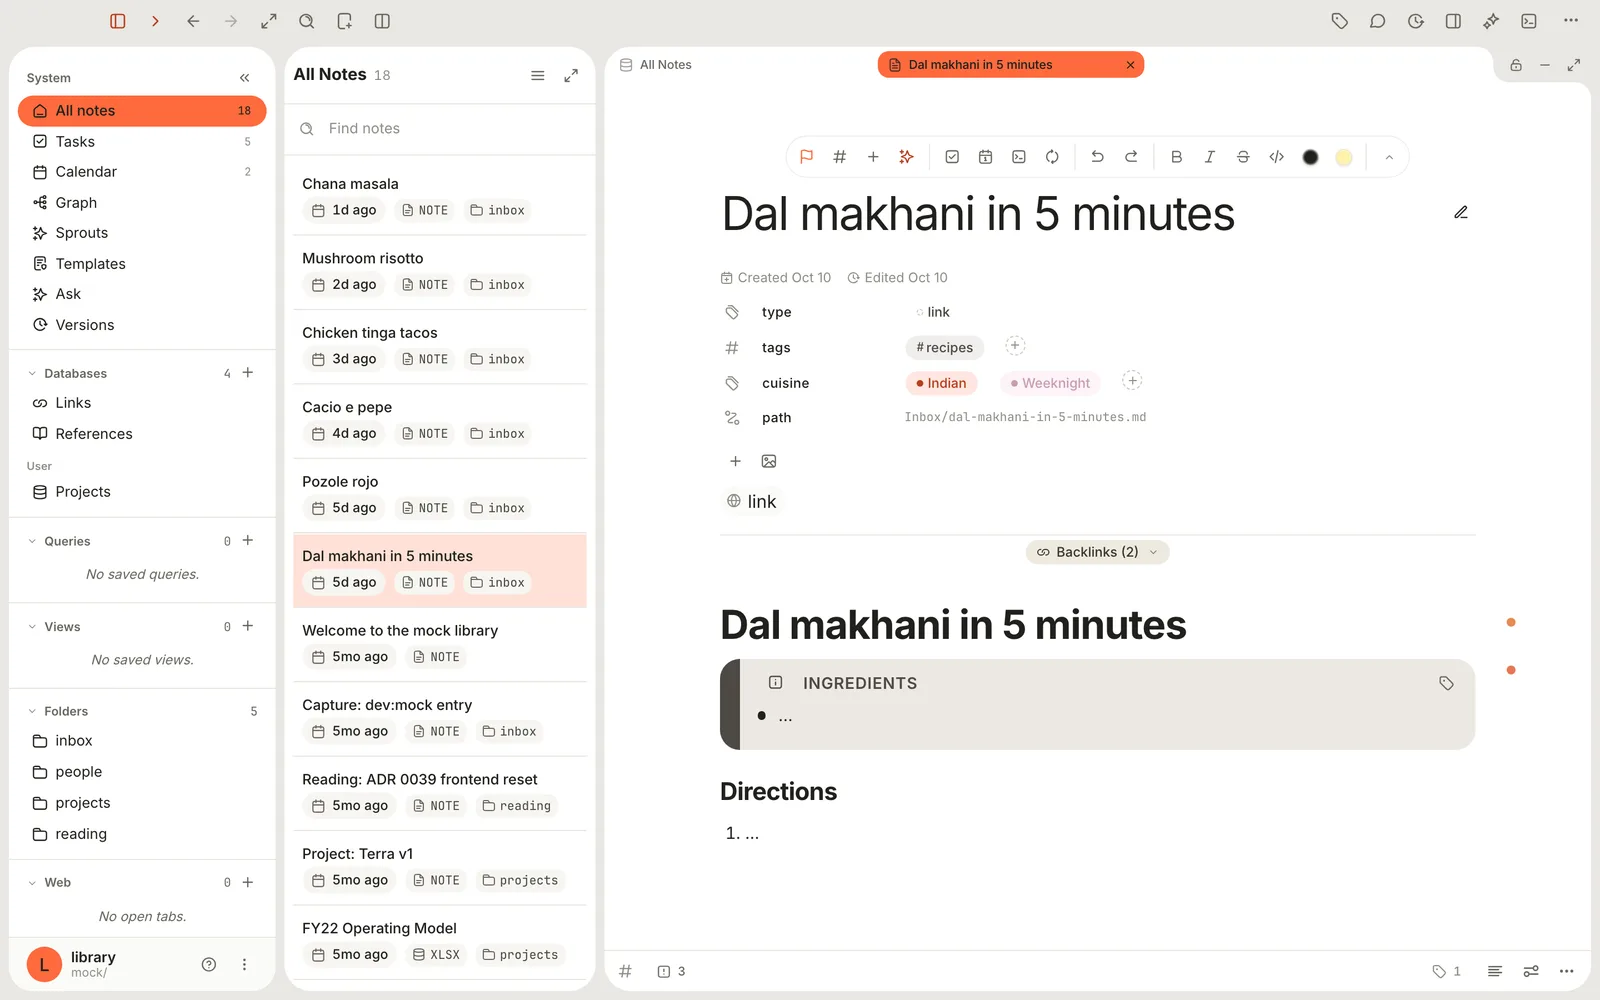
3. Click a suggestion to apply it, or point at it and click **×** (**Dismiss suggestion**) to turn it down.
4. Change or clear any applied value the way you'd edit any property.
Suggestions appear on the note's own page, not in tables or boards. There's no single undo for enrichment: delete any added sections in the editor, and change values by hand.
> [!TIP] Tune the threshold to your patience
> Getting too many suggestions to review? Lower **Apply at confidence** a little. Finding wrong values applied? Raise it, and sharpen the option meanings.
## Step 7: Let databases do the filing
Captures stay in your `Inbox` folder; "filed" means the right databases show them. Build one view for each way you'll want to browse:
1. Create a database — sidebar **Databases** › **+**, name it *Recipes*, add the condition **tags** · **contains** · `recipe`, and click **Save**.
2. Add a **Board** view and set **Show boards as** to `cuisine`.
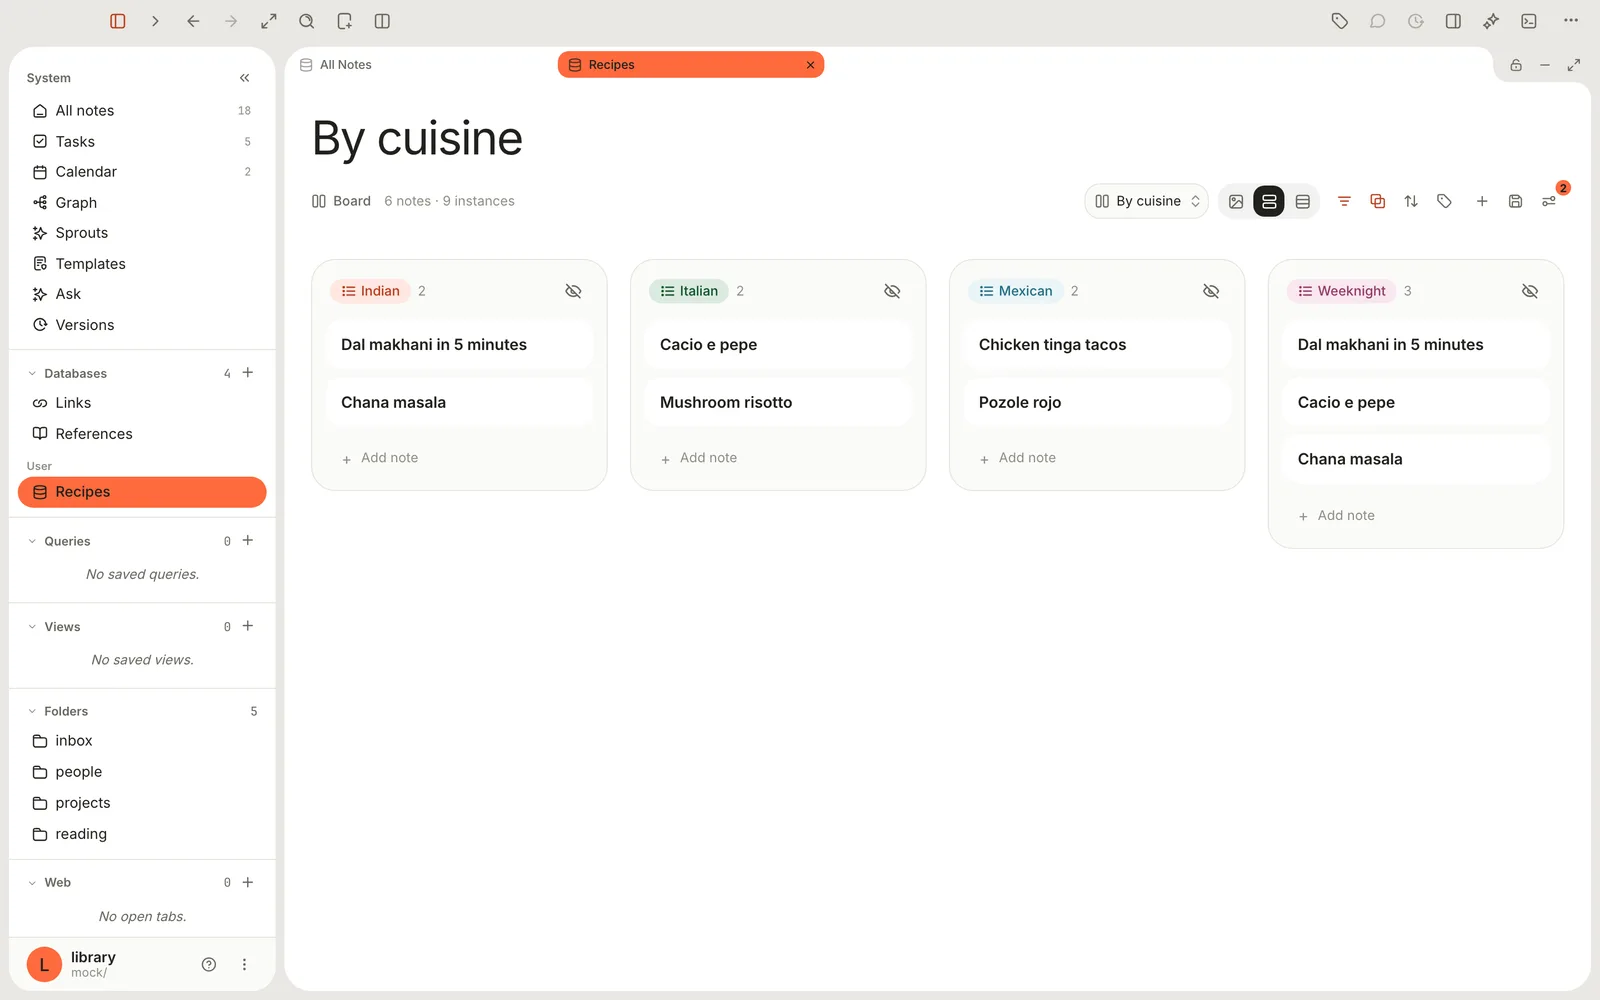
Every new recipe you capture appears in the right column as soon as Jev has classified it. Prefer tidy folders too? Use the note's **Note actions** menu (**⋯** at the bottom of the note) › **Move note** to move it out of the Inbox once you've reviewed it. [Run a project with boards, timelines and burndowns](https://terramd.io/docs/project-suite) covers databases and views in depth.
## Step 8: Sort the notes you already have
The classifier can also go back through notes you captured before you set it up.
1. Open the database whose notes you want to sort and click **View preferences** (the settings icon at the right of its header).
2. In the panel, click **Classify notes** (the sparkle icon).
3. Terra estimates the job — how many notes, which properties, and roughly what it will cost. Click **Classify**.
4. Review the list of proposed changes. Untick any you don't want, then click **Apply**. Terra confirms with **Classified N notes**.
> [!WARNING] Classify notes can overwrite values
> Unlike enrichment at capture time, **Classify notes** reconsiders properties that already have values and proposes replacements — and for multi-select properties, it replaces the whole list. Review the changes before you apply them.
## What it costs
Enrichment calls paid models, so Terra keeps a running total for each Library and stops at your **Monthly budget**:
- Spending is counted per calendar month (UTC) and resets on the 1st.
- When the budget is reached, enrichment stops for that capture with a message, and the capture itself is still saved. Captures made after that aren't enriched until next month or until you raise the budget — and raising it doesn't re-run the ones you missed.
- A budget of `0` turns enrichment calls off entirely.
- Classifying is very cheap. Tidying costs more, depending on the model you chose and how long the page or transcript is — long videos and big articles cost the most.
## Features you might have missed
### Transcripts of videos, without a template
Capture a YouTube, Instagram, TikTok or Vimeo link with **Enrich** on and no template, and Terra adds the post's caption and a timestamped transcript under a **Source** heading. Captions come from the site; short videos without captions (up to 20 minutes) are transcribed on your Mac. The first time, macOS asks for permission to use speech recognition.
### Templates without paying for AI
Pick a template that has nothing for a model to fill — like **Meeting** or **Daily log** — with **Enrich** on, and Terra simply appends the template's sections and tags. If no property has **Auto-classify** on, no model is called at all.
### Keep the whole page with Save to Terra
Terra has its own browser. Choose **View › New Webpage**, open the page, then click **Page options** (next to the address bar) › **Save to Terra**. Terra saves the article's text as Markdown, plus a picture of the page, into your Inbox.
### Add a paper or book by its DOI or ISBN
Click **New…** in the toolbar, choose **Add reference**, paste a DOI or ISBN and click **Look up**. Terra creates a reference note with authors, date and publisher, ready to cite. See [Build a research library](https://terramd.io/docs/research-library).
### Paste as note
Right-click an empty part of the window and choose **Paste as note** to turn whatever's on your clipboard into a new Inbox note.
### Share from Safari
In release builds of Terra, the macOS **Share** menu has a **Terra** item. It opens Quick capture filled in with the page's title and address; nothing is saved until you click **Save**.
### A capture button and an in-app shortcut
Add a **Quick capture** button to the toolbar with **Customize toolbar…** (right-click any toolbar button). To open the card with a different shortcut while you're in Terra, set one for **Quick capture** in **Settings › Hotkeys**, under **Global**.
## Troubleshooting
> [!NOTE]- Nothing is ever applied — everything arrives as a suggestion
> The classifier is running without OpenRouter. Check that **OpenRouter** is connected under **Settings › AI › Providers** and that **Classifier** is set to **OpenRouter** with a Jev model. Also check **Apply at confidence** isn't set too high.
> [!NOTE]- "Couldn't enrich capture: enrichment model unavailable"
> The tidying model can't be reached. In **Settings › AI › Capture**, set **Enrichment** to a connected provider *and* pick a **Model** — **Chat default** may point at a model you haven't set up.
> [!NOTE]- "Monthly enrichment budget reached"
> You've hit the cap for this month. Raise **Monthly budget** in **Settings › AI**, in the **Capture** section (the message may say "Settings → Capture" — it's moved). Captures that weren't enriched stay as they were.
> [!NOTE]- I picked a template but nothing was added
> Templates only apply when **Enrich** is on in the card. Check the switch before saving.
> [!NOTE]- The page's text isn't in my note
> Enrichment reads the page to fill in your template, but doesn't paste the article in. To keep the full text, use **Save to Terra** in Terra's browser.
> [!NOTE]- The capture shortcut doesn't work
> Terra has to be running, and another app may already use ⌃ ⌥ ⌘ N. You can still use **File › Quick Capture…**. To change the global shortcut, quit Terra, open `~/Library/Application Support/Terra/preferences.toml` in a text editor and change `global_hotkey` under `[capture]` (for example `"ctrl+option+cmd+j"`), then reopen Terra.
## What's next
- [Templates](https://terramd.io/docs/templates) — design the templates your captures fill in.
- [Run a project with boards, timelines and burndowns](https://terramd.io/docs/project-suite) — build the databases that do the filing.
- [Get answers from your own notes](https://terramd.io/docs/ask-your-library) — ask questions across everything you've captured.
---
# Get answers from your own notes
> Ask questions in plain language and get answers that cite your notes. Let the assistant write for you, with every edit reviewable.
Source: https://terramd.io/docs/ask-your-library
You wrote it down somewhere. A decision from last spring's planning meeting, a quote from a paper, the name of the contractor who fixed the roof. Search finds words, but sometimes you only remember the idea.
Terra Agent reads your Library for you. Ask a question the way you'd ask a colleague and it searches your notes, reads the ones that matter and answers with links back to them. When you want more than an answer — a summary filed as a new note, a follow-up added to a project page — it can write too, and nothing changes unless you allow it.
> [!SUMMARY]
> - Connect an AI provider, cloud or fully local
> - Ask a question and follow the citations back to your notes
> - Hand the assistant the right context: a note, a file, what's on screen
> - Choose how much it may do without asking, then approve, edit or deny each change
> - Review every edit in one place and undo it with **Revert**
> [!BEFORE]
> - A Library open in Terra. New to Terra? Start with the [Quickstart](https://terramd.io/docs/quickstart).
> - An account with an AI provider: an API key from Claude (Anthropic), OpenAI or Gemini, or an OpenRouter account. If you already use the Codex or Hermes Agent command-line tools, Terra can use those instead.
> - About 10 minutes.
## How it fits together
There are two doors into the same conversation:
- **AI conversations** in the toolbar opens the chat as a drawer on the right, next to whatever you're working on. Handy when a question is about the note in front of you.
- **Ask** in the sidebar opens the chat as a full page, with your chat history in the column beside it. Better for longer sessions.
A reply keeps streaming if you switch from one to the other. Each chat is saved inside your Library, in `.terra/conversations/`, so your conversations travel with your notes and never show up as notes themselves.
The assistant has tools for working with your Library — search, read, create, edit, append — and a **mode** that decides which of those run without asking you first. You'll set that in step 4.
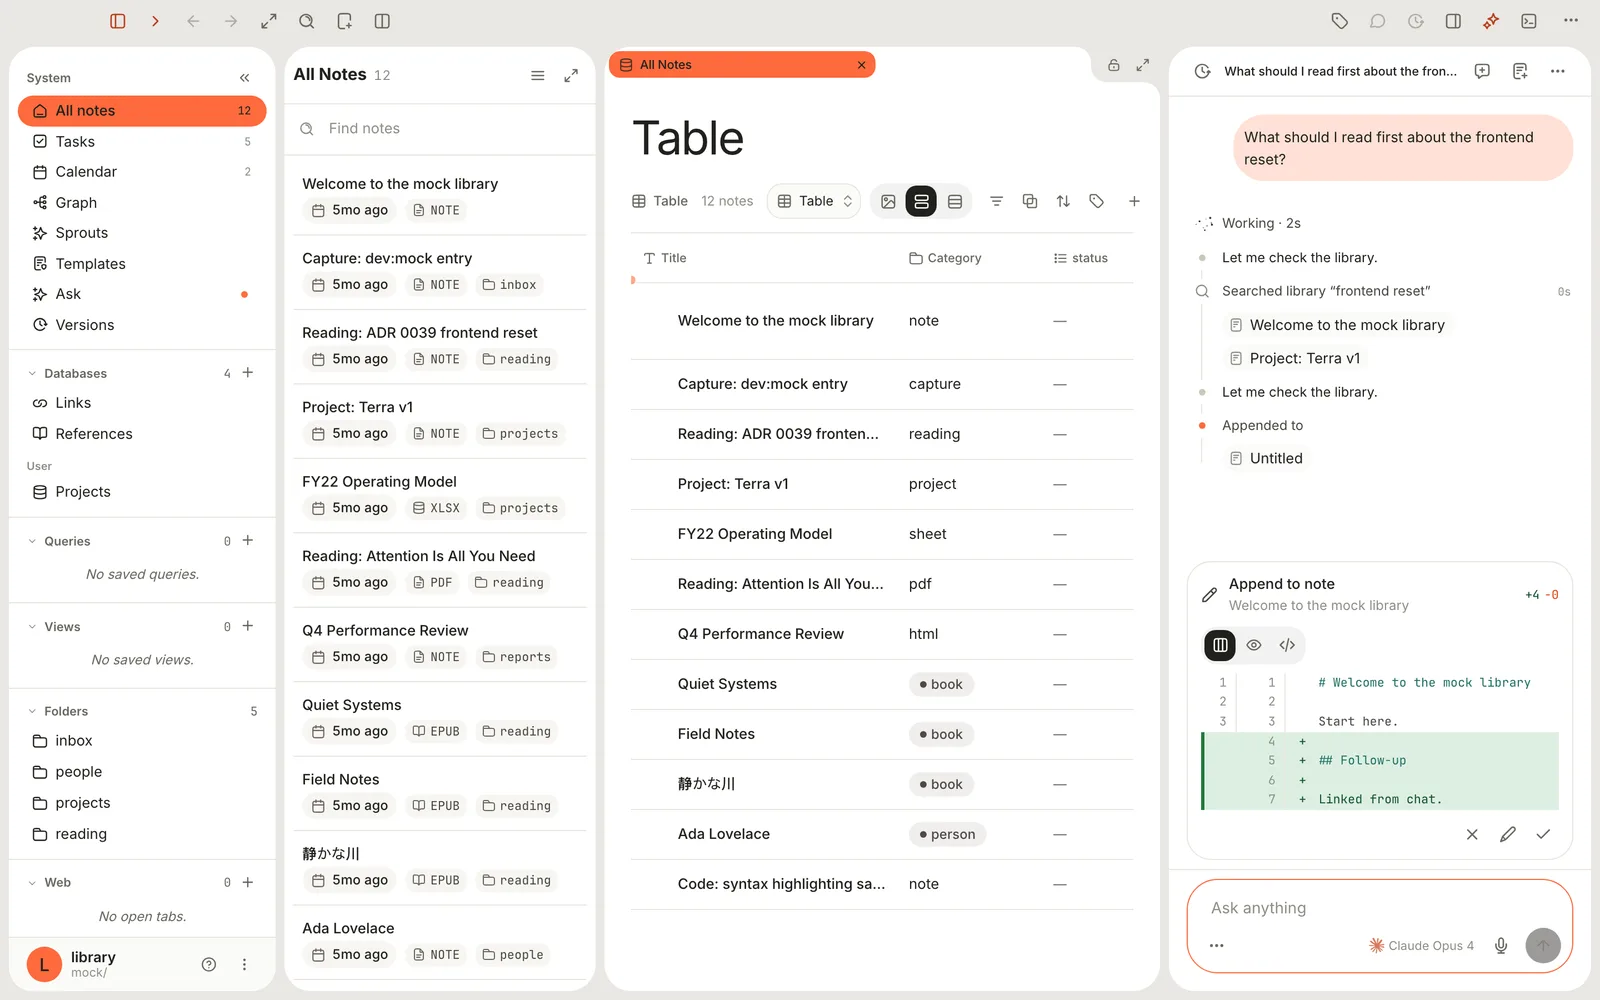
## Step 1: Connect an AI provider
Terra doesn't ship its own model. You bring one, and you can connect several and switch between them.
1. Open **Settings**: press ⌘ , or choose **Terra › Settings…**. (The **⋯** **Library menu** at the bottom of the sidebar has **Library settings…** too.)
2. In the list on the left, under **Library**, click **AI**.
3. Scroll to **Add provider** and click the service you use — **Claude**, **OpenAI**, **Gemini** or **OpenRouter** for most people.
4. macOS asks **Allow AI provider connection?** and spells out the arrangement: who runs the model, who pays, and that your prompt and selected notes may leave this Mac. Click **Allow**. The provider joins the list under **Providers**.
5. On the provider's row, click the link icon (**Connect**):
- **Claude**, **OpenAI** or **Gemini**: paste your API key into **API key** and click **Connect**.
- **OpenRouter**: Terra opens your browser to sign in to OpenRouter; approve, then come back. Prefer a key? Click the key icon (**Paste API key**) instead and paste a key that starts with `sk-or-`.
6. The status line at the bottom of the pane reads **Connected Claude.** (or the provider you picked), and the row's icon changes to **Disconnect**.
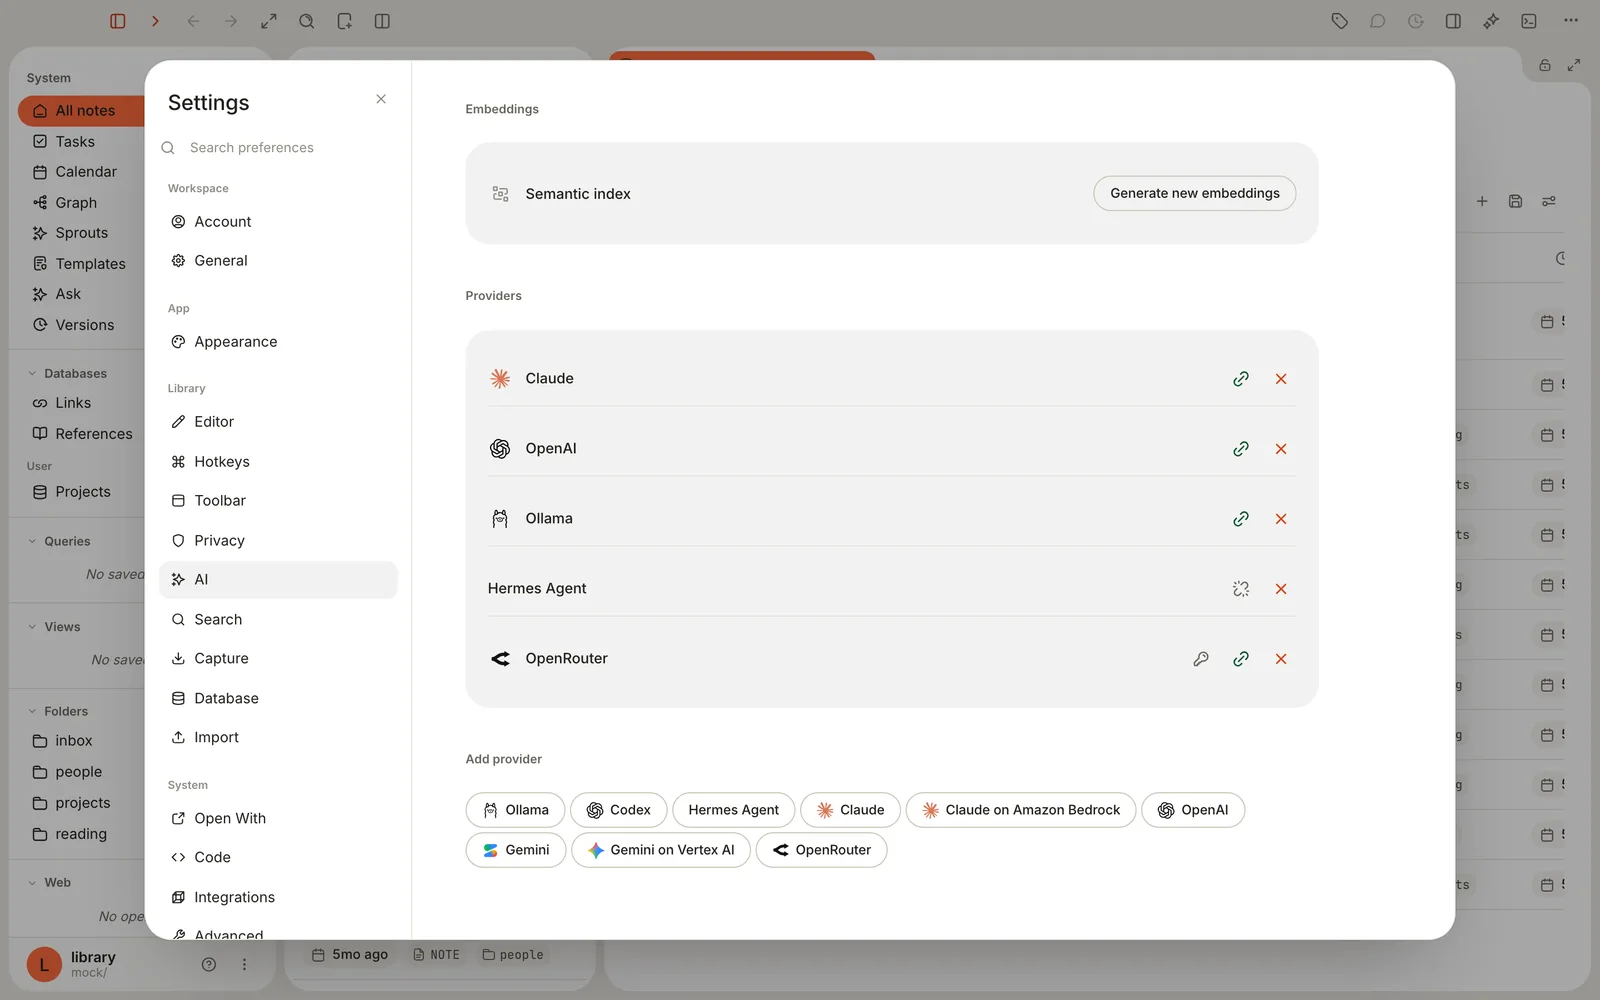
7. Scroll back up to **Defaults**. In the **Chat** row, choose the provider, then choose a **Model**. New conversations, the editor's **AI** menu and inline rewrites use it.
> [!WARNING] Terra doesn't test the key when you connect
> "Connected" means the key is stored, not that it works. A mistyped key shows up on your first question, as an error such as `401 Unauthorized`. Keys are kept in your Mac's Keychain, never in the Library folder.
> [!NOTE]- Using Codex or Hermes Agent instead of an API key
> If you've installed and signed in to the Codex or Hermes Agent command-line tool, click **Codex** or **Hermes Agent** under **Add provider**, click **Allow**, then click **Connect** on its row. Terra finds the program, shows a second macOS alert describing exactly what it will run, and connects once you click **Allow**. These tools use their own sign-in and model provider, so your prompts still go to that provider. After you update the tool, click **Connect** again to approve the new version.
## Step 2: Ask your first question
Say you're picking a project back up after a few weeks away and want to know where you left it.
1. Click **Ask** in the sidebar. The Ask page opens with a greeting and a box that says **Ask anything**.
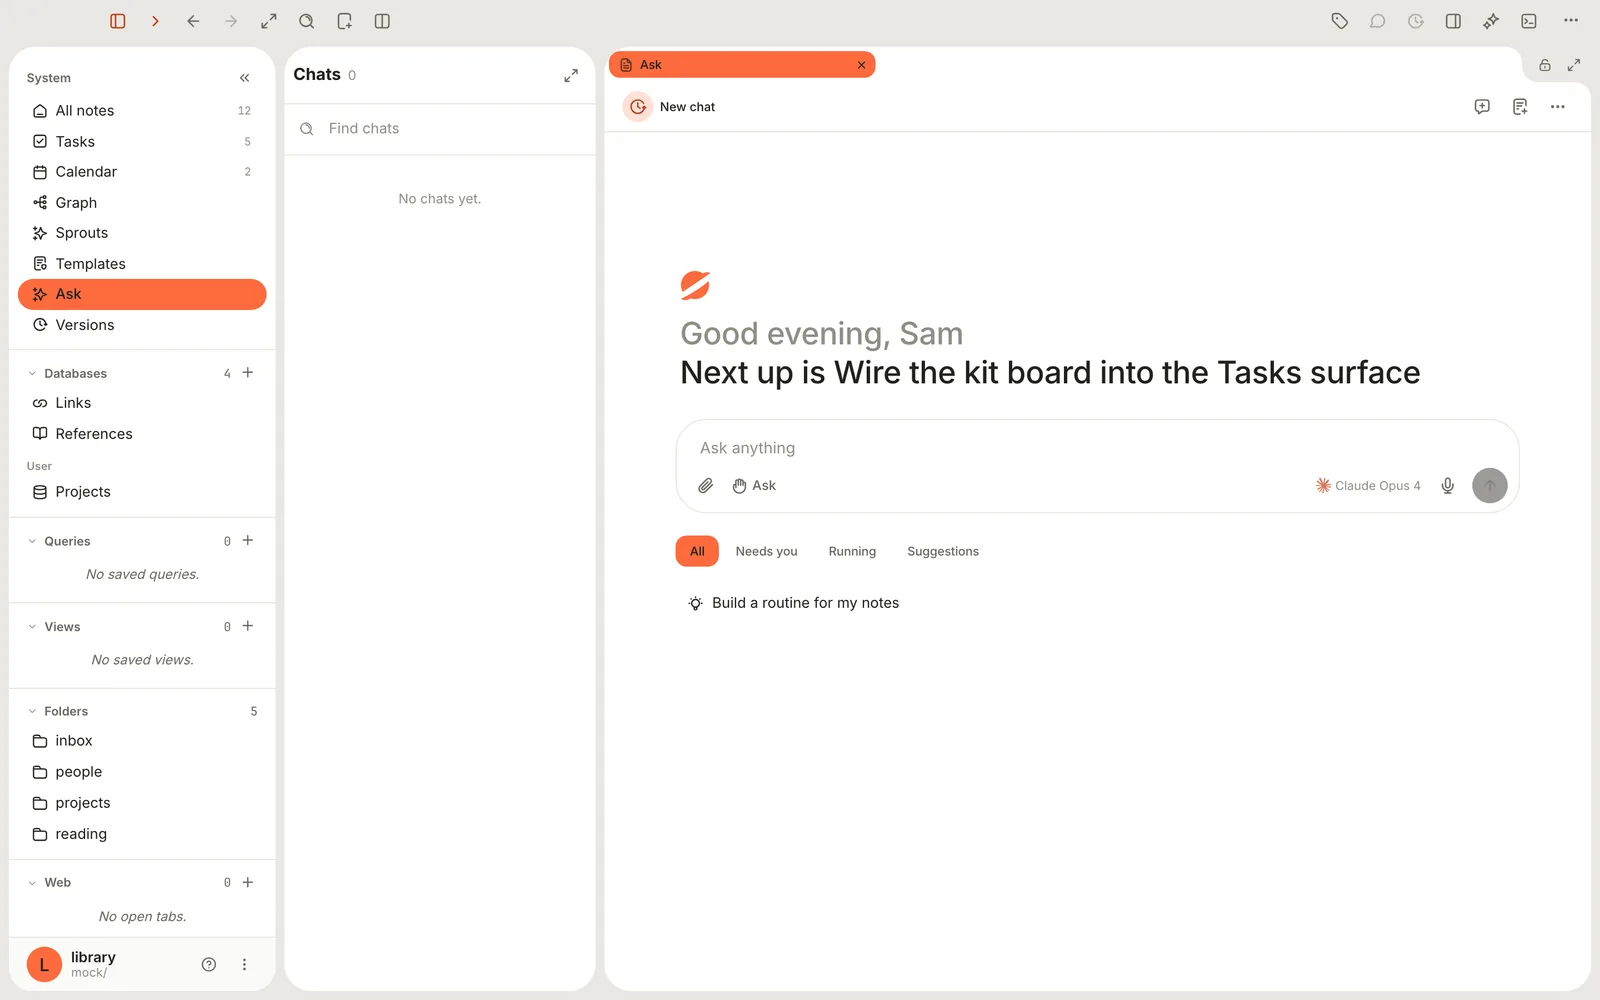
2. Type a question in plain language. For example: *What did we decide about the launch date, and who owns the press kit?*
3. Press Return to send. (⇧ Return starts a new line instead.)
4. Watch the activity line above the answer. It reads **Working** while the assistant searches and reads, and lists each step: **Searched library "launch date"**, **Read**, and so on, with the notes it touched.
5. Read the answer. Wherever it relies on a note, you'll see a small note chip. Hover a chip to preview the note, or click it to open the note.
Questions that name specific things — a project, a person, a date range — get better answers than vague ones, because the assistant starts from a search of your Library.
> [!NOTE] Build the semantic index for better recall
> Until Terra has a *semantic index* of your Library, it finds notes by their words, not their meaning. If you see **Recall is keyword-only until the semantic index is built**, click **Build index** (or go to **Settings › AI** and click **Generate new embeddings**), then click **Allow** when macOS asks **Generate local embeddings?**. With no **Embedding** default set, Terra downloads a small model once and builds the index on your Mac — your notes aren't sent to any provider.
## Step 3: Give it the right context
The assistant searches on its own, but you can save it the guesswork by handing it exactly what you mean.
1. Click the paperclip (**Attach**) under the message box.
2. Choose where the context comes from:
- **Search library** — type a few letters of a note's title and pick it.
- **Local file** — pick a file from your Mac. Text files (Markdown, plain text, CSV, JSON, code and similar) and images attach directly.
- **On screen** — in the drawer, attaches the note you're looking at. (On the Ask page there's nothing beside the chat, so it reads **Nothing on screen**.)
3. Attached items appear as chips above the message. Click **×** on a chip to remove it.
In the drawer, the same choices live behind the **⋯** button next to the model name.
> [!WARNING] PDFs go through your Library
> A PDF can't be attached straight from Finder. Add it to your Library first (drag it into the Terra window), then attach its note. Images need a model that can read images, and anything attached is trimmed at 60,000 characters.
## Step 4: Decide how much it can do on its own
Reading and writing notes are *actions*, and you choose which ones need your say-so. The setting is called the mode, and it applies to the whole Library on this Mac.
1. On the Ask page, click the mode button under the message box. It starts as **Ask**. (In the drawer: **⋯** › **Mode**.)
2. Pick a mode:
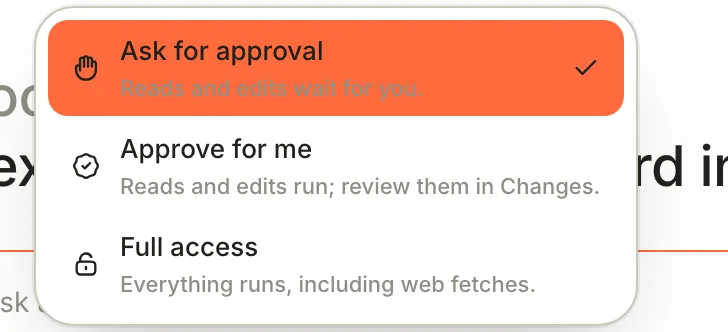
| Mode | Reading and editing notes | Opening web pages |
| --- | --- | --- |
| **Ask for approval** (default) | Each action waits for you | Asks every time |
| **Approve for me** | Runs, and every edit is listed under **Changes** | Asks every time |
| **Full access** | Runs, and every edit is listed under **Changes** | Runs |
3. If you raise the mode, macOS asks you to confirm — for example *Let the assistant edit without asking?* Click **Allow**. Lowering the mode never asks.
Whatever the mode, the assistant can't delete notes or empty the trash.
> [!TIP] Start strict, loosen later
> Spend a day in **Ask for approval** and watch what the assistant asks to do. Once you trust its judgement for your kind of work, **Approve for me** saves clicks while **Changes** still keeps every edit undoable.
## Step 5: Approve, edit or deny a change
In **Ask for approval** mode, when the assistant wants to act, a card appears above the message box naming the action — **Read note**, **Append to note**, **Edit note**, **Create note** — and the note it affects.
1. Look at what it wants to do. For edits, the card opens on a diff: green lines are being added, red lines removed. Use the buttons at the top of the card to switch between the diff, a rendered **Preview** of the note, and the exact **Call** the assistant made.
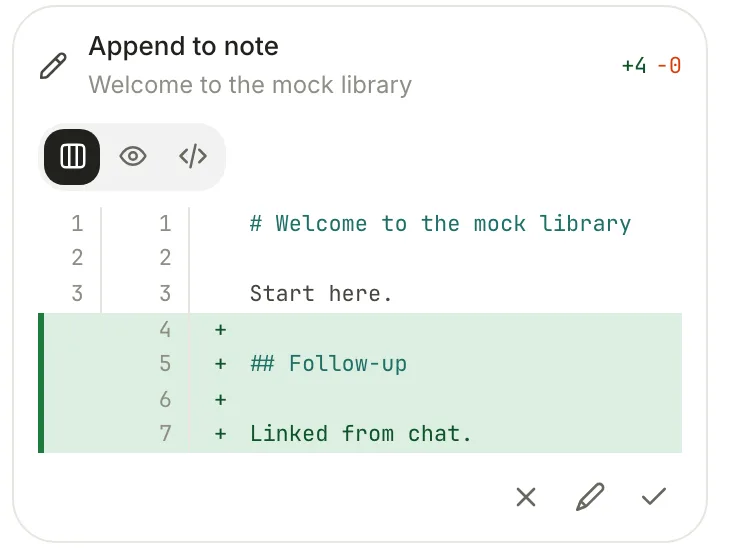
2. Choose what happens:
- **Approve** (✓) — let it go ahead.
- **Deny** (✕) — refuse. The assistant is told you declined and carries on without it.
- **Edit before approving** (pencil) — rewrite the text yourself, then click **Approve edit**. Available when it creates, edits or appends to a note.
- **Allow reads in this chat** — for read requests, approves this read and every later one in the same chat, until you quit Terra.
3. If several actions are queued, the card shows how many are waiting. Work through them one at a time.
## Step 6: Review and undo its edits
Every edit the assistant makes in a chat is recorded, before and after, so you can check its work and take any of it back.
1. In the chat's header, click **⋯** (**Chat options**) and choose **Changes**. It shows a count like **+4 −0**, and is greyed out until the assistant has edited something.
2. The **Changes** pane opens beside the chat. The left side lists **Changed notes**; click one to see its diff.
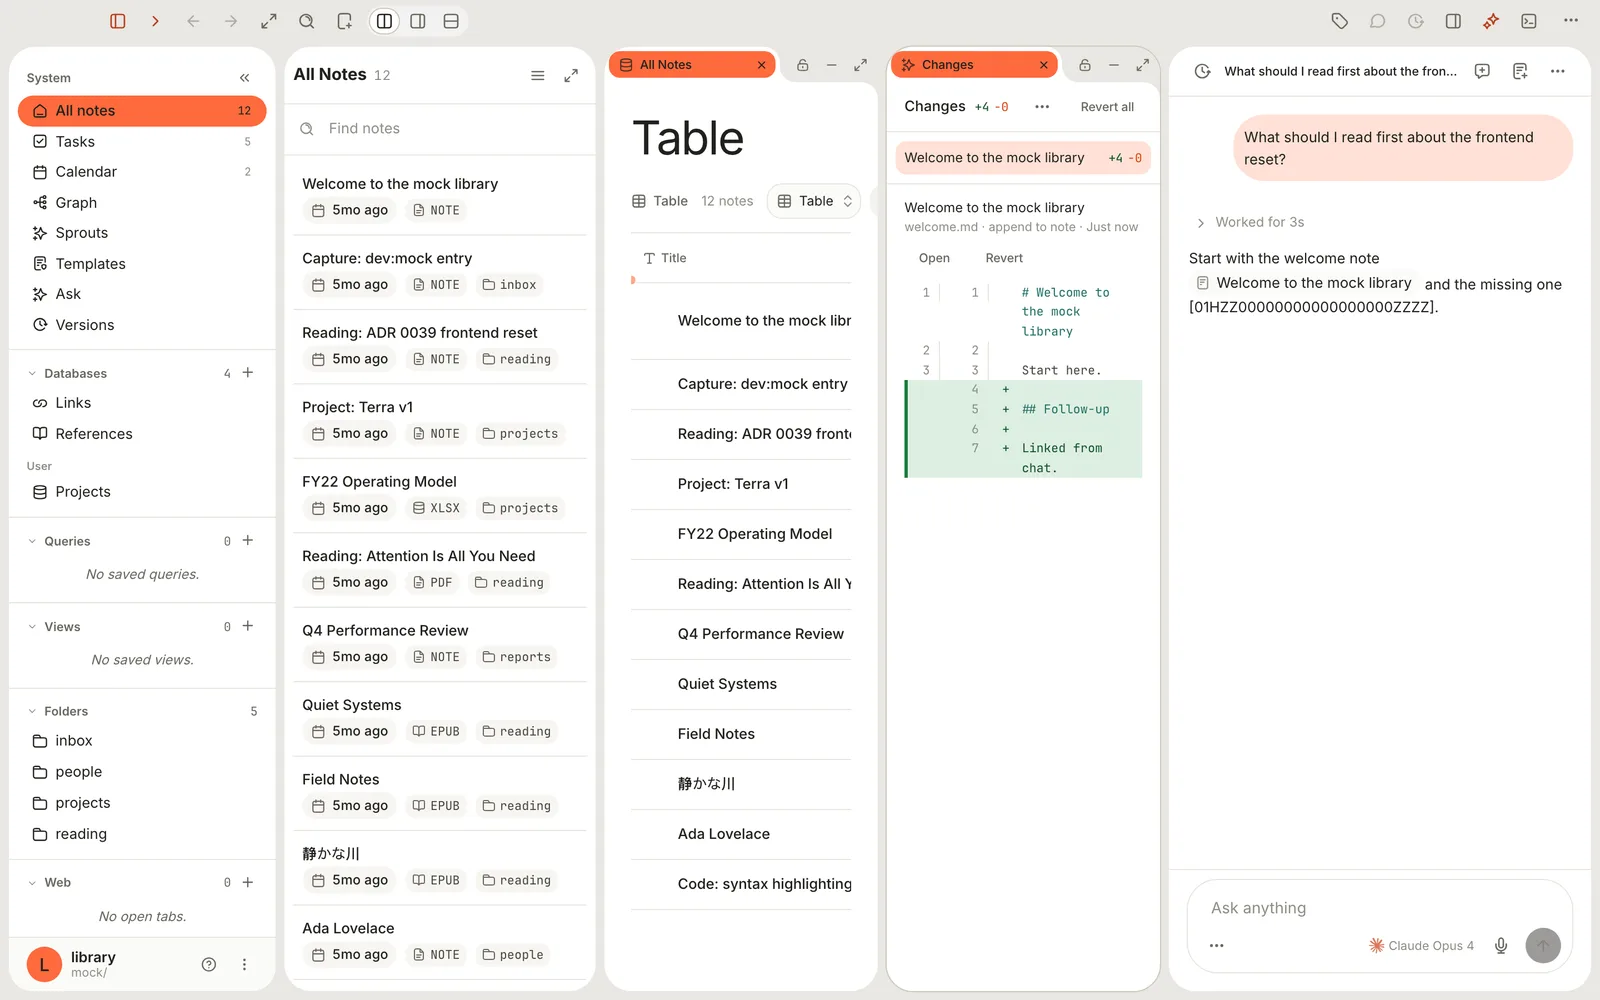
3. Click **Open** to jump to the note, **Revert** to undo that note's change, or **Revert all** at the top to undo everything from this chat.
A revert won't overwrite work you did afterwards: if you've edited the note since, Terra says the note changed and leaves it alone.
## Step 7: Keep the conversation
Some conversations are worth keeping as notes — a research summary, a plan you talked through.
- **Make a note** (the page-with-plus button in the chat header) turns the whole chat into a note in your **Inbox**, with your questions and the answers under headings, and opens it.
- **Chat history** (the clock at the left of the header) lists earlier chats. On the Ask page they're in the **Chats** column; right-click one for **Convert to note** or **Delete**.
- Double-click a chat's title to rename it. **Chat options** also has **Rename**, **Archive** and **Delete**.
## Features you might have missed
### Talk instead of type
Click the microphone beside the send button (**Voice input**) and speak. Your words appear in the box; pause or click again to stop, then press Return. The first time, macOS asks for permission to use the microphone and speech recognition. When macOS supports your language, speech is recognised on your Mac.
### See more, or less, of the work
**Chat options › Transcript view** changes how much of each answer's working you see: **Normal** folds the steps away once the answer lands, **Summary** shows one line, **Verbose** opens every step with its input and result, and **Thinking** adds the model's reasoning.
### Pick a model per chat
Click the model name under the message box to switch models for this chat only. New chats go back to your default.
### Give the assistant a personality
In **Settings › AI**, the **Terra Agent** section has a **Default provider**, a **Default model** and a **System prompt** — standing instructions such as "Answer in British English" or "Always end with next steps". They apply to new chats.
### AI where you write
In any note, the **AI** button in the editor toolbar offers **Continue writing**, **Improve writing**, **Fix grammar** and **Summarize**. Select some text first for **Improve writing** and **Fix grammar**; **Summarize** works on a selection or the whole note, and **Continue writing** picks up after the paragraph you're in.
### Plain-English queries
In a Query, type what you want into **Describe the query you want…** and click **Generate**. Terra writes the SQL for you and checks it only reads.
### Ask about Terra itself
The assistant can search Terra's built-in help. Ask "how do I make a board from my projects?" and it answers from the help articles.
### Use your Claude, ChatGPT or Gemini subscription
In the drawer, **Chat options** lists **Claude**, **ChatGPT** and **Gemini**. Pick one to use that service's own website inside the drawer, signed in with your account. Pick **Terra** to come back. These chats live on the vendor's site and can't see your Library.
## What leaves your Mac
Terra sends your AI provider what the model needs to answer: your message, anything you attach, short passages from notes it found (up to eight), and the text of any note or web page the assistant reads while it works. After a reply, Terra also asks a smaller model from your **Defaults › Chat** provider to pick facts out of the answer, which it stores in your Library to improve later recall.
Things that don't leave your Mac: your API keys (they're in the Keychain), notes the assistant doesn't touch, and — if you build it without an **Embedding** default — the semantic index. Codex and Hermes Agent send your prompts through their own provider.
## Troubleshooting
> [!NOTE]- It says "No AI connection"
> Connect a provider first: click **Open AI settings**, or follow [step 1](#connect-an-ai-provider).
> [!NOTE]- My providers disconnected after I moved my Library
> Provider approvals and keys belong to this Mac *and* this Library's folder location. Moving or renaming the Library folder, or opening it on another Mac, disconnects them. Click **Connect** on each provider and paste its key again.
> [!NOTE]- "Another chat is still replying"
> Terra runs one reply at a time. Your message stays in the box; send it when the other chat finishes. There's no stop button yet — a reply ends when the model finishes.
> [!NOTE]- The assistant answers but never edits anything
> The model you picked may not support tools. It can still answer from the notes Terra finds for it. Switch to a model that supports tool use — a current Claude, GPT or Gemini model — with the model button.
> [!NOTE]- I connected Ollama but can't pick it for chat
> In this version, Terra offers Ollama models for the semantic index (**Defaults › Embedding**) only. Use a hosted provider for chat.
> [!NOTE]- "Couldn't attach …"
> Only images and text files attach directly. Add PDFs and other files to your Library first, then attach their notes. Images also need a model that can read images.
> [!NOTE]- "Request too large" or "AI cost cap reached"
> Terra refuses a single request that would send more than about 150,000 tokens — attach less, or ask about fewer notes at once. It also pauses a provider when the day's spending passes a safety limit; the limit resets daily.
> [!NOTE]- macOS asks "Allow exact agent action?" even in Full access
> A few lookups into Terra's own knowledge of your Library still ask every time, whatever the mode. Opening a web page asks too, unless you're in **Full access**. Each approval covers that one call only.
## What's next
- [Capture anything and let Terra file it](https://terramd.io/docs/capture-and-classify) — the same providers power capture enrichment.
- [Find anything with search](https://terramd.io/docs/power-search) — when you know the words, search is faster than asking.
- [Templates](https://terramd.io/docs/templates) — the assistant can create notes from your templates.
---
# Find anything in your Library
> Track down a decision, a phrase or a whole quarter's notes. Learn the three ways to look, build precise searches and get answers from ⌘K.
Source: https://terramd.io/docs/power-search
It's the week before your quarterly review. You need the pricing decision from a meeting in August, every launch note your team wrote last quarter, and the line where someone moved the launch date. It's all in Terra somewhere. The question is how quickly you can get to it.
Terra gives you three ways to look, each suited to a different kind of memory. If you remember a note's name, **Go to file** opens it. If you remember what it said, **Search** reads every note and lets you narrow by tag, folder, date and property. And if you're after something to *do* — a command, a Settings page, a how-to answer — the **command palette** has it.
> [!SUMMARY]
> - Open any note by name in a couple of keystrokes
> - Search the text of every note, then narrow it with phrases, tags, folders and dates
> - Search your own properties, words on one line, or a pattern with **Regex**
> - Run commands and get how-to answers from the command palette
> - Understand how results are ranked, and tune it in **Settings › Search**
> [!BEFORE]
> - A Library with some notes in it. New to Terra? Start with the [Quickstart](https://terramd.io/docs/quickstart).
> - Nothing else to set up. Search runs on your Mac and works offline. Matches by *meaning* are optional: they join in once you build a semantic index (see [Get answers from your own notes](https://terramd.io/docs/ask-your-library#ask-your-first-question)).
> - About 15 minutes.
## How it fits together
| You remember… | Use | Shortcut |
| --- | --- | --- |
| The note's name | **Go to file** | ⌘ O |
| Words in the note | **Search** | ⇧ ⌘ F |
| What you want to do | **Command palette** | ⌘ K |
Search also has a button in the toolbar (the magnifying glass), and the command palette can open Search or Go to file for you. None of the three lives in the menu bar. **Edit › Find…** (⌘ F) is something else: it finds text inside the note you have open.
This guide follows one Library throughout: a small team launching a printed field guide, with meeting notes in a `meetings` folder, project notes in `projects`, and tags like `#launch` and `#draft`.
## Step 1: Open a note by name
When you know what a note is called, skip searching altogether. Go to file matches names only, so it's instant and never surprises you.
1. Press ⌘ O. A short list opens near the top of the window with your most recently edited notes, each with its folder underneath.
2. Type part of the name, for example `launch`.
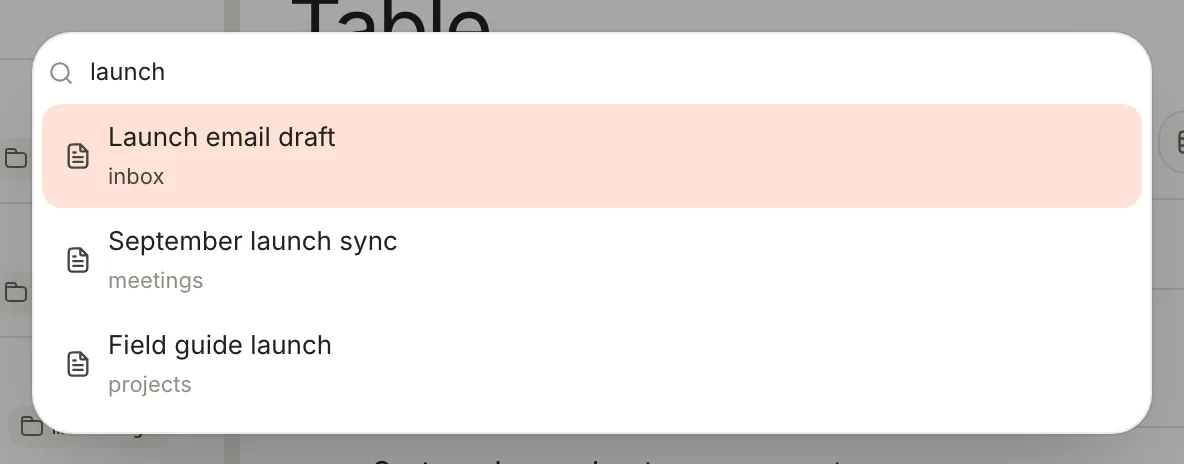
3. Press ↓ and ↑ to pick a note, then press Return. The highlight wraps from the last row back to the first.
You don't have to type whole words. Once you've typed three or more letters, letters in order match too: `fgl` finds **Field guide launch**. Folder names count as well, ranked below title matches, so `meet` lists everything in `meetings`. Notes in Trash never appear here.
> [!TIP] Return or click
> Return opens the note in place of what you're looking at. Clicking a row opens it in a new tab instead, so what you were reading stays one click away. Search results work the same way.
## Step 2: Search the text of every note
Now the harder case: you remember *what* was decided, not where it was written down. Search looks through the title, text and tags of every note.
1. Press ⇧ ⌘ F, or click **Search** (the magnifying glass) in the toolbar. A search box opens over the window with the hint **Search the library**.
2. Type `pricing decision`. Results appear as you type, a moment after you pause.
3. Read the results. Each row shows the note's title, the line from the note that holds the most of your words, and the note's folder on the right. Your words are highlighted.
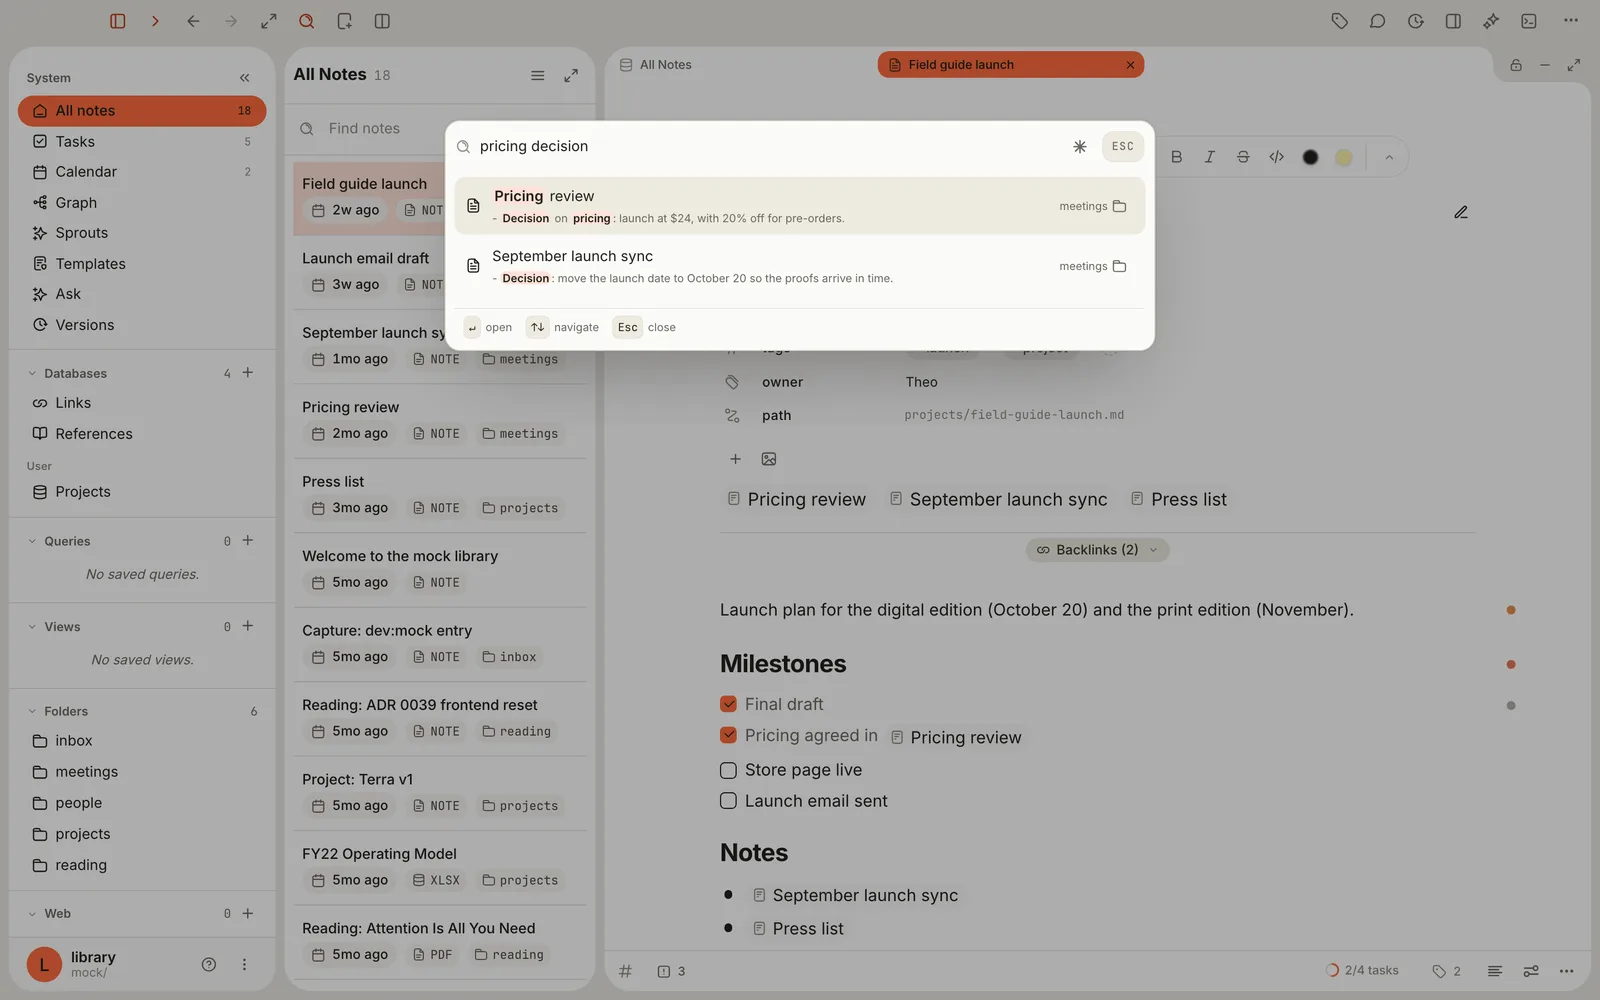
4. Press ↓ and ↑ to move through the results and Return to open one. Esc closes the window.
Three rules explain almost every result:
- **Every word must match.** `pricing decision` finds notes that contain both words anywhere in the note. They don't have to sit next to each other.
- **Words match from their start.** `budg` finds "budget", but `port` doesn't find "report". [Step 5](#match-a-pattern-with-regex) shows how to match inside words.
- **Capitals and accents don't matter.** `cafe` finds "Café".
Search shows up to 25 notes, with no "show more". If what you want isn't there, add a word or a filter rather than scrolling. The window also remembers your last search and reopens with it until you quit Terra; press ⌘ A then Delete to start fresh.
## Step 3: Narrow down with tags, dates and exclusions
Next question: what did the team write about the launch last quarter? Searching `launch` alone finds every note that mentions the word. Build the query up a piece at a time and watch the list shrink.
1. Type `tag:launch`. Now you only see notes tagged `#launch`, not every note that happens to say "launch".
2. Add a date range: `tag:launch updated>=2026-07-01 updated<2026-10-01`. Spaces mean *and*, so a note has to pass every part.
3. Leave out drafts by adding `-tag:draft`. A minus sign in front of anything excludes it.
4. To check the dates, click the folder name at the right of any result and choose **Updated**. Every row switches to the date the note was last edited.
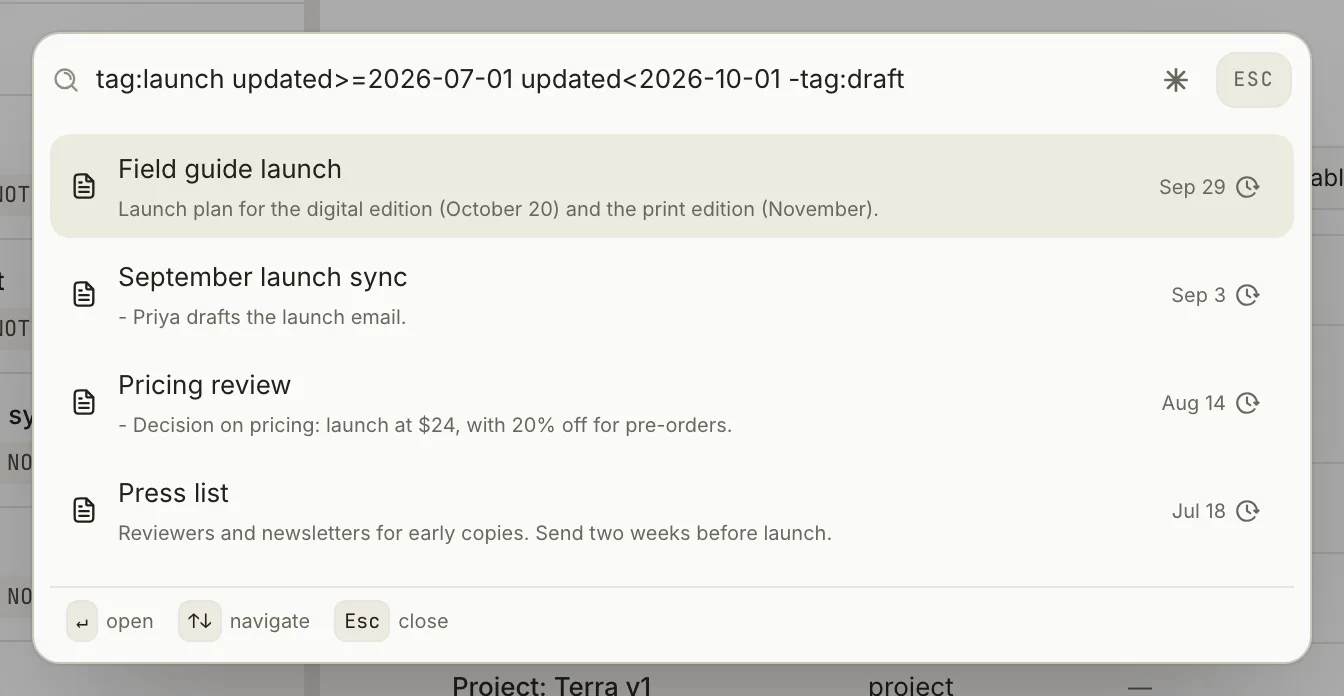
The other building blocks work the same way, and you can mix them freely:
| To find | Type | Example |
| --- | --- | --- |
| An exact phrase | Quotes | `"launch date"` |
| Either of two things | `OR`, in capitals | `pricing OR budget` |
| Anything except | `-` right before it | `-draft`, `-tag:draft`, `-"to do"` |
| A combination | Parentheses | `(tag:press OR tag:launch) review` |
| A tag | `tag:` | `tag:launch` |
| A type or status | `type:`, `status:` | `type:meeting` |
| Everything in a folder | `path:Folder/**` | `path:meetings/**` |
| Last edited before or after a day | `before:`, `after:` | `after:2026-06-30` |
| Created or edited in a range | `created` or `updated` with `>`, `>=`, `<`, `<=` | `created>=2026-10-01` |
A few details trip people up:
- `tag:`, `type:` and `status:` are exact and case-sensitive. `tag:Launch` doesn't find `#launch`, `tag:projects` doesn't include nested tags such as `projects/terra`, and the `#` stays out.
- `before:` and `after:` leave out the day you name: `after:2026-06-30` starts on July 1. Dates are always written `YYYY-MM-DD`; words like "yesterday" aren't understood.
- `OR` only works in capitals. A lowercase `or` is searched as an ordinary word.
The [search syntax reference](https://terramd.io/docs/search-syntax) lists every operator, filter and error message.
> [!TIP] Change what each row shows
> The value at the right of each result can show the note's **Folder**, **Status**, **Type**, **Updated** date or **Tags**. Click it to pick one. Your choice lasts until you quit Terra.
>
> 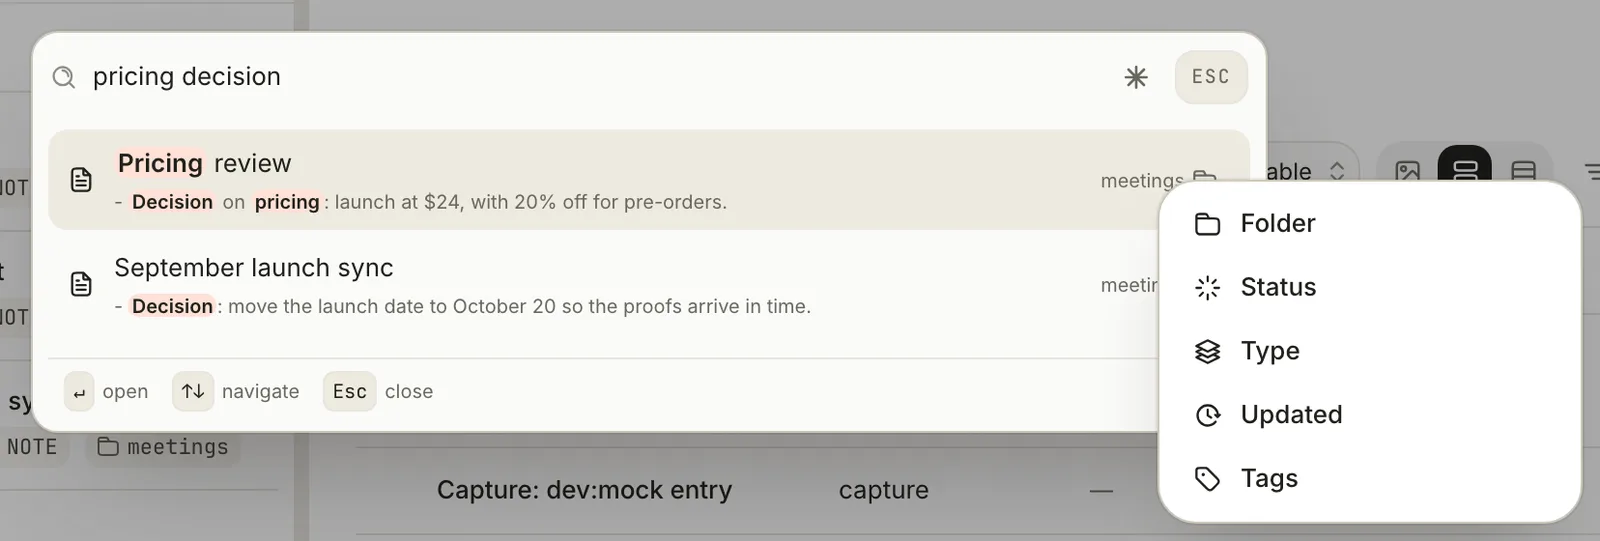
## Step 4: Search your own properties, lines and sections
Tags and folders cover most searches. Sometimes, though, the answer lives in a property you made up, or you only remember two words that sat close together.
**Properties go in brackets.** Your team records an `owner` on each meeting and project note. To see what Theo owns:
1. Type `owner:Theo`. Instead of results, a red line appears: **invalid query: unknown field: owner**. Search only understands a handful of filter names before a colon, and `owner` isn't one of them.
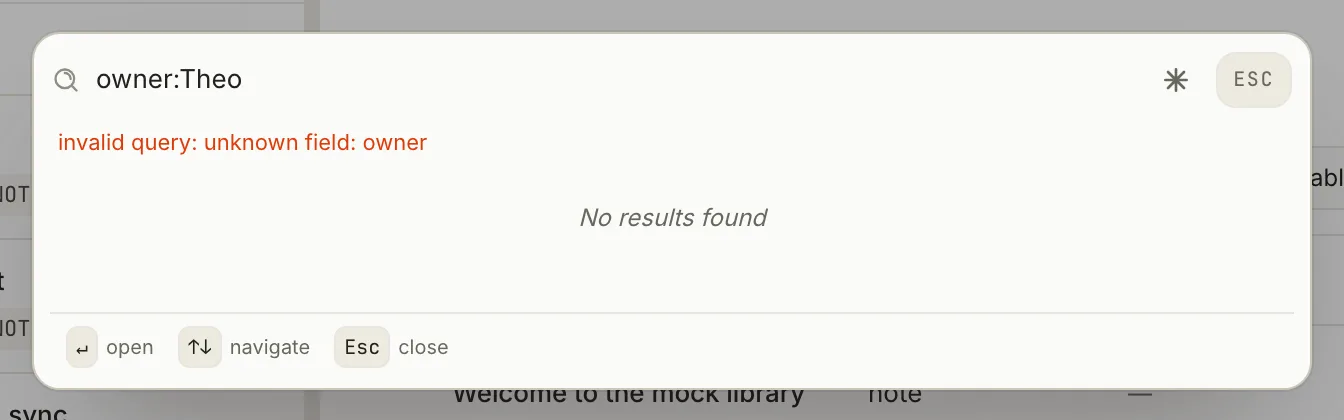
2. Wrap it in brackets instead: `[owner:Theo]`. Now it finds every note whose `owner` property is Theo.
Bracket filters ignore capitals in the value but must match the whole value, so `[owner:Theo]` doesn't find "Theo Grant". Leave out the value to find every note that has the property at all: `[owner]`. The property name must be spelled exactly as it appears in your notes.
**Words on one line, or under one heading.** Your meeting notes are long, and "proofs" and "late" turn up all over them. You want the line where they appear together:
- `line:(proofs late)` finds notes where both words are on the same line.
- `section:(decision pricing)` finds notes where both words fall under the same heading.
Both need the parentheses. Put a phrase in quotes to keep it together: `line:("launch date" october)`.
## Step 5: Match a pattern with Regex
A regular expression describes a pattern rather than exact words — "launch, followed by either *date* or *day*". Reach for one when plain words can't say what you mean, or when you need to match part of a word.
1. In the search window, click the asterisk at the right end of the box (**Regex**). It turns highlighted, and its tooltip changes from **Regex off** to **Regex on**.
2. Type a pattern, without slashes: `launch (date|day)`.
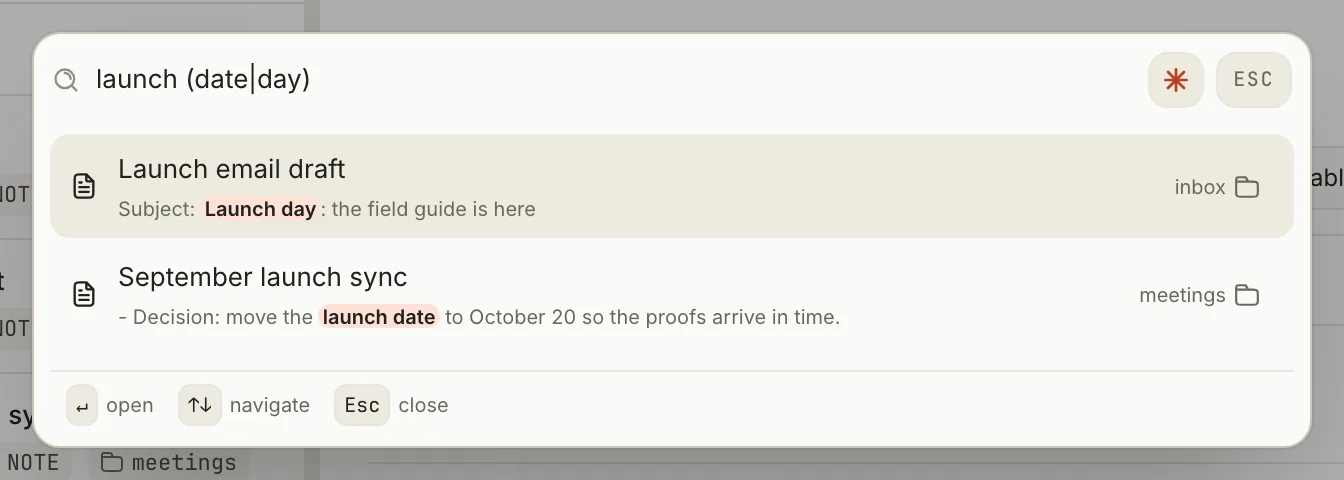
With **Regex** on:
- The pattern is matched against each note's title and text, ignoring capitals. Tags and properties aren't searched.
- Results are ranked by keyword alone, and matches by meaning are left out. Help and canvas results don't appear.
- The switch stays on until you click it again or quit Terra.
You can also mix a pattern into an ordinary search by putting it between slashes. `tag:launch /\$\d+/` finds launch notes that mention a dollar amount.
## Step 6: Run commands and get answers with ⌘K
The command palette searches what Terra can *do*, not what your notes say. It's the quickest route to anything whose shortcut you don't remember.
1. Press ⌘ K. With nothing typed, the palette lists the commands you can run right now, each with its shortcut.
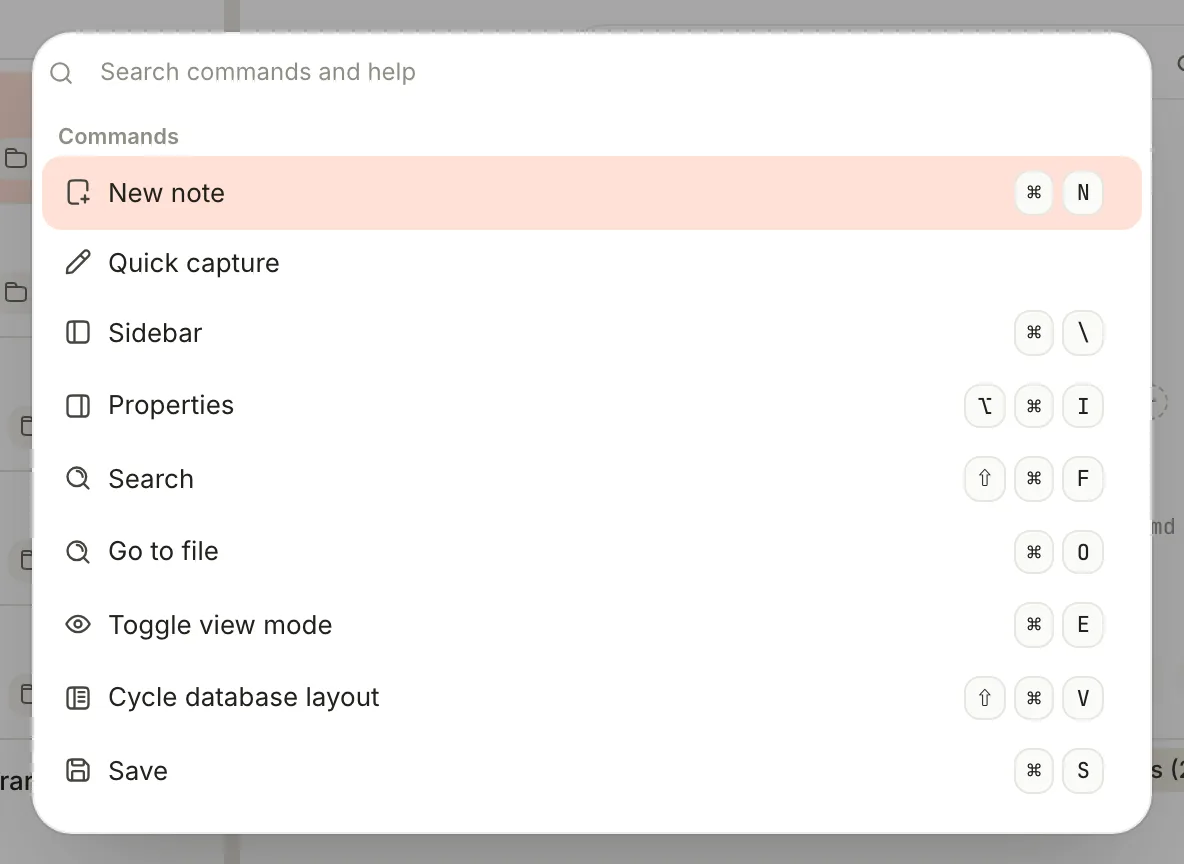
2. Type part of what you want. The palette finds more than commands:
- notes and databases by name: type `pricing` to open **Pricing review**;
- Terra's own views: **Tasks**, **Calendar**, **Graph**, **Sprouts**, **Query** and **Versions**;
- Settings pages: type `hotkey` for **Hotkey settings**.
3. Press ↓ and ↑ to pick a row, then Return. The palette closes and runs it. Esc, or ⌘ K again, closes it without running anything.
Once you type, commands that can't run right now appear too, dimmed, with the reason underneath. **Back**, for example, reads **No previous location** until you've moved around. The arrow keys skip over dimmed rows.
**Ask it how.** Type a few words about a task, or a whole question, and answers from Terra's built-in Help appear under **Help**, below the commands.
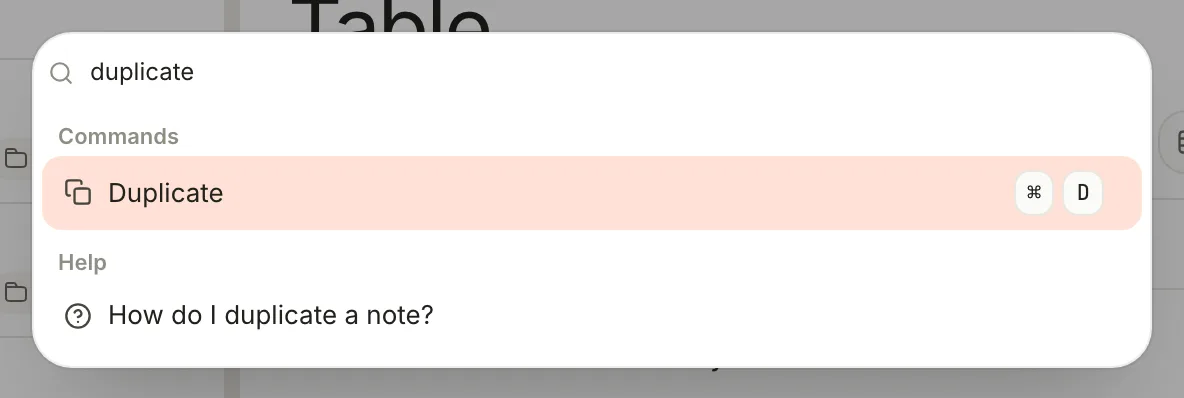
Choosing a Help row opens the article in a **Help** tab. The search window shows Help answers too, up to three, after your notes.
> [!NOTE] The palette shows the original shortcut
> If you change a shortcut in **Settings › Hotkeys**, the palette (and the toolbar's tooltips) keep showing the default one. Your new shortcut still works.
## Step 7: Understand and tune the ranking
Search doesn't sort by a single score. It blends several signals, which is why a note with your words in its title usually comes first, and why a note you edited this morning can edge out an older one:
- **Keyword match** — how well your words match. A match in the title counts most, then the tags, then the text.
- **Fuzzy match** — how close the note's title is to everything you typed.
- **Recent edits** — recently edited notes get a small lift.
- **Graph proximity** — notes within three links of the note you have open get a small lift.
- **Semantic similarity** — how close a note is in *meaning*. This only counts once your Library has a semantic index. Until then it adds nothing.
You can change how much each one counts:
1. Open **Settings** (⌘ ,) and click **Search** in the **Library** group.
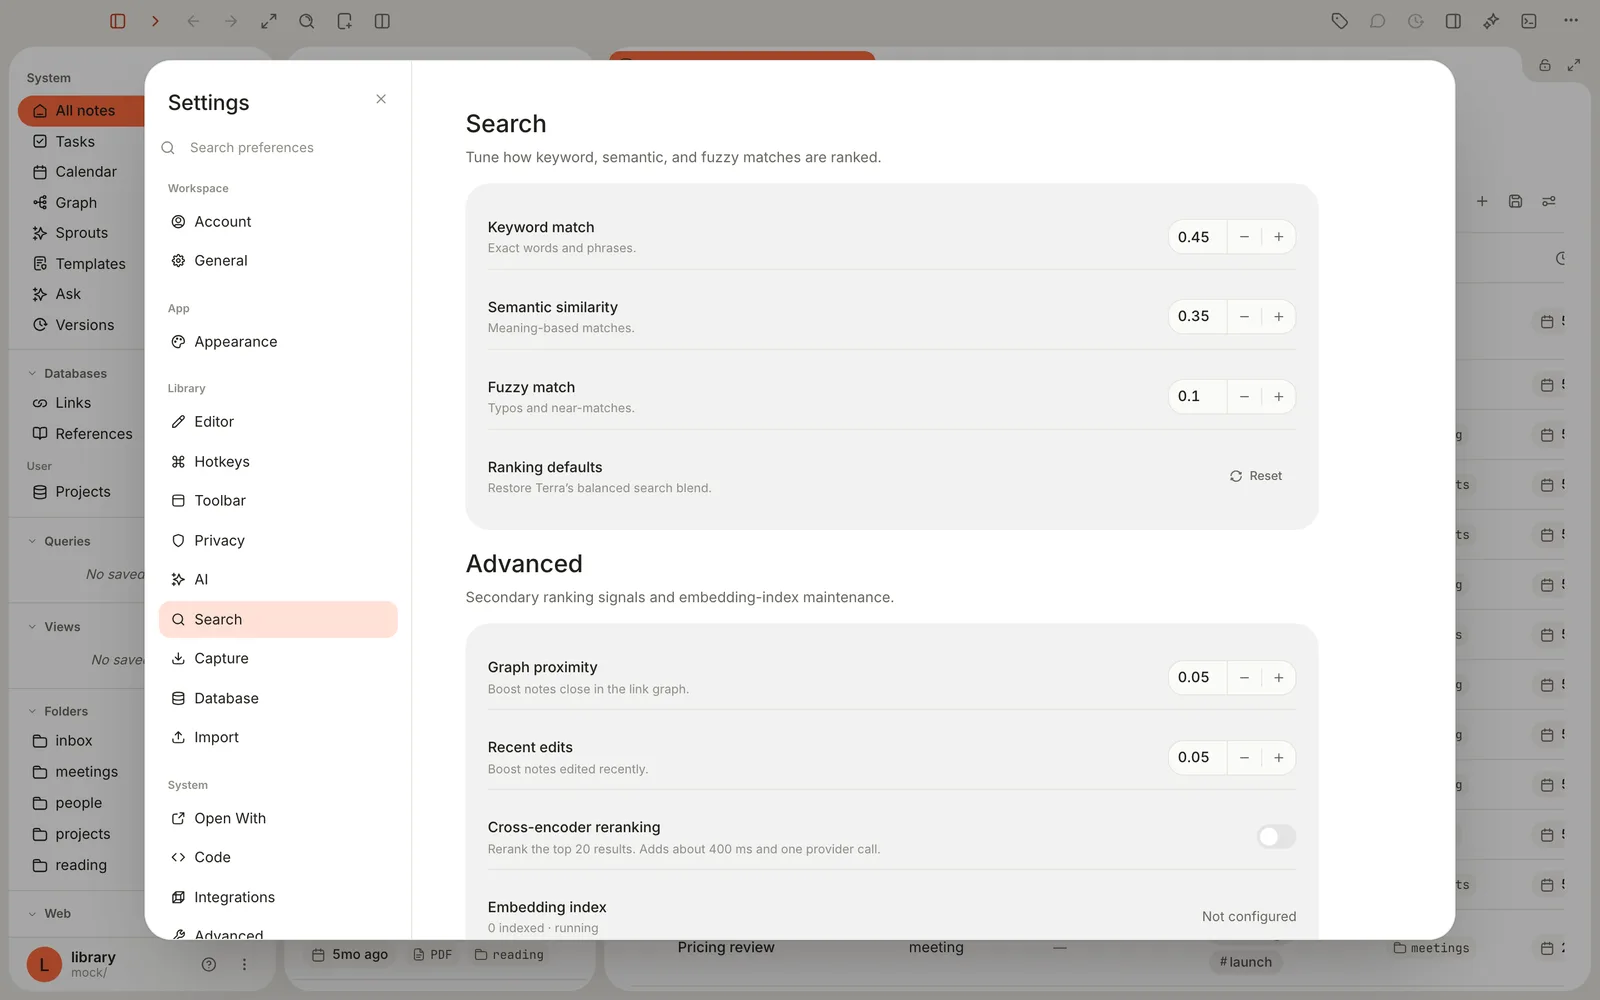
2. Click **−** or **+** beside a weight, or click its number to choose a value from a list. Changes save at once and apply to your next search.
3. To go back to Terra's balance, click **Reset** in the **Ranking defaults** row.
Here's what each setting does in this version. A few of the descriptions in the pane promise more than they deliver:
| Setting | Default | What it does |
| --- | --- | --- |
| **Keyword match** | 0.45 | How much matching your words counts. |
| **Semantic similarity** | 0.35 | How much closeness in meaning counts. No effect until **Embedding index** names a model. |
| **Fuzzy match** | 0.1 | How much a title's closeness to your whole query counts. Despite the description, it doesn't find misspelled words: it only reorders notes that already matched. |
| **Graph proximity** | 0.05 | Lift for notes linked to the note you have open. |
| **Recent edits** | 0.05 | Lift for recently edited notes. |
| **Cross-encoder reranking** | Off | Doesn't call a provider or add any time. It gives matches by meaning a small boost, then re-sorts. |
| **Embedding index** | | Shows the embedding model, or **Not configured**, and how much is indexed. |
| **Rebuild embedding index** | | **Reindex changes** catches up on edits; **Force rebuild** starts over. Both stay greyed out until a model is set up. |
With **Regex** on, none of these weights apply: results are ranked by keyword match alone.
> [!WARNING] Matches by meaning don't follow your filters
> Once a semantic index exists, Search also brings in notes that are close in meaning to what you typed, even when they don't contain your words and even when they fail your `tag:`, `path:` or `-` filters. When you need strictly literal results, turn on **Regex**. Your search text is also sent to your embedding provider to be compared; if that model runs on your Mac, it never leaves.
## Features you might have missed
### Search a tag from anywhere
Right-click a tag pill, in a note's properties or a database table, and choose **Search tag**. The search window opens with `tag:launch` already typed. In a note's text, ⌘-click an inline `#tag` to do the same; a plain click opens the tag's page instead.
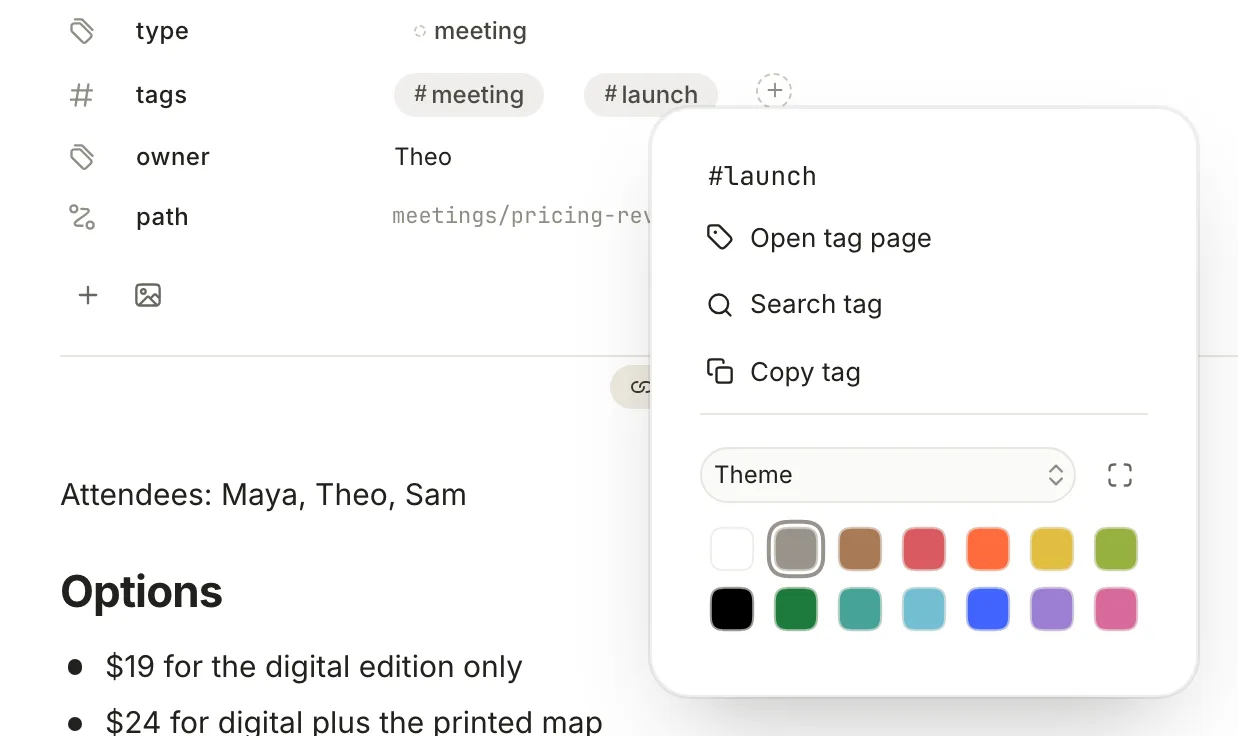
### Words inside books and spreadsheets
Search reads the text of EPUB books in your Library and the cells of your spreadsheets, not only the notes about them. Type a phrase you remember from a book and the book comes up. Opening it takes you to where you stopped reading rather than to the phrase; there's no search inside a book yet.
### Text on your canvases
Sticky notes, text boxes, group and swimlane labels, diagram source and connector labels are searchable too. They appear after your notes, marked **Canvas ·** and the kind of item, and opening one shows the canvas centered on it. Canvas text has to contain your whole query as one phrase, so operators don't apply to it. See [Canvas, mind maps and the graph](https://terramd.io/docs/canvas-and-mind-maps).
### How a note connects
When Search finds the note but you want to see what surrounds it, right-click it in the note list beside the sidebar and choose **Graph of this note**. You'll see the note and everything linked to it. See [the graph section](https://terramd.io/docs/canvas-and-mind-maps#see-a-notes-connections-in-the-graph) of the canvas guide.
### Filter one list without searching
The **Find notes** box at the top of the note list filters only that list. It keeps notes whose title, or any value shown in the list, contains what you type. It doesn't understand operators.
### Your own shortcuts and toolbar buttons
To change ⌘ K, ⌘ O or ⇧ ⌘ F, open **Settings › Hotkeys**: **Command palette** and **Go to file** are under **Global**, **Search** under **Navigation**. To put the palette on the toolbar, right-click any toolbar button, choose **Customize toolbar…**, type `palette` in the **Command library** search, drag **Command palette** onto the toolbar and click **Apply**.
## Troubleshooting
> [!NOTE]- "invalid query: unknown field: …"
> A word followed by a colon has to be a filter Terra knows, such as `tag:`, `type:`, `status:` or `path:` (the [full list](https://terramd.io/docs/search-syntax#filters) is in the reference). For your own properties, use brackets: `[owner:Theo]`. Pasted web addresses trigger the error too, because `https:` looks like a filter. Put the address in quotes.
> [!NOTE]- Results include notes that don't contain my words
> Those are matches by meaning from your semantic index. They don't have to contain your words or pass your filters. Turn on **Regex** for strictly literal results.
> [!NOTE]- A note I deleted still shows up
> Notes in Trash stay searchable. Add `-path:Trash/**` to your search to leave them out. Go to file already skips them.
> [!NOTE]- Search keeps opening with a tag: query
> After you use **Search tag**, the search window reopens with that tag's query each time, until you quit Terra. Press ⌘ A and Delete to clear it.
> [!NOTE]- tag: finds nothing, but the note is tagged
> Tag filters are exact and case-sensitive. Check the capitals, leave out the `#`, and for a nested tag search for the whole name in quotes: `tag:"projects/terra"`. If capitals are the problem, `[tags:Launch]` ignores them, but it only sees tags set in the note's properties, not `#tags` written in the text.
> [!NOTE]- The highlight moved off the bottom of the list
> The results list doesn't scroll to follow the arrow keys. Scroll it with your trackpad or mouse, or add a word to shorten the list.
> [!NOTE]- Return opened the wrong note
> Results refresh a moment after you stop typing. If you press Return straight away, you can open the top result of your previous search. Wait until the list settles.
> [!NOTE]- Can I save a search, or see recent searches?
> Not yet. You can't save a search or turn it into a database, and Terra doesn't keep a search history. The window only remembers your last search and the **Regex** switch until you quit. For a list you come back to often, make a database with filters instead; see [Create the project's database](https://terramd.io/docs/project-suite#create-the-projects-database).
## What's next
- [Search syntax](https://terramd.io/docs/search-syntax) — every operator, filter and error message in one place.
- [Get answers from your own notes](https://terramd.io/docs/ask-your-library) — ask in plain language when you don't know the exact words.
- [Canvas, mind maps and the graph](https://terramd.io/docs/canvas-and-mind-maps) — lay out what you found and see how it connects.
- [Keyboard shortcuts](https://terramd.io/docs/keyboard-shortcuts) — every other key worth knowing.
---
# Think visually with canvas and mind maps
> Brainstorm on an endless canvas with sticky notes, shapes, arrows and mind maps beside your real notes, then turn the best ideas into notes.
Source: https://terramd.io/docs/canvas-and-mind-maps
Some thinking doesn't fit in lines of text. When you're planning an event, untangling a process or seeing how a dozen ideas relate, you want room to put things down, move them around and draw arrows between them.
A [canvas](https://terramd.io/docs/glossary#canvas) in Terra is that room: an endless board where sticky notes, shapes, arrows, images and your real notes sit wherever you put them. Mind maps grow on it from the keyboard, one idea at a time. When something on the board deserves to be a note, it becomes one in a click.
This guide follows Maya as she plans the launch week for her field guide.
> [!SUMMARY]
> - Create a canvas and find your way around it
> - Sketch with text, sticky notes, shapes and arrows
> - Grow a mind map with Tab and Return
> - Bring notes onto the canvas, and turn ideas into notes
> - Arrange, export, and see a note's connections in the graph
> [!BEFORE]
> - A [Library](https://terramd.io/docs/libraries) open in Terra. New to Terra? Start with the [Quickstart](https://terramd.io/docs/quickstart).
> - A trackpad or mouse. The canvas is built for pointing and dragging.
> - About 15 minutes.
## How it fits together
A canvas is a [database](https://terramd.io/docs/databases) shown with the **Canvas** layout, so it holds two kinds of things:
| On the canvas | What it is | Delete it and… |
| --- | --- | --- |
| **Note cards** | Real notes from your Library, shown as cards | Nothing happens to the note. Cards are hidden, not deleted. |
| **Drawn items**: text, sticky notes, shapes, arrows, images, diagrams, ink | Drawings that live only on this canvas | They're gone from the canvas (and **Undo** brings them back) |
The canvases you create with **New canvas** are listed in the sidebar under **Canvases**. Any other database, folder or tag can be laid out as a canvas too; see [Features you might have missed](#features-you-might-have-missed).
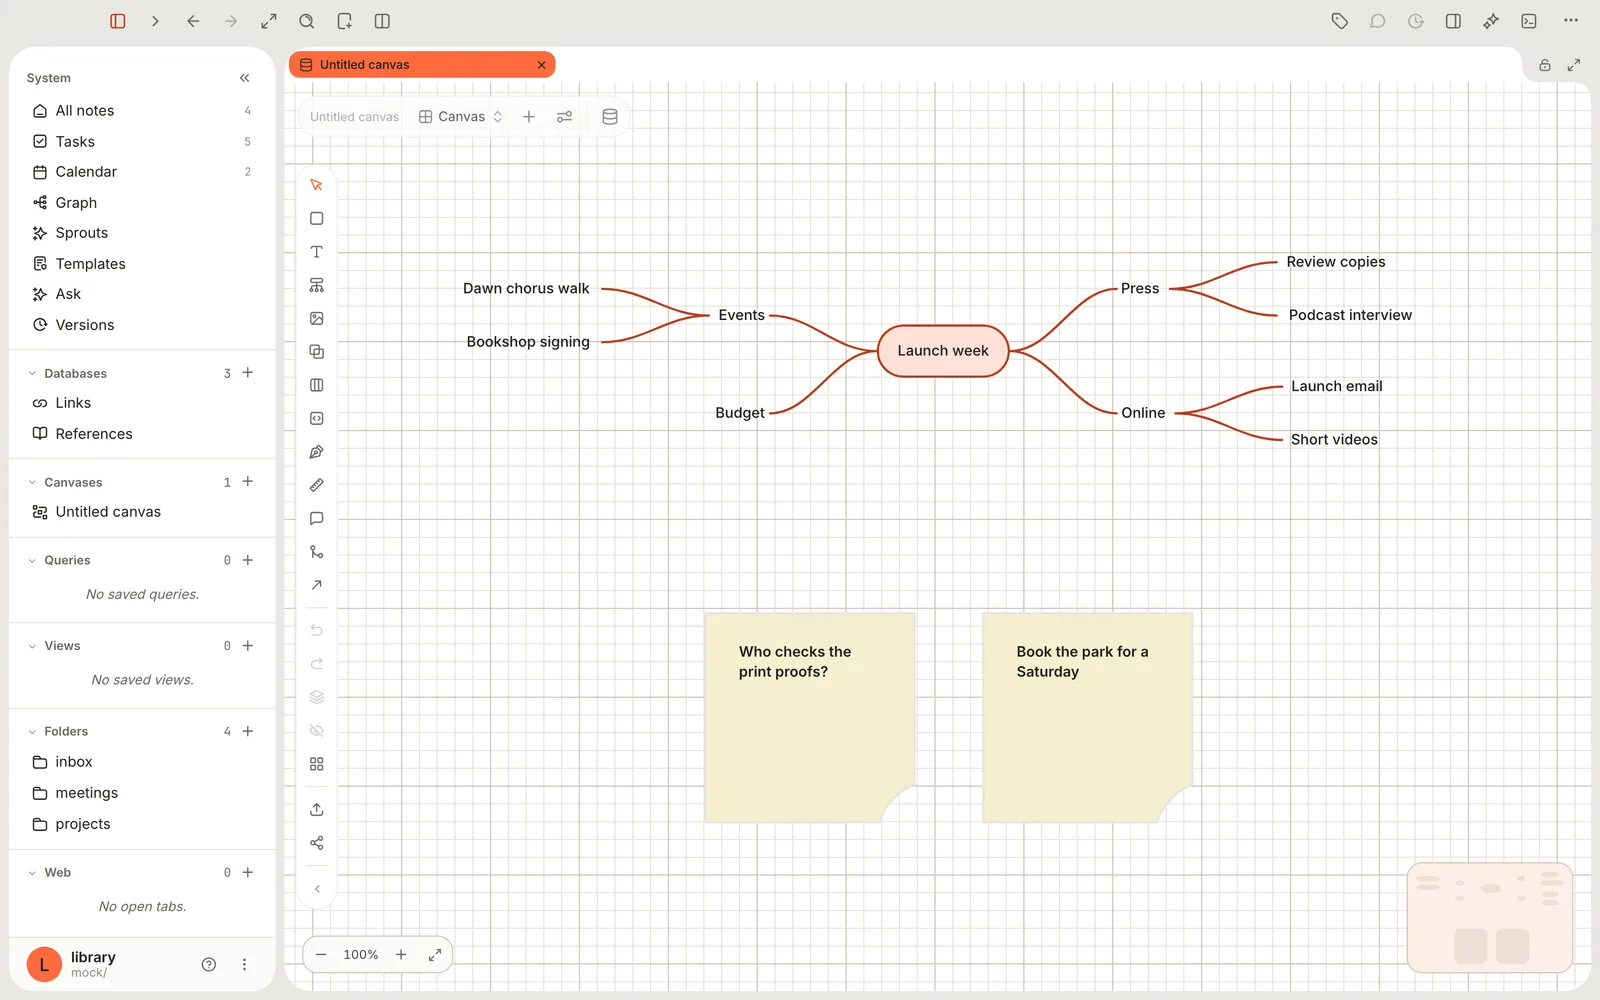
## Step 1: Create a canvas
1. Click **New…** in the toolbar and choose **New canvas**. You can also right-click an empty part of the sidebar, or of the window, and choose **New canvas**.
2. An empty canvas called *Untitled canvas* opens, and Terra shows **New canvas**.
3. Rename it: right-click *Untitled canvas* under **Canvases** in the sidebar, choose **Rename**, type *Launch week* and click **Rename**.
The tools run down the left of the canvas. Point at any of them for its name:
| Tool | Use it to |
| --- | --- |
| **Select** | Pick, move and resize things |
| **Shapes** | Add a shape or a sticky note, and style what's selected |
| **Text** | Add a text box |
| **Mind map** | Start a mind map |
| **Image** | Add a picture, **From library** or **Upload** |
| **Group**, **Swimlane** | Draw a frame, or a frame with two lanes |
| **Diagram** | Turn Mermaid source into a diagram |
| **Ink** | Draw freehand |
| **Connector** | Draw an arrow between two things |
| **Flow connection** | Link two note cards with a real relationship |
Below them sit **Undo**, **Redo**, **Arrange**, **Hide in Canvas**, **Background**, **Import Canvas** and **Export Canvas**.
**Getting around:** drag empty space to move around. Scroll or pinch to zoom, from 25% to 250%. **Zoom in**, **Zoom out** and **Fit to screen** are at the bottom left, and clicking the minimap jumps to that spot.
## Step 2: Sketch with text, sticky notes and shapes
Get ideas down first; arrange them later. Everything new appears in the middle of the view.
1. Click **Shapes**. The **Add shape** panel opens with 19 shapes, from **Rounded** and **Sticky note** to **Diamond**, **Cylinder** and **Cloud**. Point at one for its name.
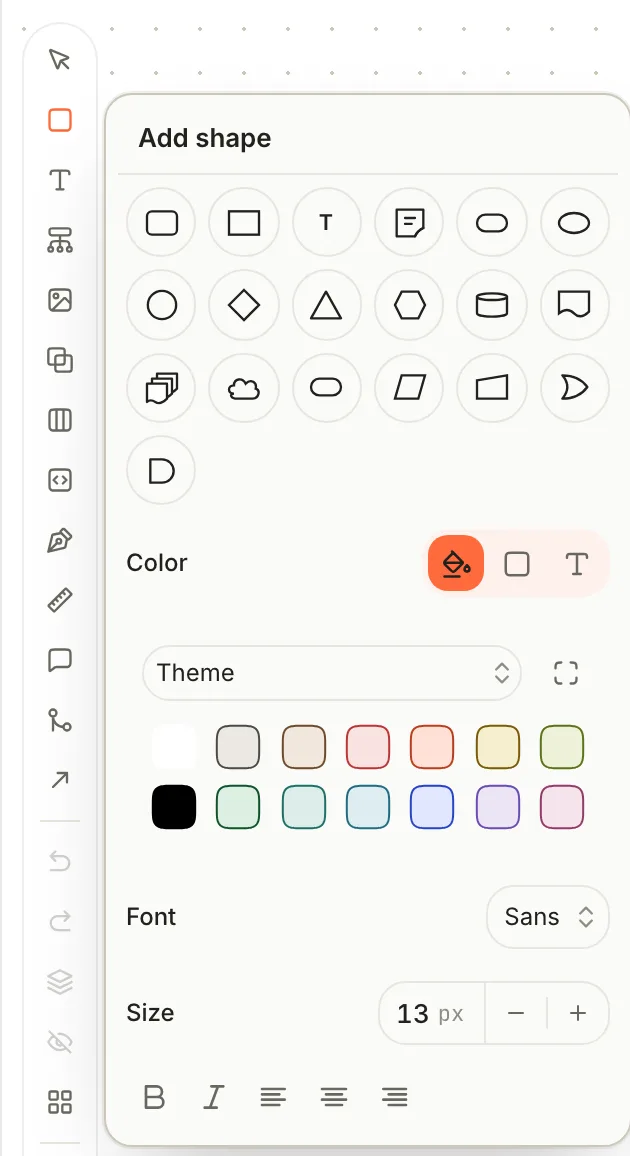
2. Click **Sticky note** and type: *Who checks the print proofs?* Press ⌘ Return, or click away, to finish.
3. For a plain label, click **Text** instead. To change any text later, double-click it, or select it and click **Edit text** in the bar at the bottom.
4. To style something, select it and open **Shapes**: switch **Color** between **Fill**, **Border** and **Text** and pick a colour, then set **Font** (**Sans** or **Mono**), **Size** and bold, italic or alignment. New items take the last style you used.
A tool stays chosen after you use it. Press Esc or click **Select** to go back to selecting.
## Step 3: Connect ideas with arrows
1. Click **Connector**.
2. Drag from one item to another, or click one and then the other. The arrow attaches to the sides that face each other; start or finish on one of an item's side handles to pick the side yourself.
3. To style an arrow, select it and click **Style** in the bottom bar, or double-click it. The **Connector** panel opens.
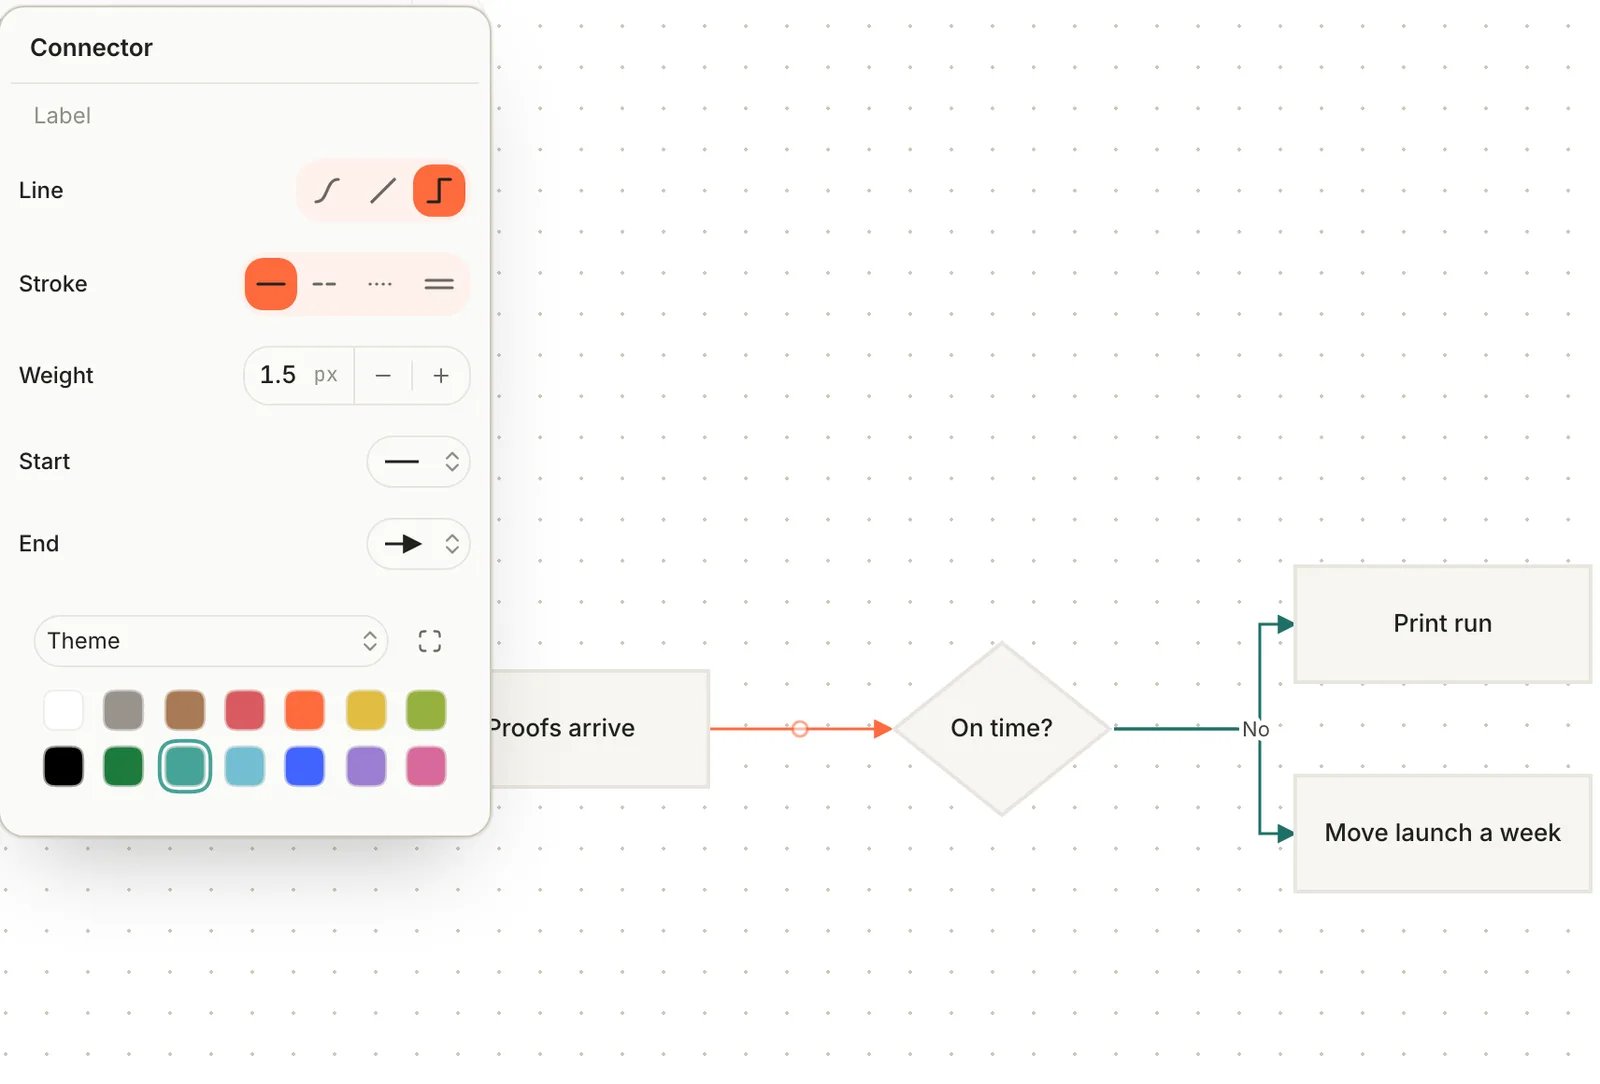
| Setting | Choices |
| --- | --- |
| **Label** | Text shown on the arrow |
| **Line** | **Curved**, **Straight** or **Elbow** (the default) |
| **Stroke** | **Solid**, **Dashed**, **Dotted**, **Double** |
| **Weight** | 0.5 to 8 px |
| **Start**, **End** | **None**, **Line arrow**, **Triangle arrow**, **Circle arrow**, **Diamond arrow**, **Open diamond**, and the crow's-foot ends used in data diagrams: **One**, **Many**, **One or many**, **Zero or many**, **Zero or one** |
With an arrow selected, drag the small hollow handles along it to add bends; double-click a bend to remove it. With nothing selected, the panel sets the style of the next arrow you draw.
> [!TIP] Draw a flowchart from text
> Click **Diagram**, write a Mermaid flowchart (`flowchart LR`, then lines like `A[Proofs arrive] --> B{On time?}`) and click **Insert diagram** (or press ⌘ Return). Terra lays it out as real shapes and arrows you can move and restyle. Other Mermaid diagram types appear as one picture you can edit later.
## Step 4: Grow a mind map
A mind map starts from one idea and branches out, and you can build one without touching the mouse.
1. Click **Mind map**. A rounded root appears in the middle, ready to type. Type *Launch week*.
2. Press Tab for a child and type *Press*. Tab again for a child of that: *Review copies*.
3. Press Return for a sibling: *Podcast interview*. Press Esc to finish typing; the item stays selected.
4. Click the root and press Tab to start the next branch. Branches spread to both sides and the map lays itself out as it grows.
| Keys | With an item selected | While typing in it |
| --- | --- | --- |
| Tab | Add a child | Save, then add a child |
| ⇧ Tab | Move it up a level | Save, then move it up a level |
| Return | Start typing (text and sticky notes) | Save, then add a sibling (on the root, a child) |
| Esc | Clear the selection | Save and keep it selected |
| Arrow keys | Move around the map | Move the cursor |
| ⌥ ↑ / ⌥ ↓ | Reorder among siblings | |
| ⌘ . | Fold or unfold its branch | |
| Delete | Remove it and its branch | |
**With the mouse:** point at any item and small **+** dots appear on its sides: **Add child**, **Add sibling above**, **Add sibling below**, **Insert between**. Click one to choose what to add: **Text**, **Note**, **Sticky**, **Rounded**, **Pill**, **Ellipse**, **Diamond** or **Cloud**. A **Note** becomes a real note in your Library as soon as you type its text.
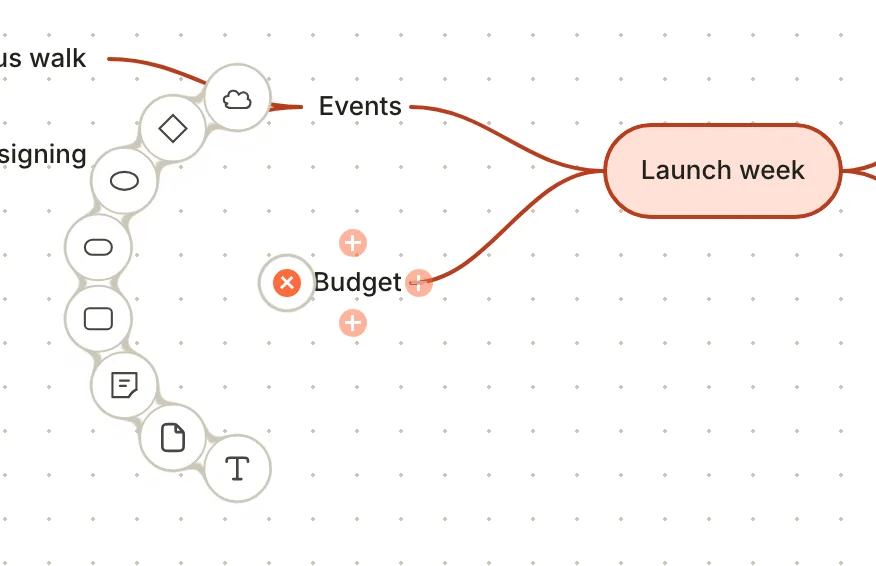
Drag an item onto another to make it a child there, or between siblings to reorder. Dragging the root moves the whole map. To turn any existing item into the root of a new map, select it and click **Start mind map**.
**Change the shape of the map:** select the root and click **Layout** in the bottom bar.
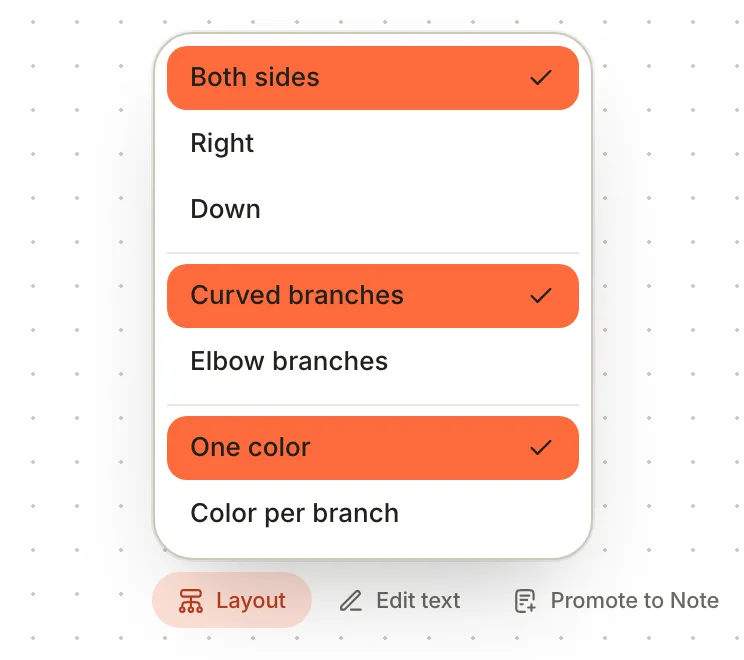
## Step 5: Bring in notes, and turn ideas into notes
A canvas is most useful when your real notes sit beside the sketches.
- **Put a note on the canvas:** drag it from the note list beside the sidebar, or from a search result, and drop it on the canvas. It appears as a card.
- **Open a card:** click it to select it, then click again to open the note.
- **Copy text from a note:** drag blocks by their grip from a note onto the canvas to make text cards. Hold ⌥ as you drop to move them out of the note instead.
When a sticky note turns into a real piece of work, promote it:
1. Select the sticky note (text, diagrams and groups work too).
2. Click **Promote to Note** in the bottom bar.
The new note takes its title from the first line and its body from all the text. It's saved in your Inbox, and its card takes the sticky's place. To take a card off the canvas without touching the note, select it and click **Hide in Canvas**.
> [!NOTE] Promote the whole canvas
> Once a canvas holds notes you'd like to see as a list, click **Promote to database** (the database icon at the top of the canvas), or right-click the canvas in the sidebar. Terra adds a **Table** view of the same notes, keeps the canvas as one of its views, and moves it to **Databases**.
## Step 6: Arrange, change the paper, export
**Tidy up.** Shift-drag across empty space to select several items, or press ⌘ A. Then open **Arrange** to align, distribute or stack them, match their widths or heights, **Tidy up** into a grid, or **Bring to front** and **Send to back**. Items snap to each other and to the grid as you drag; hold ⌥ to place them freely, or turn snapping off in **Settings › Canvas** (**Snap to grid**, **Snap to objects**).
**Change the paper.** Click **Background** for **Dots**, **Lines** or **Plain**, or a paper: **Squared**, **Ruled**, **Legal pad**, **Blueprint** or **Cardstock**.
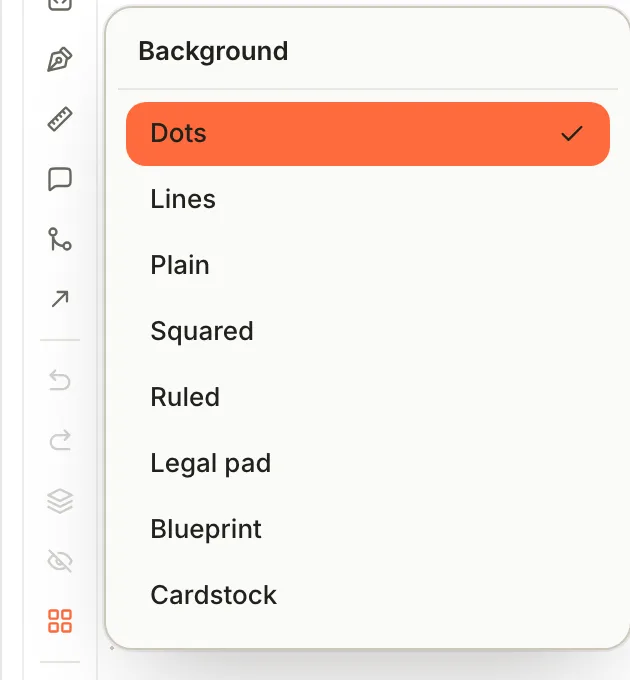
**Export and import.** **Export Canvas** saves the whole canvas, pictures included, as one `.terra.canvas` file. **Import Canvas** opens one as a new canvas; it never merges into the canvas you have open. Notes that aren't in your Library arrive as text items marked **Missing reference**.
**Where it's kept.** A canvas lives in your Library's hidden `.terra` folder: its database in `.terra/databases`, and its layout, drawings and undo history in `.terra/database-views`, with uploaded pictures beside them. Backups and sync that copy your Library folder copy canvases too, but [Versions](https://terramd.io/docs/sync-and-back-up) doesn't track the `.terra` folder. Export a `.terra.canvas` file when you want a snapshot.
## Step 7: See a note's connections in the graph
A canvas shows the connections you draw. The graph shows the ones already in your notes: every link, embed and citation.
1. Click **Graph** in the sidebar. Each note is a dot, and each link, embed or citation is a line.
2. Point at a dot to see the note's title, tags and how many links it has. Click it to focus on it and its neighbours; click it again to open it.
3. For one note's surroundings, right-click it in the note list beside the sidebar and choose **Graph of this note**. You see the note and everything one link away.
4. To keep a focus, click **Save neighborhood** at the bottom of the graph. **Clear neighborhood** shows everything again.
Any database view can use the **Graph** layout too. A view you switch to **Graph** starts with no lines: open **View preferences › Relationships** and tick **Wikilinks**, **Embeds** or **Citations**, or **Shared** values of a property such as tags. The **Graph** tab tunes how dots spread and lets you colour them with rules.
## Features you might have missed
### Any database as a canvas
Open a database, folder or tag, click **View preferences**, choose the **Canvas** layout and click **Save view**. Every note becomes a card in a grid you can rearrange and draw around. The **Canvas** tab sets the grid: **Arrange all** in **Rows** or **Columns**, **Spacing**, **Wrap**, **Snap to grid** and **Show group regions**. **Reset canvas layout** puts every card back in the grid.
### Real links between cards
**Flow connection** draws a line between two note cards and writes it into the notes as a relationship. The first time, Terra creates a relationship property called *Flow*. Unlike an arrow, it's saved in the notes themselves, as a property you can see and filter on.
### Search reads your canvases
Search finds the text on sticky notes, shapes, labels and diagrams, marked **Canvas ·** in the results. Opening one shows the canvas centred on it. See [Find anything in your Library](https://terramd.io/docs/power-search).
### Undo that outlasts a restart
A canvas remembers its last 50 changes in its own file, so **Undo** still works after you quit and reopen Terra.
### Bend a mind map's branches
⌘-drag a branch line to bend it. The **Branch** menu in the bottom bar mirrors the curve or sets it back with **Reset to automatic**.
## What a canvas can't do yet
- **No picture or PDF export.** **Export Canvas** writes a `.terra.canvas` file only.
- **No other formats.** Obsidian `.canvas`, Excalidraw and draw.io files can't be imported.
- **Copy and paste stays inside Terra.** Canvas items paste into other canvases during the same session, but not into other apps, and text from other apps doesn't paste onto a canvas.
- **No right-click menu** on canvas items. Use the bottom bar and the tools.
- **Some items can't be edited after you place them:** guides, comment pins, and the labels of groups and swimlanes. Moving a group's frame doesn't move what's inside it.
## Troubleshooting
> [!NOTE]- Dragging moves the whole canvas instead of selecting
> Dragging empty space always pans. To select several items, hold ⇧ as you drag, with **Select** chosen.
> [!NOTE]- Scrolling zooms instead of moving around
> On a canvas, scrolling and pinching zoom. To move around, drag empty space.
> [!NOTE]- The Ink eraser doesn't erase
> On a canvas, **Eraser** only stops drawing. Click **Select**, click the stroke and press Delete.
> [!NOTE]- I pressed Delete on a card and nothing happened
> Cards stand for real notes, and a canvas never deletes notes. Select the card and click **Hide in Canvas**; to delete the note itself, open it and delete it there.
> [!NOTE]- My promoted note isn't in the folder I expected
> Notes promoted on a canvas made with **New canvas** go to your Inbox. Move them from there like any note.
> [!NOTE]- New canvas or Graph is missing
> They can be switched off for a Library. Check **Settings › Features** and turn **Canvas** or **Graph** back on.
> [!NOTE]- "Canvas opened read-only"
> Terra couldn't read the canvas file: it may be damaged, or saved by a newer version of Terra. Update Terra; nothing is changed while the banner shows.
## What's next
- [Find anything in your Library](https://terramd.io/docs/power-search): find the notes to bring onto your canvas.
- [Links and backlinks](https://terramd.io/docs/links-and-backlinks): the links the graph draws.
- [Databases](https://terramd.io/docs/databases): what a canvas is underneath, and what else it can be.
- [Views and layouts](https://terramd.io/docs/views-and-layouts): every way to lay out a database.
---
# Make Terra yours
> Choose light or dark, a theme and fonts, put your own buttons on the toolbar and your own keys on commands, tidy the sidebar, and give one note its own page.
Source: https://terramd.io/docs/make-terra-yours
You'll spend a lot of hours in Terra, so it should feel like your own desk: the colours you like, text at a size you can read late in the evening, the buttons you reach for most, and nothing you never use.
This guide follows one setup from start to finish. You're running the launch of a pocket field guide to the birds of the lower valley, often after dark, so you'll switch to a dark theme, make the text a little bigger, give the launch plan its own toolbar button, and set up a few keys. Every step stands on its own, so skip to the part you want.
> [!SUMMARY]
> - Switch between light and dark, and choose an interface style and a theme
> - Set the fonts, text sizes and zoom
> - Put the buttons you use on the toolbar, and your own keys on commands
> - Tune the editor and arrange the sidebar
> - Give one note its own page width and font
> [!BEFORE]
> - A [Library](https://terramd.io/docs/libraries) open in Terra. New to Terra? Start with the [Quickstart](https://terramd.io/docs/quickstart).
> - About 15 minutes.
## How it fits together
Almost everything here is in **Settings**: press ⌘ , or choose **Terra › Settings…**. Most changes apply the moment you make them, with no Save button.
Most settings belong to the Library that's open, so a work Library and a personal one can each look their own way. They're saved in the Library's hidden `.terra` folder and travel with it. A few things stay with this Mac instead:
| What | Applies to |
| --- | --- |
| **Light**, **Dark** or **System** | Every Library on this Mac |
| Interface style, theme, accent, app icon, fonts, sizes, toolbar and shortcuts | The Library that's open |
| How the sidebar is arranged, and your reading theme and text size | This Mac |
| A note's own page width and font | That note, wherever it goes |
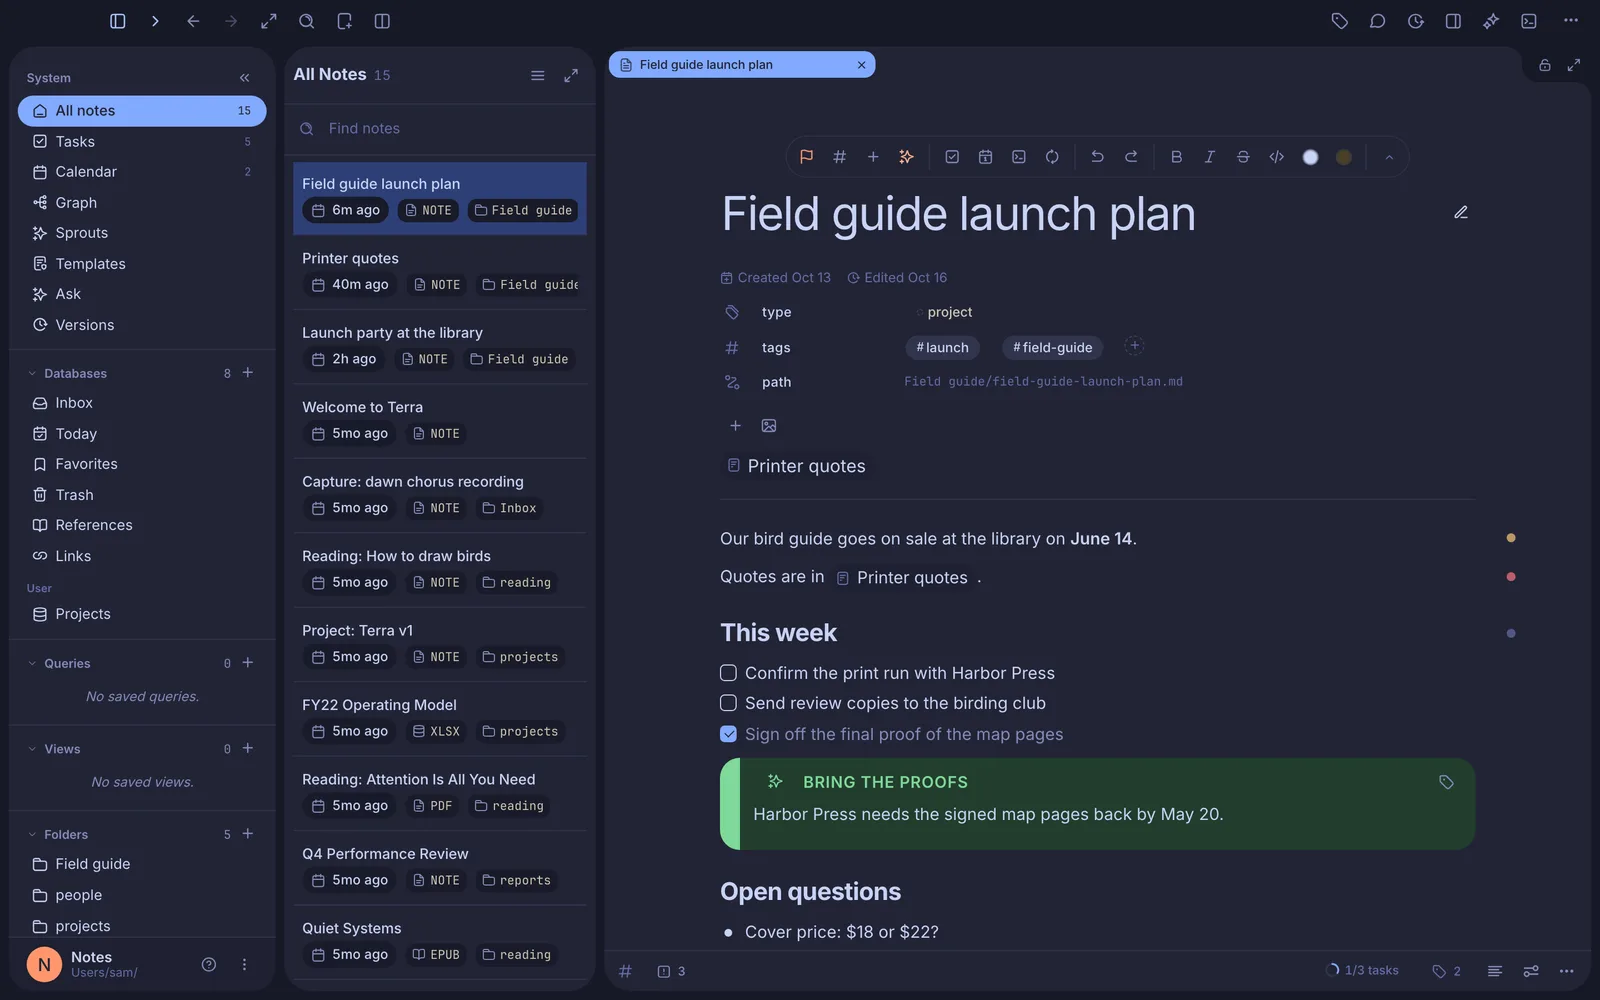
## Step 1: Choose light or dark, and an interface style
The top of the Appearance pane sets the overall look.
1. Press ⌘ , and click **Appearance**.
2. Click **Light**, **Dark** or **System**. **System** follows macOS, so Terra turns dark when your Mac does.
3. Under **Interface style**, choose how controls are shaped. It changes their feel, not their colours:
- **Modern** (the default): curved, flat, organic.
- **System**: compact and minimal.
- **Glass**: fluid, with translucent surfaces. On Macs that support it, the toolbar becomes a native macOS toolbar.
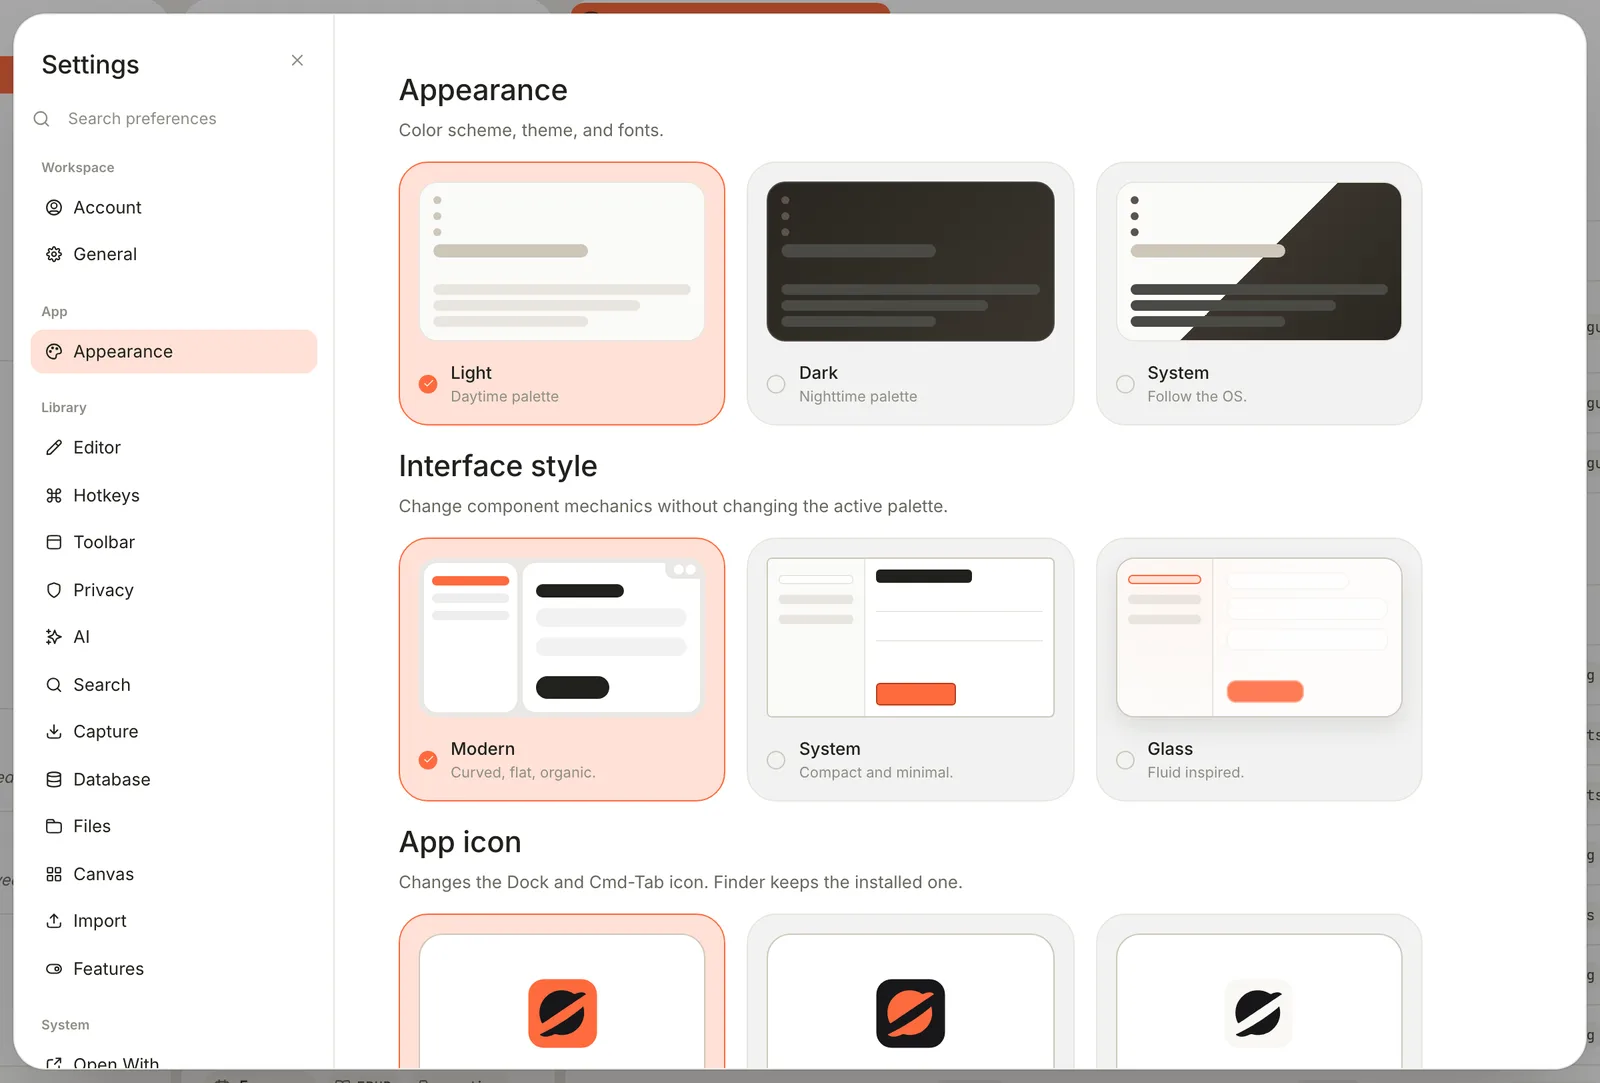
4. Under **App icon**, pick **Orange**, **Midnight**, **Paper** or **Ink** for the icon in the Dock and the app switcher. Finder keeps showing the icon Terra was installed with.
To flip between light and dark without opening Settings, press ⇧ ⌘ L, or choose **View › Appearance › Toggle Light / Dark**.
## Step 2: Pick a theme and an accent
A theme sets every colour in the window. Terra comes with sixteen: Terra, Catppuccin, Gruvbox, GitHub, One, Ayu, Night Owl, Synthwave '84, Blade Runner 2049, Eldritch, Cobalt2, Citron, Pulse, Dracula, Monokai and Tokyo Night.
1. In **Appearance**, scroll to **Theme** and click a card. The window changes straight away.
2. A card that says **Light + Dark** follows your choice from step 1. A card that lists flavors has more than one version: right-click it and pick one. For the evening sessions, right-click **Tokyo Night** and choose **Moon**.
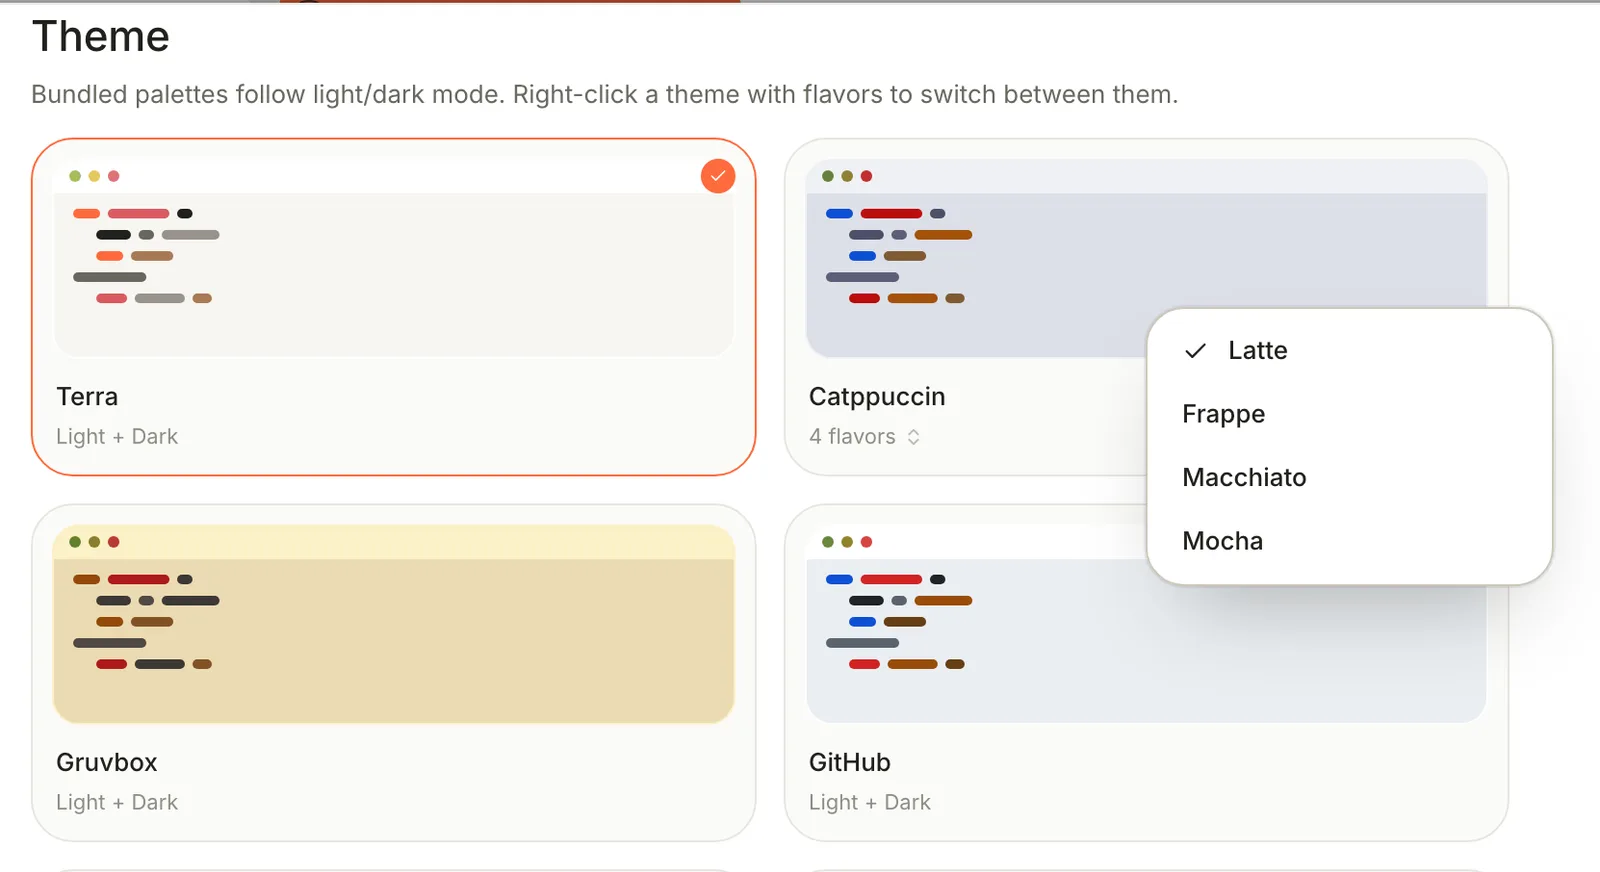
3. Under **Accent**, click a swatch to change the colour of highlights and selected items. Picking another theme resets the accent to that theme's own.
Some flavors are made for one scheme only. Tokyo Night's Moon is dark, so choosing it makes Terra dark whatever step 1 says.
> [!TIP] Make a theme of your own
> Click the **+** card after the themes. Name your theme, set its **Base**, **Crust**, **Text** and **Accent** colours for **Light** and **Dark**, add more with **Add flavor**, and click **Save**. Your themes appear under **Custom Themes**, where **⋯** offers **Duplicate**, **Rename**, **Edit** and **Delete**. Terra saves them as CSS files in your Library's `Themes` folder.
## Step 3: Set the fonts and sizes
Text you can read comfortably matters more than any colour.
1. In **Appearance**, scroll to **Fonts**. For **UI font** (the sidebar, toolbars and labels), **Body font** (what you write), **Heading font** (note titles) and **Monospace font** (code), type the name of a font installed on your Mac, as it appears in Font Book. Leave a field empty to use Terra's default.
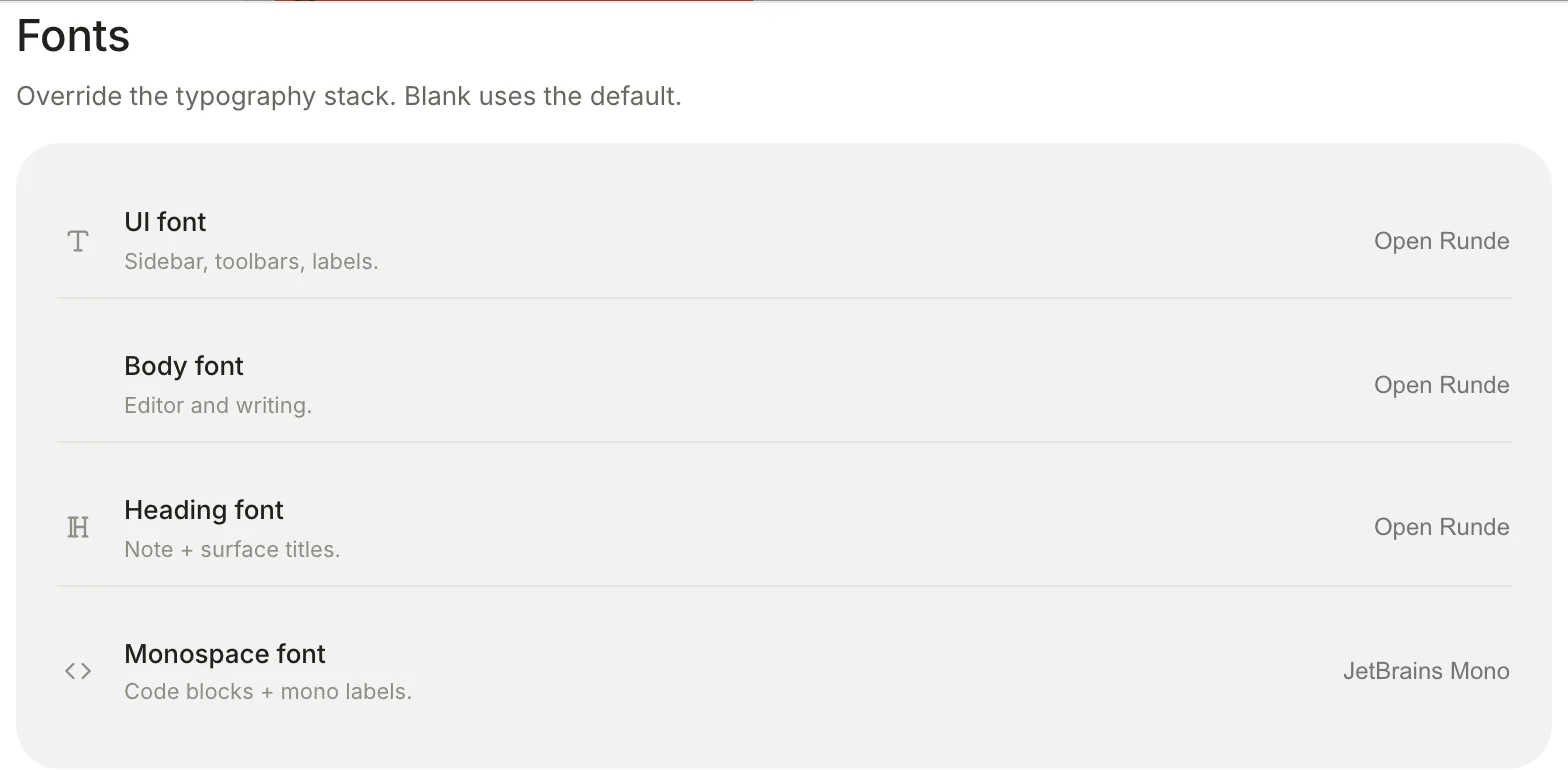
2. Under **Display**, set the sizes with **−** and **+**:
| Setting | What it changes | Range |
| --- | --- | --- |
| **UI font size** | Everything except the text of your notes | 11 to 18 px, default 13 |
| **Body font size** | The text you write and read | 8 to 22 px, default 15 |
| **Zoom** | The whole window, like zooming a web page | 70 to 150%, default 100% |
For the late sessions, set **Body font size** to 17.
3. **Animations** controls movement: **Match system** follows your Mac's Reduce motion setting, **Full** keeps every animation, **Reduced** keeps fades but stops animated GIFs, and **Off** removes all animation.
4. **Note outline** chooses what appears beside a note when the pane has room: **Table of contents** (a list of its headings), **Minimap** (a small picture of the whole note) or **None**. ⇧ ⌘ O shows or hides it for now without changing the setting.
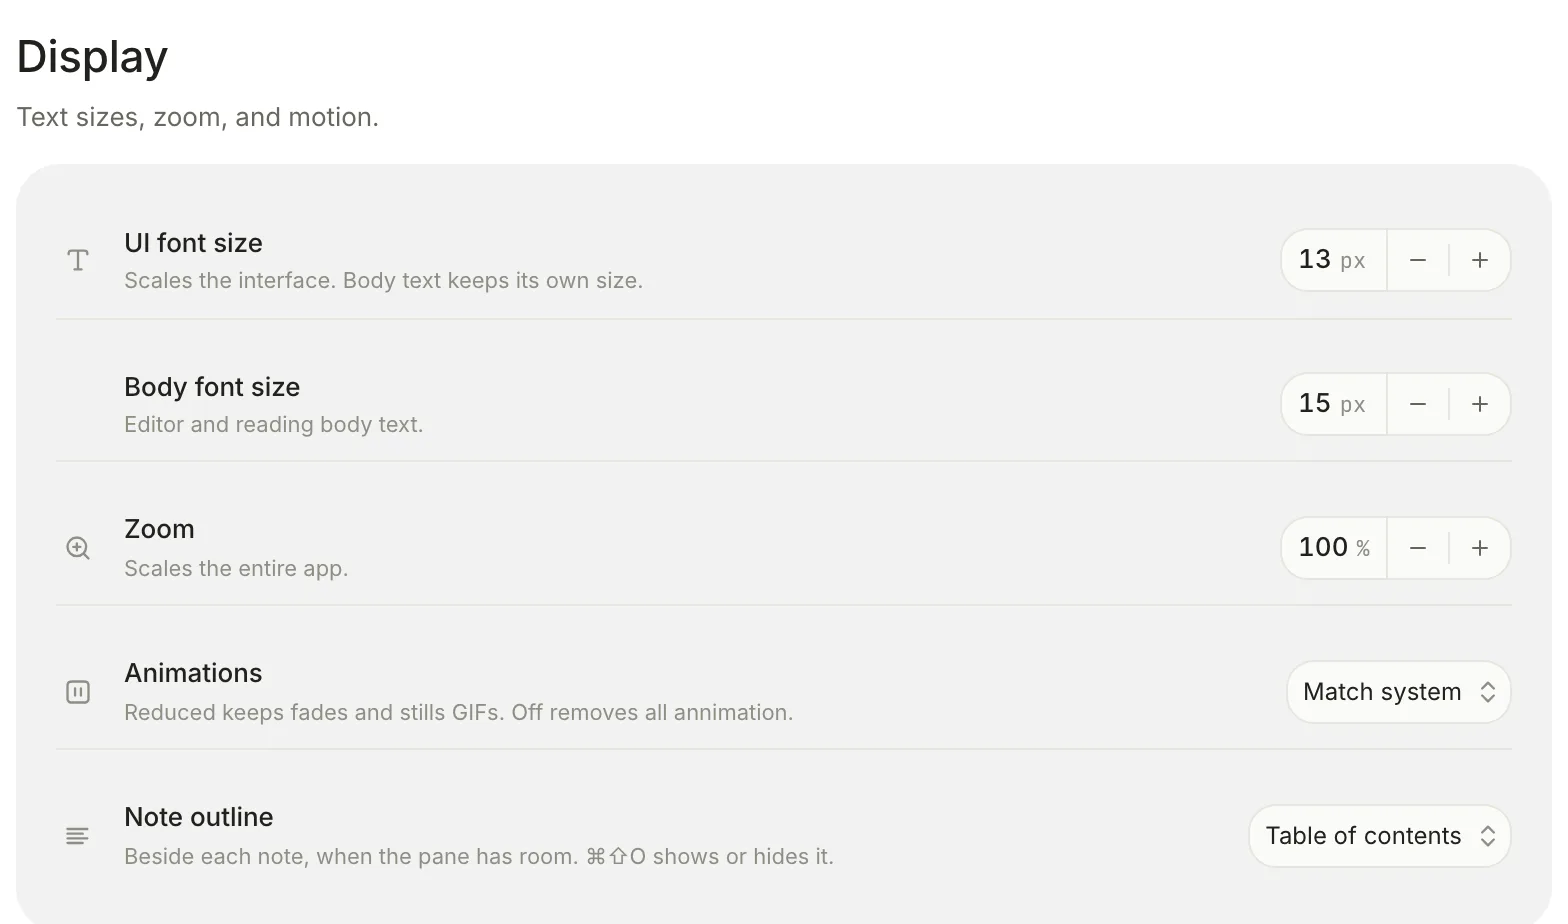
From anywhere in Terra, ⌘ = zooms in and ⌘ - zooms out, changing the same **Zoom** setting; ⌘ 0 sets it back to 100%.
## Step 4: Put your buttons on the toolbar
The toolbar starts with the buttons most people use. You can add any command to it, and also notes, databases and views such as Tasks or Calendar. A button that opens the launch plan saves you hunting for it.
1. Right-click any button in the toolbar and choose **Customize toolbar…**. (The **⋯** at the far right of the toolbar has it too, and so does **Settings › Toolbar**.) The **Toolbar** pane opens with a preview of your toolbar and, below it, the **Command library**.
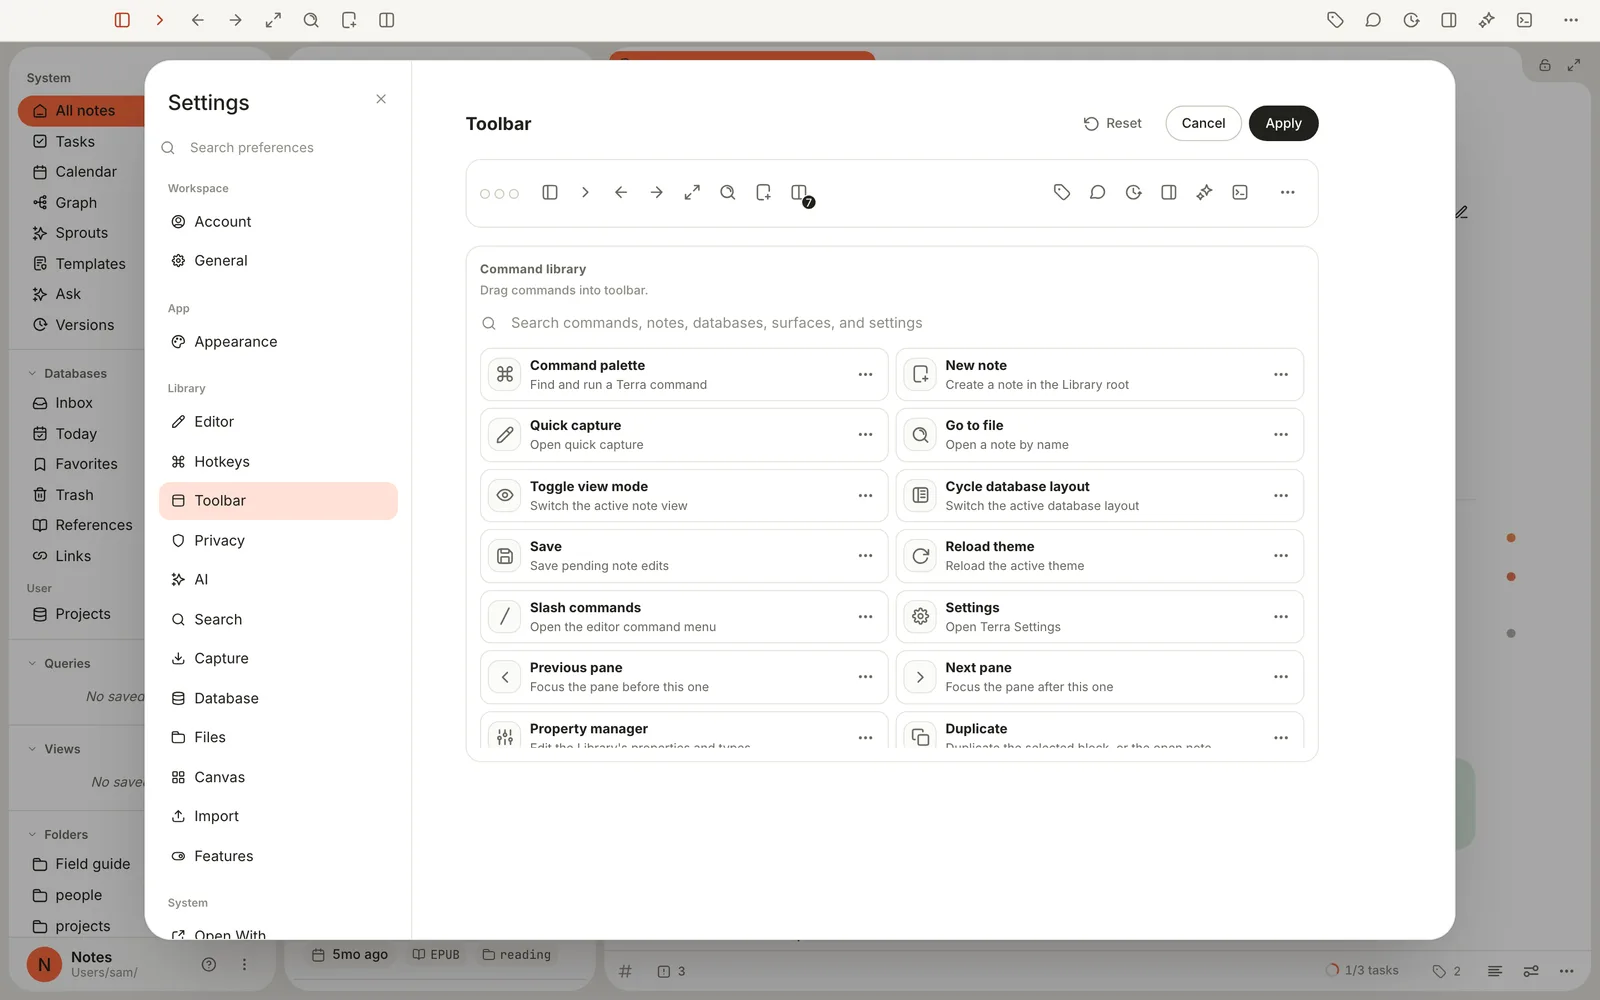
2. In the **Command library**, type in the search field to find what you want, such as *Field guide launch plan*.
3. Drag it into the preview: into the left group, the right group, or onto the **⋯** to put it in the **More** menu.
4. To move or hide a button, drag it to a new place in the preview, or drag it off the toolbar. You can also right-click a button for **Move earlier**, **Move later**, **Leading**, **Trailing**, **More menu** and **Hidden**.
5. To rename a button or change its icon, right-click it in the preview and choose **Edit label and symbol…**. Type a **Label** and pick a **Symbol**.
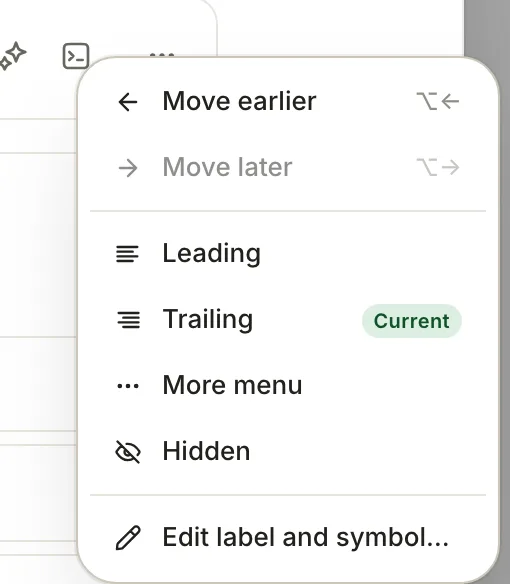
6. Click **Apply** to keep your changes, or **Cancel** to throw them away. **Reset** puts back the toolbar Terra started with; click **Apply** after it.
In the preview, the layout buttons from **Split** to **2 × 2** show as one button with a number on it, **Pane layouts**. Click it to choose which layouts the toolbar offers.
## Step 5: Give commands your own keys
Any command can have keys, including ones that have none to start with, such as **Database drawer** or **AI conversations**.
1. In **Settings**, click **Hotkeys**. (**Help › Keyboard Shortcuts** goes straight there.)
2. Click the keys beside a command. They change to **Press keys…**.
3. Press the new keys, or Esc to back out.

Hover over a command to see **Reset to default** (the curved arrow) and **Unbind** (**×**). Terra doesn't warn you when two commands share keys, so pick ones that aren't taken. [Keyboard shortcuts](https://terramd.io/docs/keyboard-shortcuts) lists every default and covers the details.
## Step 6: Tune the editor
**Settings › Editor** holds the settings for writing:
- **Caret style**: the insertion point as a **Line**, a **Block** or an **Underline**. Turn off **Blink caret** for a steady one.
- **Reference preview lines**: how many lines of a note show when you point at a link to it, from 0 to 5.
- **Citation style**: how citations to your references are written.
- **Task statuses**: the checkbox marks your tasks can have, their names, and the board column each one goes in. See [Tasks](https://terramd.io/docs/tasks).
- **Sprouts**: the kinds of [Sprout](https://terramd.io/docs/sprouts) you can choose, each with its own name, icon and colour.
- **Version history**: turn it off to stop saving versions and hide **Versions** everywhere. See [Sync and back up](https://terramd.io/docs/sync-and-back-up).
The editor toolbar above a note can move too: drag the arrow at its right end to another edge of the pane, or click it to hide the toolbar until you need it again.
## Step 7: Arrange the sidebar
The sidebar remembers your arrangement on this Mac.
- **Reorder**: drag a row up or down, or drag a section by its name.
- **Collapse**: click a section's name to fold it. Right-click any section name for **Collapse all** and **Expand all**.
- **Pin to the rail**: right-click a view such as **Tasks**, or a database, and choose **Pin to rail**. Pinned rows stay one click away when the sidebar is hidden.
- **Change icon**: right-click a row and choose **Change icon**, then pick one, or choose **Default** to go back.
- **Hide built-ins you don't use**: right-click **Today**, **Links** or another built-in database and choose **Hide**. To bring it back, right-click **Databases** and choose it under **Hidden**.
- **Rename**: your own databases, saved views and folders have **Rename** on their right-click menu.
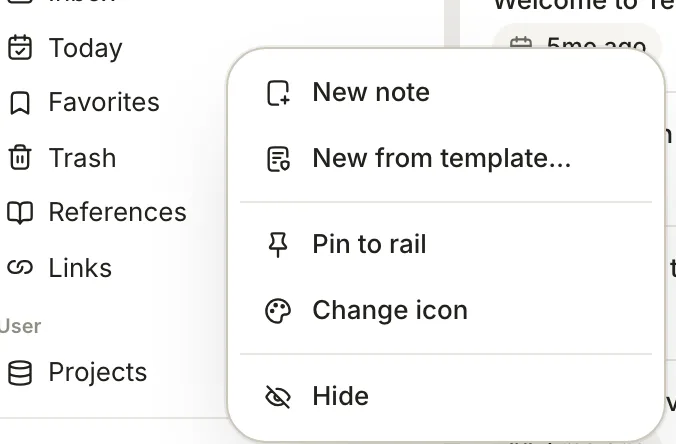
To change what the sidebar shows at the bottom, set a **Display name** and upload a logo in **Settings › General**, under **Library**. The display name replaces the folder's name in the sidebar; the folder itself isn't renamed.
## Step 8: Give one note its own page
Some notes read better wide, such as *Printer quotes* with its table, and some read better narrow. Each note can keep its own page width and font.
1. Open the note and click **Reader preferences**, the sliders at the bottom right of the note, beside **⋯**.
2. Turn on **Remember for this note**. From now on, the width and font you choose are saved with this note.
3. Use the arrows beside **Width** to choose **Narrow**, **Normal**, **Wide** or **Full width**. For the quotes, choose **Wide**.
4. Under **Font**, choose **Open Runde**, **EB Garamond** or **JetBrains Mono**.
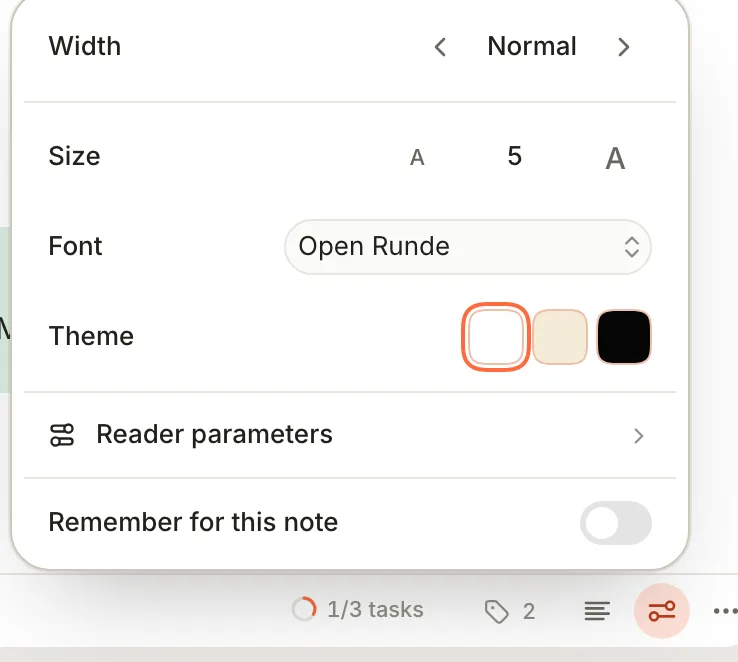
Terra keeps the remembered width and font in the note's [sidecar](https://terramd.io/docs/glossary#sidecar), so they apply wherever the note opens. Turn **Remember for this note** off to go back to the usual page.
With it off, **Width** applies to every note until you close the window. **Font**, **Size**, **Theme** (**White**, **Sepia** or **Dark**) and the **Reader parameters**, such as **Line spacing**, **Justify text** and **Two columns**, shape how notes look in **Read** mode. Switch a note to **Read** with the button beside its title, or press ⌥ ⌘ E.
## Features you might have missed
### Switch off what you don't use
**Settings › Features** has a switch for **AI**, **Web viewer**, **References**, **Canvas**, **Graph**, **Queries** and **Terminal**, and under **Database views** for **Calendar**, **Map**, **Gallery**, **Kanban** and **Sheets**. A feature that's off disappears from places like the sidebar, the toolbar, the `/` menu and the command palette. Its files stay in your Library, and turning it back on brings everything back.
### Decide where dropped files go
**Settings › Files › Dropped files go to** is **Where I drop them** by default: the folder or database under the pointer, or else the one that's open. Choose **Always Inbox** to collect every dropped file in the Inbox instead.
### Choose what happens at launch
**Settings › General › Open at launch** reopens your last Library by default. Either of the other choices starts Terra on the **Open a library** screen instead. **Week starts** sets whether weeks in calendars and date groups start on **Monday** or **Sunday**.
### Drop caps for reading
**Settings › Appearance › Reading** adds a large first letter to the first paragraph of a note in **Read** mode, with **Drop-cap accent tint** to colour it.
## Troubleshooting
> [!NOTE]- A font I typed doesn't appear
> The name has to match a font installed on your Mac, as Font Book shows it. Check the spelling, or clear the field to go back to the default.
> [!NOTE]- My toolbar changes are gone
> Changes stick only after **Apply**; **Cancel**, or closing Settings, throws them away. The toolbar also belongs to the Library, so another Library keeps its own.
> [!NOTE]- The menu bar still shows the old keys
> The menu bar always shows a command's default keys, and those keys still work from there. Your new keys work in the window.
> [!NOTE]- Line height and Tab size in Settings › Editor don't change anything
> In this version those two settings have no effect. To give text more room, raise **Body font size** in **Appearance**, or **Line spacing** under **Reader parameters** for **Read** mode.
## What's next
- [Keyboard shortcuts](https://terramd.io/docs/keyboard-shortcuts): every default key, and how rebinding works.
- [Find your way around](https://terramd.io/docs/find-your-way-around): the parts of the window you've just been arranging.
- [Sprouts](https://terramd.io/docs/sprouts): make your own kinds of Sprout, with your own colours.
- [Read comfortably in the e-reader](https://terramd.io/docs/read-in-the-e-reader): themes and fonts for books and PDFs.
---
# Run a project with boards, timelines and burndowns
> Track a project's work as notes, then see it as a kanban board, a Gantt-style timeline, progress charts and a dashboard — plus an honest recipe for a burndown.
Source: https://terramd.io/docs/project-suite
Projects don't fail for lack of a plan. They fail when the plan lives in one place, the work in another and the status in someone's head.
In Terra, every piece of work is a note — the draft, the decisions, the links — and the project plan is just a different way of looking at those notes. Group them by status and you have a kanban board. Lay them along their dates and you have a timeline. Count them and you have a progress chart. Change a card on the board and the note changes with it, because it *is* the note.
This guide builds a complete project suite for a real-sized example: launching a field guide in five weeks with two collaborators, Sam and Ines.
> [!SUMMARY]
> - Give the project a folder and a database that collects its work
> - Add the properties every view runs on: status, owner, start, due, effort
> - Build a kanban board, a timeline and progress charts as views of the same notes
> - Bring it all onto one dashboard note
> - Chart a burndown of remaining work over time
> [!BEFORE]
> - A Library open in Terra. New to Terra? Start with the [Quickstart](https://terramd.io/docs/quickstart).
> - A rough list of the project's pieces of work. You can add more as you go.
> - About 30 minutes. The burndown at the end takes another 10.
## How it fits together
Four ideas carry the whole guide:
- **Work items are notes.** "Draft chapter 2" is a note in the project's folder. Its notes, links and checklists live inside it.
- **Properties describe them.** Each note carries a few [properties](https://terramd.io/docs/properties) — `status`, `owner`, `start`, `due`, `effort` — stored in the note's front matter. Every board, timeline and chart is built from these.
- **A database collects them.** A [*database*](https://terramd.io/docs/databases) is a live list of notes that match a rule, such as "everything in the `projects/field-guide` folder". It doesn't move or copy anything; notes join and leave it as they change.
- **Views show them.** A database can have many saved [*views*](https://terramd.io/docs/views-and-layouts), each with its own layout:
| You want to see | Use a view with layout | Built from |
| --- | --- | --- |
| Who's doing what, and what's stuck | **Board** | `status` (or any property you group by) |
| What happens when | **Timeline** | `start` and `due` |
| How far along you are | **Chart** | Counts or sums, grouped by `status` |
| Everything, editable | **Table** | All of them |
| Remaining work over time | A **query** chart | A `completed` date you record |
## Step 1: Give the project a home
Keep every piece of work for the project in one folder. It makes the database rule simple, and it means the project's files stay together on disk.
1. In the sidebar, under **Folders**, right-click **projects** (or any folder) and choose **New subfolder**. Name it `field-guide` and click **Save**.
2. Point at the new folder in the sidebar and click **New note here**. Name the note after a piece of work: *Outline the field guide*.
3. Repeat for each piece of work — *Draft chapter 1*, *Design the cover*, *Copy edit*, and so on. One note per thing someone can finish.
> [!TIP] Size work items so they finish
> A good work item takes between a day and a week, and has one owner. "Write the book" is a project; "Draft chapter 2: Boards" is a work item. Small items make boards honest and burndowns smooth.
## Step 2: Create the project's database
1. In the sidebar, point at **Databases** and click **+** (**New database**).
2. Type a name: *Field guide launch*.
3. Click **+** (**Add condition**). Set the condition to **Folder** · **starts with** · `projects/field-guide`.
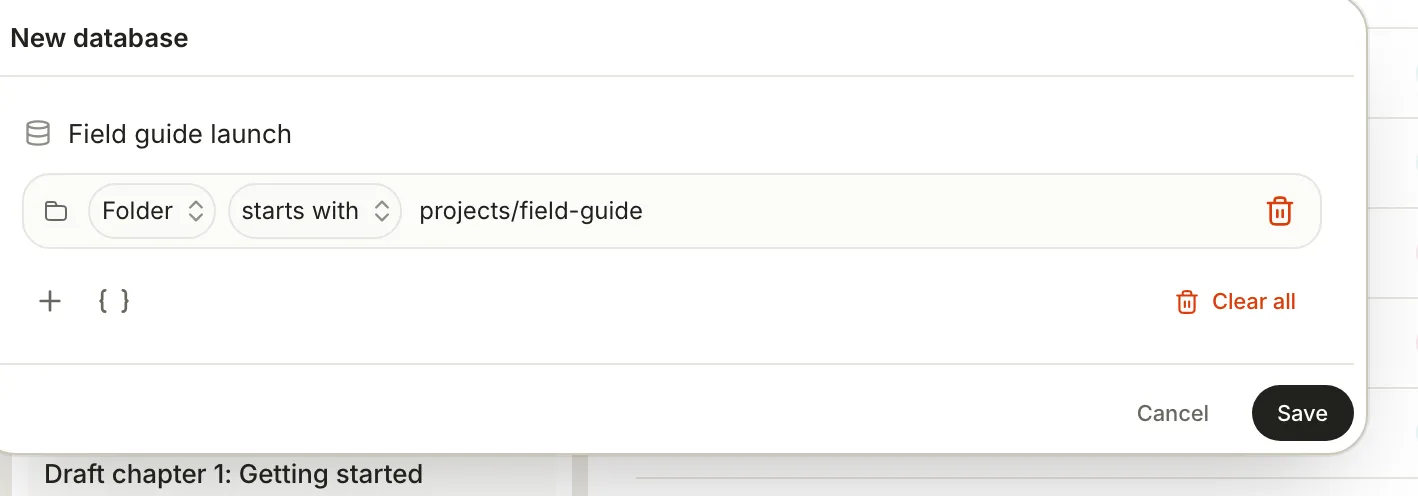
4. Click **Save**. The database opens as a table, with **View preferences** open beside it. It also appears in the sidebar under **Databases**, in the **User** group.
Prefer tags to folders? Use **tags** · **contains** · `field-guide` instead, and tag each work item. Either way, the rule lives on the **Database** tab of **View preferences** and you can change it later.
## Step 3: Add the properties every view runs on
Five properties are enough to run a serious project. Add them once and every view can use them.
| Property | Type | What it's for |
| --- | --- | --- |
| `status` | **Status** | Board columns, progress charts, timeline progress |
| `owner` | **Select** | Who's on it — options *Maya*, *Sam*, *Ines* |
| `start` | **Date** | When work begins (timeline bars) |
| `due` | **Date** | When it should finish (timeline bars, due-date charts) |
| `effort` | **Number** | Rough size in days — weights charts and progress |
1. In the table, click **+** at the right end of the header row (**Add property**), then **New property**.
2. Type the name — `status` — and click the type, **Status**.
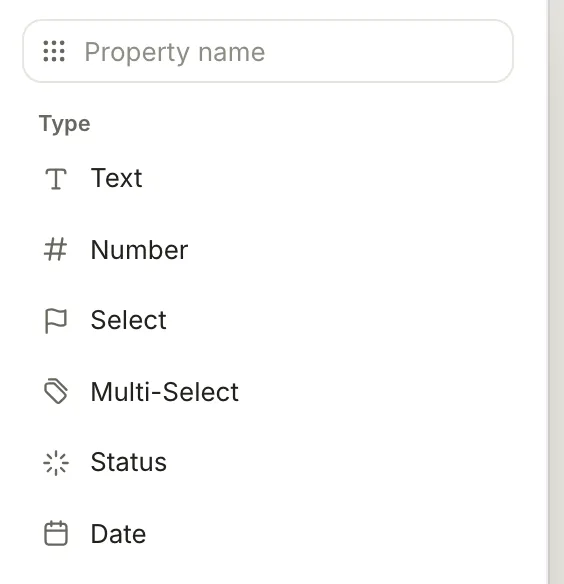
3. Repeat for `owner` (**Select**), `start` and `due` (**Date**) and `effort` (**Number**).
4. Fill in the values right in the table: click a cell and pick or type. A new **Status** property comes with three options — *Not started*, *In progress* and *Done* — which is all most projects need.
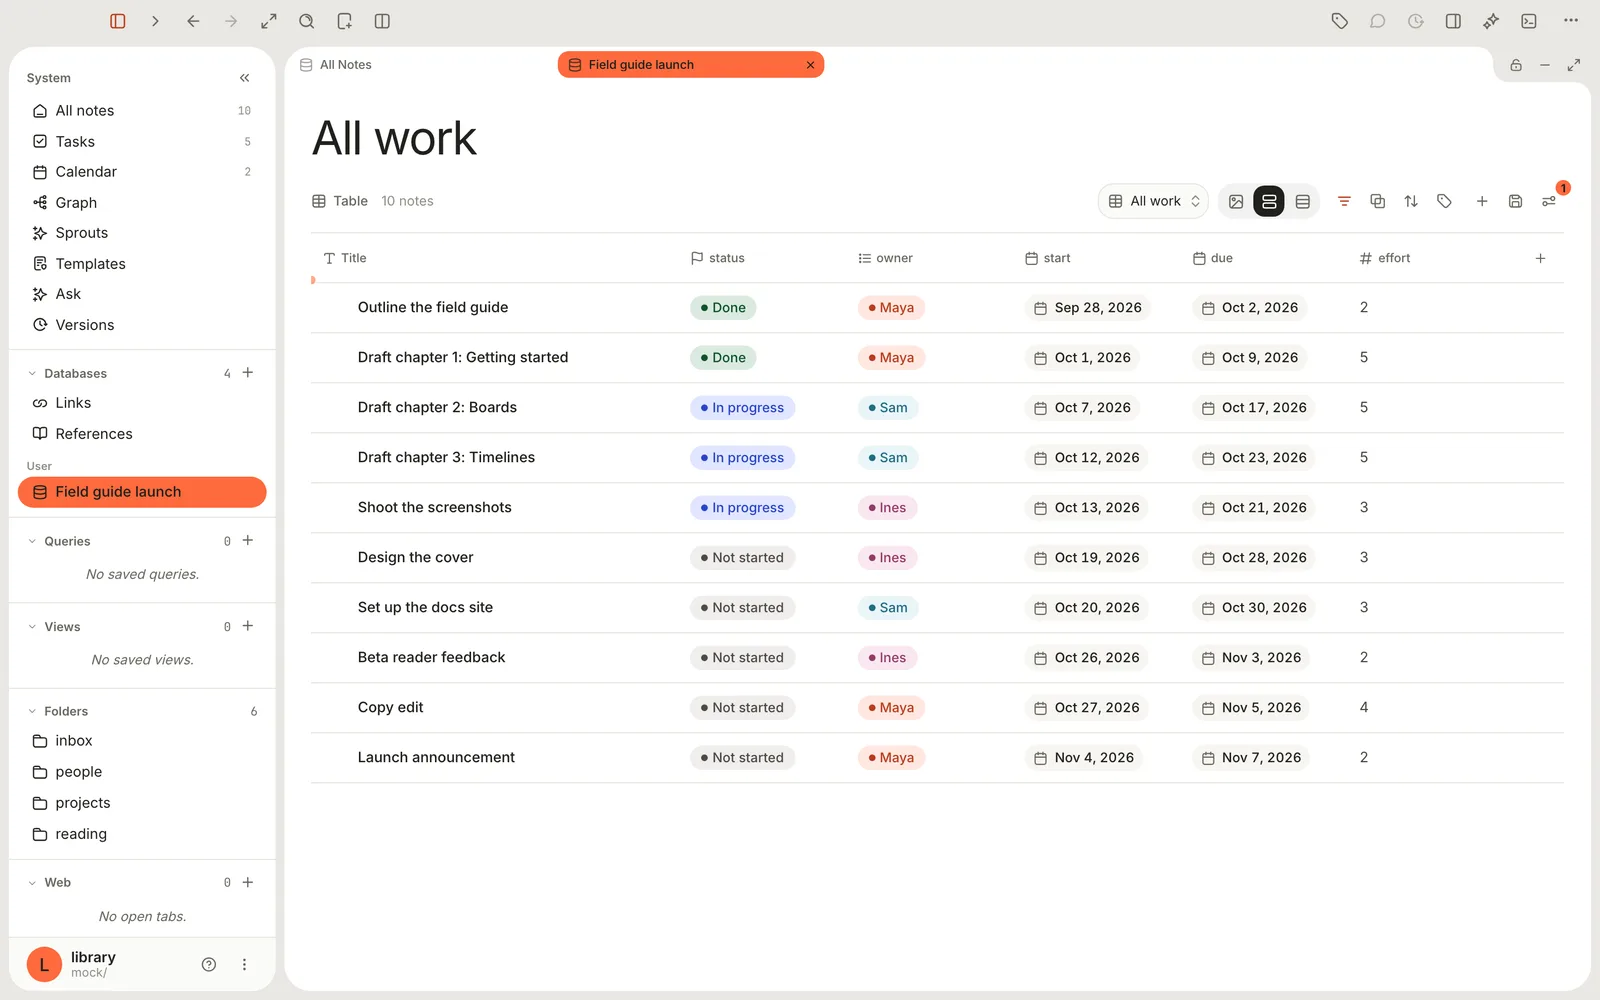
> [!NOTE] Call the status property `status`
> Terra lowercases property names. Keep the status property's name exactly `status` and its finished option *Done* — the timeline's progress bars look for those words. To rename options or change their colours, open **Tools › Property Manager…**.
## Step 4: Build the kanban board
A board shows each work item as a card in a column — one column per status — so the state of the project is visible at a glance.
1. At the top of the database, click the view menu (it shows the current view's name, **All work** here) and choose **Add view**. **View preferences** opens on the **Layout** tab.
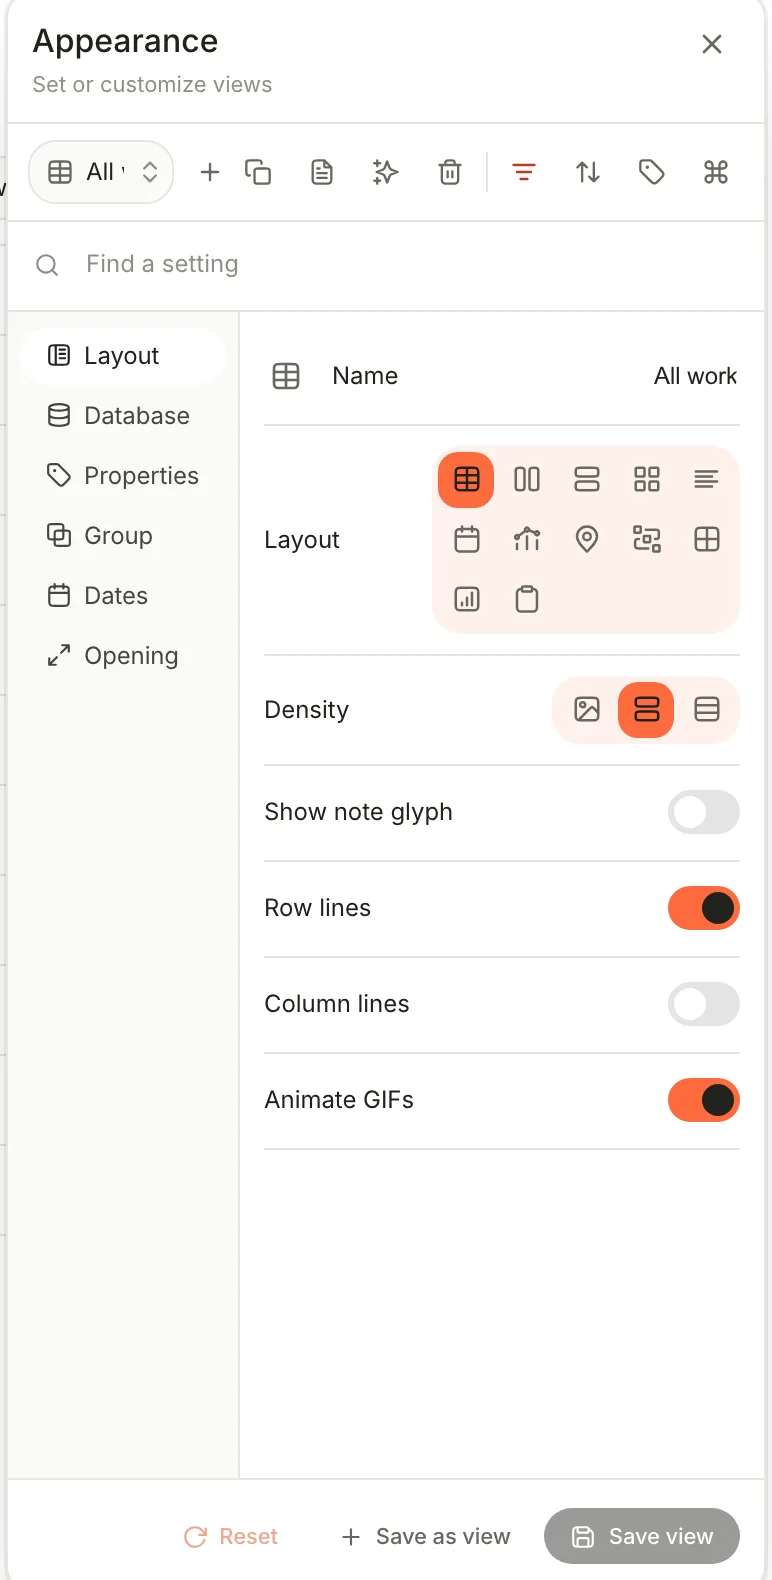
2. Click the **Board** layout (the two-column icon), type **Board** in **Name**, and click **Save view**.
3. Close the panel. Terra groups the cards by your first Status property, so you get **Not started**, **In progress** and **Done** columns. Each column shows how many cards it holds out of the whole board — *3/10*.
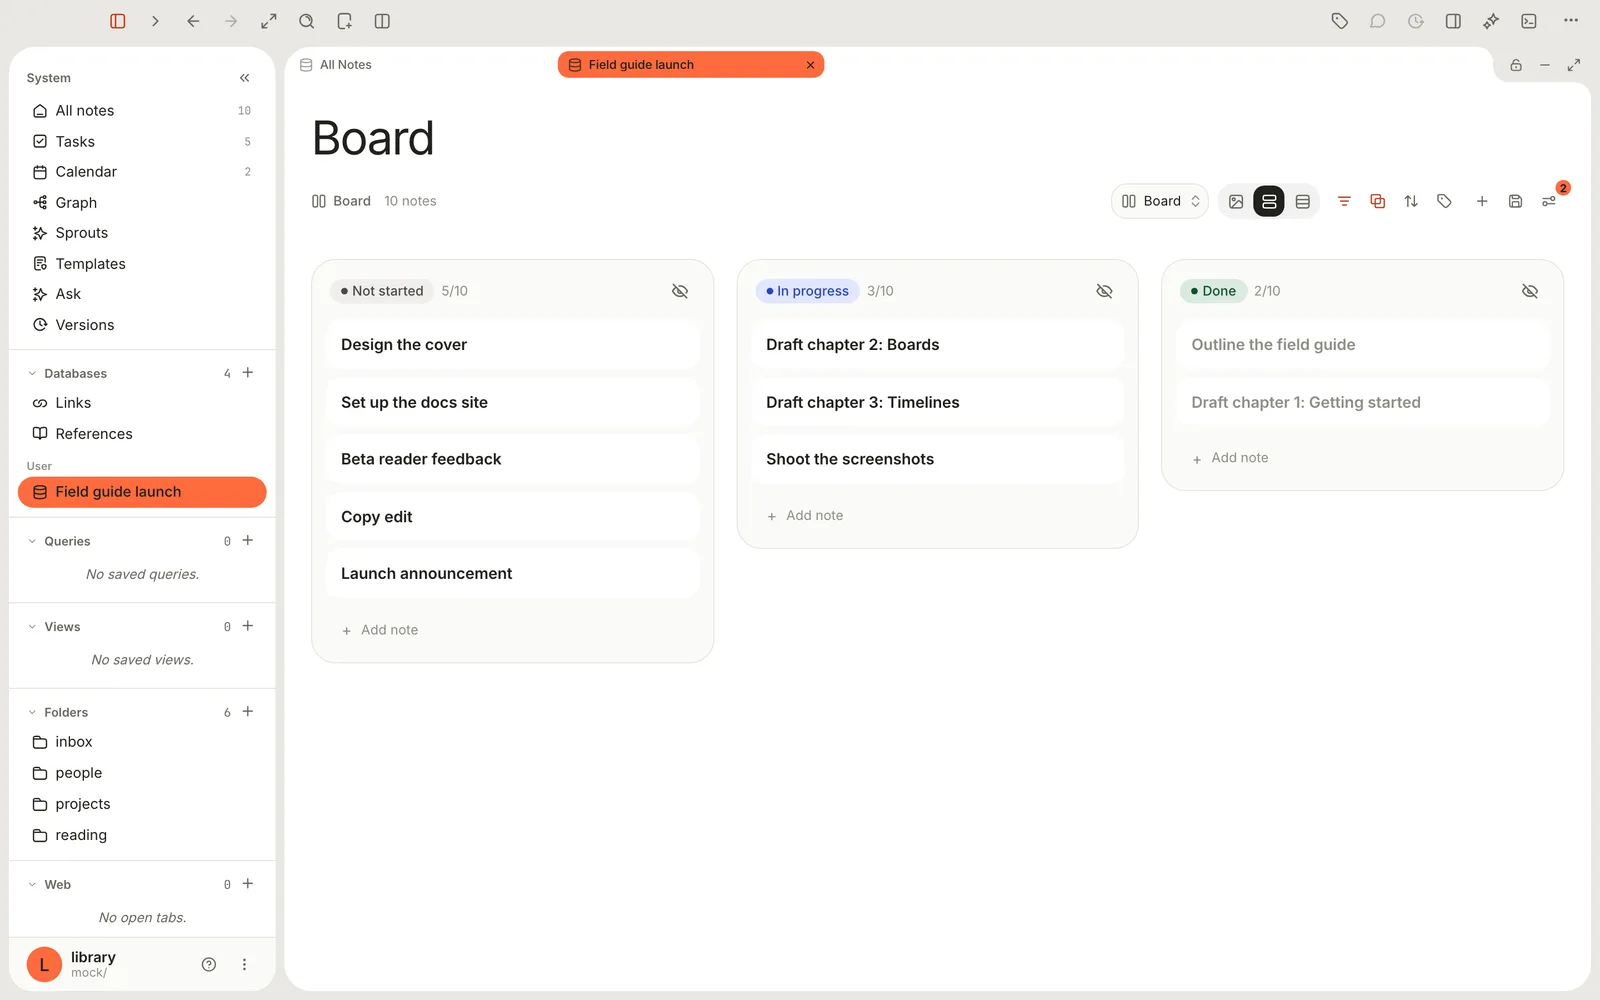
Now run the project from here:
- **Move work forward:** drag a card to another column. Terra writes the new status into the note.
- **Open a card:** click it to read or edit the note beside the board.
- **Show more on cards:** click **Properties** in the header and tick `owner`, `due` and `effort`; drag them to reorder.
- **Group by something else:** click **Show boards as** and pick another property — `owner` turns the board into a who's-doing-what view.
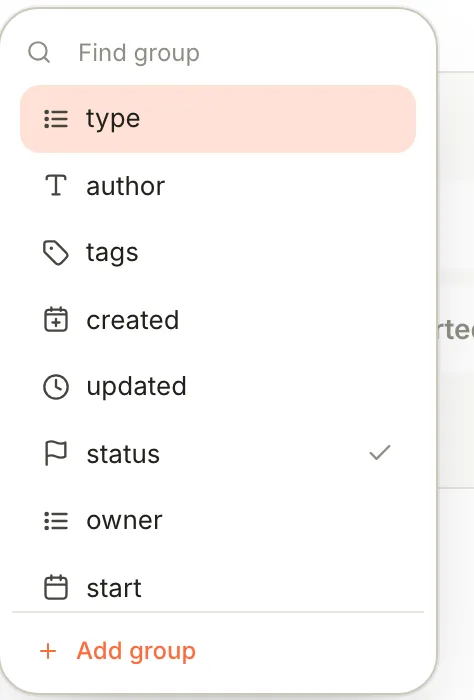
- **Collapse to three columns:** if your status property has many options, open **View preferences › Group** and set **Group status by** to **Group**. You get **To do**, **In progress** and **Done**.
- **Hide a column:** click the eye icon in its header. Bring it back from **View preferences › Group › Hidden groups**.
> [!WARNING] Add new work from the folder, not the board
> **+ Add note** at the foot of a column creates the note in your **Inbox**. Because this database collects notes from the project folder, the new card disappears from the board until you move the note into `projects/field-guide`. To add work, use **New note here** on the folder in the sidebar instead.
## Step 5: Lay out the timeline
The timeline answers "what happens when" and shows where work overlaps.
1. Open the view menu and choose **Add view**. Pick the **Timeline** layout, name it **Timeline**.
2. In **View preferences**, click the **Dates** tab. Set **Start** to `start` and **End** to `due`.
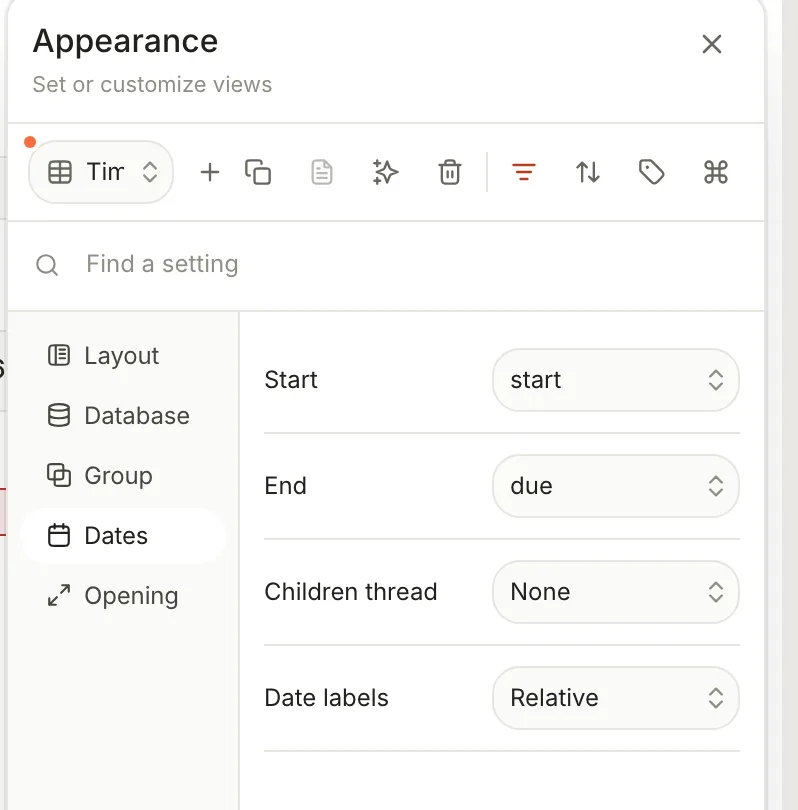
3. Click **Save view**. Each work item becomes a bar from its start date to its due date, with a line marking today.
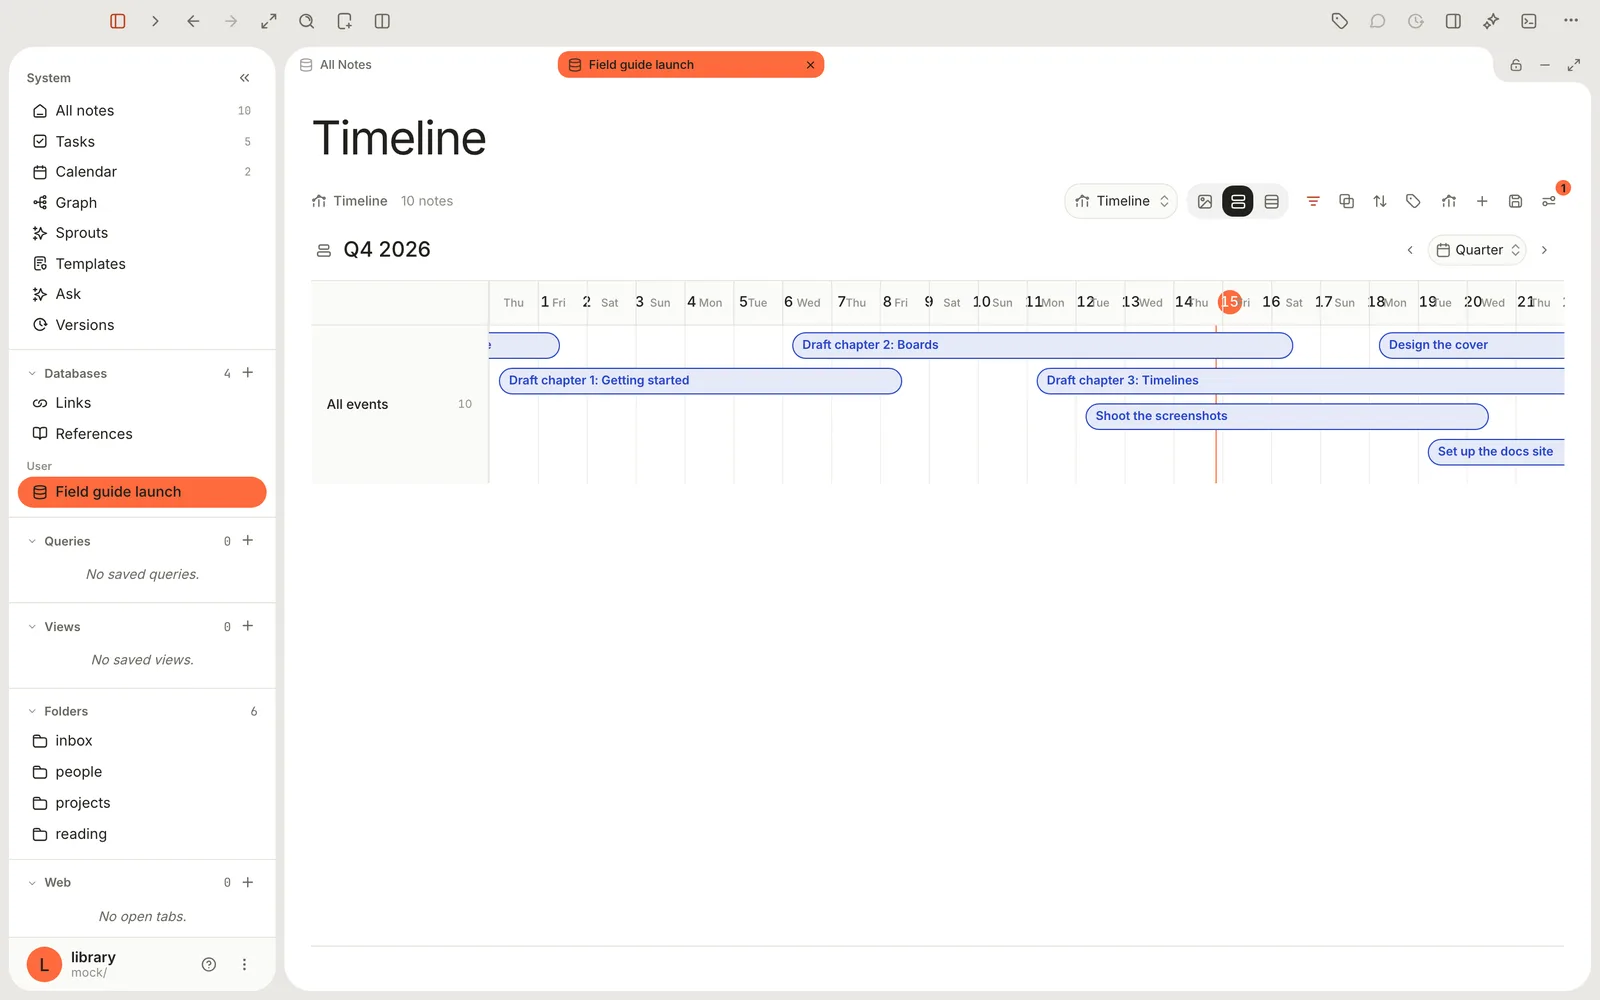
Working with the timeline:
- **Zoom:** use the zoom menu at the top right — **Day**, **Week**, **Month**, **Quarter** or **Year** — and the arrows to move to the previous or next range. Scroll sideways to load more time.
- **Reschedule:** drag a bar left or right. Its start and due dates move together and are written to the note.
- **Details:** click a bar to see the item, open its note, or delete it.
- **Swimlanes:** group the view by `status` (in **Group by**) to get one lane per status.
> [!NOTE]- What the timeline doesn't do yet
> Bars can't be resized by dragging their ends — edit `start` or `due` in the table instead. There are no dependency arrows between bars. Swimlanes work for status, folder, type, tags and the created and updated dates. And the timeline is for notes: checkbox tasks with due dates appear on the **Calendar** instead (see [Run your week with tasks](https://terramd.io/docs/run-your-week-with-tasks)).
## Step 6: Chart your progress
Charts turn the same properties into answers. Add a view with the **Chart** layout, then shape it on the **Chart** tab of **View preferences**:
- **Chart** — **Bar**, **Horizontal bar**, **Line**, **Donut** or **Number** (a single big figure).
- **X axis** — what to group by, such as `status`, `owner` or `due`. For dates, pick a **Bucket**: **Day**, **Week**, **Month**, **Quarter** or **Year**.
- **Y axis** — **Count** of items, or **Sum**, **Average**, **Min** or **Max** **Of** a number such as `effort`.
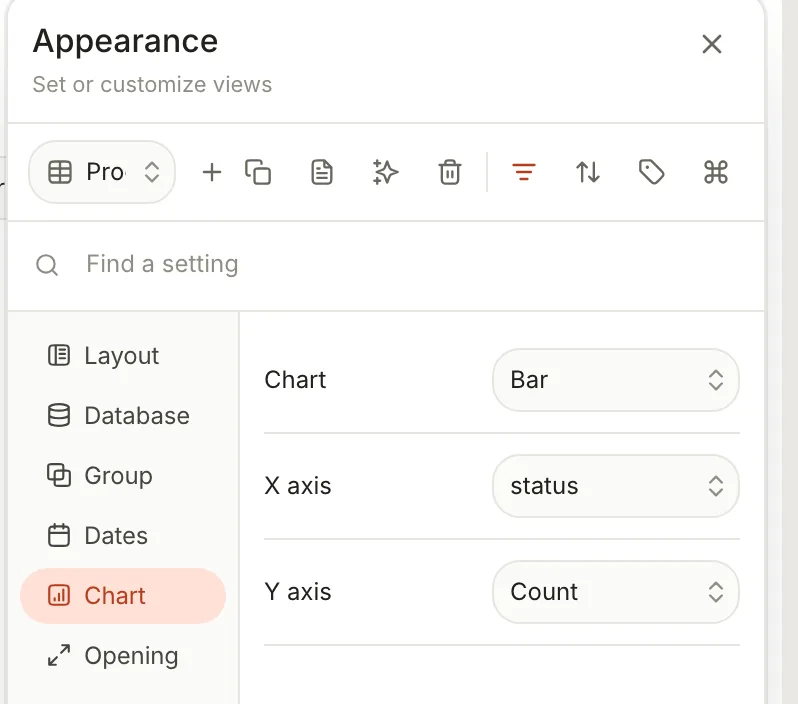
Three charts worth making for any project:
1. **Where are we?** — Chart **Donut** or **Bar**, X axis `status`, Y axis **Count**. Click a bar to list the items in it.
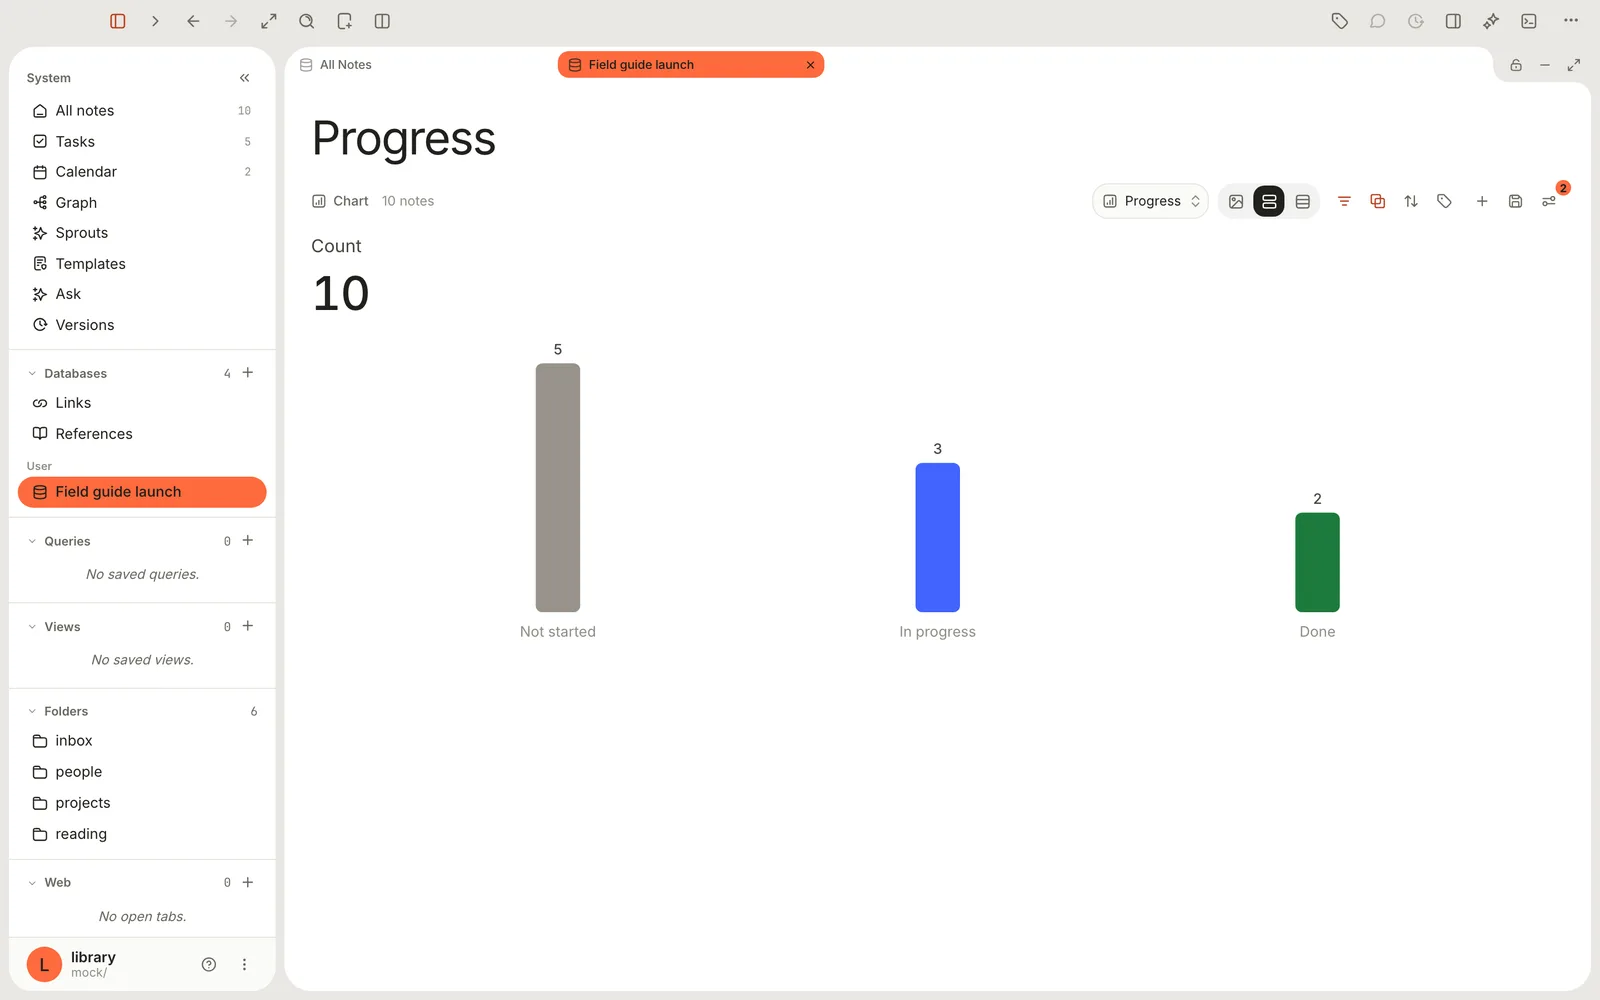
2. **What's still due, and when?** — Click **Filters** and add `status` **is not in group** **Done**. Then Chart **Bar**, X axis `due` with **Bucket** **Week**, Y axis **Sum** **Of** `effort`. You get the remaining work, week by week — a forward-looking cousin of the burndown.
3. **Did we finish anything this week?** — Filter `status` **is in group** **Done**, Chart **Number**, **Compare** **Previous period**, **Date** `completed` (see step 8), **Window** **Last 7 days**. The tile shows this week's count against last week's, with a small trend line.
> [!TIP] Filter by status group, not by name
> `status` **is not in group** **Done** keeps working even if you rename or add options later, because it tests the group (To do, In progress or Done) rather than the option's name.
## Step 7: Put it all on one dashboard
A dashboard is an ordinary note that holds live views of your databases — so the board, the chart and the key numbers sit on one page you can pin, link or open in a split.
1. Click **New…** in the toolbar and choose **New from template…**.
2. Pick **Dashboard** — "A count, a chart, a table, and a board on one page."
3. The note has four blocks: a number, a chart, a table and a board. In each block's picker, choose **Field guide launch**.
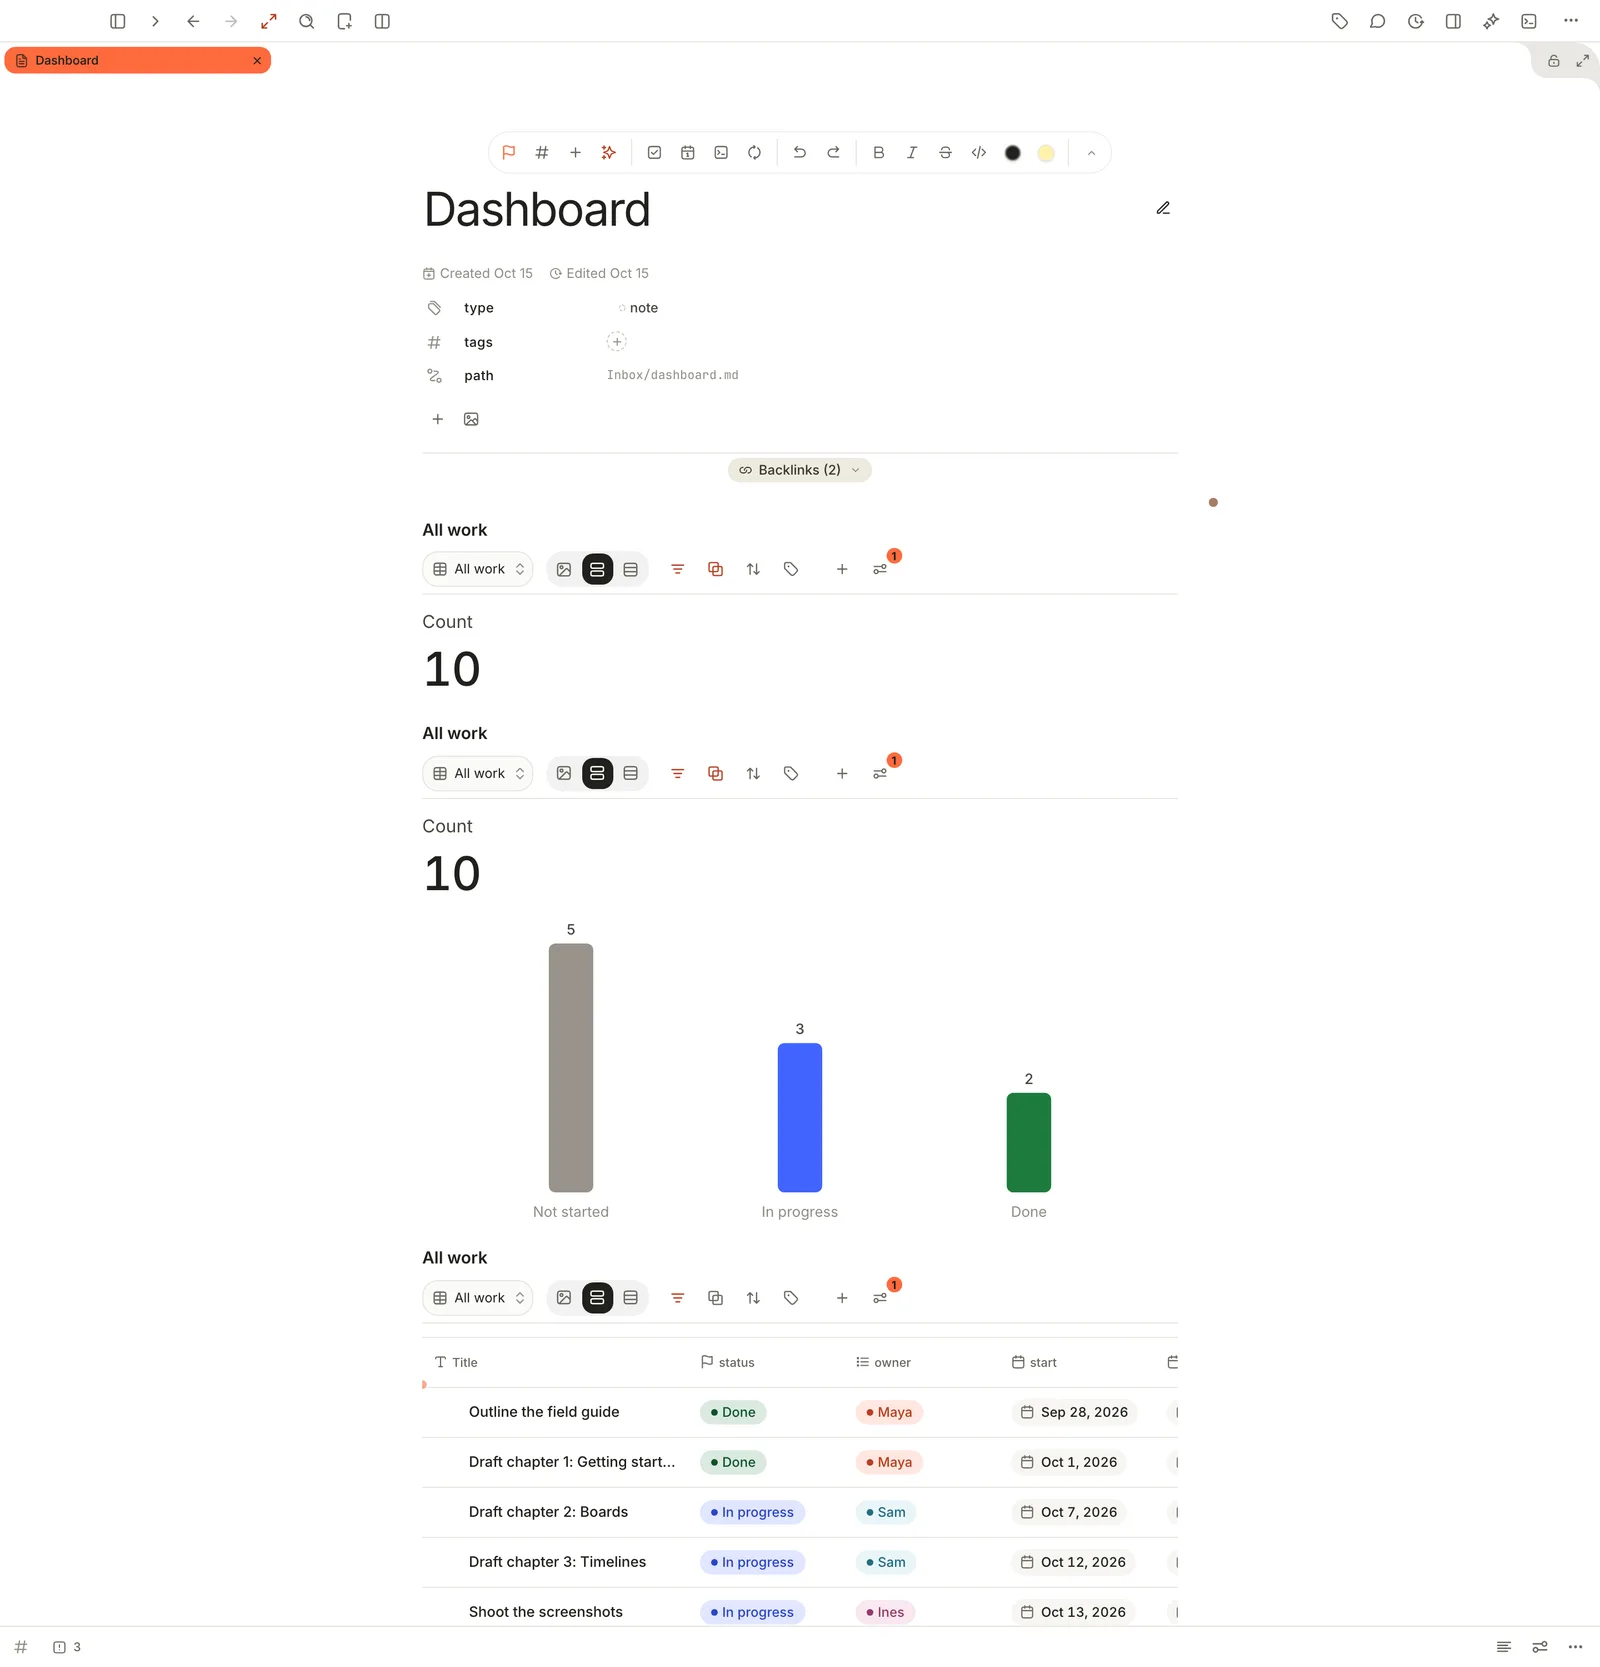
Each block looks through the database's current view, so a filter, sort or grouping you change in one block changes that view everywhere it appears. Only the template blocks' layouts and their number and chart settings stay with the block. A change shows straight away in the block you made it in, and in the other blocks the next time you open the dashboard; [Build a dashboard](https://terramd.io/docs/dashboards) has the details. Rename the note *Field guide — dashboard* and pin it to the sidebar rail.
> [!NOTE] Don't see the Dashboard template?
> Terra adds its starter templates to brand-new Libraries only. In an older Library, build the same page by hand: on an empty line type `/database`, press Return and pick the database. Repeat for each block, and switch each block's layout from its view menu.
## Step 8: Chart a burndown
A burndown plots how much work is left on each day, so you can see whether you'll land on time.
> [!WARNING] There's no built-in burndown chart yet
> Terra doesn't record when an item was finished, and database charts don't have a running-total mode. The recipe below gets you a real burndown using a query and its chart's **Cumulative** setting. The catch: you record a `completed` date yourself, and the chart's settings aren't saved with the query, so you set them again each time you open it.
**Record when work finishes**
1. Add a **Date** property called `completed` to the database (step 3).
2. Whenever you drag a card to **Done**, set its `completed` date. A table view sorted by `status` makes this quick.
**Build the chart**
1. Choose **File › New Query**.
2. Paste this into the editor, replacing `projects/field-guide/` with your project's folder (keep the trailing slash):
```sql
WITH items AS (
SELECT
date(n.created) AS opened,
(SELECT f.value_text FROM v_frontmatter f
WHERE f.note_id = n.id AND f.key = 'completed') AS closed
FROM v_notes n
WHERE instr(n.path, 'projects/field-guide/') = 1
),
events AS (
SELECT opened AS day, 1 AS change FROM items
UNION ALL
SELECT closed AS day, -1 AS change FROM items WHERE closed IS NOT NULL
)
SELECT day, sum(change) AS net
FROM events
GROUP BY day
ORDER BY day
```
Each item adds one on the day it was created and takes one away on the day it was completed. Added up over time, that's the number of items still open — your burndown, including any scope you add along the way.
3. Press ⌘ Return, or click **Run query** in the floating tools. The results appear as a table.
4. Click **View: Results** in the floating tools and choose **Chart**.
5. Pick **Line** from the chart-type menu, then click **Chart settings** (the gear):
- **X axis › What to show** — `day`
- **Y axis › What to show** — `net`
- Turn on **Cumulative**.
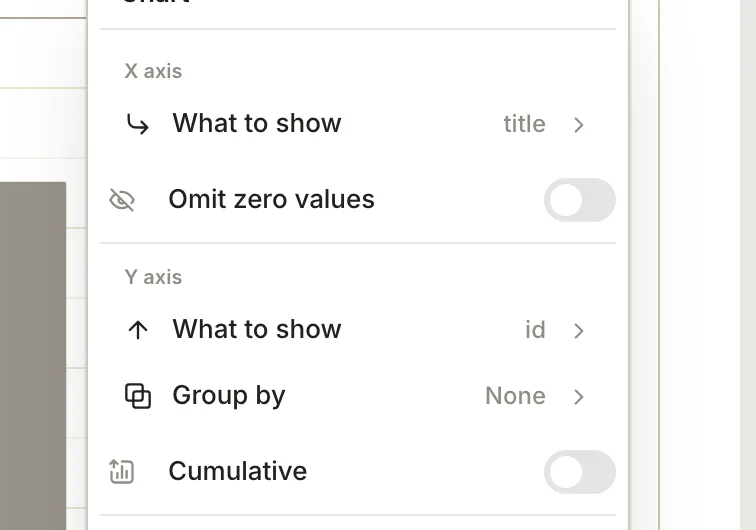
6. Click **Save query** and give it a name, so the SQL is one click away next time.
For an effort-weighted burndown, replace `1` and `-1` with the item's `effort` (from `v_frontmatter`, key `effort`, column `value_number`). For a burn-up of finished work, keep only the `completed` rows and count them.
## Features you might have missed
### Checklists inside work items
Each work item can hold its own checklist (`- [ ] Review`). Show the **Progress** property on any view of the database to see a small completion ring per item — a lightweight way to track sub-steps without more notes.
### A task board for the project's to-dos
If you write to-dos as checkboxes inside your notes, right-click **Tasks** in the sidebar and choose **New task database**. Name it *Field guide tasks*, then click **Sources** in its header and pick the `projects/field-guide` folder. You get a board of every checkbox in the project, in **Open**, **In progress**, **Done** and **Cancelled** columns. See [Run your week with tasks](https://terramd.io/docs/run-your-week-with-tasks).
### Roll work up into milestones
On the timeline, parent items can show the progress of their children. Add a **Thread** property (in **Add property**, under **Computed**) that links a milestone note to its work items, then in **View preferences › Dates** set **Children thread** to it, **Completion status** to **Status** and **Weight by Effort** to `effort`. Parents gain a progress bar, weighted by effort. Children must be in the same database.
### Status reports in one click
**View preferences › Save as Markdown note** freezes the current view into a dated note in your Inbox — a table you can paste into an update or keep as a record of where things stood.
### An intake form
Add a view with the **Form** layout and share the screen in a meeting: each submission becomes a new note with the fields you chose.
### Switch layouts instantly
Press ⇧ ⌘ V to cycle the current view through every layout — a quick way to see which one tells the story best.
## Troubleshooting
> [!NOTE]- A card I added from the board disappeared
> **+ Add note** puts new notes in your Inbox, which this database doesn't collect. Find the note in **Inbox** and move it into the project folder, or add work with **New note here** on the folder.
> [!NOTE]- The timeline says "No timeline dates"
> Open **View preferences › Dates** and set **Start** and **End** to your date properties. Until you do, Terra draws each note from the day it was created to the day it was last edited.
> [!NOTE]- Milestone progress counts nothing as finished
> Timeline progress treats an item as complete when its status is *Done* (or *Cancelled*). If you renamed your finished option — to *Shipped*, say — rename it back to *Done* in **Tools › Property Manager…**.
> [!NOTE]- Clicking Delete on a timeline bar removed my note
> **Delete** in a timeline or calendar popover moves the note itself to the Trash. Restore it from **Trash** with **Put Back**.
> [!NOTE]- The burndown chart lost its settings
> Query chart settings aren't saved yet. Reopen the query, choose **View: Results › Chart** and set the axes and **Cumulative** again.
## What's next
- [Build a personal dashboard](https://terramd.io/docs/dashboards) — more chart and stat-tile ideas.
- [Run your week with tasks](https://terramd.io/docs/run-your-week-with-tasks) — checkbox tasks, due dates and the calendar.
- [Find anything with search](https://terramd.io/docs/power-search) — find items across every project at once.
---
# Run your week with tasks and the calendar
> A weekly routine in Terra: capture tasks in your notes, triage them on one board, plan the week on the Calendar and close it out on Friday.
Source: https://terramd.io/docs/run-your-week-with-tasks
By Friday, the week's to-dos are everywhere. Two came out of Thursday's meeting, one is buried in a project note, three are in a list you started on Monday, and you can't remember whether you ever booked the boiler service. A separate to-do app helps until the tasks in it drift away from the notes that explain them.
Terra keeps each task where it was born, as a checkbox line in a note, and gathers every one of them into a single board and onto the Calendar. This guide builds a weekly routine around that: write tasks down as they come up, sort them once a week, plan the coming days on the Calendar, and close the week out. The example is the field-guide launch from [Run a project](https://terramd.io/docs/project-suite): you're working with Sam and Ines, and it's Friday 16 October.
> [!SUMMARY]
> - Capture tasks in the notes where they come up, with due dates and owners
> - Triage everything on the Tasks board in one sitting
> - Keep an Overdue view that shows what's slipping
> - Plan the coming week on the Calendar by moving tasks between days
> - Work through each day from the Tasks drawer, then close the week out
> [!BEFORE]
> - A Library open in Terra. New to Terra? Start with the [Quickstart](https://terramd.io/docs/quickstart).
> - A few notes with to-dos in them, or the meeting note from [Take meeting notes that turn into tasks](https://terramd.io/docs/meeting-notes).
> - About 20 minutes the first time, 10 to 15 minutes each week after that.
## How it fits together
A [task](https://terramd.io/docs/tasks) is a line like `- [ ] Book the copy editor` in any note. Terra reads every one and shows it in three places, each suited to a different moment in the week:
| Where | What it shows | Use it to |
| --- | --- | --- |
| A note | The task in context, with its properties as pills | Write tasks down as they come up |
| **Tasks**, in the sidebar | Every task in the Library on a board, one column per status | Triage, change status, set dates |
| **Calendar**, in the sidebar | Tasks on their due dates, next to your meetings | See the week, move work between days |
Change a task in any of them and the line in the note changes too. There is nothing to sync.
## Step 1: Capture tasks where they come up
A task is most useful next to the note that explains it: the meeting where it was agreed, the chapter it belongs to. So the first habit is to write tasks straight into whatever note you're in, and to keep one list for odds and ends that don't belong anywhere.
1. In any note, start a new line with `[ ]` and a space, then type the task. (You can also type `/todo` and choose **To-do**.)
2. To give it a due date, type a space, three colons and a space at the end, then the date: ` ::: due=2026-10-21`. When you type the next space, the date turns into a pill under the task.
3. To add more, type ` ::: ` again before each one: ` ::: priority=high`, ` ::: assignee=Sam`. Or click **⋯** at the end of the line, choose **Properties** and switch on **Due**, **Priority** or **Assignee**.
4. Press Tab on a new line to make it a subtask of the one above.
Here's a personal list kept in `Inbox/tasks.md`, as it's stored:
```md
- [ ] Weekly review ::: due=2026-10-16 repeat=weekly
- [ ] Call the printer about paper stock ::: due=2026-10-16T09:30
- [ ] Book the boiler service ::: due=2026-10-21
- [ ] Renew the passport
- [x] Order more notebooks
```
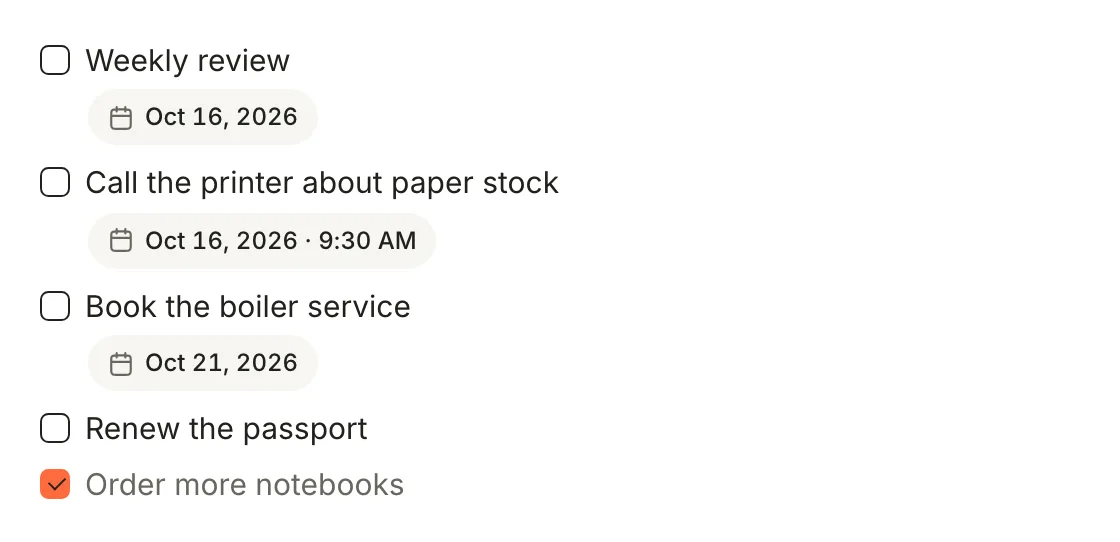
> [!TIP] Not every task needs a date
> Give dates to things that really are due. A list where everything is due today is no better than one where nothing is. Undated tasks still show up on the board, under **Open**.
## Step 2: Triage everything on the Tasks board
Once a week, look at all of it in one place. The board shows every task from every note, so nothing hides in a note you haven't opened for a while.
1. Click **Tasks** in the sidebar. The board opens with four columns: **Open**, **In progress**, **Done** and **Cancelled**. The number beside **Tasks** in the sidebar counts the ones that aren't done or cancelled.

2. Read down **Open**. For each card, decide: is it this week's, later, or not at all?
3. Drag the ones you're starting into **In progress**, and anything you've decided against into **Cancelled**. Terra rewrites the checkbox in the note: `[ ]` becomes `[/]` or `[-]`.
4. To add a task that came to mind, click **Add task** at the foot of a column, type it and press Return. It's written to `Inbox/tasks.md`. Click the note name under the field to send it to another note.
5. Click a card to open **Edit task**. Click the status pill to change status, click the tag button at the top to add a due date or priority, and use **Add subtask** to break a big task down.

> [!NOTE] Two ways to tick a task
> Clicking a checkbox in a note steps through every status: Open, In progress, Done, Cancelled. On the board, drag the card to the column you want.
## Step 3: Keep an Overdue view
Tasks that slip past their date are the ones worth catching early. A saved view that shows only overdue tasks takes a few seconds to set up and turns the weekly check into one click.
1. In **Tasks**, click **+** (**Add view**) in the header. **View preferences** opens on the **Layout** tab with a new table view.
2. Type `Overdue` in **Name** and click **Save view**, then close the panel with **×**.
3. Click **Filters**, then **+** (**Add condition**). A condition appears that reads **Title is**.
4. Click **Title** and choose **Due**. Click **is** and choose **overdue**.
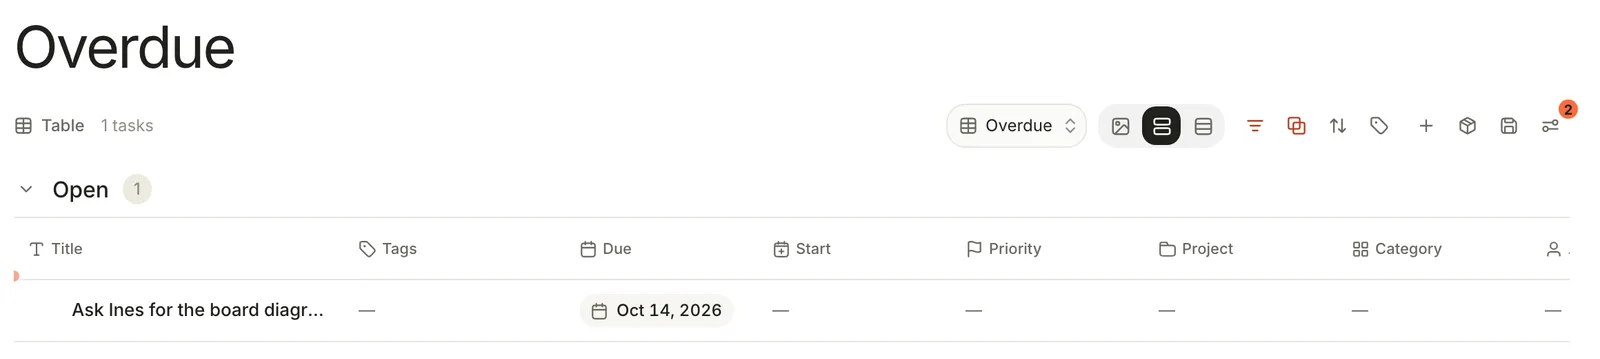
For each task in the view, do one of three things: do it now, give it a realistic new date in **Edit task**, or drag it to **Cancelled** on the board. To switch between **Board** and **Overdue** later, use the view menu at the top right of the header.
For a quicker glance, hover the number beside **Tasks** in the sidebar. A **Closest due** list opens with the unfinished tasks, soonest first. Its filter button narrows the list to **Today**, **This week**, **Overdue** or **No date**.
## Step 4: Plan the coming week on the Calendar
The board tells you what's open; the Calendar tells you whether it fits. Meetings and due dates side by side show which days are already full.
1. Click **Calendar** in the sidebar. It opens on the current month. Tasks sit on their due dates, outlined in their status colour; meetings show their start time.
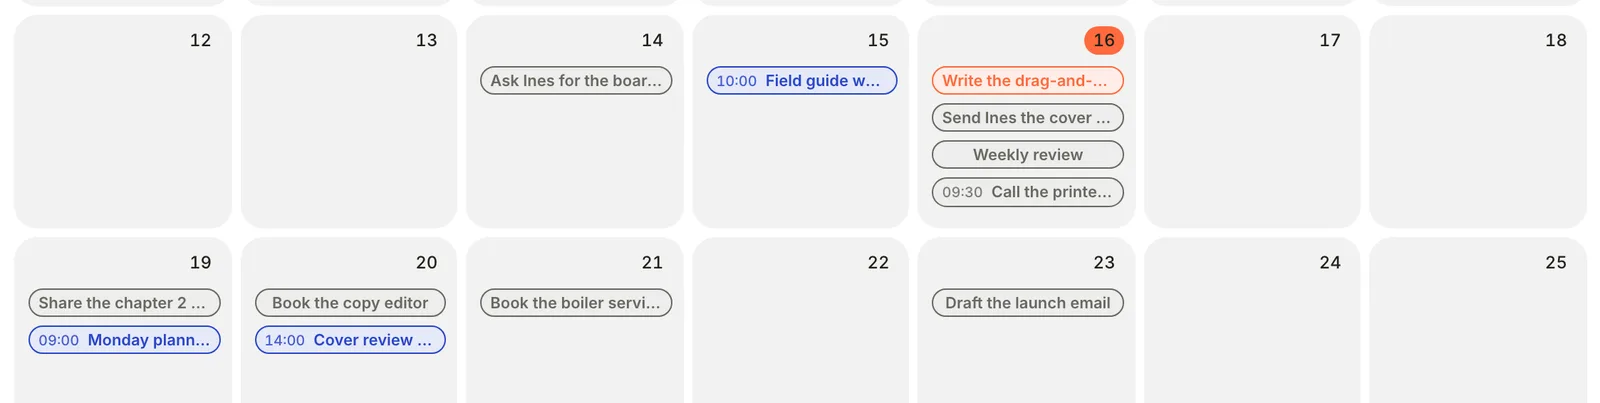
2. Look for crowded days and empty ones. Here Friday holds four tasks, while Thursday 22 October is clear.
3. Drag a task to another day to move its due date. Terra rewrites `due=` in the task's note and keeps the time, if it had one.
4. Click a task to change its status or priority without leaving the Calendar. **Open note** takes you to the line.

5. To put a meeting on the Calendar, give its note a `start-time`; see [Calendar](https://terramd.io/docs/calendar#put-a-note-on-the-calendar).
> [!WARNING] The Calendar stays on the month grid
> In this version, the built-in Calendar always shows a month, whatever you pick under **Display mode**. The month view still shows each week as a row, so planning works the same. For a single day, use the Calendar drawer in the next step.
## Step 5: Work through each day
During the week, keep the day's tasks beside your work instead of switching back to the board.
1. Open the note you're working in.
2. Click **Properties** in the toolbar (⌘ R) to open the panel on the right, then click **Show Tasks** in the row of buttons along its bottom.
3. The Tasks drawer lists the open note's tasks. Hover its header and click the **Library** button to see every task instead.

4. Click a task's marker to move it to the next status, or right-click the marker to pick one. Click the task itself to jump to its note.
5. For the day's plan, click **Show Calendar** in the same row. Click a day in the small month to list its meetings and tasks.

The ring at the bottom of each note counts how many of its tasks are done. Click it for a list of them.
## Step 6: Close out the week
On Friday, finish the loop: mark what's done, decide about what isn't, and let the repeating tasks roll over.
1. Open **Tasks** and drag finished cards to **Done**.
2. Drag anything you've dropped to **Cancelled**. It stays in its note, struck through, as a record.
3. Finish your repeating tasks the same way. The weekly review in `Inbox/tasks.md` has `repeat=weekly`, so marking it **Done** on the board changes the note to:
```md
- [x] Weekly review ::: due=2026-10-16 repeat=weekly
- [ ] Weekly review ::: due=2026-10-23 repeat=weekly
```
Next week's copy is waiting on Friday the 23rd.
4. Check the **Overdue** view one last time and give every task in it a new date or a decision.
> [!IMPORTANT] Repeat from the board, not the note
> Ticking a repeating task's checkbox in the note marks it done but doesn't create the next copy. Mark repeating tasks done on the board, in **Edit task**, on the Calendar or in the Tasks drawer.
Done and cancelled tasks stay on the board, which keeps a record but adds clutter. To hide them in your main view, add a filter: **Status** › **is not** › **done**, and another for **cancelled**.
## Features you might have missed
### A board for one project
The built-in **Tasks** board always shows every task. Right-click **Tasks** in the sidebar, choose **New task database** and name it *Field guide*. In its header, click **Sources** and pick the `projects/field-guide` folder. That board shows only the project's tasks, and **Add task** writes into the project folder.
### Group the board another way
**Show boards as** in a board's header groups cards by **Due**, **Start**, **Priority**, **Project**, **Category**, **Assignee** or **Note** instead of status. Grouped by **Assignee**, it shows what Sam and Ines owe you; dragging a card to another column rewrites that property. The menu has no way back to status columns, so try it in a second board view (**+** › **Board** layout) rather than on **Board** itself.
### A page for each day
There's no daily-note button, but the **Daily log** template (**File › New from Template…**, ⇧ ⌘ N) starts a page titled with today's date, with **Wins**, **Blockers** and **Tomorrow** sections. Tasks you write in it join the board like any others.
### Give a big task its own note
When a task grows into a project, open it in **Edit task**, click **Move task to note** and choose **New note: …** at the top. The task, its subtasks and its description move into a new note in `Inbox`.
### Bring in Jira issues
If your team uses Jira, Terra can show issues on the board too. Connect an Atlassian account under **Settings › Integrations › Jira** (**Configure**, then **Connect an Atlassian account**). Then, in **Tasks**, click **Sources** and pick a project under **Jira projects**. Dragging a Jira card to another column moves the issue in Jira once you've turned on **Write access** for the site.
## Troubleshooting
> [!NOTE]- A task I wrote isn't on the board
> The line has to be a bulleted list item with a checkbox: `- [ ] Book the venue`. Numbered items (`1. [ ]`) and checkboxes inside code blocks aren't tasks. See [Task syntax](https://terramd.io/docs/task-syntax#how-a-line-is-read).
> [!NOTE]- The due date shows as text instead of a pill
> Check for a space inside a value, such as `assignee=Sam Lee`: Terra then reads the whole property list as part of the title. Also check for the older `due:2026-10-21` form, which needs to be ` ::: due=2026-10-21`.
> [!NOTE]- The weekly review didn't come back
> It was probably ticked in the note. Mark it done on the board instead; the next copy appears straight under it.
> [!NOTE]- The board is full of finished tasks
> Done and cancelled tasks stay until you delete their lines. Filter them out of your main view, or keep a separate view that shows only **Open** and **In progress**.
## What's next
- [Take meeting notes that turn into tasks](https://terramd.io/docs/meeting-notes) — action items that land on this board automatically.
- [Tasks](https://terramd.io/docs/tasks) — statuses, custom statuses, the Edit task dialog and more.
- [Calendar](https://terramd.io/docs/calendar) — what appears on it and how to choose the dates it uses.
- [Task syntax](https://terramd.io/docs/task-syntax) — every property and repeat rule you can type.
---
# Take meeting notes that turn into tasks
> Start meetings from the Meeting template, write action items with owners and dates, and follow them up on the Tasks board and the Calendar.
Source: https://terramd.io/docs/meeting-notes
Most meetings end with a short list of things people said they'd do. A week later half of them have quietly vanished, because the list lives in the minutes and nobody reads the minutes again.
In Terra, an action item is an ordinary [task](https://terramd.io/docs/tasks): a checkbox line in the meeting note, with an owner and a due date. The moment you write it, it's on the Tasks board, and with a date it's on the Calendar too, next to the meeting it came from. This guide follows the field-guide team's weekly sync on Thursday 15 October, from a blank page to the follow-up.
> [!SUMMARY]
> - Start a meeting note from the **Meeting** template
> - Put the meeting itself on the Calendar
> - Write action items with an owner and a due date
> - Follow them up on the Tasks board, grouped by person
> - Optionally, bring in meetings recorded with Granola
> [!BEFORE]
> - A Library open in Terra. New to Terra? Start with the [Quickstart](https://terramd.io/docs/quickstart).
> - A folder for meetings helps. This guide uses one called `Meetings`; to make one, click **+** (**New folder**) beside **Folders** in the sidebar.
> - For the Granola step only: a Granola account, and an internet connection.
> - About 10 minutes.
## How it fits together
A meeting note is a normal [note](https://terramd.io/docs/glossary#note). Three things turn it into a working record:
| Part | What it is | Where it shows up |
| --- | --- | --- |
| The **Meeting** template | Sections for attendees, agenda, discussion, decisions and action items | The note itself |
| `start-time` and `end-time` | Two [properties](https://terramd.io/docs/properties) holding the meeting's date and time | The [Calendar](https://terramd.io/docs/calendar) |
| Action items | Task lines with `assignee=` and `due=` | **Tasks**, the Calendar and the Tasks drawer |
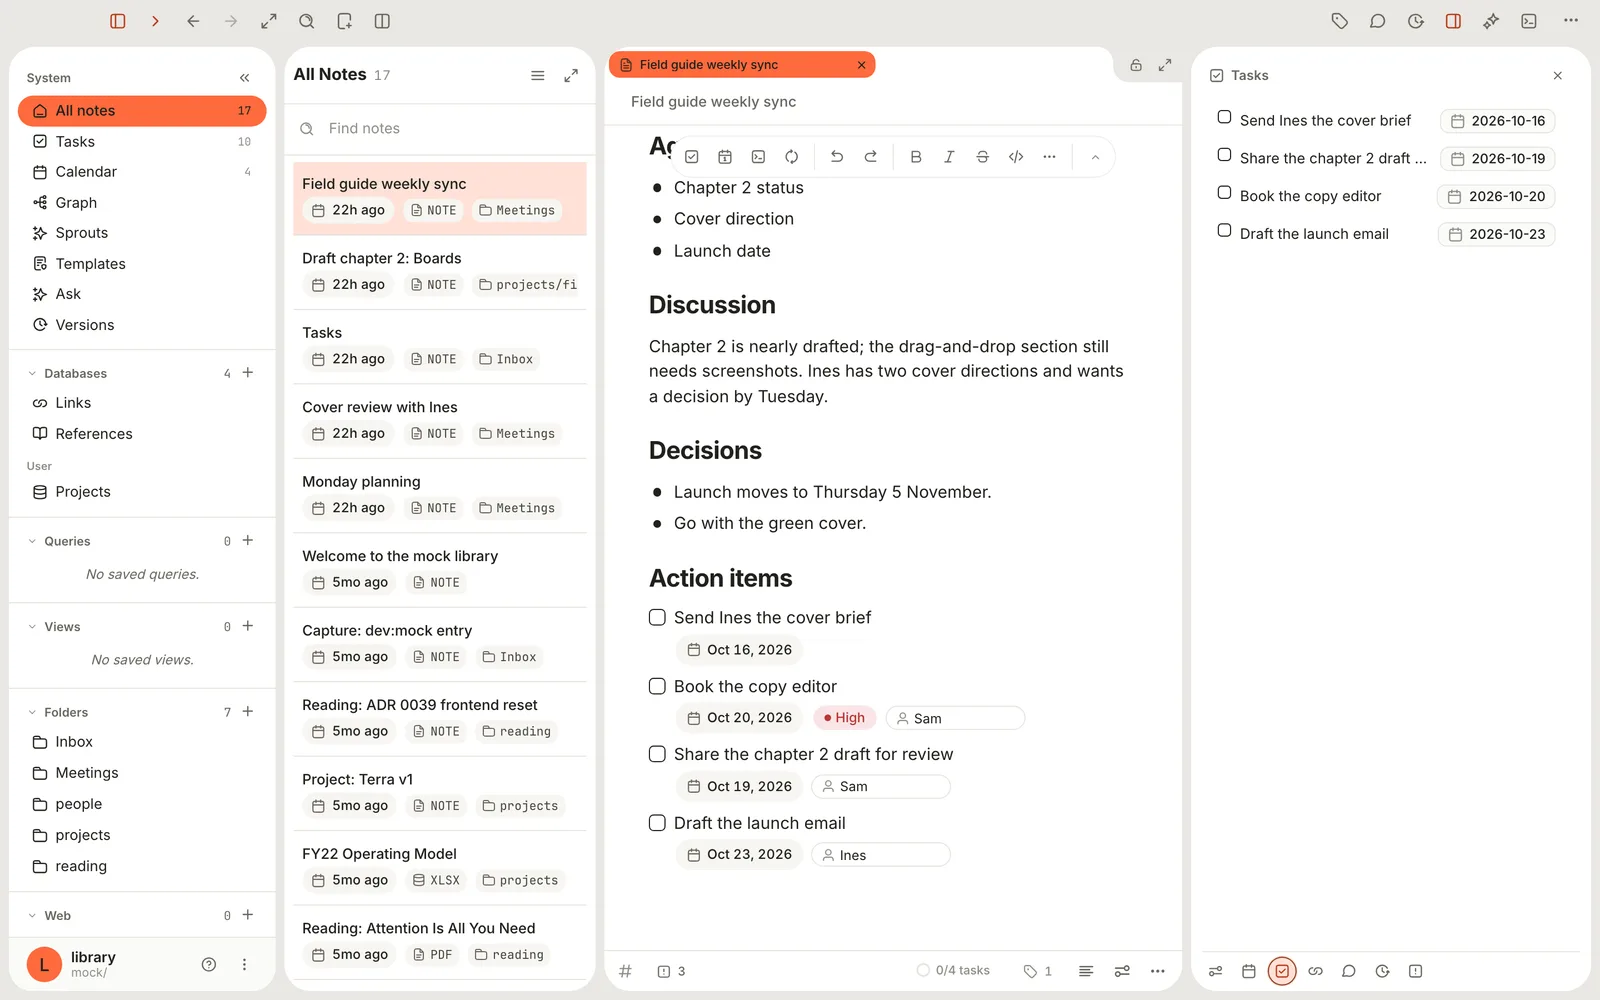
## Step 1: Start the note from the Meeting template
A [template](https://terramd.io/docs/templates) gives every meeting the same shape, so the action items are always in the same place.
1. In the sidebar, right-click your `Meetings` folder and choose **New from template…**.
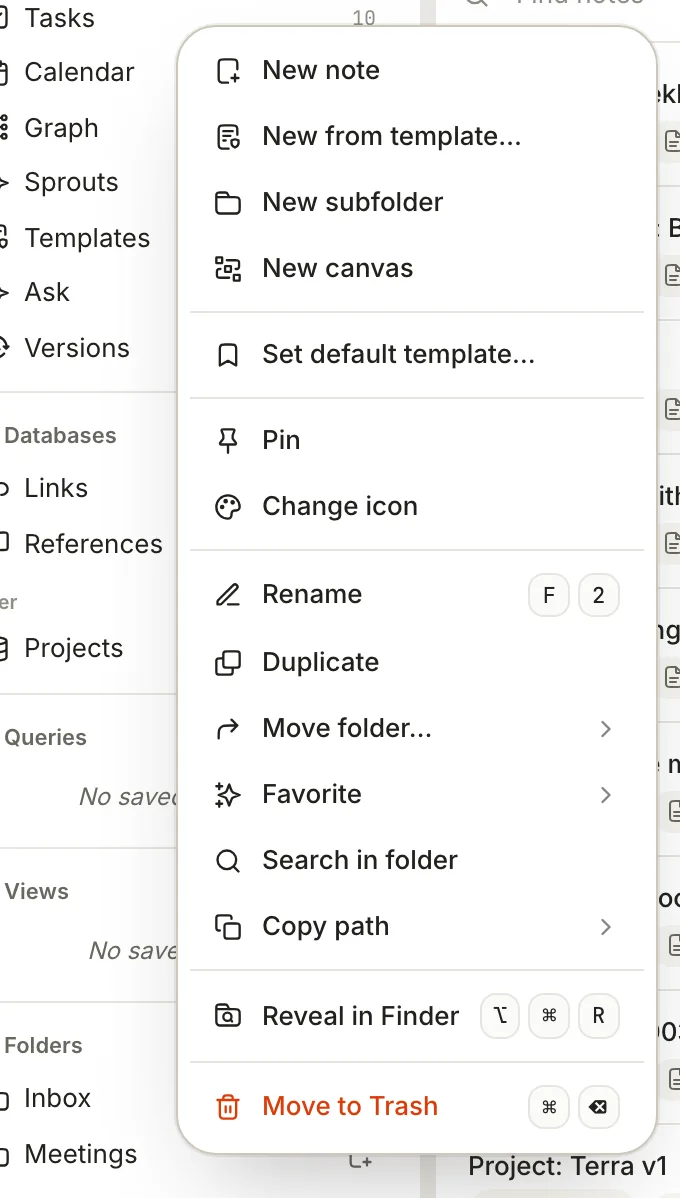
2. Click **Meeting**, or move to it with the arrow keys and press Return.
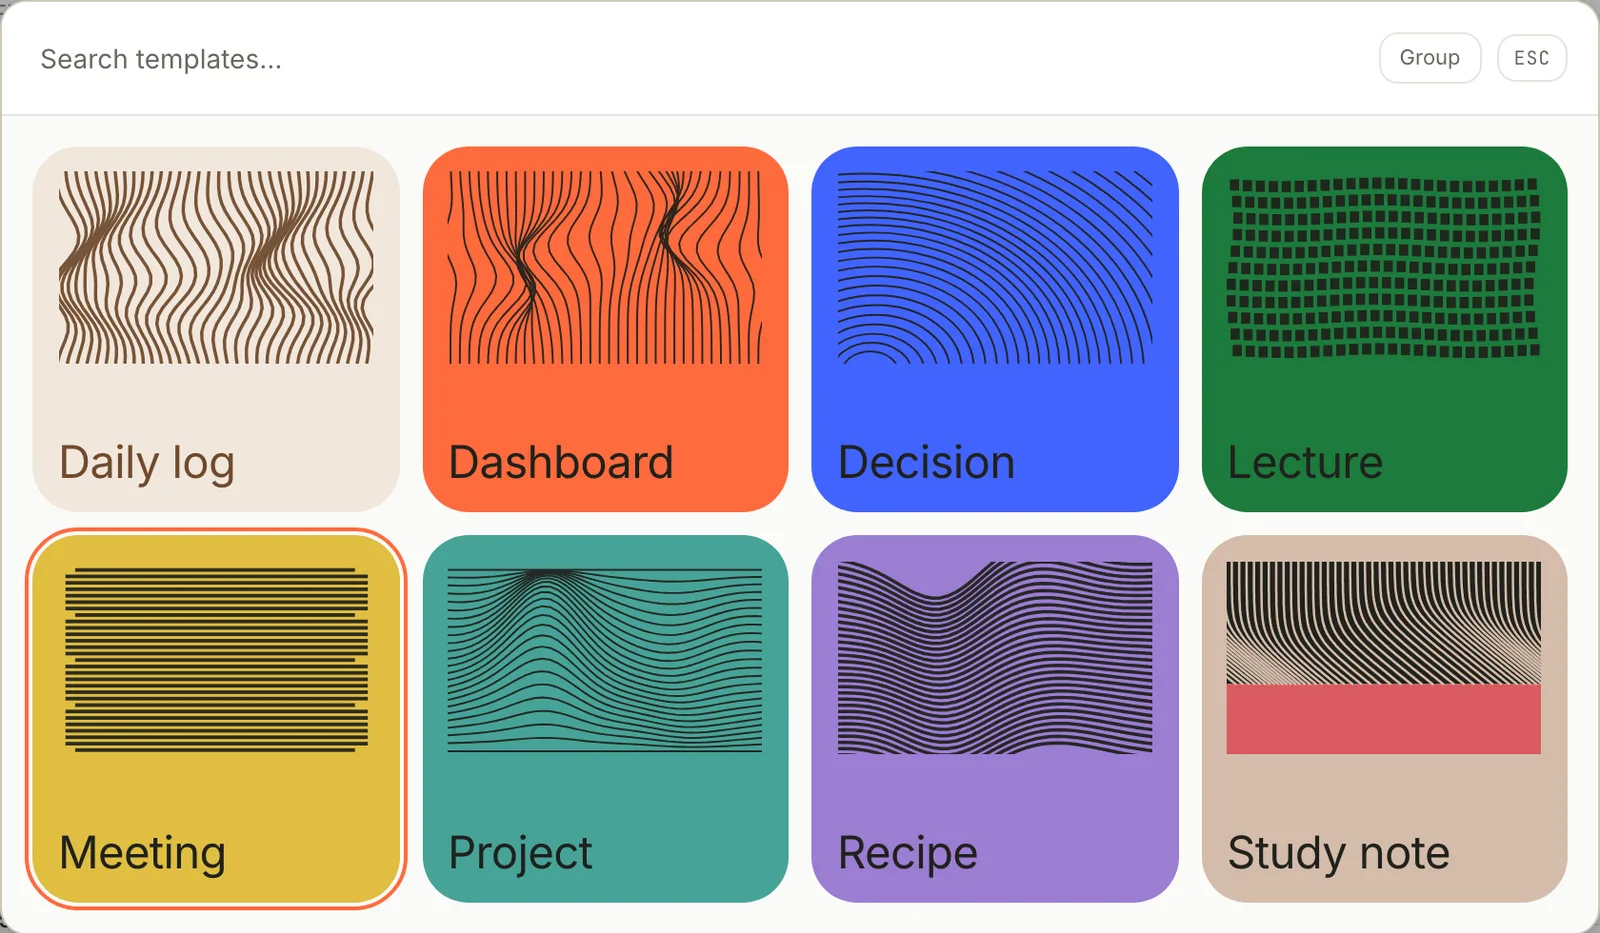
3. Terra creates a note called **Meeting** in the folder and opens it, with today's date and the current time already filled in.
4. Click the title and rename it: *Field guide weekly sync*. The template also writes the title as a heading at the top of the page; change that heading too, or delete it.
You can start a meeting note from anywhere with **File › New from Template…** (⇧ ⌘ N). The note then goes into the folder of the note you have open.
The template's sections are plain Markdown, so the note looks like this as you fill it in:
```md
**Date:** October 15, 2026
**Time:** 10:00
## Attendees
Sam, Ines
## Agenda
- Chapter 2 status
- Cover direction
- Launch date
## Discussion
Chapter 2 is nearly drafted; the drag-and-drop section still needs screenshots.
## Decisions
- Launch moves to Thursday 5 November.
- Go with the green cover.
## Action items
- [ ]
```
## Step 2: Put the meeting on the Calendar
The **Date** and **Time** lines are text for people to read; the Calendar doesn't read them. To put the meeting on the Calendar, give the note a start time.
1. Under the note's properties, click **+** (**Add property**).
2. Choose **Existing property**, type `time` and pick `start-time`.
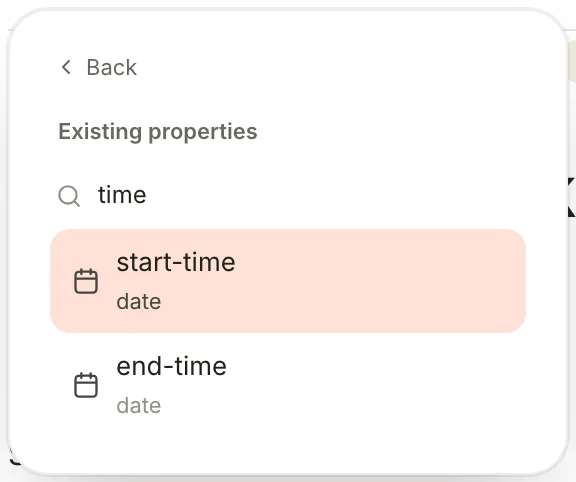
3. Click the new property's value and pick the date and time: 15 October, 10:00.
4. Add `end-time` the same way and set it to 10:45.

The meeting now appears on the Calendar on Thursday the 15th, with its start time in front of the title. To have the Calendar use the end time as well, open **Calendar**, click **View preferences** and set **Dates › End** to `end-time`. You only do that once.
## Step 3: Write the action items
An action item needs three things: what, who and by when. Write each one as a task under **Action items**; the template leaves an empty checkbox there to start you off.
1. Click after the empty checkbox and type the first action: *Send Ines the cover brief*.
2. Add a due date at the end of the line: ` ::: due=2026-10-16`. When you type the next space, it becomes a date pill.
3. Press Return for the next action. For one that belongs to someone else, add an owner too, typing ` ::: ` before each property: ` ::: due=2026-10-20`, then ` ::: priority=high`, then ` ::: assignee=Sam`.
4. Prefer menus? Click **⋯** at the end of a task's line, choose **Properties** and switch on **Due**, **Assignee** or **Priority**.
When you're done, the section reads:
```md
## Action items
- [ ] Send Ines the cover brief ::: due=2026-10-16
- [ ] Book the copy editor ::: due=2026-10-20 priority=high assignee=Sam
- [ ] Share the chapter 2 draft for review ::: due=2026-10-19 assignee=Sam
- [ ] Draft the launch email ::: due=2026-10-23 assignee=Ines
```
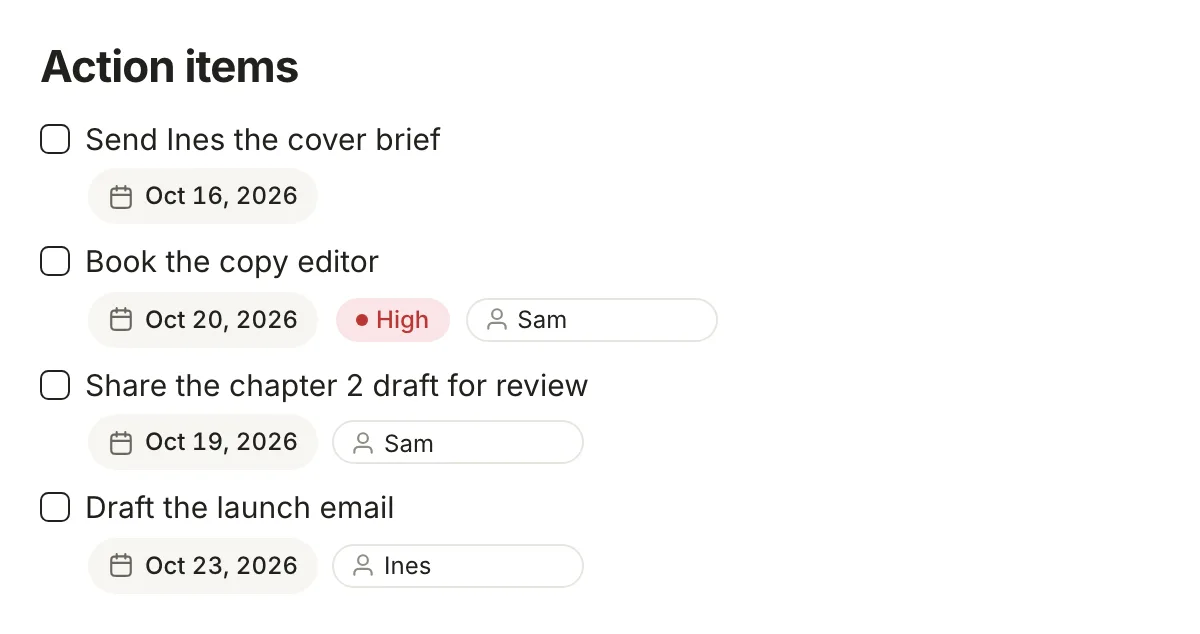
> [!TIP] Names without spaces
> A property value can't contain a space. Write `assignee=Sam` or `assignee=sam-lee`, not `assignee=Sam Lee`: a space makes Terra read the whole property list as part of the title.
Keep decisions as plain bullets under **Decisions**. Only things someone has to *do* should be tasks, or the board fills up with statements.
## Step 4: Follow up on the Tasks board
The action items are already on the board; there's no import step. The line under each card's title names the meeting it came from.
1. Click **Tasks** in the sidebar.
2. Give the board a second view, so the main one keeps its status columns: click **+** (**Add view**) in the header, click the **Board** layout, type *By person* in **Name**, click **Save view** and close the panel.
3. Click **Show boards as** in the header and choose **Assignee**. The board regroups into a column per person, plus **No value** for tasks without an owner.
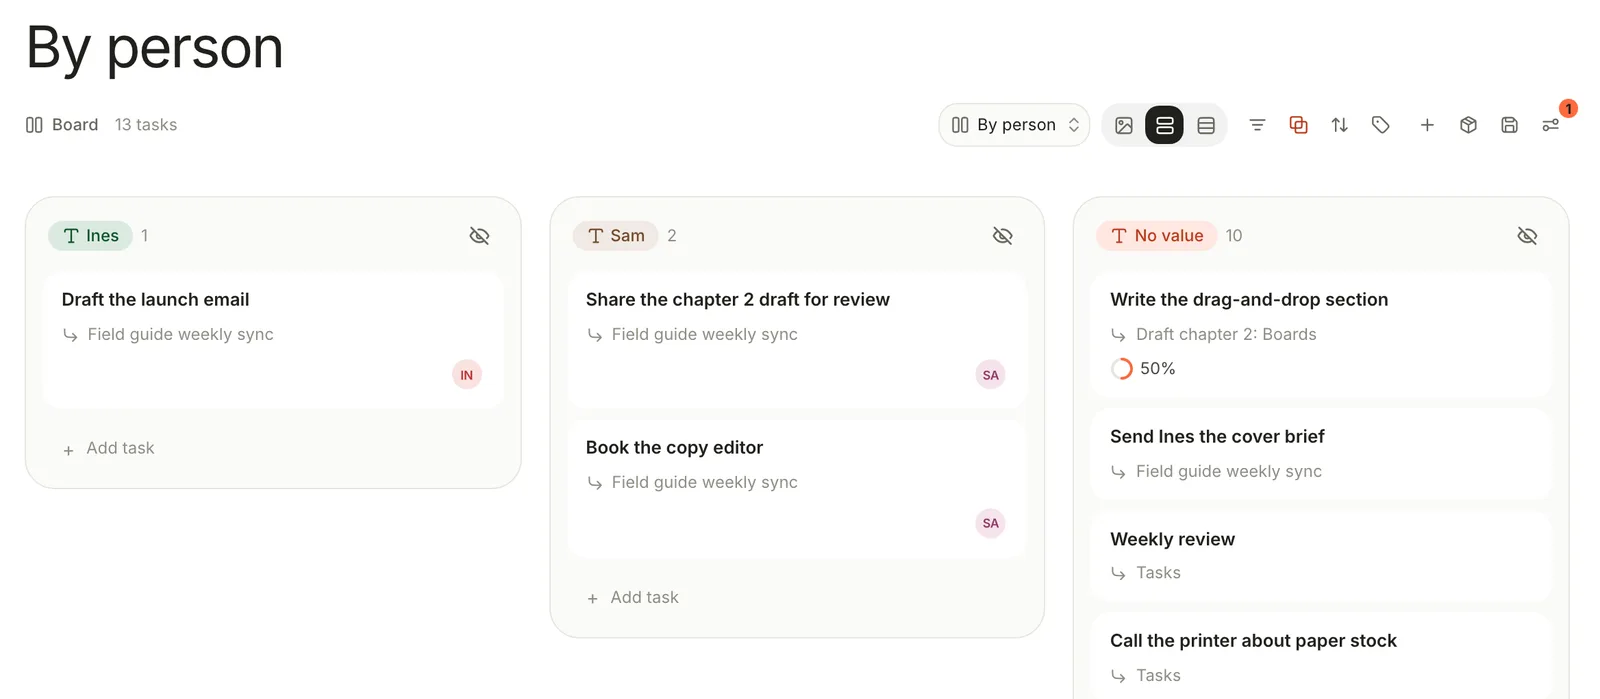
4. Drag a card to another person's column to hand the task over. Terra rewrites `assignee=` in the meeting note.
5. Switch between **Board** and **By person** with the view menu at the right of the header.
To see one meeting's items only, open **Filters** and click **+** (**Add condition**). Change **Title** to **Note** and **is** to **contains**, then type part of the meeting's title. Click **Clear all** in the same panel when you're done.
> [!NOTE] The meeting note stays the source
> Ticking an action item on the board, or in the meeting note, changes the same line. Months later, the note still shows who agreed to what and whether it got done.
## Step 5: Check in before the next meeting
Before next week's sync, look at what came out of this one.
1. Open last week's meeting note.
2. Click **Properties** in the toolbar (⌘ R), then **Show Tasks** in the row of buttons along the bottom of the panel. The Tasks drawer lists the note's action items with their dates.
3. Open **Calendar** to see the meeting and the action items' due dates side by side.

4. Carry anything unfinished into the new meeting's **Action items**, or move it: open the task in **Edit task**, click **Move task to note** and pick the new meeting. Terra moves the line under a `## Tasks` heading there.
## Step 6: Bring in meetings from Granola (optional)
If you record meetings with Granola, Terra can turn each one into a note in `Meetings/`, with Granola's summary and its action items as tasks under `## Action items`. Action items are lines under headings such as *Action items*, *Next steps*, *Follow-ups* or *To-dos* in Granola's summary, plus any checkboxes.
1. Open **Settings** (⌘ ,), click **Integrations**, then **Configure** on the **Granola** row.
2. To import one meeting, click **Import**, paste the meeting's public share link (it starts `https://notes.granola.ai/p/`) into **Share link**, and click **Import** on the **Import meeting** row.
3. To bring in your private meetings, click **Sync**, paste your Granola **Personal API key**, and click **Connect**. Then click **Sync** on the **Sync now** row. Your key is kept in the macOS Keychain.
4. To keep pulling new meetings, switch on **Scheduled sync** and choose how often under **Sync every**.
The first **Sync** brings in every meeting in your Granola account, not only recent ones. **Scheduled sync** runs while Terra is open and switches off when you quit, so turn it on again next time.
> [!WARNING] Work on Granola's action items below the sync line
> In a Granola note's file, everything above the line `` belongs to Granola. If you edit anything there, including ticking an action item or adding a due date, and Granola then sends a newer version of that meeting, Terra keeps your edited copy below the line and writes a fresh copy above it, so every action item appears twice. Copy the action items below the line, or into your own meeting note, before you work on them.
## Features you might have missed
### A calendar of meetings
Right-click **Calendar** in the sidebar, choose **New calendar database** and call it *Meetings*. Use its **Filters** to keep only the `Meetings` folder. Unlike the built-in Calendar, a calendar database you make switches **Display mode** to **Week**, **Day** or **Agenda**, which lists the next two weeks of meetings.
### Live Jira and Confluence cards
If you've connected Jira or Confluence under **Settings › Integrations**, paste an issue or page link on an empty line of the meeting note and choose **Embed**. You can also type `/` and pick from **Connected apps**. The card shows the issue's details, and **Refresh** in its options fetches the latest.
### Give a big action item its own note
When an action item turns into a project, open it in **Edit task**, click **Move task to note** and choose **New note: …**. The task moves into a new note in `Inbox`, named after it.
### Daily stand-ups
For a quick daily page, use the **Daily log** template instead: it's dated for today, with **Wins**, **Blockers** and **Tomorrow** sections. Tasks you write under **Tomorrow** join the board like any others.
## Troubleshooting
> [!NOTE]- The meeting isn't on the Calendar
> The Calendar reads `start-time`, not the **Date** line the template writes. Add the property as in [step 2](#put-the-meeting-on-the-calendar).
> [!NOTE]- An action item isn't on the Tasks board
> Check that it's a checkbox in a bulleted list, `- [ ] …`, not a numbered item or plain text. See [Task syntax](https://terramd.io/docs/task-syntax).
> [!NOTE]- The owner shows as text in the title
> The assignee probably has a space in it. Use one word or hyphens: `assignee=sam-lee`.
> [!NOTE]- Granola's action items appear twice
> The meeting was edited above `` and then synced again. Delete the extra copies, and work on action items below the line from now on.
> [!NOTE]- The Granola import says "Already up to date — no changes written."
> That meeting is already in your Library and nothing has changed in Granola since.
## What's next
- [Run your week with tasks and the calendar](https://terramd.io/docs/run-your-week-with-tasks) — a weekly routine for everything these meetings produce.
- [Tasks](https://terramd.io/docs/tasks) — statuses, the board and the Edit task dialog.
- [Templates](https://terramd.io/docs/templates) — change the **Meeting** template or make your own.
- [Calendar](https://terramd.io/docs/calendar) — choose the dates it uses and make calendars of your own.
---
# Build a dashboard for anything
> Put live views of your databases on one page: big numbers with a trend, charts, boards and tables for a project, a reading list or a habit.
Source: https://terramd.io/docs/dashboards
Every Monday you check the same places: the project board, the reading list, last week's journal. Each is a click or two away, and you never see them together.
A [dashboard](https://terramd.io/docs/glossary#dashboard) puts them on one page. In Terra a dashboard is an ordinary note whose [blocks](https://terramd.io/docs/glossary#block) are live views of your [databases](https://terramd.io/docs/databases): a big number with a trend line, a bar chart, a board you can drag cards across, a table. Nothing is copied. Each block reads its database when you open the page.
This guide builds Maya's Monday dashboard: how much she read this week, where her field guide launch stands, and what's on her shelf.
> [!SUMMARY]
> - Start a dashboard from the **Dashboard** template, or add blocks to any note
> - Show a number that matters, with a trend against the week before
> - Keep a project's chart and board on the same page
> - Put blocks side by side in columns, and tuck the rest into tabs
> - Keep a busy dashboard quick to open
> [!BEFORE]
> - A [Library](https://terramd.io/docs/libraries) with a database or two to show. New to databases? [Run a project with boards, timelines and burndowns](https://terramd.io/docs/project-suite) builds the *Field guide launch* database used here.
> - Terra adds the **Dashboard** template to new Libraries only. In an older Library you can build the same page by hand; [step 2](#start-from-the-dashboard-template) shows how.
> - About 20 minutes.
## How it fits together
A block is a window onto one database, and it looks through that database's *current view*: the [view](https://terramd.io/docs/views-and-layouts) the database opens to. So most of what you change in a block is really a change to that view, and it shows up wherever the view does.
| What you change in a block | Where it's kept |
| --- | --- |
| Filters, sorting, grouping, visible properties | The database's current view. The database and every block that shows it change too. |
| Which view is current (the view menu in the block's header) | The database |
| The layout of the template's four blocks | The block |
| The settings of the template's number and chart blocks (except a chart's **X axis**, which is its grouping) | The block |
That gives the one rule worth remembering: **give each question its own database.** A database is a saved rule, not a copy of your notes, so three small databases cost nothing and never fight over filters. Maya's dashboard reads three:
| Database | Collects | On the dashboard |
| --- | --- | --- |
| *Field guide launch* | Notes in `projects/field-guide` | A bar chart by status, and a board |
| *Reading list* | Notes whose type is `book` | A table of books with author, shelf and pages |
| *Reading log* | Daily log notes, tagged `#journal`, each with the pages read that day | Two numbers: pages read and days read this week |
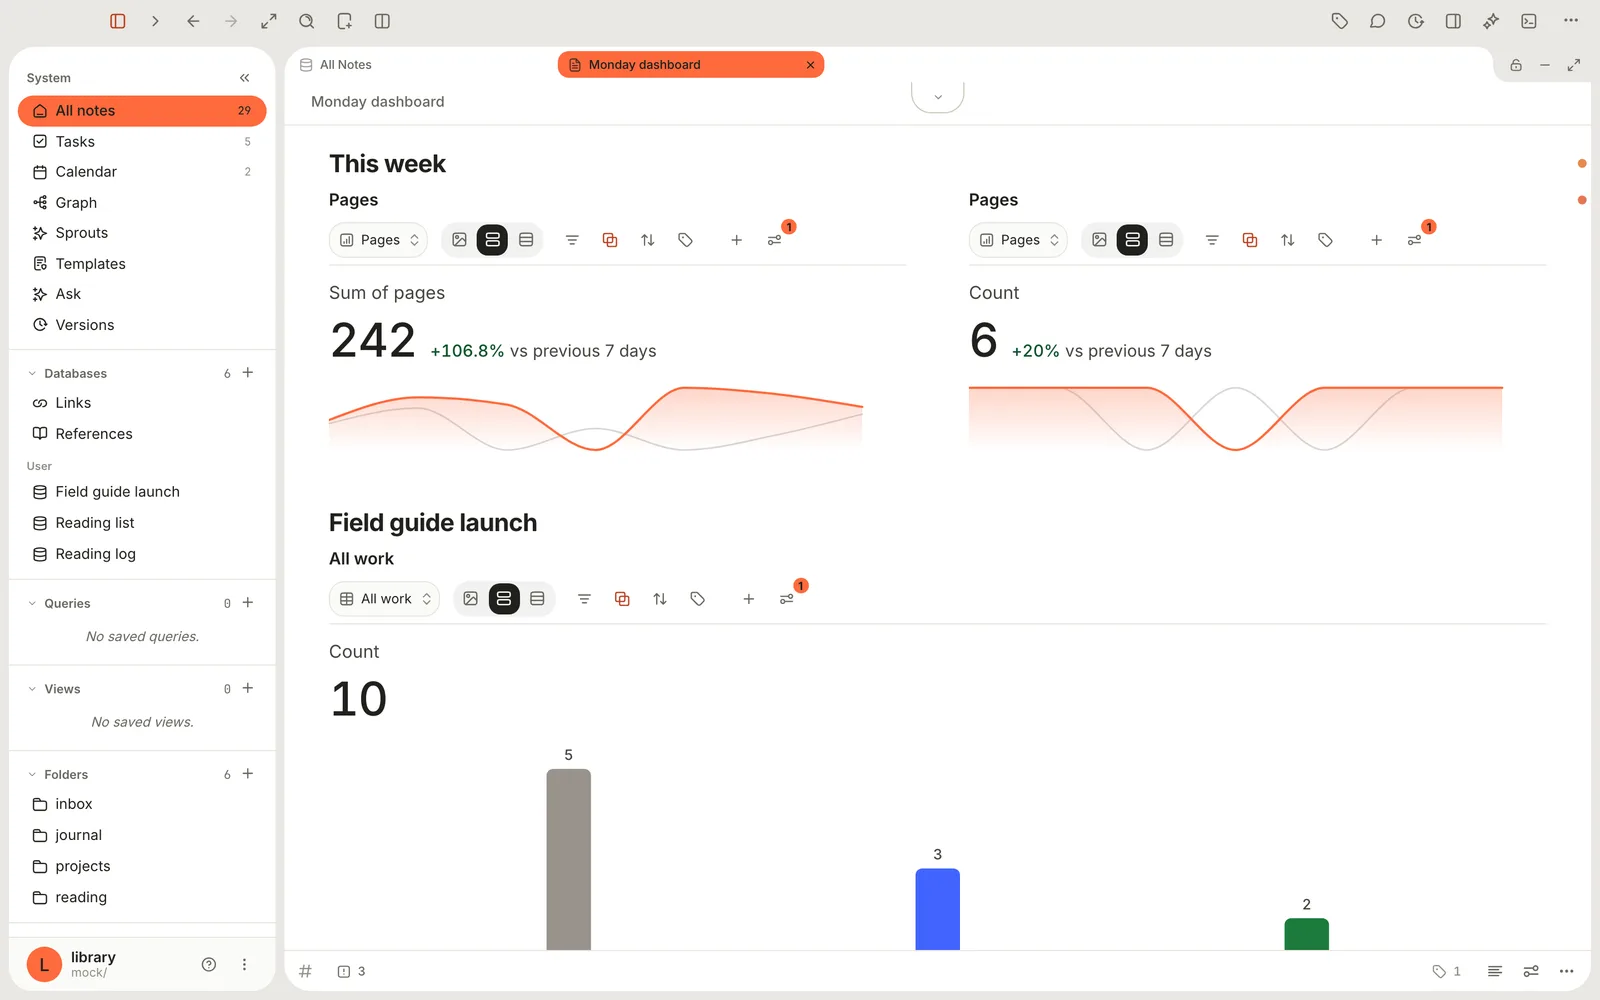
## Step 1: Make a database for each question
Build the databases first, the way you want to see them. Blocks pick them up as they are.
1. In the sidebar, point at **Databases** and click **+** (**New database**).
2. Name it *Reading list*. Click **+** (**Add condition**), set **type** · **is** · `book`, and click **Save**.
3. Make *Reading log* the same way, with the condition **tags** · **contains** · `journal`. Notes made from the **Daily log** template carry that tag.
4. Add the [properties](https://terramd.io/docs/properties) each question needs. In the Reading log's table, click **+** at the right end of the header row (**Add property**), choose **New property**, type `pages` and click **Number**. Give each day a number. The reading list gets a `shelf` property (**Select**, with *To read*, *Reading* and *Finished*).
5. Give the Reading log a chart view. Open the view menu at the top of the database (it shows the current view's name) and choose **Add view**. Click the **Chart** layout and name the view *Pages*. On the **Chart** tab, set **Y axis** to **Sum** and **Of** to `pages`, then click **Save view**.
The new view is now the Reading log's current view. You'll see why that matters in step 3.
## Step 2: Start from the Dashboard template
The **Dashboard** [template](https://terramd.io/docs/templates) gives you four blocks to start with: a number, a bar chart, a table and a board. Each asks which database to show.
1. Click **New…** in the toolbar and choose **New from template…** (or press ⇧ ⌘ N).
2. Click **Dashboard**. A note called *Dashboard* opens with four pickers: **Number view**, **Chart view**, **Table view** and **Board view**.
3. In **Number view**, click *Reading log*. Type a few letters in **Search databases…** to shorten the list.
4. In **Chart view** and **Board view**, click *Field guide launch*. In **Table view**, click *Reading list*.
5. Click the title, type *Monday dashboard* and press Return.
Two blocks can share a database, as the chart and board do here. With no grouping set, a chart or board groups notes by your Library's first **Status** property, so the field guide gets a bar and a column for each of *Not started*, *In progress* and *Done*.
> [!NOTE] No Dashboard template?
> On an empty line in any note, type `/database`, press Return and pick a database. The block shows the database's current view exactly as it is, layout and settings included, so set the view up in the database first.
## Step 3: Show this week's pages, with a trend
A plain total of every page you've ever logged isn't much use on a Monday. A number for the last seven days, with the change from the seven before, is.
The Number block already reads **Sum of pages**: it starts from the chart settings of the Reading log's current view, the *Pages* chart you made in step 1.
1. Click **View preferences** at the right end of the Number block's header. A panel opens.
2. Click **Chart** in the panel's list.
3. Set **Compare** to **Previous period**. Two more rows appear: **Date**, which starts on the day each note was created (right for a daily log), and **Window**.
4. Set **Window** to **Last 7 days**, then close the panel.
The block now shows the pages read in the last seven days, the change against the previous seven (*+106.8% vs previous 7 days*), and a small line of the two weeks. These settings belong to this block alone: the Reading log's *Pages* view is unchanged.
> [!NOTE] Where's the Chart tab?
> A block's **View preferences** only lists **Chart** while its database's current view is a chart. That's why the Reading log got one in step 1. **Window** can also be **Last 30 days**, **Last 90 days** or **This month**; **Compare** can be **Same period last year**.
## Step 4: Add a second number, side by side
A dashboard reads faster when related numbers sit in a row. Maya wants the days she read next to the pages.
1. Point at the Number block. A grip (⠿) appears to the left of its title. Click it and choose **Duplicate**.
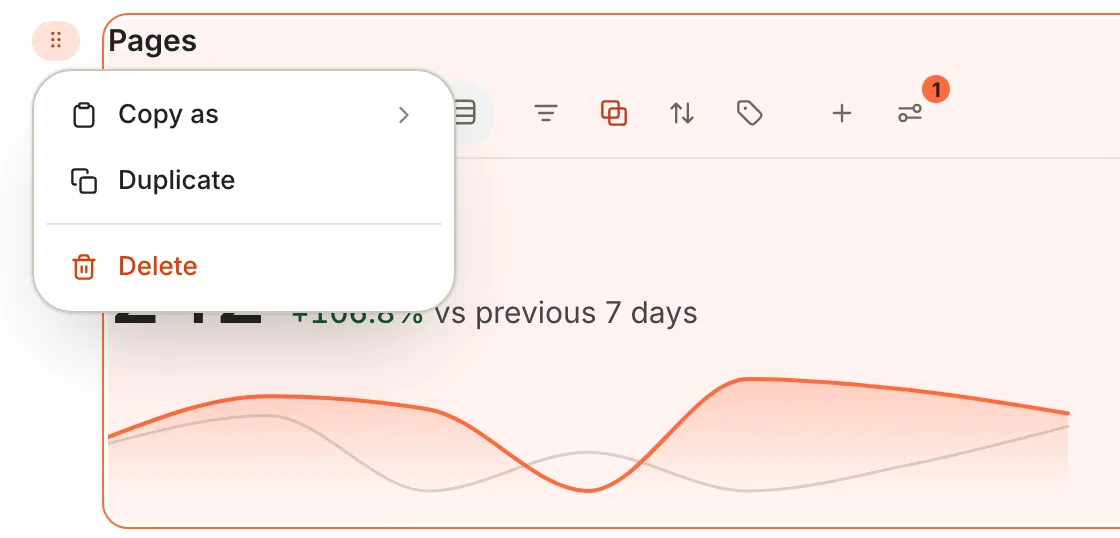
2. In the copy, open **View preferences › Chart** and set **Y axis** to **Count**. It now counts the days you logged, with the same comparison.
3. Drag the copy's grip onto the right edge of the first block, about halfway down. A vertical line shows where it will land. Let go, and the two sit side by side.
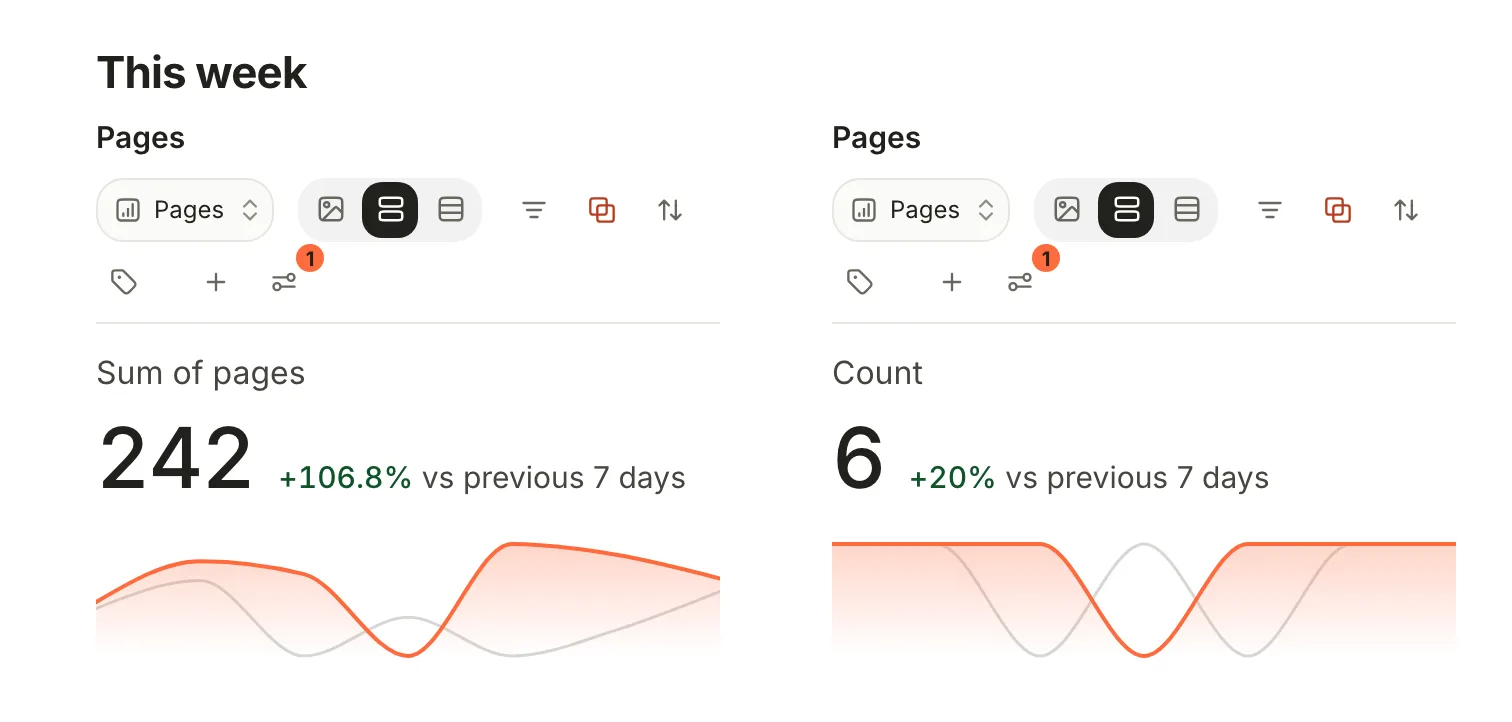
4. To change the split, drag the gap between the columns. Widths snap at quarters, thirds and halves; double-click the gap to even them out.
A row holds up to four columns. Columns sit at the top level of a note, not inside tabs, and they stack when the window is too narrow for them.
## Step 5: Work the project from the dashboard
The chart and the board are the same notes seen two ways, and both are live.
- **Move work along:** drag a card on the board to another column. Terra writes the new status into the note.
- **See what's behind a bar:** click it to list its notes under the chart. Click a note to open it.
- **Open a note:** click a card or a row. It opens the way the view is set to open notes (**View preferences › Opening**), beside the dashboard by default.
- **Regroup:** **Group by** in a block's header (**Show boards as** on a board) changes the grouping of the database's current view, so the chart and the board change together.
Changes you make inside a block show in that block straight away. The other blocks catch up the next time you open the dashboard.
## Step 6: Add more with /database
Any database can join the page, including the built-in ones. Maya adds her checkbox tasks.
1. Click at the end of the last line and press Return.
2. Type `/database` and press Return. The **Insert database** picker opens, listing each database with the layout of its current view.
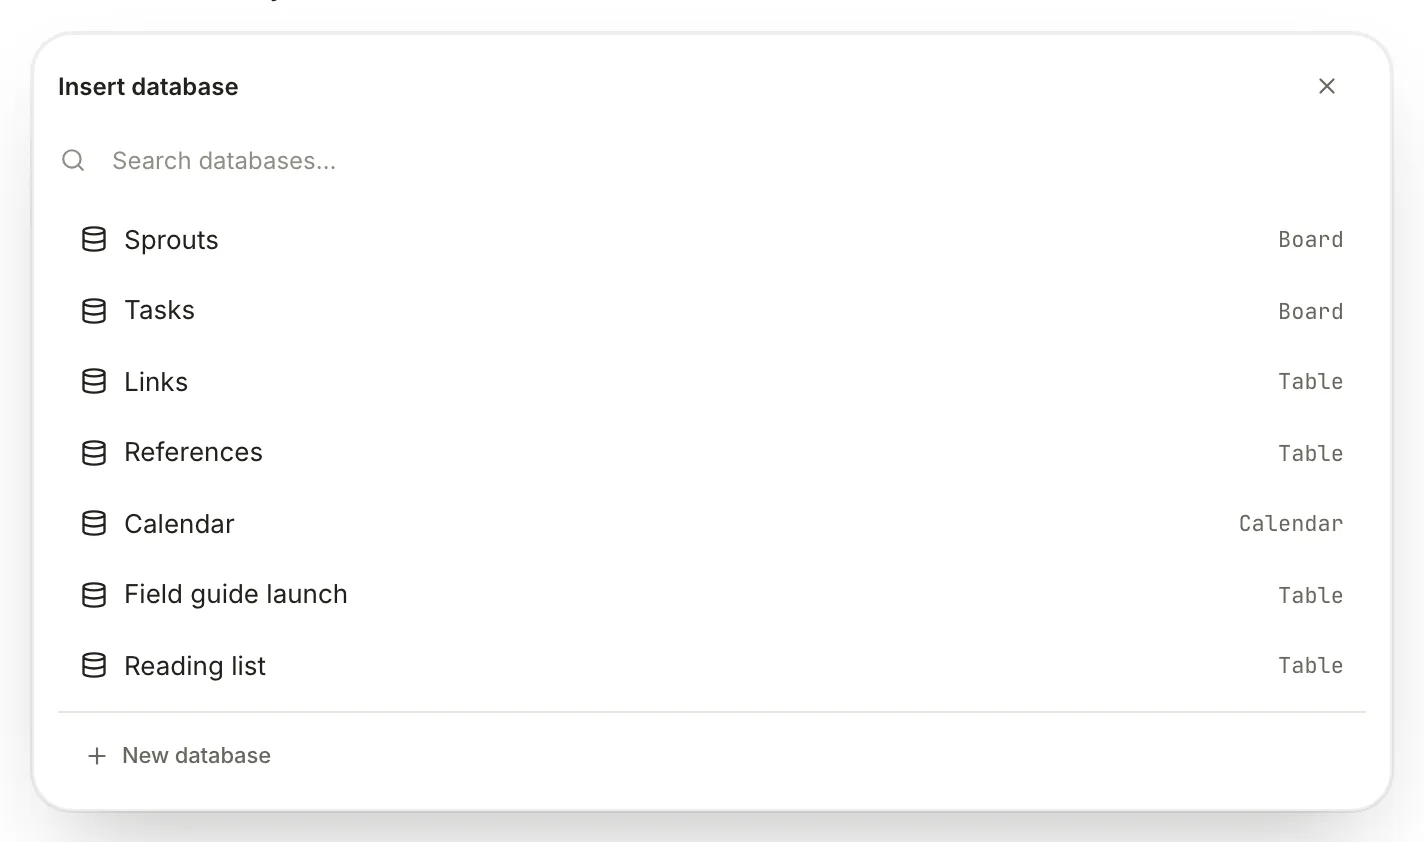
3. Click **Tasks**. Your task board appears in the note.
A block inserted this way keeps no layout of its own. To show it differently, change its database's current view (from the block's **View preferences**, or in the database itself). The block switches the next time you open the dashboard.
## Step 7: Keep it fast
Every block runs its database when the dashboard opens. A few habits keep a busy page quick.
**Put what you don't need at a glance in tabs.** A block in a tab that isn't showing doesn't load until you open that tab. To turn sections into tabs, select from a heading down through the sections after it, then choose **Turn into › Tabs from sections** in the editor toolbar. Each heading becomes a tab.
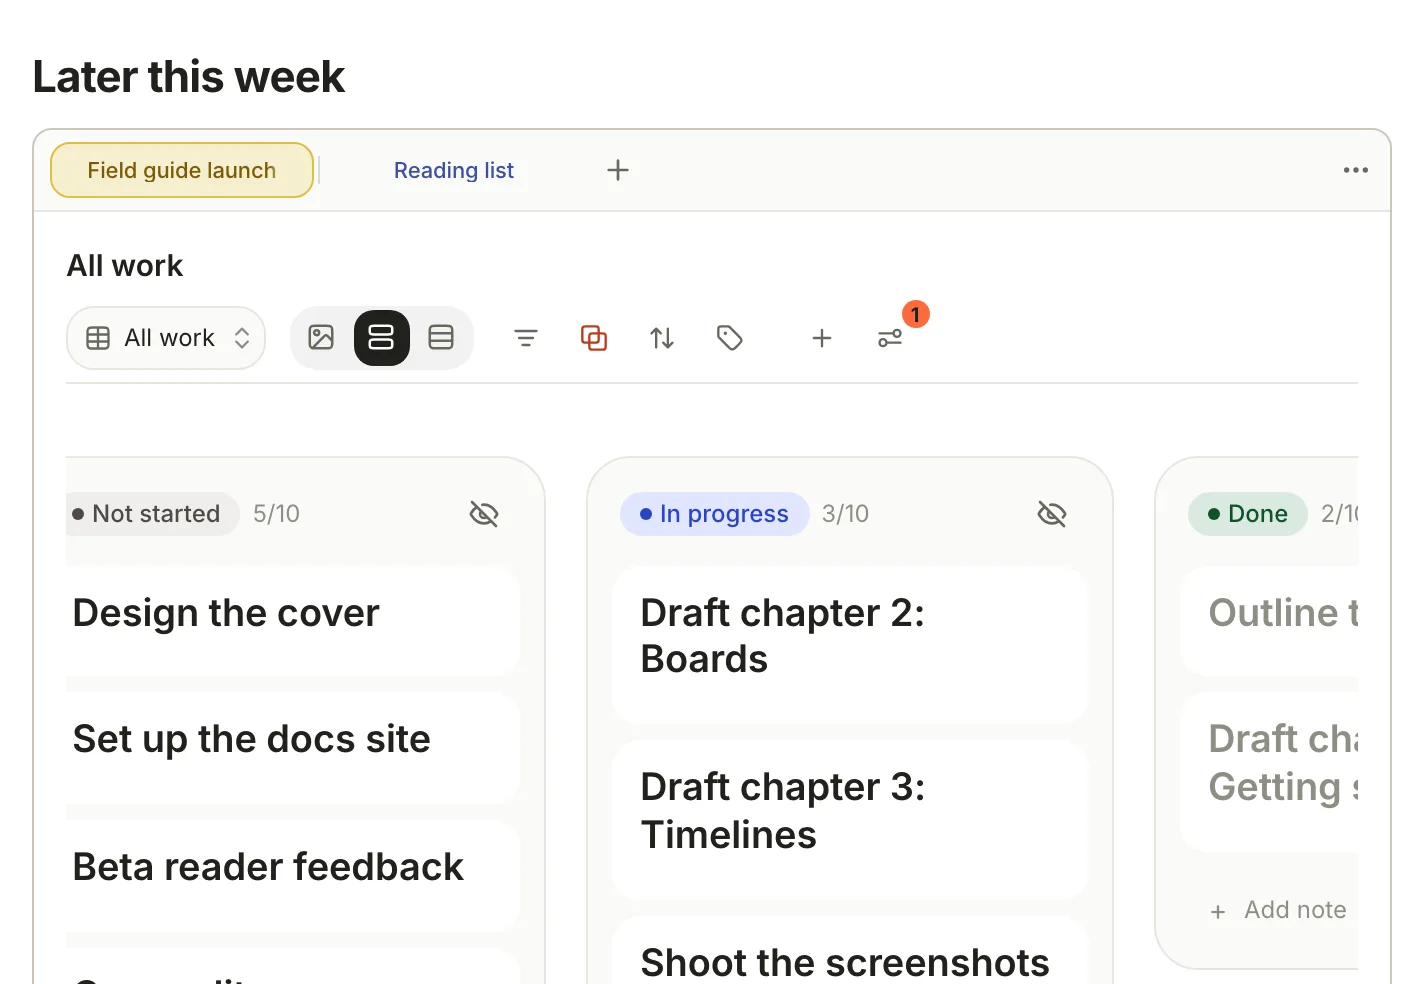
**Keep database rules lean.** Conditions on tags, folders, types and properties come straight from Terra's index. A **Note Body** condition makes Terra read every note's file each time the database opens. The **Database** tab of **View preferences** shows what a rule costs, as *12 notes · 4 ms*; for a rule written in SQL, turn on **Cache the result** and use **Refresh now** when you want fresh numbers.
**Skip the entrance animation.** Charts draw themselves in over about a second the first time they appear. To show them at once, set **Settings › Appearance › Animations** to **Reduced** or **Off**.
## Features you might have missed
### Give the dashboard room
Click **Reader preferences** at the bottom of the note and use the arrows beside **Width** to pick **Wide** or **Full width**. Turn on **Remember for this note** so only the dashboard gets wider.
### A snapshot for your weekly review
In a block's **View preferences**, **Save as Markdown note** freezes the current view into a dated note in your Inbox, as a table of up to 1,000 rows. Save the view first if the button reads **Save the view to snapshot it**.
### Reuse the layout
Right-click the dashboard in the note list and choose **Save as template…**. Next quarter's dashboard is then one pick in **New from template…**, with every block waiting for its database. See [Templates](https://terramd.io/docs/templates).
### Make a database from the picker
Every picker ends in **New database**. Type a name and click **Create database**: the database appears in the sidebar and in the block. Its rule starts empty, so it shows every note until you set one on the block's **Database** tab.
### Keep it one click away
Click **Add to Favorites** (the flag) in the editor toolbar. Or put the dashboard on the toolbar: right-click any toolbar button, choose **Customize toolbar…**, find it among the recent notes in the **Command library**, drag it onto the toolbar and click **Apply**.
## Troubleshooting
> [!NOTE]- I changed one block and another changed too
> Filters, sorting and grouping belong to the database's current view, which every block of that database shares. Give the question its own database instead; see [How it fits together](#how-it-fits-together).
> [!NOTE]- I picked a new layout, but the block didn't change
> The template's four blocks keep their own layout, whatever the view says. A block added with `/database` follows its database's current view, and switches the next time you open the dashboard.
> [!NOTE]- There's no Chart tab in View preferences
> The **Chart** tab appears only while the block's database has a chart as its current view. Add a **Chart** view to the database, or pick an existing one from the view menu in the block's header.
> [!NOTE]- The number shows 0, or doesn't move
> With **Compare** on, a number counts only notes whose **Date** falls inside the **Window**, which ends today. Check that **Date** is the right property and the window is wide enough.
> [!NOTE]- "Database not found"
> The block's database was deleted or moved. Click **Pick another** to point the block at a different database, or **Remove** to delete the block.
> [!NOTE]- Boards or cards show up as tables
> A view kind can be switched off for the whole Library. Check **Settings › Features**: **Kanban** controls boards and **Gallery** controls cards.
## What's next
- [Run a project with boards, timelines and burndowns](https://terramd.io/docs/project-suite): build the views your dashboard shows.
- [Views and layouts](https://terramd.io/docs/views-and-layouts): every layout a view can use.
- [Filter, sort and group](https://terramd.io/docs/filter-sort-and-group): shape what each database shows.
- [Templates](https://terramd.io/docs/templates): turn a finished dashboard into a starting point.
---
# Keyboard shortcuts
> Every default shortcut in Terra, grouped the way Settings › Hotkeys groups them, and how to change, reset or remove one.
Source: https://terramd.io/docs/keyboard-shortcuts
These are Terra's default shortcuts. To see them in the app, and to change them, open **Settings › Hotkeys**: press ⌘ , and click **Hotkeys**, or choose **Help › Keyboard Shortcuts**. The groups below follow the same order.
Keys are shown in the order macOS uses: ⌃ Control, ⌥ Option, ⇧ Shift, ⌘ Command. Where a command has more than one shortcut, any of them works.
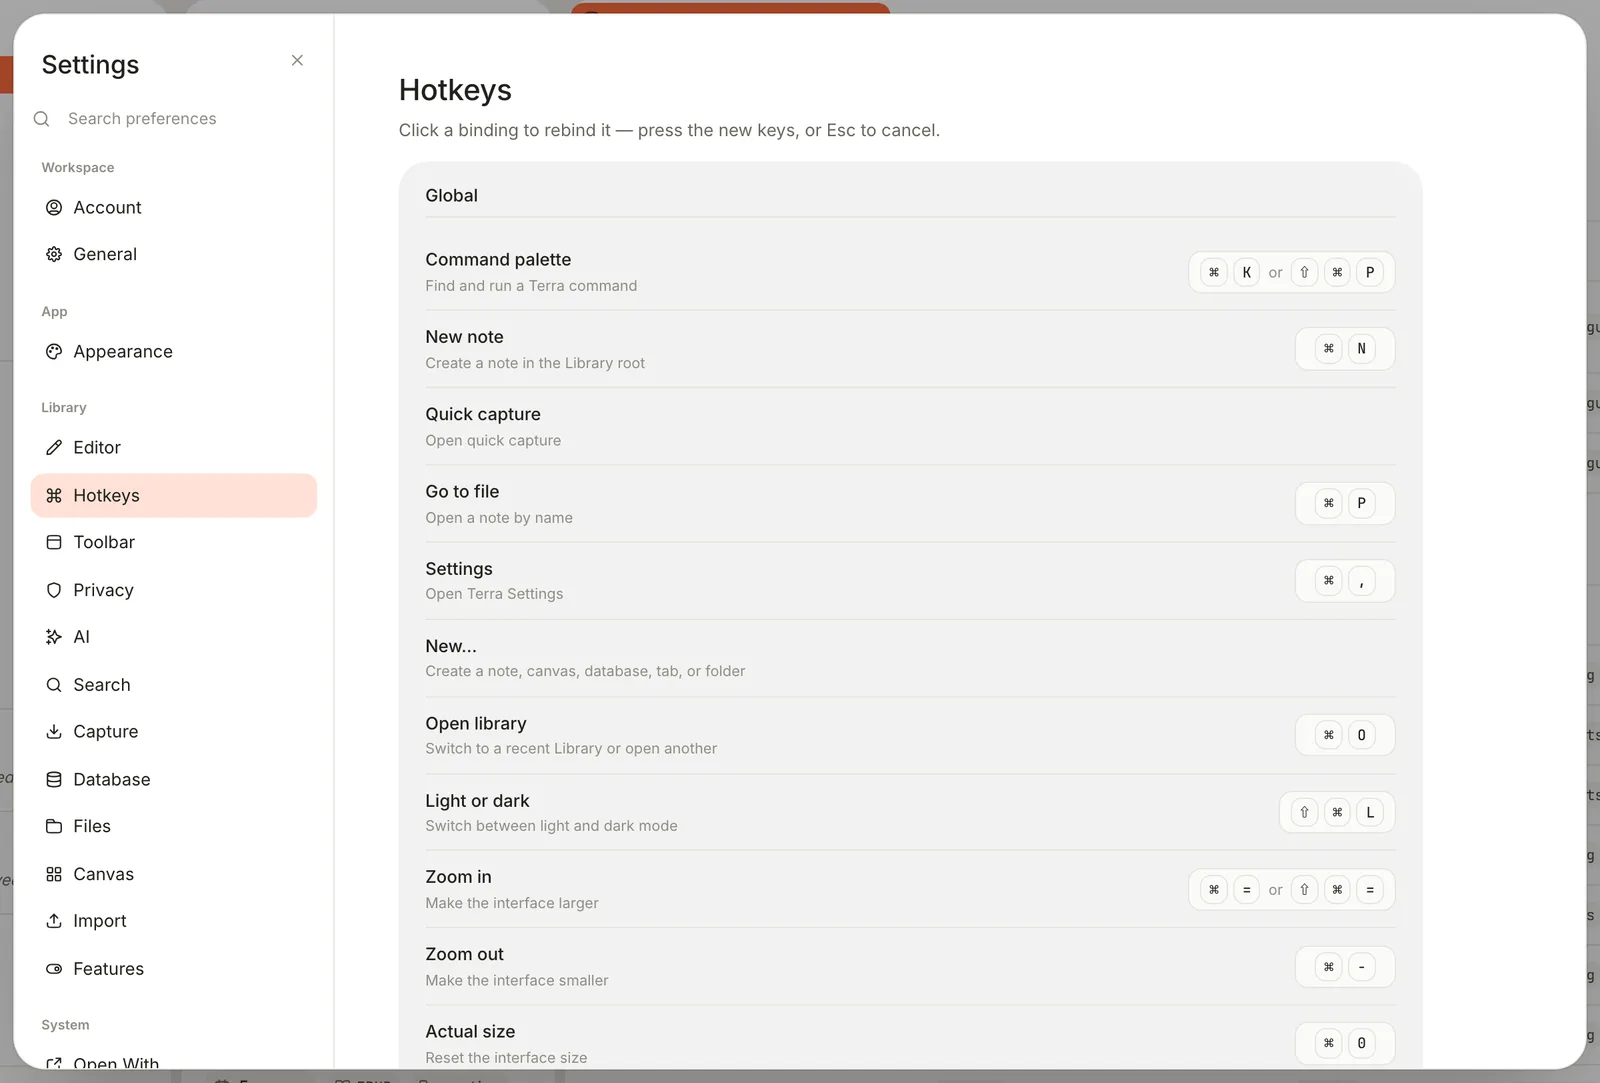
## Global
| Action | Shortcut |
| --- | --- |
| Command palette | ⌘ K or ⇧ ⌘ P |
| New note | ⌘ N |
| Go to file (open a note by name) | ⌘ P |
| Settings | ⌘ , |
| Open library (switch to another Library) | ⌘ O |
| Light or dark | ⇧ ⌘ L |
| Zoom in (make the interface larger) | ⌘ = or ⇧ ⌘ = |
| Zoom out | ⌘ - |
| Actual size | ⌘ 0 |
| Close window | ⇧ ⌘ W |
No keys by default: **Quick capture** and **New…**. Separately, ⌃ ⌥ ⌘ N opens quick capture from any app, even when Terra is in the background. That one isn't listed in Settings › Hotkeys.
## Navigation
| Action | Shortcut |
| --- | --- |
| Sidebar (show or hide) | ⌘ B |
| Properties (show or hide the panel on the right) | ⌘ R or ⌥ ⌘ B |
| Search | ⇧ ⌘ F |
| Toggle view mode (Edit or Read) | ⌥ ⌘ E |
| Cycle database layout | ⇧ ⌘ V |
| Zen mode | ⌥ ⌘ Z |
| Terminal | ⌘ J |
| Back | ⌘ [ |
| Forward | ⌘ ] |
| Reveal in sidebar (show the open note's folder) | ⇧ ⌘ E |
No keys by default: **Database drawer**, **Comments**, **Versions**, **AI conversations**, **Source mode** and **Reader mode**.
With text selected in a note, ⌘ B makes it bold instead of hiding the sidebar.
## Panes and tabs
| Action | Shortcut |
| --- | --- |
| Split (open a second pane to the right) | ⌘ \ |
| Previous pane | ⌃ ⌥ ← |
| Next pane | ⌃ ⌥ → |
| Close tab | ⌘ W |
| Reopen closed tab | ⇧ ⌘ T |
| Next tab | ⇧ ⌘ ] or ⌥ ⌘ → or ⌃ Tab |
| Previous tab | ⇧ ⌘ [ or ⌥ ⌘ ← or ⌃ ⇧ Tab |
| Focus pane 1 to 9, in reading order | ⌘ 1 to ⌘ 9 |
| Tab 1 to 9 of the focused pane | ⌃ 1 to ⌃ 9 |
| Last tab of the focused pane | ⌃ 0 |
- ⌘ W closes the tab you're in, and a pane closes with its last tab. With only one tab left in the window, it closes the window.
- A window holds up to four panes, so only ⌘ 1 to ⌘ 4 ever have a pane to go to. Previous pane and Next pane stop at the first and last pane rather than wrapping around.
- ⇧ ⌘ T remembers the last 20 tabs you closed, until you quit.
## Editor
| Action | Shortcut |
| --- | --- |
| Save (Terra also saves as you type) | ⌘ S |
| Duplicate (the selected block, or the open note) | ⌘ D |
| Find in page | ⌘ F |
| Redo | ⌘ Y |
| Copy link to note (a `terra://` link to the open note) | ⌘ L |
| Comment (opens the note's comments) | ⇧ ⌘ M |
No keys by default: **Slash commands** and **Reload theme**.
## Other
| Action | Shortcut |
| --- | --- |
| Side by side (two panes) | ⌃ ⌥ 1 |
| 60 / 40 (two panes, the first wider) | ⌃ ⌥ 2 |
| Stacked (two panes, one above the other) | ⌃ ⌥ 3 |
| Three columns | ⌃ ⌥ 4 |
| Main + two (one main pane, two stacked beside it) | ⌃ ⌥ 5 |
| 2 × 2 (four panes) | ⌃ ⌥ 6 |
A layout rearranges the panes you already have, so each one works only with that many panes open. No keys by default: **Tag manager**, **Property manager** and **Help**.
## Reader
These work while a book is open in the [e-reader](https://terramd.io/docs/read-in-the-e-reader) and the page has focus. Click the page first.
| Action | Shortcut |
| --- | --- |
| Previous page | ← or Page Up or ⇧ Space |
| Next page | → or Page Down or Space |
| Previous chapter | ⇧ ⌘ ← or ⌘ Page Up |
| Next chapter | ⇧ ⌘ → or ⌘ Page Down |
| Beginning of book | ⌘ Home |
| End of book | ⌘ End |
| Back (to where you were reading) | ⌘ ⌫ |
| Forward | ⇧ ⌘ ⌫ |
| Bookmark page | ⌘ B |
| Named bookmark | ⌥ ⇧ B |
| Highlight with note | ⌥ ⇧ A |
| Quick highlight | ⌥ ⇧ Q |
| Annotations in margin | ⌥ ⇧ ⌘ Z |
| Go to page | ⇧ ⌘ P |
| Zoom in | ⌘ 9 |
| Zoom out | ⌘ 8 |
| Fit page | ⌘ 0 |
Zoom in, Zoom out and Fit page apply to fixed-layout books, whose pages are laid out like a PDF. Go to page needs a book that lists its print pages.
## Keys in notes, code, sheets and the sidebar
Settings › Hotkeys lists these too, as a reference. They belong to the part of the window you're working in, so you can't change them.
### Undo
| Action | Shortcut |
| --- | --- |
| Undo | ⌘ Z |
| Redo | ⇧ ⌘ Z |
Outside a text field, ⌘ Z also brings back the last note you moved to the Trash.
### Text
While you're writing in a note:
| Action | Shortcut |
| --- | --- |
| Bold (with text selected) | ⌘ B |
| Italic | ⌘ I |
| Underline, while you edit only: Markdown has no underline, so it isn't saved to the file | ⌘ U |
| Strikethrough | ⇧ ⌘ S |
| Inline code | ⌘ E |
| Add a link (with text selected) | ⌘ K |
| Turn into… (choose a new block type) | ⌘ / |
| Turn into text | ⌥ ⌘ 0 |
| Turn into heading 1 | ⌥ ⌘ 1 |
| Turn into heading 2 | ⌥ ⌘ 2 |
| Turn into heading 3 | ⌥ ⌘ 3 |
| Turn into to-do | ⌥ ⌘ 4 |
| Turn into bulleted list | ⌥ ⌘ 5 |
| Turn into numbered list | ⌥ ⌘ 6 |
| Turn into toggle (a block you can fold) | ⌥ ⌘ 7 |
| Turn into code | ⌥ ⌘ 8 |
| Turn into page (move the block to a new note, and link to it) | ⌥ ⌘ 9 |
| Indent a list item or to-do | Tab |
| Outdent a list item or to-do | ⇧ Tab |
| Move block up | ⌥ ↑ |
| Move block down | ⌥ ↓ |
| Duplicate block up | ⌥ ⇧ ↑ |
| Duplicate block down | ⌥ ⇧ ↓ |
| Duplicate block | ⌘ D |
| Delete block | ⇧ ⌘ K |
| Check a to-do, or open or close a toggle | ⌘ Return |
| Expand or collapse all toggles | ⌥ ⌘ T |
| Select the current block | Esc |
| Show or hide the outline beside the note | ⇧ ⌘ O |
### Code
With the cursor in a code block:
| Action | Shortcut |
| --- | --- |
| Comment line | ⌘ / |
| Indent line | ⌘ ] |
| Outdent line | ⌘ [ |
| Select line | ⌘ L |
| Select next match | ⌘ D |
| Move line up | ⌥ ↑ |
| Move line down | ⌥ ↓ |
| Delete line | ⇧ ⌘ K |
| Toggle line numbers | ⌘ ; |
| Format (needs a formatter installed on your Mac) | ⇧ ⌘ I |
| Convert code block to text | ⌘ E |
### Sheets and databases
In a sheet, with several cells selected:
| Action | Shortcut |
| --- | --- |
| Fill down | ⌘ D |
| Fill right | ⌘ R |
### Peek
While a note is open in a peek:
| Action | Shortcut |
| --- | --- |
| Previous row of the list it came from | ⌃ ⇧ K |
| Next row | ⌃ ⇧ J |
### Sidebar
With a folder selected in the sidebar:
| Action | Shortcut |
| --- | --- |
| Rename | F2 |
| New folder | ⌥ ⌘ N |
| Copy absolute path | ⌥ ⌘ C |
| Copy relative path (from the Library folder) | ⌥ ⇧ ⌘ C |
| Reveal in Finder | ⌥ ⌘ R |
| Move to Trash | ⌘ ⌫ |
## More keys
A few keys aren't in Settings at all:
| Action | Shortcut |
| --- | --- |
| Flip a split between side by side and stacked | ⇧ ⌘ \ |
| Open a note in a new tab | ⌘-click it in any list |
| Restore a maximized pane, close a peek, or close a menu or dialog | Esc |
| Nest or un-nest the selected blocks | ⌥ ⇧ → or ⌥ ⇧ ← |
| Back and forward | swipe left or right with two fingers, or use your mouse's back and forward buttons |
| Move a toolbar button earlier or later, while customizing the toolbar | ⌥ ← or ⌥ → |
| Hide a toolbar button, while customizing the toolbar | ⌫ |
## Markdown as you type
In a note, typing Markdown marks formats the text straight away. A few of the most used:
| Type | To get |
| --- | --- |
| `#` to `######`, then a space, at the start of a line | Heading 1 to 6 |
| `-` or `*`, then a space | Bullet list |
| `1.`, then a space | Numbered list |
| `[ ]`, then a space | To-do |
| `>`, then a space | Quote |
| ```` ``` ```` (with an optional language, such as ```` ```python ````), then a space | Code block |
| `---` | Divider |
| `**bold**`, `*italic*`, `~~struck~~`, `` `code` ``, `==highlighted==` | Bold, italic, strikethrough, inline code, highlight |
| `/` | The menu of blocks to insert |
| `@` | A menu to link a note or cite a source; on a to-do line, to add a date too |
[Basic formatting syntax](https://terramd.io/docs/formatting-syntax) shows each one with what it saves in the file, and [Advanced formatting](https://terramd.io/docs/advanced-formatting) covers tables, math and the rest.
## Change a shortcut
You can give any command in the Global, Navigation, Panes and tabs, Editor, Other and Reader groups new keys, including commands that have none.
1. Press ⌘ , to open **Settings**, then click **Hotkeys**. (**Help › Keyboard Shortcuts** goes straight there.)
2. Click the keys beside a command. They change to **Press keys…**.
3. Press the new keys. To back out, press Esc.

To undo a change, hover over the command and click **Reset to default** (the curved arrow). To remove a shortcut without replacing it, hover and click **Unbind** (**×**).
Good to know:
- New keys replace all of a command's shortcuts. Command palette has two by default, ⌘ K and ⇧ ⌘ P; after a change it has only the one you pressed. **Reset to default** brings both back.
- Terra doesn't warn you when two commands share the same keys, and only one of them will run. Check the list for the keys before you use them.
- Shortcuts belong to the Library that's open, so each Library can have its own.
- The menu bar keeps showing the default keys, and its items still respond to them.
- A shortcut without ⌘ or ⌃ doesn't fire while you're typing in a note or a text field.
## Related
- [Make Terra yours](https://terramd.io/docs/make-terra-yours): the toolbar, themes and the rest of Settings.
- [Find your way around](https://terramd.io/docs/find-your-way-around): what each pane, panel and drawer is.
- [Basic formatting syntax](https://terramd.io/docs/formatting-syntax): what to type for each kind of formatting.
- [Search syntax](https://terramd.io/docs/search-syntax): what you can type in the search window.
---
# Search syntax
> Every operator and filter the search window understands, with an example of each, plus the rules for dates, patterns and the errors you might see.
Source: https://terramd.io/docs/search-syntax
Everything on this page works in the search window: press ⇧ ⌘ F, or click **Search** in the toolbar. For a guided tour that builds these up one step at a time, read [Find anything in your Library](https://terramd.io/docs/power-search).
The examples use a Library where meeting notes live in `meetings`, project notes in `projects`, and notes carry tags such as `#launch` and an `owner` property.
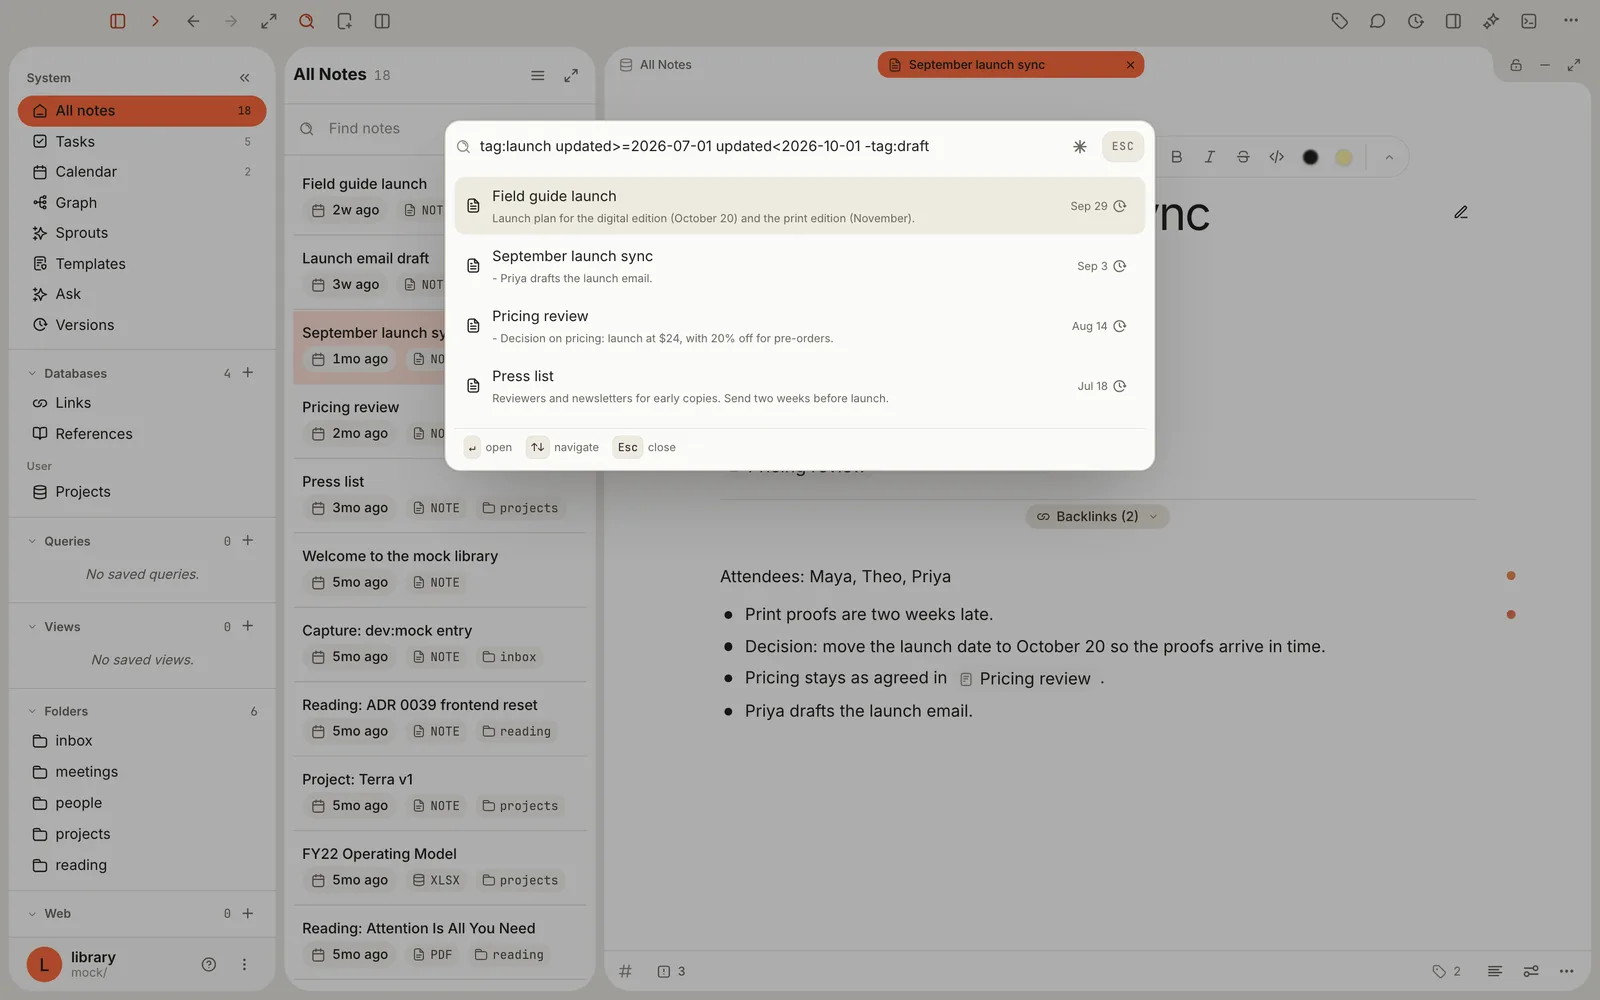
## How a search is read
- **Spaces mean *and*.** `pricing decision` finds notes that contain both words, anywhere in the note.
- **`OR` means *either*.** It must be in capitals; a lowercase `or` is searched as a word. *And* binds tighter than `OR`, so `a b OR c d` means (a and b) or (c and d). Use parentheses to say otherwise.
- **Words match from their start**, in the title, the text and the tag names. `budg` finds "budget"; `port` doesn't find "report". Capitals and accents are ignored.
- **A word followed by a colon is a filter.** Only the names under [Filters](#filters), plus `line:` and `section:`, work. Anything else, such as `owner:`, shows an error instead of results.
- **Filter names ignore capitals** (`TAG:launch` works), but most filter *values* don't: see the notes on each filter.
- **Quote values that contain spaces**: `tag:"reading list"`, `path:"Client work/**"`.
- **Half-typed searches are forgiven.** A missing `)` is fine, and a dangling `OR` is ignored. A stray `)` ends the search: everything after it is ignored.
## Operators
| Type this | What it finds | Example |
| --- | --- | --- |
| `word` | Notes with a word that starts with this, in the title, text or tags | `budg` |
| `word word` | Notes that contain every word, in any order | `pricing decision` |
| `"exact phrase"` | The words together, in this order. Inside quotes, `""` stands for a quote mark. | `"launch date"` |
| `a OR b` | Notes that match either side | `pricing OR budget` |
| `-something` | Leaves out notes that match. Works before a word, phrase, filter, group, pattern or property. | `-draft`, `-tag:draft`, `-"to do"`, `-(press OR podcast)`, `-[owner]` |
| `( … )` | Groups parts together | `(tag:press OR tag:launch) review` |
| `[key]` | Notes that have this property set to anything | `[owner]` |
| `[key:value]` | Notes whose property equals the value, or whose list property contains it | `[owner:Theo]`, `[venues:icml]`, `[done:true]` |
| `line:(a b)` | Notes where every term appears on one line | `line:(proofs late)` |
| `section:(a b)` | Notes where every term appears under one heading | `section:(decision pricing)` |
| `/pattern/` | Notes whose title or text matches a regular expression | `/launch (date\|day)/` |
Put the minus right against what it excludes: `-draft`, not `- draft`. A hyphen inside a word, as in `well-known`, is part of the word.
**Properties in brackets.** The property name is case-sensitive and must be spelled as it is in your notes; only top-level properties work. The value ignores capitals but must match the whole value, so `[owner:Theo]` doesn't find "Theo Grant". Quotes around the value are optional. Checkbox properties take `true` or `false`.
**Lines and sections.** Both need the parentheses; `line:proofs` on its own is an error. Quote a phrase to keep it together: `line:("launch date" october)`. A section starts at any heading and runs until the next heading of any level, and the text before the first heading counts as a section of its own.
## Filters
| Filter | What it finds | Example |
| --- | --- | --- |
| `tag:name` | Notes with exactly this tag, set in the note's properties or written as `#tag` in its text. Case-sensitive; leave out the `#`. Nested tags aren't included, so `tag:projects` doesn't find `projects/terra`. Repeat it to require several. `tags:` works too. | `tag:launch tag:press` |
| `type:name` | Notes of this type. Case-sensitive. Repeating it finds notes of any of the types. | `type:meeting type:project` |
| `status:name` | Notes whose `status` is this value. Case-sensitive. If you repeat it, only the last one counts. | `status:active` |
| `path:Folder/**` | Every note in a folder and its subfolders. Ignores capitals. `**` is the only wildcard, and it has to come last; `path:**` matches every note. | `path:meetings/**` |
| `path:folder/file.md` | One note, by its exact path in the Library. Case-sensitive. `path:meetings` on its own only matches a note whose path is exactly `meetings`. | `path:inbox/launch-email-draft.md` |
| `title:"Exact title"` | The note with exactly this title. Case-sensitive. | `title:"Pricing review"` |
| `before:YYYY-MM-DD` | Notes last edited before that day. The day itself isn't included. | `before:2026-07-01` |
| `after:YYYY-MM-DD` | Notes last edited after that day. The day itself isn't included. | `after:2026-06-30` |
| `source:kind` | Notes by where they came from: `link` (web pages you've saved), `import`, `reference` or `manual`. | `source:link` |
| `is:reference` | Notes with bibliographic details, such as papers you cite. `reference` is the only value `is:` accepts. | `is:reference` |
| `format:kind` | Notes that hold a file of this format. JPEG images are `jpeg`, not `jpg`. | `format:pdf`, `format:epub`, `format:xlsx` |
| `id:value` | The note with this id, the 26-character code in its `id` property. Handy when you've copied an id from a note's file. | `id:` then the id |
Date ranges are in the next section. Plain words only search titles, text and tag names, never other properties; to match a property, use [brackets](#operators).
## Dates
`created` and `updated` take a comparison and a date. `before:` and `after:` are shorthands for `updated`.
| Type this | Finds notes | Example |
| --- | --- | --- |
| `updated>D` | edited after day D (from the next day on) | `updated>2026-09-30` |
| `updated>=D` | edited on day D or later | `updated>=2026-07-01` |
| `updated=D`, and the others | created on or after D, and so on | `created>=2026-10-01` |
| `before:D` | the same as `updatedD` | `after:2026-06-30` |
- `>=` and `<=` are two characters each: a `>` or `<` followed by `=`.
- Write dates as `YYYY-MM-DD`, with four-digit years and two-digit months and days, or as a full timestamp such as `2026-10-01T09:00:00Z`. Relative dates like `today` or `last week` aren't understood.
- For one day, combine two comparisons: `updated>=2026-09-03 updated<=2026-09-03`. An equals sign (`updated=2026-09-03`) matches almost nothing.
- Days run from midnight to midnight UTC, so a note edited late in the evening, in time zones behind UTC, can count toward the next day.
- `created:` and `updated:` with a colon aren't filters; they show **unknown field**.
## Regular expressions
There are two ways to use a pattern:
- Put it between slashes anywhere in a search: `tag:launch /\$\d+/` finds launch notes that mention a dollar amount.
- Turn on the **Regex** switch (the asterisk at the right end of the search box) and type the pattern without slashes. The whole box becomes one pattern. With the switch on, results are ranked by keyword only, matches by meaning are left out, and Help and canvas results don't appear.
Rules:
- A pattern is matched against the note's title, then its text, ignoring capitals. Tags and properties aren't searched. Put `(?-i)` at the start to make it case-sensitive.
- `^` and `$` match the start and end of everything searched, which begins with the title: `/^pricing/` finds notes whose title starts with "pricing". Put `(?m)` at the start to match the start or end of any line instead.
- Patterns use the syntax most tools share: `.`, `\d`, `\w`, `\b`, `[abc]`, `(a|b)`, `*`, `+`, `?`, `{2,4}`. Look-arounds and back-references aren't available.
- Between slashes, the closing `/` is required; write `\/` for a slash inside the pattern. Without a closing slash, the text is searched as an ordinary word.
- With slashes, a pattern can match inside words, which plain words can't: `/port/` finds "report".
## Errors you might see
When Terra can't read a search, a red line appears above the results instead. Some of these show briefly while you're still typing, such as an unclosed quote or a half-written date, and go away once the search is complete.
| Message | What causes it | What to do |
| --- | --- | --- |
| `invalid query: unknown field: owner` | A word followed by a colon that isn't a filter. Pasted web addresses cause it too (`https:`), and so do `created:` and `updated:` with a colon. | For your own properties use brackets: `[owner:Theo]`. Put web addresses in quotes. For dates, use `updated>=…`. |
| `invalid query: unterminated quoted phrase` | A `"` with no closing quote | Close the quote. |
| `invalid query: bad date in range filter: 2026-7-1` | A date that isn't `YYYY-MM-DD`, or one you haven't finished typing | Use four digits for the year and two each for the month and day. |
| `invalid query: range op only supported on created/updated, got: size` | `>`, `<` or `=` after something other than `created` or `updated`, as in `size>3` or `x=1` | Remove it, or put the text in quotes to search for it. |
| ``invalid query: shallow path glob `path:meetings/*` not supported in v1.1; use `**` for recursive match`` | A single `*` in `path:` | Use `/**`, which includes subfolders. |
| ``invalid query: path glob `meetings/**/notes` must end in `/**` `` | `**` anywhere but the end | Search the outer folder, or add a word to narrow it. |
| `invalid query: bad regex /…/: …` | A pattern Terra can't read; the rest of the message says what's wrong | Fix the pattern, or escape the character it complains about with `\`. |
When a search fails, the whole list empties, including Help and canvas results, until you fix it.
## Not supported
- `AND` and `NOT` as words. Spaces already mean *and*, and `-` means *not*; typing `AND` or `NOT` searches for those words.
- Comparing other properties: `[rating>3]` isn't a comparison. It's quietly searched as plain words.
- Relative dates such as `today` or `last week`.
- Matching inside a word without a pattern: use `/port/`.
- Including nested tags under a parent tag: search each nested tag by its full name, such as `tag:"projects/terra"`.
- Saving a search or seeing past searches. The window remembers only your last search, until you quit.
## What's next
- [Find anything in your Library](https://terramd.io/docs/power-search) — the guided version, with Go to file and the command palette.
- [Keyboard shortcuts](https://terramd.io/docs/keyboard-shortcuts) — every key, including the ones for search.
- [Glossary](https://terramd.io/docs/glossary) — the Terra words used on this page.
---
# Task syntax
> Exactly what Terra reads as a task: list markers, status characters, the ::: property list, dates, priorities and repeat rules, with examples.
Source: https://terramd.io/docs/task-syntax
Every [task](https://terramd.io/docs/tasks) in Terra is one line of Markdown in a note. This page lists exactly what Terra reads on that line and what it writes back when you change a task in the app. A task line has three parts:
```md
- [ ] Title of the task ::: key=value key=value
```
A list marker and a status in brackets, then the title, then, optionally, a space, three colons and a space (` ::: `) followed by the task's properties.
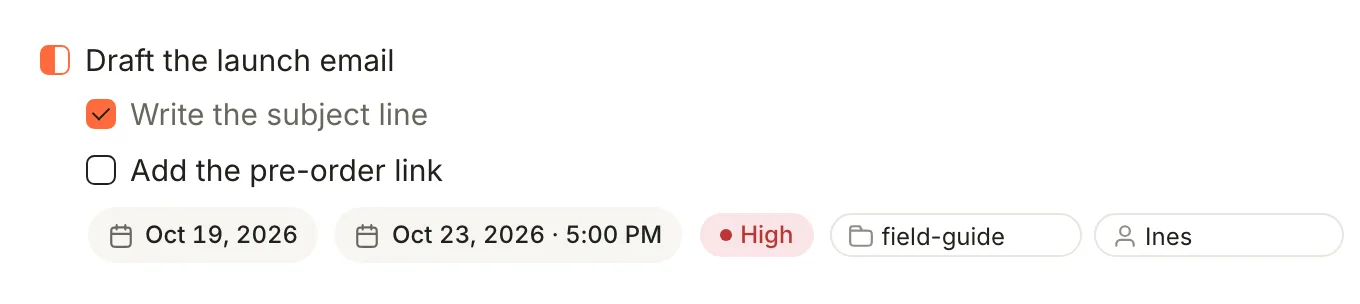
## How a line is read
- **It must be a bulleted list item.** The line starts with `-`, `*` or `+`, then at least one space, then the brackets. Indent it as much as you like.
- **Indented under another task, it's a subtask.** Nest as deep as you need.
- **The space after `]` is optional.** `- [ ]Call Ana` is a task.
- **Everything before the last ` ::: ` is the title**, colons and all.
- **The properties are `key=value` pairs separated by spaces**, after the last ` ::: `.
- **One bad pair spoils the list.** If any pair has no `=`, no value, or a value with a space in it, Terra reads the whole tail as part of the title and the task has no properties. There's no error message.
- **Indented lines straight under a task** (not tasks themselves, no blank line between) are its description, which **Edit task** shows.
These are never tasks:
| Line | Why |
| --- | --- |
| `1. [ ] Call Ana` | Numbered list items aren't tasks. |
| A checkbox inside a ```` ``` ```` or `~~~` code block | Code blocks are ignored. |
| `- [[Launch plan]]` | A wiki-link, not a status. |
| `- [docs](https://example.com)` and `- [docs][1]` | Links. |
| `-[ ] Call Ana` | No space after the `-`. |
| `- [] Call Ana`, `- [ x] Call Ana`, `- [later] Call Ana` | Empty brackets, a space mixed with other characters, more than four characters. |
## Status markers
| Marker | Status |
| --- | --- |
| `[ ]` | `Open`{gray} |
| `[/]` | `In progress`{orange} |
| `[x]` or `[X]` | `Done`{green} |
| `[-]` | `Cancelled`{sky} |
| Any other 1 to 4 characters, such as `[?]` or `[wip]` | A custom status. Give it a name and colour in **Settings › Editor › Task statuses**. |
A custom marker uses plain keyboard characters (letters, digits, punctuation), with no spaces, tabs or brackets. A marker you haven't set up in **Task statuses** still makes a task; it just goes by the marker itself until you name it.
## Properties
Keys are lowercase and spelled exactly as below. Any other key becomes a custom property of that name, so `Due=` is not a due date.
| Key | Value | Example | Notes |
| --- | --- | --- | --- |
| `due` | A [date](#dates) | `due=2026-10-20`, `due=2026-10-20T14:30` | Puts the task on the Calendar. Overdue the day after. |
| `start` | A [date](#dates) | `start=2026-10-19` | When work should begin. |
| `priority` | `high`, `med` or `low` | `priority=high` | Shown as `High`{red}, `Medium`{yellow}, `Low`{sky}. Terra's menus write these three; other words are kept as written, but the Calendar's priority buttons don't recognise them. |
| `project` | Text | `project=field-guide` | |
| `category` | Text | `category=admin` | |
| `assignee` | Text | `assignee=Sam` | Shows as a person on board cards. |
| `tags` | Names separated by commas | `tags=launch,press` | Tags the task, not its note. A leading `#` is dropped; names use letters, digits, `-`, `_` and `/`. No pill in the note; filter with **Tags** in Tasks. |
| `repeat` | A [rule](#repeating-tasks) | `repeat=weekly` | Needs `due=`, unless you add `repeat-on=completion`. |
| `until`, `count`, `repeat-on` | See [repeating tasks](#repeating-tasks) | `until=2026-12-31` | Only mean something next to `repeat=`. |
| `id` | Your own id, no spaces | `id=launch-email` | Fixes the task's identity, for `blocks` and `blocked-by`. |
| `blocks`, `blocked-by` | Ids separated by commas | `blocked-by=launch-email` | Terra reads and keeps these, but nothing in the app shows them yet. |
| Anything else | Text | `effort=2` | A custom property, shown as a pill under the task. |
A value is everything after the first `=` up to the next space.
## Dates
`due`, `start` and `until` take the same forms:
| Write | Means |
| --- | --- |
| `2026-10-20` | That day, all day |
| `2026-10-20T14:30` | That day at 14:30, on a 24-hour clock |
| `2026-10-20T14:30:00` | The same, with seconds |
| `2026-10-20T14:30:00Z`, `2026-10-20T14:30:00+02:00` | 14:30 on that day. The time zone part is ignored. |
Use a four-digit year and two-digit months, days and hours. Terra doesn't understand `20/10/2026`, `Oct 20`, `today`, `next friday`, `2:30pm` or a space instead of the `T`. A due date it can't read is kept on the line, but the task has no due date.
## Repeating tasks
Add `repeat=` to a task with a due date. When you finish it on the board, in **Edit task**, on the Calendar or in the Tasks drawer, Terra adds the next copy. Ticking the checkbox in the note doesn't.
| Rule | The next copy is due | Example |
| --- | --- | --- |
| `daily` | The next day | `repeat=daily` |
| `weekly` | A week later | `repeat=weekly` |
| `weekly:` and days | On the next listed day: `mon`, `tue`, `wed`, `thu`, `fri`, `sat`, `sun` | `repeat=weekly:mon,wed,fri` |
| `monthly` | The same day next month, or that month's last day | `repeat=monthly` |
| `monthly:` and a day | That day of next month, 1 to 31 | `repeat=monthly:15` |
| `yearly` | The same date next year | `repeat=yearly` |
| `every:` and a number with `d`, `w`, `m` or `y` | Every so many days, weeks, months or years | `repeat=every:2w`, `repeat=every:3m` |
| Add | What it does | Example |
| --- | --- | --- |
| `until=` | No copies due after this date. | `until=2026-12-31` |
| `count=` | How many times in all, this one included. Each copy counts down; at `count=1` the series ends. | `count=12` |
| `repeat-on=completion` | Count from the day you finish, not from the due date. Works without `due=`. | `repeat-on=completion` |
When a task repeats, Terra changes its status, then inserts a new open line directly under it with the same title and properties, the next `due=` and one less `count=`. The new due date is a day without a time, even if the old one had a time. Subtasks aren't copied, and because the new line goes in above them, the old subtasks end up under the new copy. `repeat-on=completion` takes "the day you finish" from the UTC calendar, so late in the evening in the Americas it can count from tomorrow.
## What Terra writes when you edit a task
Changing a task anywhere in the app rewrites only its line, or the lines next to it, in its note.
| You | Terra writes |
| --- | --- |
| Change the status (board, Edit task, Calendar, drawer, checkbox) | Only the character between the brackets |
| Set a property | Replaces that `key=value`, or adds it at the end of the list, adding ` ::: ` if the line had none |
| Remove a property | Deletes it, and the ` ::: ` too when nothing is left |
| Pick a date | `2026-10-20`, or `2026-10-20T14:30` with a time |
| Pick a priority | `high`, `med` or `low` |
| Drag a task to another day on the Calendar | A new `due=`, keeping the time if it had one |
| Add a subtask in **Edit task** | `- [ ] Text` on a new line two spaces deeper, above any existing subtasks |
| Add a description in **Edit task** | Lines two spaces deeper, straight under the task |
| Click **Add task** on the board | `- [ ] Text` at the end of `Inbox/tasks.md`, or the note you picked, with the column's status |
| **Move task to note** | Moves the line, its subtasks and description under a `## Tasks` heading in the other note |
## Examples
A meeting's action items:
```md
## Action items
- [ ] Send Ines the cover brief ::: due=2026-10-16
- [ ] Book the copy editor ::: due=2026-10-20 priority=high assignee=Sam
```
Everything at once, as in the screenshot at the top:
```md
- [/] Draft the launch email ::: start=2026-10-19 due=2026-10-23T17:00 priority=high project=field-guide assignee=Ines tags=launch
- [x] Write the subject line
- [ ] Add the pre-order link
```
Chores that come back:
```md
- [ ] Weekly review ::: due=2026-10-16 repeat=weekly
- [ ] Pay the studio rent ::: due=2026-11-01 repeat=monthly:1 count=12
- [ ] Water the plants ::: repeat=every:3d repeat-on=completion
```
A custom status and a custom property:
```md
- [?] Check the print proofs ::: assignee=Ines effort=2
```
Lines that don't do what they look like:
```md
1. [ ] Order the flowers
- [ ] Book the venue ::: assignee=Sam Lee due=2026-10-20
- [ ] Call the printer due:2026-10-20
```
The first isn't a task. The second is, but `Sam Lee` has a space, so its whole property list is read as title. The third has no ` ::: `, so `due:2026-10-20` is just words.
## Coming from Obsidian
Terra's four markers are the ones the Obsidian Tasks plugin uses, but Terra only reads properties after ` ::: `. It doesn't read the Tasks plugin's emoji dates (`📅 2026-10-20`, `🔁 every week`) or Dataview fields (`[due:: 2026-10-20]`); they stay as text in the title. Rewrite them as `::: due=2026-10-20 repeat=weekly`.
## Not supported
- Relative dates such as `today` or `tomorrow`, and 12-hour times.
- Spaces inside a value.
- Tasks in numbered lists.
- Showing `blocks` and `blocked-by` anywhere in the app.
- Setting a repeat rule from a menu. Type it on the line.
## Related
- [Tasks](https://terramd.io/docs/tasks) — the board, Edit task and the Tasks drawer.
- [Calendar](https://terramd.io/docs/calendar) — where `due=` puts a task.
- [Search syntax](https://terramd.io/docs/search-syntax) — the other little language in Terra.
- [Glossary](https://terramd.io/docs/glossary) — the Terra words used on this page.
---
# Glossary
> The words Terra uses, from Agent to Zen mode, each explained in a sentence or two with a link to the page that covers it.
Source: https://terramd.io/docs/glossary
Terra has a few words of its own, and uses some familiar ones in a particular way. Here they are from A to Z. Coming from Obsidian? A Library is what Obsidian calls a vault, and a Sprout is a callout.
## Agent
Terra Agent is the AI assistant built into Terra. It answers questions from your notes, with links to the ones it used, and can create or edit notes when you allow it. It runs on an AI provider you connect, such as Claude, OpenAI or Gemini. See [Ask your Library](https://terramd.io/docs/ask-your-library).
## Annotation
A highlight, a note on a passage or a bookmark you add while reading. For EPUB books, Terra keeps annotations in the book's [sidecar](#sidecar) and never changes the book; PDF highlights are written into the PDF itself. See [Highlights and annotations](https://terramd.io/docs/annotate-in-the-sidecar).
## Attachment
A file that belongs to a note, such as an image you pasted or a document you dropped in. Terra copies it into an `attachments` folder beside the note, and the note links to it. See [How Terra stores your notes](https://terramd.io/docs/how-terra-stores-your-notes).
## Backlink
A link to the note you're looking at, from another note. The **Backlinks** button above a note's text counts them; click it to see where they come from. See [Links and backlinks](https://terramd.io/docs/links-and-backlinks).
## Block
One piece of a note: a paragraph, a heading, a list item, a quote, a [Sprout](#sprout), a table, an image or a code block. Point at a block to show its handle in the margin; drag the handle to move the block, or click it for **Turn into**, **Toggle**, **Copy link to block**, **Copy as**, **Duplicate** and **Delete**. See [Advanced formatting](https://terramd.io/docs/advanced-formatting).
## Canvas
A free-form board where you place notes, sticky notes, text, shapes and images, and draw connections between them. Canvases you make are listed under **Canvases** in the sidebar, and a [database](#database) can be laid out as a canvas too. See [Canvas, mind maps and the graph](https://terramd.io/docs/canvas-and-mind-maps).
## Capture
Saving something into Terra in a couple of seconds, from any app: press ⌃ ⌥ ⌘ N, or choose **File › Quick Capture…**, and the capture lands in your [Inbox](#inbox). With enrichment on, Terra can also tidy it into a [template](#template) and sort it into categories you choose. See [Capture and classify](https://terramd.io/docs/capture-and-classify).
## Command palette
The search box that runs any command by name. Press ⌘ K and type: it lists commands with their shortcuts, notes whose titles match, and answers from Terra's Help. See [Find your way around](https://terramd.io/docs/find-your-way-around#command-palette).
## Connector
A connection to an outside service, set up in **Settings › Integrations**: Google Calendar, Granola, Slack, GitHub, Jira and Confluence. Depending on the service, its items can appear inside your notes, arrive as notes of their own or, for Google Calendar, show on the Calendar. Keys are kept in your Mac's Keychain. See [Bring in meetings from Granola](https://terramd.io/docs/meeting-notes#bring-in-meetings-from-granola-optional) for one example.
## Dashboard
A note that puts live views of your databases on one page, such as a count, a chart, a table and a board. The **Dashboard** template starts one for you. See [Build a dashboard](https://terramd.io/docs/dashboards).
## Database
A live collection of the notes that match a set of conditions, such as every note in a folder or every note with a tag. Each note is a row and its [properties](#property) are the columns. Nothing is copied: the rows are your notes. See [Databases](https://terramd.io/docs/databases).
## Drawer
A panel that opens beside your panes. **Properties** in the toolbar opens the drawer on the right, with sections for the open note's properties, comments, versions and more; **AI conversations** opens the chat; **Database drawer** is the note list. See [Find your way around](https://terramd.io/docs/find-your-way-around#drawers).
## Embed
Something shown inside a note rather than linked: another note, written `![[Note title]]`, a view of a database, inserted with `/database`, or an item from a [connector](#connector). See [Advanced formatting](https://terramd.io/docs/advanced-formatting).
## Favorites
Notes you've marked with **Add to Favorites**, the flag in the editor toolbar. They're listed under **Favorites** in the sidebar, and you can sort them into favorites collections without moving the files. See [Files and folders](https://terramd.io/docs/files-and-folders).
## Filter
A condition that narrows a database view to the notes you want, such as *status is Done* or *tags contain launch*. Each [view](#view) keeps its own filters. See [Filter, sort and group](https://terramd.io/docs/filter-sort-and-group).
## Folder
A real folder inside your Library folder. The **Folders** section of the sidebar shows the same tree you'd see in Finder, and clicking a folder shows its notes. See [Files and folders](https://terramd.io/docs/files-and-folders).
## Formula
A computed [property](#property) in a database you made: an expression, much like a spreadsheet formula, that Terra works out for each row from its other properties. In a table inside a note, a cell that starts with `=`, such as `=SUM(above)`, is a formula too. See [Formulas, threads and gathers](https://terramd.io/docs/formulas-threads-and-gathers).
## Frontmatter
The block of properties at the top of a note's Markdown file, written in YAML between two lines of three dashes. Terra keeps a note's id, title, dates, tags and other [properties](#property) there. See [Properties](https://terramd.io/docs/properties).
## Gather
A computed property that reads through a [thread](#thread) and totals, counts or picks values from the notes it links to, such as the total effort of a milestone's work items. You write it as one function, such as `SUM(@work.@effort)`. See [Formulas, threads and gathers](https://terramd.io/docs/formulas-threads-and-gathers).
## Inbox
The `Inbox` folder in your Library, where new notes and quick captures land. It's also listed under **Databases** in the sidebar. See [Files and folders](https://terramd.io/docs/files-and-folders).
## Layout
How a database [view](#view) arranges its notes: **Table**, **Board**, **List**, **Cards**, **Feed**, **Calendar**, **Timeline**, **Map**, **Graph**, **Canvas**, **Chart** or **Form**. Layouts such as **Side by side** and **2 × 2** also arrange the [panes](#pane) in the window. See [Views and layouts](https://terramd.io/docs/views-and-layouts).
## Library
A folder on your Mac that Terra treats as one collection of notes, with its own settings, databases and templates. Any folder can be a Library, including an Obsidian vault. See [Libraries](https://terramd.io/docs/libraries).
## Note
A Markdown file in your Library, with a short header of [frontmatter](#frontmatter) at the top. PDFs, books, images and spreadsheets you add get a note of their own, too. See [Files and folders](https://terramd.io/docs/files-and-folders).
## Outline
The list of a note's headings shown at the right of the note when the pane has room. Click a heading to jump to it. **Settings › Appearance › Note outline** switches it between **Table of contents**, **Minimap** and **None**, and ⇧ ⌘ O shows or hides it. See [Make Terra yours](https://terramd.io/docs/make-terra-yours).
## Pane
A tile in the main part of the window that holds [tabs](#tab). A window can show up to four panes side by side or stacked. See [Find your way around](https://terramd.io/docs/find-your-way-around#split-panes).
## Peek
A note shown over the pane you're in, so you can look at it without losing your place. Clicking a row in a database opens a peek; you can dock it left, right, center or at the bottom. See [Find your way around](https://terramd.io/docs/find-your-way-around#peek).
## Property
A named value on a note, such as a status, a due date or an owner. Properties appear under the note's title and are saved in its [frontmatter](#frontmatter), and databases can sort, filter and group by them. See [Properties](https://terramd.io/docs/properties).
## Query
A saved question about your Library, written in SQL and listed under **Queries** in the sidebar. You can also describe what you want in plain English and let Terra write the SQL, if you've connected an AI provider. See [Queries](https://terramd.io/docs/queries).
## Rail
The slim column of icons that replaces the sidebar when you hide it or the window gets narrow. It keeps **All notes**, **Tasks**, **Calendar** and anything you've pinned within reach. See [Find your way around](https://terramd.io/docs/find-your-way-around#sidebar).
## Reader
Terra's e-reader for EPUB books and PDFs, with your own theme, font and layout, and your place remembered in every book. A note's **Read** mode is something else: it shows the note without editing. See [Read comfortably in the e-reader](https://terramd.io/docs/read-in-the-e-reader).
## Recipe
One of the [templates](#template) Terra puts in every Library. It turns a recipe note, such as a captured web page, into a tidy one: the title, a link to the source, the first picture, the ingredients in a [Sprout](#sprout) and the directions as a numbered list. See [Capture and classify](https://terramd.io/docs/capture-and-classify).
## Shelf
A strip at the foot of the window for panes you've set aside with **Minimize to shelf**. Click a pane on the shelf to bring it back. See [Find your way around](https://terramd.io/docs/find-your-way-around#shelf).
## Sidecar
A file next to a note or book, with the same name and the ending `.terra.json`, where Terra keeps what Markdown can't hold: a book's highlights and reading position, a table's formulas, comments, a Sprout's properties. Most notes don't have one. If you move a note in Finder, move its sidecar with it. See [How Terra stores your notes](https://terramd.io/docs/how-terra-stores-your-notes).
## Slash menu
The menu that opens when you type `/` in a note. It lists blocks you can insert, such as headings, lists, [Sprouts](#sprout), tables, code and math; keep typing to narrow it down. The **+** button in the editor toolbar opens it too. See [Basic formatting syntax](https://terramd.io/docs/formatting-syntax).
## Sprout
A coloured box in a note that makes a point stand out, such as a tip or a warning. It's written like an Obsidian callout, `> [!tip] Title`, and can carry its own properties. Every Sprout in the Library also appears in **Sprouts** in the sidebar. See [Sprouts](https://terramd.io/docs/sprouts).
## Status
A property type for where something stands. Each option belongs to a group, **To do**, **In progress** or **Done**, so databases know what's finished; a new Status property starts with **Not started**, **In progress** and **Done**. [Tasks](#task) have their own statuses, written in the checkbox: `[ ]` open, `[/]` in progress, `[x]` done, `[-]` cancelled. See [Properties](https://terramd.io/docs/properties) and [Task syntax](https://terramd.io/docs/task-syntax).
## Tab
One open item in a [pane](#pane): a note, a database, a web page or Help. Right-click a tab to close it, close the others or pin it. See [Find your way around](https://terramd.io/docs/find-your-way-around#panes-and-tabs).
## Tag
A short label such as `#reading` that gathers notes from different folders. Write it in the text or add it to the note's **tags** property; either way the note shows up on the tag's page and in tag searches. See [Tags](https://terramd.io/docs/tags).
## Task
A checkbox line in a note, such as `- [ ] Book the projector`. Terra gathers every task in the Library into **Tasks**, where you can set due dates and change status, and the line in the note changes to match. See [Tasks](https://terramd.io/docs/tasks).
## Template
A note that new notes start from, with placeholders such as `{{ title }}` and properties of its own. Every Library starts with a few, including Daily log, Meeting, Project, Decision and [Recipe](#recipe). Choose **File › New from Template…** to use one. See [Templates](https://terramd.io/docs/templates).
## Thread
A computed property that links a note to other notes, such as work items to their milestone. You pick the notes, or let conditions pick them. Terra saves the links in the note's `relations` property, and [gathers](#gather) and timelines can follow them. See [Formulas, threads and gathers](https://terramd.io/docs/formulas-threads-and-gathers).
## Toggle
A block you can fold. Folding a toggle hides what belongs to it: a heading's section, a list item's nested items, a quote's or Sprout's body, or everything after the first line of a paragraph. Turn one on with **Toggle** in the block menu, or press ⌥ ⌘ 7. See [Keyboard shortcuts](https://terramd.io/docs/keyboard-shortcuts#text).
## Trash
Where deleted notes go, in a `Trash` folder in your Library. Right-click a note there and choose **Put Back** to restore it. By default, Terra empties notes that have been in the Trash for 30 days, and emptying is permanent. See [Files and folders](https://terramd.io/docs/files-and-folders).
## Type
A property that says what kind of thing a note is, such as `project`, `meeting` or `contact`; you choose the names. A type can use one of Terra's models (Person, Article, Book, Location, Group, Event, Plan or Medium), which decides how its cards look. Not to be confused with a property's type, such as Text or Date. See [Properties](https://terramd.io/docs/properties).
## Versions
Terra's history of your notes, built on git. Click **Save version** to record how the Library's notes are now, then compare or restore any note from an earlier version, or send the history to a Git server. It's off until you turn it on. See [Sync and back up](https://terramd.io/docs/sync-and-back-up).
## View
A saved way of looking at a [database](#database): a [layout](#layout) plus its filters, sort, grouping and visible properties. One database can have many views of the same notes. The **Views** section of the sidebar is different: it saves arrangements of panes. See [Views and layouts](https://terramd.io/docs/views-and-layouts).
## Wiki-link
A link to another note, written in double square brackets: `[[Printer quotes]]`, the same as in Obsidian. Terra shows it as a chip with the note's title, and updates it when you rename the note. Type `@` and pick a note to insert one. See [Links and backlinks](https://terramd.io/docs/links-and-backlinks).
## Zen mode
A way to clear the window down to your panes. Press ⌥ ⌘ Z to hide the sidebar, note list and drawers, and again to bring them back. See [Find your way around](https://terramd.io/docs/find-your-way-around#zen-mode).
## Related
- [Get started with Terra](https://terramd.io/docs/quickstart): the basics, step by step.
- [Find your way around](https://terramd.io/docs/find-your-way-around): every part of the window.
- [Keyboard shortcuts](https://terramd.io/docs/keyboard-shortcuts): every key.
---
# What's new in Terra
> This is Terra 0.1.0, the first release, so there's nothing earlier to compare it with yet.
Source: https://terramd.io/docs/answers/get-started/whats-new
Each later release lists its changes here, newest first.
## Good to know
- To find how to do something, choose **Help › Search Help…**.
- To see every shortcut, choose **Help › Keyboard Shortcuts**.
- You can ask the agent too. It answers from these same Help articles.
---
# Open or switch libraries
> Choose **File › Open Library…** and pick the library's folder.
Source: https://terramd.io/docs/answers/get-started/open-or-switch-libraries
1. Choose **File › Open Library…**, or press ⇧⌘O.
2. Pick the library's folder and confirm.
3. It opens in place of the current library, in the same window.
**Shortcut:** ⇧⌘O
## Other ways
- With no library open, click **Choose folder**.
## Good to know
- Any folder can be a library. Pick an empty one to start a new library.
- Terra reopens your last library when it starts. **Settings › General › Open at launch** changes that.
- To rename a library in the sidebar without renaming its folder, set **Display name** in **Settings › General**.
- The **Library menu** at the bottom of the sidebar has **Open in Finder** and **Copy library path**.
---
# Run a command
> Press ⌘K, type what you want to do, and press Return.
Source: https://terramd.io/docs/answers/workspace/run-a-command
1. Press ⌘K. The command palette opens over the window.
2. Type part of a command's name, such as "new note" or "zen". Notes, databases and Settings pages show up too.
3. Use ↑ and ↓ to pick a row, then press Return. Press Esc to close the palette.
**Shortcut:** ⌘K
## Other ways
- Put **Command palette** in the toolbar: right-click the toolbar, choose **Customize toolbar…**, and drag it in from the **Command library**.
## Good to know
- A command's shortcut shows at the end of its row.
- Type a question, such as "how do I duplicate a note", to find answers under **Help**.
- With nothing typed, the palette lists only the commands you can run right now. When you search, commands that can't run are dimmed, with the reason underneath.
- To search the text of your notes, press ⇧⌘F instead.
---
# Split a pane
> Click **Split** in the toolbar. A second pane opens to the right of the one you're in.
Source: https://terramd.io/docs/answers/workspace/split-a-pane
1. Click in the pane you want to split.
2. Click **Split** in the toolbar. A second pane opens to its right and takes focus.
3. Click a note in the note list to open it there.
4. Drag the divider between the panes to resize them.
**Shortcut:** none
## Other ways
- Drag a note from the note list or from search results onto the edge of a pane, and drop it on **Split**.
- Drag a pane's tab onto the edge of another pane.
- Right-click a note in the note list, choose **Open as**, then **Right pane**, **Left pane**, **Top pane** or **Bottom pane**. If a pane is already on that side, the note joins it as a tab.
## Good to know
- A window holds up to four panes. At four, an edge drop reads **Replace** and swaps that pane's content instead.
- With two or more panes, the toolbar shows layouts in place of **Split**.
- A pane closes with its last tab. ⌘W closes the active tab.
- **Maximize pane** in a pane's header fills the window with it. Press Esc to restore.
---
# Move between panes
> Click a pane, or press ⌃⌥→ and ⌃⌥← to move to the next or previous one.
Source: https://terramd.io/docs/answers/workspace/move-between-panes
1. Click anywhere in a pane to work in it.
2. Press ⌃⌥→ for the next pane, or ⌃⌥← for the previous one. Panes go in reading order.
3. Press ⌘1, ⌘2, ⌘3 or ⌘4 to jump straight to a pane by its place in that order.
**Shortcut:** ⌃⌥→ **Next pane**, ⌃⌥← **Previous pane**, ⌘1–⌘4 a pane by number
## Other ways
- Add **Previous pane** and **Next pane** to the toolbar with **Customize toolbar…**.
## Good to know
- These keys need two or more panes. They stop at the first and last pane rather than wrapping around.
- To move a pane itself, drag the empty space in its header onto another pane's edge and drop it on **Move here**. A locked pane stays put.
- Change ⌃⌥→ and ⌃⌥← in **Settings › Hotkeys**.
---
# Open a note in a new tab
> Click the note in the note list. It opens as a new tab in the pane you're working in.
Source: https://terramd.io/docs/answers/workspace/open-a-note-in-a-new-tab
1. Click in the pane where you want the tab.
2. Click a note in the note list or in search results.
3. The note opens as a tab in that pane's header. Click a tab to switch to it.
**Shortcut:** none
## Other ways
- Right-click a note in the note list and choose **Open as › Tab**.
- Drag a tab onto the middle of another pane and drop it on **Add as tab**.
## Good to know
- If the note is already open in that pane, Terra switches to its tab.
- Right-click a tab for **Close Others**, **Close Left**, **Close Right**, **Close All** and **Pin Tab**. Pinned tabs stay open when you close the others.
- In a database, where a row opens depends on the view's **Open notes** setting.
---
# Go back or forward
> Click **Back** or **Forward** in the toolbar, or press ⌘[ and ⌘].
Source: https://terramd.io/docs/answers/workspace/go-back-or-forward
1. Click **Back** in the toolbar to return to the note, database or page you had open before.
2. Click **Forward** to retrace your steps.
**Shortcut:** ⌘[ back, ⌘] forward
## Other ways
- Swipe sideways with two fingers on the trackpad.
- Press the back or forward button on your mouse.
## Good to know
- Terra remembers your last 50 places in each library, even after you quit.
- **Back** and **Forward** are unavailable when there's no place to go.
- In a webpage, the arrows beside the address bar move through that page's own history instead.
---
# Use a preset layout
> With two or more panes open, click a layout in the toolbar, or press ⌃⌥ and a number.
Source: https://terramd.io/docs/answers/workspace/use-a-preset-layout
1. Open the number of panes the layout needs: two for **Side by side**, **60 / 40** or **Stacked**; three for **Three columns** or **Main + two**; four for **2 × 2**.
2. The toolbar shows only the layouts that fit the panes you have.
3. Click one. Your panes keep their content and move into the new arrangement.
**Shortcut:** ⌃⌥1 **Side by side**, ⌃⌥2 **60 / 40**, ⌃⌥3 **Stacked**, ⌃⌥4 **Three columns**, ⌃⌥5 **Main + two**, ⌃⌥6 **2 × 2**.
## Other ways
- To keep an arrangement of your own, click **+** in the sidebar's **Views** section and give it a name. Click the view later to bring the panes back.
## Good to know
- A layout never adds or closes panes. With one pane open, the toolbar shows **Split** instead.
- Click **Lock pane** in a pane's header to keep it in its place when you switch layouts.
- Saved layouts in **Views** are not database views.
---
# Hide the sidebar or use Zen mode
> Click **Sidebar** in the toolbar to hide the sidebar, or **Zen mode** to hide every drawer at once.
Source: https://terramd.io/docs/answers/workspace/hide-the-sidebar
1. Click **Sidebar** in the toolbar, or press ⌘\. A slim rail takes its place, with **All notes**, **Tasks**, **Calendar** and your pinned items.
2. For Zen mode, click **Zen mode**, or press ⌥⌘Z. The sidebar, the rail, the database drawer, properties and AI conversations all close.
3. Click **Zen mode** again to leave. The sidebar and the database drawer come back.
**Shortcut:** ⌘\ sidebar, ⌥⌘Z Zen mode
## Other ways
- Right-click an empty part of the window and choose **Zen mode**, or **Exit Zen mode** to leave.
## Good to know
- Leaving Zen mode doesn't reopen properties or AI conversations. Open them from the toolbar.
- Closing all four drawers by hand counts as Zen mode too.
- In a narrow window, Terra folds the sidebar into the rail on its own.
- Change these keys in **Settings › Hotkeys**.
---
# Modify the toolbar
> Right-click any toolbar button and choose **Customize toolbar…**.
Source: https://terramd.io/docs/answers/workspace/modify-the-toolbar
1. Right-click a button in the toolbar at the top of the window and choose **Customize toolbar…**.
2. Drag commands from the **Command library** onto the toolbar. Search it to find one. Notes, databases, views and Settings pages can be buttons too.
3. Drag a button off the toolbar to hide it, or onto **More** to tuck it into the overflow menu.
4. Click **Apply**. **Reset** brings back the default toolbar.
## Other ways
- Open **Settings › Toolbar**.
- Open the **More** menu at the end of the toolbar and choose **Customize toolbar…**.
- While customizing, right-click a button for **Move earlier**, **Move later**, **Hidden** or **Edit label and symbol…**. ⌥← and ⌥→ move the selected button; Delete removes it.
## Good to know
- Each library has its own toolbar, so a library must be open to customize it.
- The formatting tools inside a note can't be customized. Drag their grip to move them to another edge, or hide them. The new spot lasts until you quit.
- A database header has its own arrangement for each view: **Arrange header actions** in the view's settings.
---
# Open the terminal
> Click **Terminal** in the toolbar, or press ⌘J, then click **Open a terminal**.
Source: https://terramd.io/docs/answers/workspace/open-the-terminal
1. Click **Terminal** in the toolbar, or press ⌘J. A panel opens below the main pane.
2. Click **Open a terminal**.
3. Terra asks you to confirm the program and folder. Click **Allow**.
4. The terminal starts in your library's folder. Click **+** to open another tab.
5. To close the panel, press ⌘J again or click **Close terminal panel**.
**Shortcut:** ⌘J
## Good to know
- The terminal has your full account access. Terra asks again for each new tab.
- Pasting text with a line break asks first. Click **Paste** to send it.
- Closing the panel closes its tabs. Reopening it starts fresh.
- Set the shell, font, size and cursor in **Settings › Code**, under **Terminal**.
---
# Search my library
> Press ⇧⌘F, type a few words, and press Return to open the top result.
Source: https://terramd.io/docs/answers/workspace/search-your-library
1. Press ⇧⌘F, or click **Search** in the toolbar.
2. Type what you're looking for. Results update as you type.
3. Press ↑ and ↓ to move through the results.
4. Press Return to open the highlighted note, or click any result. Esc closes the search.
**Shortcut:** ⇧⌘F. ⌘O (**Go to file**) opens the same search.
## Other ways
- Right-click a tag and choose **Search tag**.
## Good to know
- Every word you type must match. Put words in quotes to match an exact phrase.
- Narrow results with filters: `tag:name`, `type:name`, `status:name` or `path:Folder/**`. For dates, use `created` or `updated` with a date, like `updated>2026-01-01`.
- Other words that end in a colon, like `author:`, show an error instead of results.
- **Find notes** at the top of a list only filters that list, by title and visible fields.
---
# Create a note
> Choose **File › New Note**, or press ⌘N.
Source: https://terramd.io/docs/answers/write/create-a-note
1. Choose **File › New Note**, or press ⌘N.
2. A new note named Untitled opens.
3. Give it a title and start writing.
**Shortcut:** ⌘N
## Other ways
- Click **New…** in the toolbar and choose **New note**.
- Right-click a folder in the sidebar and choose **New note**, or click its **New note here** button. The note goes in that folder.
## Good to know
- ⌘N and **New…** put the note in your Inbox folder.
- A Library must be open first.
---
# Insert a block with the slash menu
> Type `/` in a note and pick a block from the menu.
Source: https://terramd.io/docs/answers/write/insert-a-block
1. Open the note in Edit mode and put the caret where the block goes.
2. Type `/`. The menu lists commands under **Blocks**, **Inline** and **Insert**.
3. Keep typing to narrow the list, like `/table` or `/h2`.
4. Press ↑ or ↓ and Return, or click a command. Esc closes the menu.
**Shortcut:** ⌘/ opens the menu at the caret.
## Other ways
- Click **Insert block** (+) in the toolbar at the top of the note.
## Good to know
- The menu opens at the start of a line or after a space, so text like `a/b` stays as typed.
- It doesn't open inside code blocks or math.
- To change a block that's already there, click its handle in the left margin and choose **Turn into**.
---
# Add headings, lists, to-dos, quotes or code blocks
> Type `/` and pick the block, or type its Markdown at the start of a line.
Source: https://terramd.io/docs/answers/write/add-headings-and-lists
1. Start a new line.
2. Type `/` and choose **Heading 1**, **Heading 2**, **Heading 3**, **Bullet list**, **Numbered list**, **To-do**, **Quote** or **Code block**.
3. Or type the Markdown, then a space:
- `#`, `##` or `###` for a heading
- `-` or `*` for a bullet
- `1.` for a numbered list
- `[ ]` for a to-do
- `>` for a quote
- `` ``` `` for a code block
**Shortcut:** ⌥⌘1, ⌥⌘2 or ⌥⌘3 for a heading. ⇧⌘8 bullets, ⇧⌘7 numbers, ⇧⌘9 to-dos, ⇧⌘B quote, ⌥⌘C code block.
## Other ways
- Click **Turn into** in the note's toolbar to change the current block. **Task** and **Code block** have their own buttons there.
- Click a block's handle in the left margin and choose **Turn into**.
## Good to know
- Tab and ⇧Tab indent and outdent list items.
- Click a to-do's box to move it through open, in progress, done and cancelled.
- A `#` followed by a word, with no space between, makes a tag, not a heading.
- Add a language after the backticks, like `` ```python ``, to set the code block's language.
---
# Insert a table
> Type `/table` and pick a size from the grid.
Source: https://terramd.io/docs/answers/write/insert-a-table
1. On an empty line, type `/table` and press Return.
2. Move over the grid to choose rows and columns, then click. Arrow keys and Return work too.
3. Type in the cells. Tab moves to the next cell.
**Shortcut:** none
## Other ways
- Hover the table to add rows and columns: **Insert column** and **Insert row** sit between cells, **Add column** and **Add row** at the edges.
## Good to know
- The first row is always the header row.
- Right-click a cell to add or delete rows and columns, **Rename column**, or **Delete table**.
- Backspace at the very start of a table selects it. Press it again to delete the table.
- For a spreadsheet-style grid, type `/sheet` instead.
---
# Insert and resize an image
> Type `/image` and choose where the image comes from. Drag its corner to resize it.
Source: https://terramd.io/docs/answers/write/insert-an-image
1. Type `/image` and press Return. **Insert image** opens.
2. Pick a source:
- **Library**: search images already in your library, select one and click **Insert**.
- **Upload**: drop an image, or click **Choose file…**.
- **Link**: paste an image address, then click **Save to library** or **Keep as link**.
3. To resize, drag the handle at the image's bottom-right corner. The image keeps its shape.
**Shortcut:** none
## Other ways
- Paste an image, or drag an image file into the note.
## Good to know
- Uploaded, pasted and saved images are copied into the note's attachments.
- **Keep as link** loads the picture from the web. It shows a **Load image** placeholder until you click it.
- The width is saved in the Markdown, like ``.
- **Choose file…** doesn't accept SVG files.
---
# Write math
> Type `/math`, choose **Math block** or **Math (inline)**, then click it to enter LaTeX.
Source: https://terramd.io/docs/answers/write/write-math
1. Type `/math`. Choose **Math block** for an equation on its own line, or **Math (inline)** for math inside a sentence.
2. A placeholder box appears. Click it.
3. Type your LaTeX in the **LaTeX** field and click **Save**.
**Shortcut:** none
## Other ways
- Inside a line, type `$$x^2$$` to make inline math.
- On an empty line, type `$$$x^2$$$` to make a math block.
## Good to know
- Click any math later to edit it the same way.
- In the note's Markdown, inline math is saved as `$…$` and math blocks as `$$…$$`.
---
# Add a callout
> Type `/` and choose **Sprout**. A Sprout is Terra's callout.
Source: https://terramd.io/docs/answers/write/add-a-sprout
1. On an empty line, type `/sprout` and press Return. A Note Sprout appears.
2. Write inside it. Add a title in the field at its top if you want one.
3. To change its type, click the icon at its top left and pick **Note**, **Tip**, **Warning**, **Important**, **Quote** or **Info**.
**Shortcut:** none
## Good to know
- On a line that already has text, the Sprout wraps that line.
- **Convert to Note** in the icon menu moves the Sprout's content into a note of its own and embeds that note in its place.
- **Manage Sprouts…** in the same menu edits the list of Sprout types.
---
# Add tabs inside a note
> Type `/tabs`. Terra adds a group with two tabs.
Source: https://terramd.io/docs/answers/write/add-tabs
1. On an empty line, type `/tabs` and press Return. A group with **Tab 1** and **Tab 2** appears.
2. Click a tab and write in it. Each tab holds its own blocks.
3. Click **Add tab** (+) for another tab.
4. To rename the open tab, click **Tab actions** (…) and choose **Rename tab**. Type a name and click **Save**.
**Shortcut:** none
## Other ways
- Select two or more sections that each start with a heading. In the note's toolbar, choose **Turn into › Tabs from sections**. Each heading becomes a tab.
## Good to know
- **Tab actions** also has **Duplicate tab**, **Move tab left**, **Move tab right** and **Dissolve group to sections**, which turns the tabs back into headings.
- Right-click a tab for **Color**, **Glyph** and **Remove tab**. A group always keeps at least one tab.
- Tab names must be unique within a group.
---
# Add or change a cover
> Click **Banner image** in the note's properties, then upload or link an image.
Source: https://terramd.io/docs/answers/write/change-the-cover
1. Open the note. In the properties under its title, click **Banner image**.
2. Click **Upload cover** and pick an image. You can also drop an image on the preview, or click **Import cover from web**, paste an image address and press Return.
3. The cover appears at the top of the note.
4. To frame it, click **Reposition cover**, drag the image, then click **Apply cover position**.
**Shortcut:** none
## Good to know
- **Replace cover** swaps the image. **Delete cover** removes it.
- Covers are copied into the note's attachments, so a web image stays if the page goes away.
---
# Switch between reading and editing
> Press ⌘E, or choose **View › Toggle Read / Edit**.
Source: https://terramd.io/docs/answers/write/switch-read-and-edit
1. Open the note.
2. Press ⌘E to switch between Edit and Read.
3. Or use the switcher beside the note's title and pick **Edit**, **Read** or **Markdown source**.
**Shortcut:** ⌘E
## Good to know
- Notes open in Edit.
- In Read, the text can't change and the formatting tools are off.
- **Markdown source** shows the note's raw Markdown, read-only. ⌘E from there returns to Edit.
---
# Find text in a note
> Click in the note and choose **Edit › Find…**, or press ⌘F.
Source: https://terramd.io/docs/answers/write/find-text-in-a-note
1. Click in the pane of the note you want to search.
2. Choose **Edit › Find…**, or press ⌘F. A find bar opens at the top right of the note.
3. Type what you're looking for. Every match is highlighted, and the bar shows which one you're on, like "2 of 5".
4. Press Return for the next match, or ⇧Return for the previous one.
5. Press Esc, or click **Close**, when you're done.
**Shortcut:** ⌘F
## Other ways
- Click **Next match** or **Previous match** in the find bar.
- Find also works on web pages. Open the page and press ⌘F. Terra selects each match, but doesn't show a count.
## Good to know
- Find ignores capital letters. "terra" also finds "Terra".
- Find looks through the note's text, not its title or properties.
- Searching doesn't change the note.
- Switching to another note closes the find bar.
- To search every note in your library, press ⇧⌘F instead.
---
# Duplicate a note
> Open the note and choose **File › Duplicate**, or press ⌘D.
Source: https://terramd.io/docs/answers/write/duplicate-a-note
1. Open the note you want to copy and click in its pane.
2. Choose **File › Duplicate**, or press ⌘D.
3. The copy opens. Its title ends in **Copy**, and it sits in the same folder as the original.
**Shortcut:** ⌘D
## Other ways
- Right-click the note's tab and choose **Duplicate**.
- Right-click the note's row or card in a database, or in the **All notes** list, and choose **Duplicate**.
## Good to know
- With a block selected, ⌘D duplicates the block instead of the note.
- The copy keeps tags, properties, cover and attachments. It gets new created and updated dates.
- If the name is taken, Terra adds a number.
- Databases can't be duplicated. To copy a view, use **Duplicate view**.
---
# Comment on a note
> Click **Comments** in the toolbar and write in **Add comment…**.
Source: https://terramd.io/docs/answers/write/comment-on-a-note
1. Open the note and click **Comments** in the toolbar. The **Comments** drawer opens beside the note.
2. Type in **Add comment…** and press Return.
3. To comment on one paragraph or heading, click in it. Click **Comment** in the right margin, type, and press Return.
**Shortcut:** none
## Good to know
- ⇧Return starts a new line in a comment. Return sends it.
- Blocks with comments show a mark in the right margin. Click it to reply, **Resolve thread** or **Delete thread**.
- The drawer lists comments on the whole note and on its blocks.
---
# Check my notes for problems
> Choose **Tools › Lint All**. Terra checks every note and reports what it finds.
Source: https://terramd.io/docs/answers/write/check-notes-for-problems
1. Choose **Tools › Lint All**.
2. A message shows how many notes Terra checked, how many have problems, and the count of errors, warnings and hints.
3. To see one note's problems, open it and click the issue count at the bottom of the note. It reads **No issues** when the note is clean. The **Diagnostics** drawer lists each problem.
**Shortcut:** none
## Good to know
- Lint All only reports. It doesn't change your notes.
- Blocks with problems show a mark in the left margin. Hover it to read the problem.
---
# Link to another note
> Type `@`, then pick the note from the list.
Source: https://terramd.io/docs/answers/link-and-cite/link-to-a-note
1. In your note, type `@` at the start of a line or after a space.
2. Type part of the other note's title.
3. Pick it under **Note**. Terra adds a link.
4. Click the link to open that note. Hover it to preview it.
**Shortcut:** none
## Good to know
- Right-click a link for **Open in side**, **Edit link…**, **Unlink** and **Copy link**.
- In the note's Markdown, a link is saved as the note's title inside double square brackets.
- A link to a note that doesn't exist shows as broken text and doesn't open anything.
---
# Tag a note
> Click **Tag** in the note's toolbar and pick or create a tag.
Source: https://terramd.io/docs/answers/link-and-cite/tag-a-note
1. Open the note. Click **Tag** (#) in the toolbar at the top of the note.
2. Type to search your tags. Pick one, or choose **Create tag** to make a new one.
3. Terra adds the tag to the note's properties.
**Shortcut:** none
## Other ways
- Type `#` and the tag in the text, then a space, like `#reading`. It becomes a tag chip and tags the note. Existing tags are suggested as you type.
## Good to know
- Use `/` to nest tags, like `#project/alpha`.
- Click a tag chip to search for every note with that tag.
- To rename, merge or style tags, choose **Tools › Tag Manager…**.
---
# Cite a source
> Type `/` and choose **Citation**, then pick the source.
Source: https://terramd.io/docs/answers/link-and-cite/cite-a-source
1. Put the caret where the citation goes. Type `/citation` and press Return. Terra types `[@`.
2. Type part of the source's title, author or citation key.
3. Pick the source. The citation appears in the text, and a **References** list builds at the end of the note.
**Shortcut:** none
## Other ways
- Type `[@` yourself, or type `@` and pick from the **Cite** group.
## Good to know
- Sources are notes whose type is paper, article, book or report, and any note with a citation key.
- A source without a key gets one the first time you cite it.
- To add a source from a DOI or ISBN, click **New…** in the toolbar and choose **Add reference**. Terra saves it in your References folder.
---
# Add a reference by DOI or ISBN
> Click **New…** in the toolbar, choose **Add reference**, then enter the DOI or ISBN and click **Look up**.
Source: https://terramd.io/docs/answers/link-and-cite/add-a-reference
1. Click **New…** in the toolbar and choose **Add reference**.
2. Paste a DOI or an ISBN, then click **Look up** or press Return.
3. Check the details Terra found. You can change the **Title**.
4. Click **Add reference**. The new note opens. It lives in the **References** folder.
**Shortcut:** none
## Other ways
- To bring in many at once, use **Settings › Import** and choose **Zotero / Mendeley**.
## Good to know
- Terra treats anything shaped like an ISBN as a book and everything else as a DOI.
- Other identifiers and web addresses aren't looked up. To keep a webpage, use **Save to Terra**.
- The note gets the authors, date, publisher or journal, and the link to the source.
---
# Embed a database view in a note
> Type `/database`, then pick the database to show.
Source: https://terramd.io/docs/answers/link-and-cite/embed-a-database-view
1. On an empty line, type `/database` and press Return. **Insert database** opens in the note.
2. Search for a database and click it. Or click **New database**, type a name and click **Create database**.
3. The database appears in the note.
**Shortcut:** none
## Good to know
- The block shows the database itself, not a copy.
- A database created here also appears in the sidebar.
- If the database is deleted, the block shows **Database not found**. Click **Pick another** or **Remove**.
---
# Create or edit templates
> Open **Templates** in the sidebar and click **Create template**.
Source: https://terramd.io/docs/answers/templates-and-code/create-a-template
1. Click **Templates** in the sidebar.
2. Click **Create template** and type a **Name**. **Path** fills in from it. **Description**, **Category** and **Aliases** are optional.
3. Click **Create**.
4. To write the template, open its card's menu and choose **Edit template**. Changes save as you type. Click **Close** when you're done.
**Shortcut:** none
## Other ways
- Turn a note into a template: right-click it in the note list and choose **Save as template…**. Enter a slug or path, click **Next**, then name it.
## Good to know
- `{{title}}` and `{{date}}` fill in the new note's title and today's date. The editor marks problems as you type.
- **Edit details** changes the name, path and other details. **Delete** removes the template.
- Templates under **Connectors and imports** shape the notes Terra creates for you. **Reset to default** restores one.
---
# Start a note from a template
> Choose **File › New from Template…**, or press ⇧⌘N, and pick a template.
Source: https://terramd.io/docs/answers/templates-and-code/new-note-from-template
1. Choose **File › New from Template…**, or press ⇧⌘N.
2. Type to search, then click a template or press Return.
3. If the template asks for values, fill them in and click **Apply template**. Fields marked **Required** must be filled.
4. The new note opens.
**Shortcut:** ⇧⌘N
## Other ways
- Click **New…** in the toolbar and choose **New from template…**. The note goes in your Inbox folder.
- Right-click a folder or database in the sidebar and choose **New from template…** to add the note there.
## Good to know
- From the File menu, the note goes in the same folder as the note you have open.
- Click **Group** in the picker to sort templates by category.
---
# Run code in a note
> Set a code block to **Python · runnable** or **R · runnable**, then click **Run cell**.
Source: https://terramd.io/docs/answers/templates-and-code/run-code
1. Add a code block: type `/code` and choose **Code block**.
2. In Edit mode, click the language label at the block's top right. It reads **Plain** at first. Choose **Python · runnable** or **R · runnable**.
3. Write your code and click **Run cell**. The output appears under the code.
**Shortcut:** none
## Good to know
- Terra runs code with the Python or R on your Mac. Python needs `ipykernel`, and R needs `IRkernel`.
- **Stop cell**, **Restart kernel** and **Clear output** sit beside **Run cell**.
- Code in a note that came from outside your library waits until you click **Enable execution**. That lasts until you quit.
- After a relaunch, old output is marked stale until you run the cell again.
---
# Make folders and move notes
> Click **New…** in the toolbar and choose **New folder**. To move notes, select them and use **Move to**.
Source: https://terramd.io/docs/answers/organize/make-folders-and-move-notes
1. Click **New…** in the toolbar and choose **New folder**.
2. Type a **Folder name** and click **Save**. The folder appears under **Folders** in the sidebar.
3. To move notes, open the folder or database they're in and select them.
4. In the selection bar, click **More actions**, choose **Move to** and pick a folder.
**Shortcut:** none
## Other ways
- Right-click a folder in the sidebar and choose **New subfolder**.
- Drag a note from the list beside the sidebar onto a folder under **Folders**.
- Drag a folder onto another folder to put it inside.
## Good to know
- Folder names can't contain slashes.
- **Move to folder…** on a saved view only groups views in the sidebar. It doesn't move notes.
---
# Add files from Finder
> Drag files from Finder onto a folder in the sidebar.
Source: https://terramd.io/docs/answers/organize/add-files-from-finder
1. Select files or folders in Finder.
2. Drag them onto a folder under **Folders** in the sidebar. Dropped on the window instead, they go to **Inbox**.
3. If Terra asks, check the list and click **Add**.
4. One file opens right away. For several, click **Show** on the message that says how many were added.
**Shortcut:** none
## Other ways
- Drop onto a note's row in a database to add the files to that note's folder.
- Drop or paste files into a note's text to attach them to that note. Images appear in the text; other files become links.
## Good to know
- Terra copies files. The originals stay where they are.
- PDFs, images, EPUB books, spreadsheets, HTML pages and Markdown open in Terra. Other files get a note that links to them.
- Files over 256 MB are skipped.
- If a dropped folder's name is taken, choose **Create new folder** or **Merge**.
---
# Browse my files as a tree
> Use the **Folders** section of the sidebar. Click a folder to open it and show the folders inside.
Source: https://terramd.io/docs/answers/organize/browse-files-as-a-tree
1. Find **Folders** in the sidebar. If the sidebar is hidden, press ⌘\.
2. Click a folder. Its notes open, and the folders inside it show below it.
3. Click the folder again to fold it.
**Shortcut:** ⌘\ shows or hides the sidebar.
## Other ways
- Hover a folder and click **New note here** to add a note to it.
## Good to know
- The tree shows folders only. A folder's notes appear when you open it.
- **Inbox** and **Trash** aren't in the tree. They have their own rows in the sidebar.
- Folders start folded each time Terra opens.
---
# Edit a note's properties
> Click a value under the note's title to change it. Click **Add property** to add one.
Source: https://terramd.io/docs/answers/organize/edit-note-properties
1. Open the note. Its properties sit under the title.
2. Click a value to change it. An empty value reads **Empty**.
3. To add a property, click **Add property**, then **New property** or **Existing property**.
4. For a new one, type a **Property name** and click a type, such as Text, Date or Select.
**Shortcut:** ⌥⌘I shows or hides the **Properties** panel.
## Other ways
- Click **Show properties** at the top of the note to edit them in the **Properties** panel beside it.
## Good to know
- Properties are saved at the top of the note's Markdown file.
- Clearing a value leaves the property on the note, empty.
- To rename a property or change its type for every note, use **Tools › Property Manager…**.
---
# Manage properties and types
> Choose **Tools › Property Manager…** and select a property to edit it.
Source: https://terramd.io/docs/answers/organize/manage-properties-and-types
1. Choose **Tools › Property Manager…**, or click **Property manager** in the toolbar.
2. Click **New property** to add one, or select a property in the list.
3. In its details, set the **Type**, **Color**, **Options** and description. Turn off **Show in note properties** to hide it on notes.
4. For types, switch the menu at the top left from **Properties** to **Types**. Click **New type**, then pick a **Source model** and the fields its cards show.
**Shortcut:** none
## Other ways
- In a database's properties menu, choose **Manage properties**.
## Good to know
- Changing a property's type asks first. Values that don't fit the new type may be blanked.
- Renaming a property doesn't change notes that already use it. Their values stay under the old name.
- Built-in properties, such as title and tags, can't be renamed, retyped or deleted.
- Changes save on their own. There is no undo.
---
# Rename an option everywhere
> Open the option's picker on any note, click **⋯** beside the option and choose **Rename option...**.
Source: https://terramd.io/docs/answers/organize/rename-an-option-everywhere
1. Click a select or multi-select value on a note, or in a database cell, to open its picker.
2. Click **⋯** beside the option and choose **Rename option...**.
3. Type the new name and press Return. Every note with that option changes.
**Shortcut:** none
## Other ways
- In **Tools › Property Manager…**, select the property, click the option under **Options** and choose **Rename**.
- To fold one option into another, choose **Merge into...** and pick the one to keep. Terra shows how many notes will change and asks first.
## Good to know
- Renaming to a name that already exists merges the two options. Merging can't be undone.
- **Delete option** only removes it from the list. Notes keep the value, shown under **Not an option yet**.
- A note's type is renamed in **Property Manager › Types**, not here.
---
# Rename, recolor or merge tags
> Choose **Tools › Tag Manager…**, then click **⋯** beside the tag.
Source: https://terramd.io/docs/answers/organize/manage-tags
1. Choose **Tools › Tag Manager…**, or click **Tag manager** in the toolbar.
2. Find the tag. Type in **Find a tag** to narrow the list.
3. Click **⋯** beside it and choose **Rename** or **Color**. Press Return to keep a new name.
4. To merge, choose **Merge into** in the same menu and pick the tag to keep. Click **Merge** to confirm.
**Shortcut:** none
## Other ways
- Right-click any tag pill to change its color, or choose **Open tag page**, **Search tag** or **Copy tag**.
- Renaming a tag to the name of another tag merges the two.
## Good to know
- Renaming and merging update every note that has the tag in its tags property. Merging can't be undone.
- A `#tag` typed in a note's text isn't changed.
- **Delete tag** appears only for tags that no note uses.
---
# Change a note's or folder's icon
> Right-click the note's title or the folder's row and choose **Change icon**.
Source: https://terramd.io/docs/answers/organize/change-an-icon
1. For a note, right-click its title. For a folder, right-click it under **Folders** in the sidebar.
2. Choose **Change icon**.
3. Type in **Search icons** to narrow the list, then click an icon.
**Shortcut:** none
## Other ways
- Databases, views and the sidebar's built-in rows have **Change icon** on their right-click menus too.
## Good to know
- Icons come from Terra's own symbol set. Emoji aren't offered.
- A note's icon is saved in the note and shows beside it in databases.
- A folder's icon is kept on this Mac only. Moving the folder resets it.
---
# Find my favorites
> Click **Favorites** in the sidebar's **Databases** section.
Source: https://terramd.io/docs/answers/organize/find-your-favorites
1. To mark a note, open it for editing and click **Add to Favorites** in its toolbar.
2. To see every favorite, click **Favorites** in the sidebar's **Databases** section.
**Shortcut:** none
## Other ways
- Choose **View › Open Favorites**.
- Select notes in a database, click **More actions** in the selection bar and choose **Add to Favorites**.
## Good to know
- A favorite is a note with the tag `favorite`. Removing the tag removes it from Favorites.
- **Add to Favorites** is off while a note is in reading mode. Press ⌘E to edit.
- The same button reads **Remove from Favorites** on a favorite.
---
# Restore or permanently delete trashed notes
> Open **Trash** in the sidebar, right-click the note and choose **Put Back**.
Source: https://terramd.io/docs/answers/organize/restore-trashed-notes
1. Click **Trash** in the sidebar's **Databases** section.
2. To restore a note, right-click it and choose **Put Back**. It returns to the folder it came from.
3. To clear Trash for good, click **Empty trash** in the header, then **Empty trash** again to confirm.
**Shortcut:** none
## Other ways
- To restore several notes, select them and hold ⌥. **Delete** in the selection bar changes to **Put Back**.
- To remove only some notes for good, select them and click **Delete**. Terra doesn't ask first.
## Good to know
- Deleting from Trash removes the file from disk. It doesn't go to the macOS Trash and can't be undone.
- Notes older than 30 days are removed when you open Trash. To change the limit, click **View preferences** in the Trash header and set **Empty Trash automatically**.
- If a note's name is taken when you put it back, Terra gives it a new one.
---
# Create a database
> Click **+** beside **Databases** in the sidebar, give it a name and what it collects, then click **Create**.
Source: https://terramd.io/docs/answers/databases/create-a-database
1. In the sidebar, click **+** beside **Databases**.
2. Type a **Name**.
3. In the menu below it, pick **query** or **folder**.
4. Type what it collects. A query looks like `tag:project type:paper`. A folder looks like `Projects/Active`.
5. Click **Create**. The database opens as a Table.
**Shortcut:** none
## Other ways
- Choose **File › New Database**, or click **New…** in the toolbar and choose **New database**. Terra opens a database named **Untitled**. Click **View preferences**, open the **Database** tab and set its **Assembly**. To name it, right-click it in the sidebar and choose **Rename**.
## Good to know
- A database doesn't hold notes. It shows every note that matches its query or sits in its folder, and stays up to date as notes change.
- You can change a query later under **View preferences › Database › Assembly**, as **Filter** conditions or **SQL**. A folder database always shows its folder.
- To nest a database under **Tasks**, **Calendar** or **Links**, add a child database instead.
---
# Add a note to a database
> Right-click the database in the sidebar and choose **New note**.
Source: https://terramd.io/docs/answers/databases/add-a-note-to-a-database
1. In the sidebar, right-click the database.
2. Choose **New note**.
3. The note opens. Terra puts it in the database's folder, or gives it the tag, type or status its query starts with, so the database picks it up.
**Shortcut:** none
## Other ways
- On a Board, click **Add note** at the foot of a column, type a title and press Return. The note takes that column's value.
- To add a note you already have, give it what the database collects: move it into the folder, or add the tag or property the query names. For a database you made, **View preferences › Database** shows what that is.
## Good to know
- A database shows the notes that match it. Take away the tag, or move the note out of the folder, and it leaves the database. The note itself stays in your library.
- Terra applies only the query's first term, and only when it's `tag:`, `type:` or `status:`. With a longer query, check that the new note matches the rest.
- On **Tasks**, the Board button reads **Add task**.
---
# Create a new view
> Open the view menu in the database header and choose **Add view**.
Source: https://terramd.io/docs/answers/databases/create-a-view
1. Open the database you want another view of.
2. Open the view menu in its header and choose **Add view**. The **+** beside it does the same.
3. A Table view named **New view** opens, with its settings beside it.
4. On the **Layout** tab, type a **Name** and pick a **Layout**: Table, Board, List, Cards, Feed, Calendar, Timeline, Map, Graph or Canvas.
5. Add filters, sorts or groups if you want them, then click **Save view**.
**Shortcut:** none for a new view. ⇧⌘V switches the current view's layout instead.
## Other ways
- Click **View preferences**, then **Add view from** the current view to pick the layout first.
- To start from a view you already have, choose **Duplicate view**. The copy is named after it, with "copy" on the end.
## Good to know
- Views live in the header's view menu, not in tabs. To keep one a click away, pin it with **Arrange header actions**.
- While the settings are open, your changes are a draft until you click **Save view**.
- Deleting the last view deletes the whole database. Terra asks first and offers Undo.
- The **Views** section in the sidebar holds saved workspace layouts, not database views.
---
# Switch a view's layout
> Open **View preferences**, pick a new **Layout** on the **Layout** tab, and click **Save view**.
Source: https://terramd.io/docs/answers/databases/switch-a-view-layout
1. Open the database and choose the view in the view menu in its header.
2. Click **View preferences** at the right end of the header.
3. On the **Layout** tab, pick a **Layout**: Table, Board, List, Cards, Feed, Calendar, Timeline, Map, Graph or Canvas.
4. Click **Save view**.
**Shortcut:** ⇧⌘V moves the current view to the next layout and saves it.
## Good to know
- A view keeps its settings for each layout, so switching back brings them back.
- While **View preferences** is open, ⇧⌘V changes the draft too. Nothing is saved until you click **Save view**.
- To keep the current layout as well, add a view instead of switching this one.
- **Trash** offers only Table and Cards.
---
# Filter, sort and group rows
> Use **Filters**, **Sort by** and **Group by** in the database header.
Source: https://terramd.io/docs/answers/databases/filter-sort-and-group
1. Open the database view.
2. Click **Filters**, then **Add condition**. Choose a field, a test such as **is** or **contains**, and a value.
3. Add more conditions, or click **Add group** for a nested set. Click the **And** between conditions to change it to **Or** or **Not**.
4. Click **Sort by** and pick a field. Choose **Ascending** or **Descending** below it.
5. Click **Group by** and pick a field. On a Board the button reads **Show boards as**, and the field sets the columns.
**Shortcut:** none
## Other ways
- In **View preferences**, the **Sort** button at the top takes several rules, each with **Empty first** or **Empty last**.
- The **Group** tab in **View preferences** adds a **Subgroup**, **Show empty groups** and **Hidden groups**.
## Good to know
- Filters, sorts and groups belong to the view. Other views of the same database keep their own.
- Changes from the header save to the view at once. While **View preferences** is open, they wait for **Save view**.
- A filter hides rows in one view. To change which notes the database holds, edit **View preferences › Database › Assembly**.
- **Clear all** in **Filters** removes every condition.
---
# Preview a row without leaving the view
> Click the row. The note opens in a peek beside the view, and the list stays where it was.
Source: https://terramd.io/docs/answers/databases/peek-at-a-row
1. In a database view, click a row or card. The note opens in a peek on the right.
2. Read or edit the note there.
3. To move the peek, click **Peek position** in its header and choose **Dock left**, **Dock right**, **Center** or **Bottom sheet**. You can also drag the header.
4. Press Esc to close it.
**Shortcut:** Esc closes the peek.
## Other ways
- **Peek position › Open in split** moves the note into a pane of its own.
- **Maximize pane** in the peek's header opens the note as a tab that fills the window.
## Good to know
- Each view chooses how rows open, under **View preferences › Opening**. Set **Open notes** to **Peek**, **Pane**, **Full** or **Properties**. With **Peek**, **Peek position** sets the side it opens on.
- **Center** and **Bottom sheet** dim the view. Click outside the peek to close it.
- **References** rows open their properties. **Links** rows open their page beside the view. A task opens in the task editor.
---
# Add a child database
> Right-click a built-in such as **Links** in the sidebar and choose **New link database**.
Source: https://terramd.io/docs/answers/databases/add-a-child-database
1. In the sidebar, right-click **Tasks**, **Calendar**, **Sprouts**, **Links** or **References**.
2. Choose the first item: **New task database**, **New calendar database**, **New sprout database**, **New link database** or **New reference database**.
3. Type a **Database name** and click **Create**.
4. The new database opens and sits under its parent in the sidebar.
**Shortcut:** none
## Good to know
- A child of **Calendar**, **Links** or **References** starts with all of its parent's notes. To narrow them, click **View preferences**, open the **Database** tab and add conditions under **Assembly**.
- A child of **Tasks** or **Sprouts** opens as a Board. Pick the notes it reads with **Sources** in its header.
- A child opens like its parent, then keeps views of its own.
- Children go one level deep. Your own databases can't have children.
---
# Save a view as a Markdown note
> Open **View preferences** and click **Save as Markdown note**.
Source: https://terramd.io/docs/answers/databases/save-a-view-as-a-note
1. Open the database and choose the view in the view menu in its header.
2. Click **View preferences**.
3. If you changed anything, click **Save view** first. The snapshot button stays off until you do.
4. Click **Save as Markdown note** in the row of buttons at the top.
5. Terra saves the note to **Inbox**, named after the database, the view and today's date. Click **Open** in the message to see it.
**Shortcut:** none
## Good to know
- The note holds a Markdown table of the view's rows and visible columns, in the view's order. Each title links to its note.
- The note is a snapshot. It doesn't change when the database does. Save again for a fresh copy.
- The view's filters decide which rows appear. A snapshot holds up to 1,000 rows.
---
# Write a query
> Choose **File › New Query**, write a SELECT statement, and press ⌘↩ to run it.
Source: https://terramd.io/docs/answers/databases/write-a-query
1. Choose **File › New Query**, or click **+** beside **Queries** in the sidebar.
2. Name it in the **Untitled query** field at the top.
3. Write SQL in the editor. The **Schema** list shows what you can read, such as `v_notes` and `v_tags`. For example: `SELECT title, updated FROM v_notes ORDER BY updated DESC`.
4. Press ⌘↩, or click **Run query**, to see the results.
5. Click **Save query**. It appears under **Queries** in the sidebar.
**Shortcut:** ⌘↩ runs the query while you're typing in the editor.
## Other ways
- Describe what you want in the line under the name, such as "notes tagged project", and click **Generate**. Your AI provider writes the SQL. Read it before you run it.
- **Tools › Run Query** runs the query in the focused pane.
## Good to know
- Queries only read. They can't change your notes.
- **View** switches between Query, Results, Sheet and Chart.
- **Export results as Markdown** copies the results as a table, ready to paste into a note.
- **Open as Database** makes a database from the notes the query found. Save the query first.
---
# Manage tasks, subtasks and repeats
> Click **Tasks** in the sidebar, add tasks with **Add task**, and click a card to edit it.
Source: https://terramd.io/docs/answers/tasks/manage-tasks
1. Click **Tasks** in the sidebar. Your tasks show as a Board, in **Open**, **In progress**, **Done** and **Cancelled** columns.
2. Click **Add task** at the foot of a column, type the task and press Return.
3. Click a card to open the task. Pick its status, and add **Due**, **Start**, **Priority** and more from **Properties**.
4. Click **Add subtask**, type it and press Return. Press Esc when you're done.
5. Drag a card to another column to change its status.
**Shortcut:** none
## Other ways
- Type `/todo` in any note and choose **To-do**. Every checkbox line in a note is a task.
To make a task repeat, write the rule on the task's line in its note, after ` ::: `. For example:
`- [ ] Water the plants ::: due=2026-10-06 repeat=weekly`
Mark it **Done** on the Board or in the task, and Terra adds the next one below it with the next due date. Other rules include `daily`, `monthly`, `yearly` and `every:2w`. The next date counts from `due`. Add `repeat-on=completion` to count from the day you finish instead.
## Good to know
- Each task is a line in a note. **Add task** writes to a note named after the database in **Inbox**. Click the note's name beside the title to pick another.
- Subtasks are indented checkboxes under their task.
- Ticking a repeating task's checkbox inside the note doesn't add the next one. Mark it done on the Board or in the task.
- **Open task in note** jumps to its line. **Move task to note** moves it to another note.
---
# Pull tasks out of note text
> Write each task as a checkbox line in a note. Terra lists it in **Tasks** without any extra step.
Source: https://terramd.io/docs/answers/tasks/pull-tasks-from-notes
1. In a note, type `/todo` and choose **To-do**. To turn a line you already wrote into a task, type `/todo` on it and choose **To to-do** instead.
2. Type the task.
3. Click **Tasks** in the sidebar. The task is there.
4. Change its status or fields on **Tasks**, and Terra writes the change back to the line in the note.
**Shortcut:** none
## Good to know
- Add fields at the end of the line, after ` ::: `, such as `::: due=2026-10-06 priority=high`. The line turns into a task card in the note.
- Checkbox lines inside code blocks aren't tasks.
- To have a task database read only some notes or folders, choose them under **Sources** in its header.
---
# See tasks and events by date
> Click **Calendar** in the sidebar.
Source: https://terramd.io/docs/answers/tasks/see-tasks-by-date
1. Click **Calendar** in the sidebar.
2. Open **Display mode** in the header and choose **Month**, **Week**, **Day** or **Agenda**.
3. Tasks show on their due date. Notes with a `start-time` property show as events.
4. Click an item for its details. For a task, change its **Status** or **Priority** there. **Open note** opens the note it lives in.
5. Drag a task or event to another day to move it. For a task, that changes its due date.
**Shortcut:** none
## Other ways
- On **Tasks**, open **Filters**, click **Quick filter** and choose **Today**, **This week** or **Overdue**.
- Any database with a date property can show as a Calendar or Timeline. Switch one of its views to that layout.
## Good to know
- The calendar shows tasks due from about six months back to six months ahead.
- To place notes by a different property, choose it as **Start** under **View preferences › Dates**.
---
# Read PDFs, books and images
> Drag the file from Finder into the Terra window. Terra adds it to your library and opens it.
Source: https://terramd.io/docs/answers/read-and-capture/read-pdfs-books-and-images
1. Drag a PDF, EPUB or image from Finder into the Terra window. It goes to Inbox, or to a folder if you drop it on one in the sidebar.
2. A single file opens right away. For several, click **Show** on the notice to see them.
3. In a PDF, use **Previous page**, **Next page**, **Zoom in**, **Zoom out** and **Page display** in the reader's toolbar.
4. To highlight, click **Highlight text** and drag across the words. Drag across the same words again to remove it.
5. To draw on a page, click **Markup**. Right-click it to pick a different pen.
6. In a book, pick a chapter from the table of contents beside the text.
**Shortcut:** none
## Other ways
- PDFs and images you copy into your library folder in Finder are added the next time the library opens.
## Good to know
- PDF highlights are saved into the PDF itself and quoted under **Highlights** in its note. Click **Show note** to see the note beside the page.
- Books and images can't be highlighted.
- To open PDFs or images in another app instead, go to **Settings › Open With** and change **PDFs** or **Images**.
---
# Open a webpage
> Click a link in any note. It opens in Terra's browser, next to your notes.
Source: https://terramd.io/docs/answers/read-and-capture/open-a-webpage
1. Click a link in a note. ⌥-click opens it in your default browser instead.
2. To go to an address, choose **View › New Webpage**.
3. Type the address in the bar at the top of the window and press Return.
4. Use **Back**, **Forward** and **Reload** beside the address bar.
## Other ways
- Click **+** in the sidebar's **Web** section.
- Click **New…** in the toolbar and choose **New tab**.
- Right-click a link and choose **Open in Terra**, **Open in system browser** or **Copy link**.
**Save it to your library:** open **Page options** and choose **Save to Terra**. Terra saves a link note to Inbox with a snapshot of the page.
## Good to know
- The address bar doesn't search. Type a web address.
- Opening a page that's already open switches to its tab.
- Web tabs stay open between launches. Right-click a tab to pin it, open it beside your note, or close it.
- To send every link to your default browser, go to **Settings › Open With › Web links**.
---
# Save a webpage to my library
> Open the page in Terra, then choose **Page options › Save to Terra**.
Source: https://terramd.io/docs/answers/read-and-capture/save-a-webpage
1. Open the page in Terra's browser.
2. Click **Page options** in the bar at the top of the window.
3. Choose **Save to Terra**.
4. Terra saves a link note with the page's text to Inbox. Click the **Saved to** notice to open it.
**Shortcut:** none
## Other ways
- Right-click the page's tab in the sidebar's **Web** section and choose **Save to Terra**.
## Good to know
- Every saved page also appears in the **Links** database.
- If Terra can't read the page, the note still keeps its address so you can open the live page.
- You can't save only part of a page.
- ⌘S doesn't save a webpage. It saves your edits in the open note.
---
# Capture a quick thought or link
> Press ⌃⌥⌘N from any app, or choose **File › Quick Capture…**, then type and press ⌘↵.
Source: https://terramd.io/docs/answers/read-and-capture/capture-a-quick-thought
1. Press ⌃⌥⌘N, or choose **File › Quick Capture…**. Terra comes forward with the capture card.
2. Type a **Title**, **Notes**, or both.
3. To keep a link, copy its address and click **Paste**. Terra fills in **URL** and sets **Source** to **Link**.
4. Add **Tags** if you like, separated by commas.
5. Press ⌘↵ or click **Save**. The note goes to Inbox.
**Shortcut:** ⌃⌥⌘N opens it from any app. ⌘↵ saves, Esc closes.
## Other ways
- Right-click an empty part of the window and choose **Paste as note** to turn your clipboard into a new note in Inbox.
- Add **Quick capture** to the toolbar with **Customize toolbar…**.
## Good to know
- A library must be open.
- A captured link keeps the address, not the page. To keep the page's text, use **Save to Terra** in Terra's browser.
- Pasting with ⌘V into a field adds plain text. Only the **Paste** button recognizes a link.
- Choose **Email** or **Message** under **Source** to note who it came from.
---
# Add a spreadsheet
> In a note, type `/sheet` and choose **Sheet**.
Source: https://terramd.io/docs/answers/canvas-and-sheets/add-a-spreadsheet
1. Click in a note where you want the sheet.
2. Type `/sheet` and choose **Sheet**. A small grid appears.
3. Click a cell and type. Start with `=` for a formula, such as `=SUM(A1:A4)`.
4. Right-click a cell for formatting, cut, copy and paste.
**Shortcut:** none
## Other ways
- Drag an `.xlsx` or `.csv` file from Finder onto Terra, away from any open note. Terra copies it into **Inbox** and opens it as a full spreadsheet, with a toolbar, formula bar and sheet tabs. Your edits save back to the file.
- In a query, set **View** to **Sheet**, then click **Save sheet to Library** to keep the results as an `.xlsx` file.
## Good to know
- A sheet made with `/sheet` lives inside its note and has 6 columns and 8 rows. For anything bigger, use a spreadsheet file.
- **Table** in the same menu inserts a plain Markdown table, not a sheet.
---
# Make a canvas
> Click **New…** in the toolbar and choose **New canvas**.
Source: https://terramd.io/docs/answers/canvas-and-sheets/make-a-canvas
1. Click **New…** in the toolbar and choose **New canvas**.
2. An empty canvas named **Untitled canvas** opens. It's listed under **Databases** in the sidebar.
3. In the canvas tools, click **Text**, or open **Shapes** and choose one. Terra places it in the middle of the view. Drag it where you want it.
4. To join two shapes, pick **Connector** and drag from one to the other.
5. To make a text box a real note, select it and click **Promote to Note**.
**Shortcut:** none
## Other ways
- Right-click an empty part of the sidebar, or the **Databases** heading, and choose **New canvas**.
- To lay out an existing database's notes, switch one of its views to the **Canvas** layout. Then drag notes from the note list beside the sidebar onto the canvas.
## Good to know
- Drag empty space to move around. Scroll or pinch to zoom. Shift-drag to select several items.
- A canvas is a database with a **Canvas** view. Shapes, text and drawings live only on the canvas. Notes on it stay ordinary notes.
- **Export Canvas** saves a `.terra.canvas` file. **Import Canvas** brings one in.
- To rename a canvas, right-click it in the sidebar and choose **Rename**.
---
# See a note's connections
> Right-click the note in the note list and choose **Graph of this note**.
Source: https://terramd.io/docs/answers/canvas-and-sheets/see-a-notes-connections
1. Find the note in the note list beside the sidebar.
2. Right-click it and choose **Graph of this note**.
3. The graph opens on that note and the notes directly connected to it.
4. Click a note once to focus it. Click it again to open it.
**Shortcut:** none
## Other ways
- Click **Graph** in the sidebar to see your whole library.
- Any database can show its notes as a graph. Switch one of its views to the **Graph** layout.
## Good to know
- **View preferences › Relationships** sets which links draw lines, such as **Wikilinks**, **Embeds** and **Citations**.
- **View preferences › Graph** holds **Hide orphans**, **Gravity** and the other layout controls. **Pause layout** in the header stops the motion.
- With a note focused, **Save neighborhood** keeps the graph on it. **Clear neighborhood** shows everything again.
---
# Connect an AI provider
> Open **Settings › AI**, add your provider under **Add provider**, then click **Connect** on its row.
Source: https://terramd.io/docs/answers/ai/connect-an-ai-provider
1. Press ⌘, to open Settings, then choose **AI**.
2. Under **Add provider**, click the provider you use. It joins the **Providers** list.
3. Click **Connect** on its row.
4. Paste your **API key** and click **Connect**. Some providers sign you in through your browser instead, and a local provider needs no key.
5. Terra asks you to confirm the connection. Click **Allow**.
6. Under **Defaults**, choose the provider and **Model** for **Chat**.
**Shortcut:** ⌘, opens Settings.
## Good to know
- Keys are kept in the macOS Keychain, not in your library.
- Changes save as you make them. There's no Save button.
- **Disconnect** stops Terra from using a provider. **Remove provider** takes it off the list.
- Each library has its own AI settings, so a library must be open.
---
# Chat with AI about my notes
> Click **AI conversations** in the toolbar, type in **Ask anything**, and press Return.
Source: https://terramd.io/docs/answers/ai/chat-about-your-notes
1. Click **AI conversations** in the toolbar. For a full-page chat, click **Ask** in the sidebar instead.
2. To include a note, open the **…** menu beside the message box and choose **On screen** for the note you have open, or **Search library** to find another. On the **Ask** page, this menu is **Attach**.
3. Type your question in **Ask anything** and press Return.
4. To use a different model, click the model name under the message box.
**Shortcut:** none
## Other ways
- In a note, click **AI** in the editor's toolbar for **Continue writing**, **Improve writing**, **Fix grammar** or **Summarize**. Select text first to improve or fix it.
## Good to know
- Connect a provider first. Until you do, the panel offers **Open AI settings**.
- **New chat** starts over. **Chat history** lists earlier chats, which are saved in your library.
- **Make a note** turns the chat into a note in Inbox.
- The assistant can read and edit your notes. You choose how much it does on its own.
---
# Control what the agent can change
> Pick a mode from the chat's message box: **Ask for approval**, **Approve for me** or **Full access**.
Source: https://terramd.io/docs/answers/ai/control-what-the-agent-can-change
1. Open **AI conversations**.
2. Open the **…** menu beside the message box and choose **Mode**. On the **Ask** page, click the mode button beside the message box instead.
3. Pick **Ask for approval**, **Approve for me** or **Full access**.
4. Raising the mode asks you to confirm. Click **Allow**.
5. In **Ask for approval**, each read or edit waits as a card in the chat. Click **Approve** or **Deny**.
**Shortcut:** none
## Other ways
- On a waiting card, click **Edit before approving** to change an edit first, or **Allow reads in this chat** to let later reads through.
## Good to know
- **Approve for me** lets reads and edits run on their own. **Full access** also opens web pages without asking.
- Every edit is listed under **Chat options › Changes**. Click **Revert**, or **Revert all**, to undo.
- The mode applies to the whole library on this Mac. Lowering it never asks.
- Outside **Full access**, Terra asks each time before the assistant opens a web page.
---
# Bring in meeting notes
> Open **Settings › Integrations** and click **Configure** beside **Granola**.
Source: https://terramd.io/docs/answers/connect-and-import/bring-in-meeting-notes
1. Open **Settings › Integrations** and click **Configure** beside **Granola**.
2. To bring in one meeting, choose **Import**, paste its **Share link**, and click **Import**.
3. To keep meetings in step, choose **Sync**, paste your **Personal API key**, and click **Connect**.
4. Click **Sync** beside **Sync now** to pull recent meetings.
5. Turn on **Scheduled sync** to pull new meetings in the background, and set **Sync every**.
**Shortcut:** none
## Other ways
- Choose **Template** to change how meeting notes are laid out.
## Good to know
- Meetings land in a folder named Meetings. Importing one again updates its note instead of making a copy.
- When a meeting changes at the source, syncing replaces that note's text, including your edits.
- Scheduled sync stops when you quit. Turn it on again after you reopen Terra.
- **Disconnect** removes your key from the Keychain.
---
# Import notes from another app
> Open **Settings › Import**, pick the app your notes come from, choose its export, then click **Start import**.
Source: https://terramd.io/docs/answers/connect-and-import/import-notes
1. Open **Settings › Import**.
2. Pick the app your notes come from. For a folder of .md files from anywhere, pick **Plain markdown**.
3. Click **Browse** and choose what the tile asks for, such as a **.zip export** or a **.enex export**.
4. Under **Conflict policy**, choose **Skip existing**, **Keep both (suffix)** or **Replace**.
5. Click **Preview contents** to check what will come in, then click **Start import**.
**Shortcut:** none
## Other ways
- Right-click an empty part of the sidebar and choose **Import library…**.
## Good to know
- Each source lands in its own folder inside **Imported**, shown under **Destination**.
- Progress and a summary appear in the drawer at the bottom of the window. You can keep working while it runs.
- **Zotero / Mendeley** takes a BibTeX, RIS or CSL-JSON export and turns each entry into a reference note.
---
# Change the theme or accent color
> Open **Settings › Appearance** and click a theme.
Source: https://terramd.io/docs/answers/settings/change-the-theme
1. Choose **Terra › Settings…**, or press ⌘,.
2. Click **Appearance**.
3. At the top, pick **Light**, **Dark** or **System**.
4. Under **Theme**, click a card. If a card has flavors, right-click it to pick one.
5. Under **Accent**, click a swatch.
**Shortcut:** none. ⌘, opens Settings.
## Other ways
- Choose **View › Appearance › Light Mode** or **Dark Mode**.
## Good to know
- Light, Dark and System apply to every library. The theme and accent belong to the library that's open.
- Picking a new theme resets the accent to that theme's own default.
- The **+** card after the themes starts a theme of your own.
---
# Change fonts and text size
> Open **Settings › Appearance** and scroll to **Fonts** and **Display**.
Source: https://terramd.io/docs/answers/settings/change-fonts-and-text-size
1. Choose **Terra › Settings…**, or press ⌘,.
2. Click **Appearance** and scroll to **Fonts**.
3. Type the name of a font on your Mac in **UI font**, **Body font**, **Heading font** or **Monospace font**. Leave a field blank to use the default.
4. Under **Display**, set **UI font size**, **Body font size** or **Zoom**.
**Shortcut:** none. ⌘, opens Settings.
## Good to know
- Changes apply right away. There is no save button.
- Body text goes from 8 to 22 px, interface text from 11 to 18 px, and zoom from 70% to 150%.
- These settings belong to the library that's open.
- Spacing between lines is **Line height**, in **Settings › Editor**.
---
# Change keyboard shortcuts
> Open **Settings › Hotkeys**, click a shortcut and press the new keys.
Source: https://terramd.io/docs/answers/settings/change-keyboard-shortcuts
1. Choose **Terra › Settings…**, or press ⌘,.
2. Click **Hotkeys**.
3. Click the shortcut beside a command. It changes to **Press keys…**.
4. Press the new keys. Esc cancels.
**Shortcut:** none. ⌘, opens Settings.
## Other ways
- Click **Unbind** beside a shortcut to remove it, or **Reset to default** to bring the original back.
## Good to know
- Terra doesn't warn when two commands share the same keys. Pick keys nothing else uses.
- Shortcuts are saved with the library, so each library can have its own.
- Shortcuts in the menu bar, such as ⇧⌘O for **Open Library…**, aren't listed and can't be changed.
- A shortcut without ⌘ or ⌃ doesn't fire while you're typing.
---
# Back up or sync my library with git
> Click **Versions** in the sidebar, then **Initialize version control**.
Source: https://terramd.io/docs/answers/settings/sync-with-git
1. Click **Versions** in the sidebar.
2. Click **Initialize version control**. Terra starts a git history in your library folder.
3. Click **Save version** to record every change in the library. Each save is named with its date and time.
4. Click **Pull** to bring in changes from your remote, and **Push** to send yours. The number on each shows how many saves are waiting.
**Shortcut:** none
## Good to know
- Terra uses the git installed on your Mac. Without it, Versions shows **Version control unavailable**.
- Terra never asks for or stores git passwords. Set up the remote in Terminal: name it origin, use an HTTPS or SSH address, sign in, and push once so the branch has an upstream.
- The library's `.terra` folder is never committed. It holds the search index, caches and this library's settings.
- If a pull hits conflicts, Terra tells you. Fix the marked notes, then save a version.
---
# Restore an earlier version of a note
> Click **Versions** in the toolbar, then choose **Restore version** on a save.
Source: https://terramd.io/docs/answers/settings/restore-a-version
1. Open the note and click **Versions** in the toolbar. The **Versions** drawer lists the note's saves by month.
2. Click a save to see what it changed. It opens in a new tab in the same pane.
3. Open that save's actions (…) and choose **Restore version**. Confirm.
**Shortcut:** none
## Other ways
- **View version** in the same menu shows the note as it was, without changing it.
## Good to know
- Versions need version control, which uses git on your Mac. Click **Versions** in the sidebar and choose **Initialize version control** once.
- A save is made when you click **Save version** in **Versions**. Terra doesn't make saves on its own.
- Restoring replaces the note's text. Changes since the last save are lost, so save a version first if you want to keep them.