Bring in your notes from another app
Move your notes into Terra from Obsidian, Notion, Bear, Evernote, Roam, a Markdown folder or a reference manager, or open an existing folder as it is.
You've built up years of notes somewhere else: an Obsidian vault, a Notion workspace, a stack of Evernote notebooks. Moving to a new app shouldn't mean copying pages across one at a time.
Terra gives you three ways in. If your notes are already Markdown files, you can open their folder as a Library and carry on with the same files. For other apps, Terra's importer turns an export into Markdown notes inside your Library and leaves the original untouched. And single files, such as PDFs, images or a few stray notes, you can drag straight in from Finder.
How it fits together
| Your notes are… | Best way in | Your original files |
|---|---|---|
An Obsidian vault or another folder of .md files you'll keep using | Open the folder as a Library (Step 1) | Used where they are; Terra edits them |
| In Obsidian, but you'd rather try Terra on a copy or add them to a Library you already have | Import (Steps 2 to 5) | Left alone |
| In Notion, Bear, Evernote, Roam, Apple Notes or a reference manager | Import (Steps 2 to 5) | Left alone |
| A handful of files | Drag them in (Step 6) | Left alone; Terra copies them |
Step 1Open a Markdown folder as a Library
If your notes are already Markdown files, Terra can use them where they are, with nothing converted or copied.
Press ⌘O (or choose File › Open Library…) and choose Open other…. If no Library is open yet, click Choose folder instead.
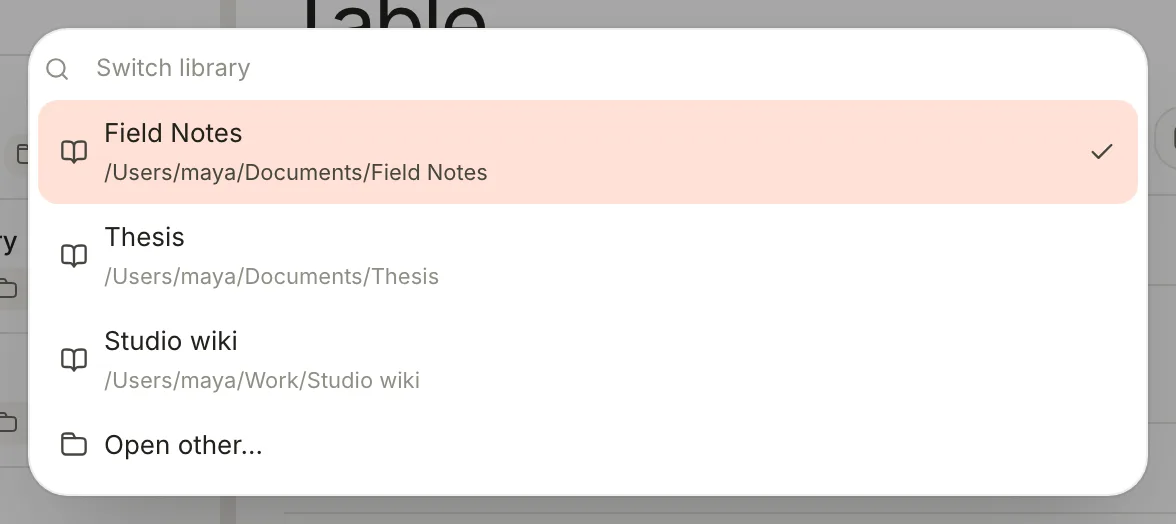
Open other… lets you pick any folder, such as your Obsidian vault. Pick your vault or notes folder and click Open.
Terra adds what it needs, a hidden .terra folder and .terra-library.toml plus an Inbox folder and Themes/default.css, and leaves your notes as they are. Notes without a header show their file name as the title, and links written [[Note name]] work in Terra too.
Step 2Open the importer
Importing makes converted copies of your notes in the Library that's open now, so you can try Terra without touching the originals.
Right-click an empty part of the sidebar, such as the space under Views, and choose Import library….
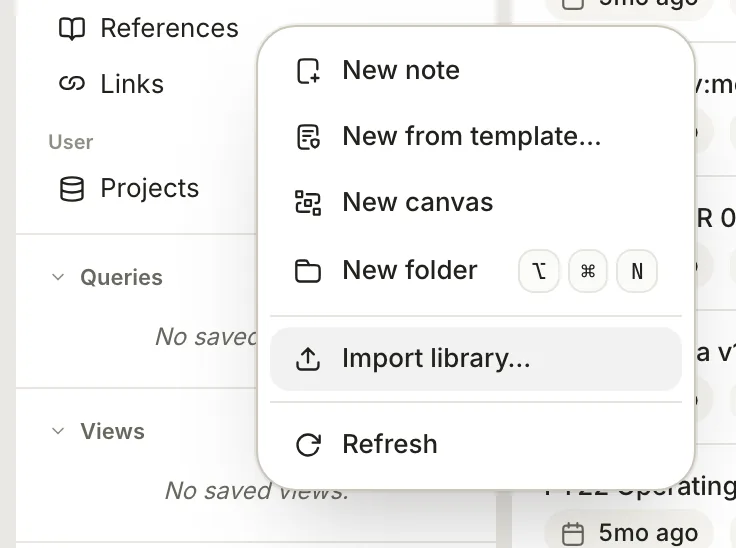
Import library… opens the importer over the window. The Import window opens. (The same options are in Settings › Import.)
Step 3Choose your source
Under Source, click the app your notes come from.
Click Browse and pick the export or folder in the window that opens, or paste its path into the box.
Destination shows where the notes will go, a folder such as
Imported/Obsidian/in your Library. You can't change it here, but you can move the notes afterwards.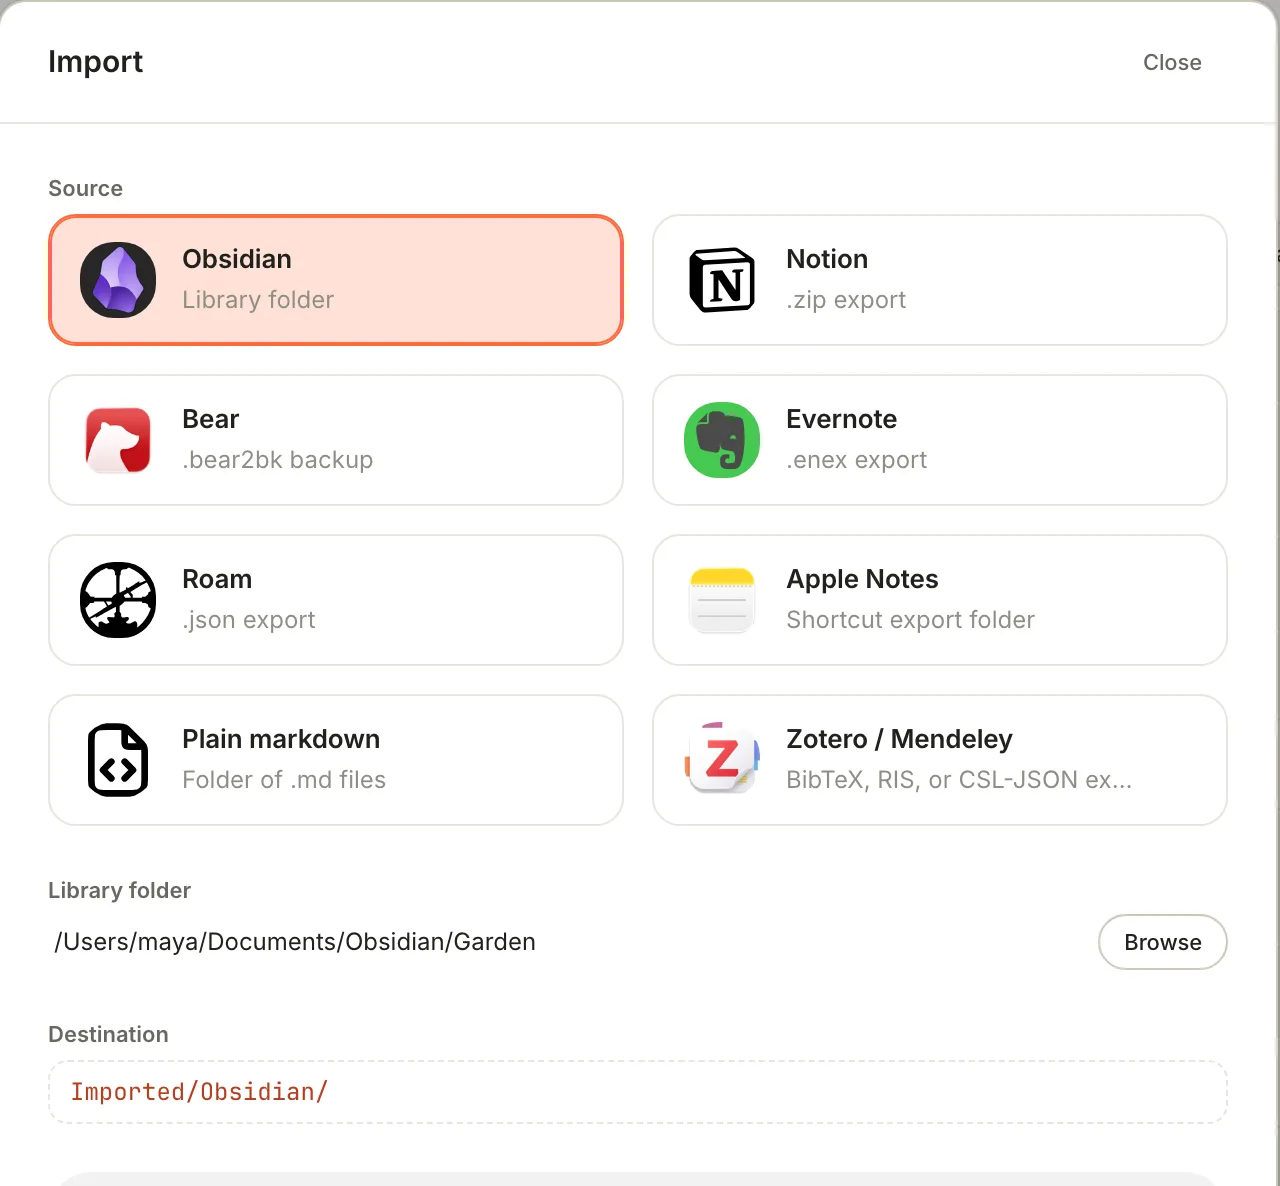
Pick a source, then its export or folder. The destination is fixed per source.
What each source expects, and what Terra does with it:
| Source | What to give Terra | What Terra does |
|---|---|---|
| Obsidian | The vault folder | Keeps each note's header, its text and your #tags. Uses each file's dates for created and updated, adds a recurrence property for the first recurring task (🔁 every …) in a note, and skips the .obsidian folder. |
| Notion | A .zip export in Markdown & CSV format | Turns page properties into note properties and fixes up callouts and links between pages. Formula, rollup and relation values come in as text. Each Notion database becomes a note with its CSV file attached, not a Terra database. |
| Bear | A .bear2bk backup | Moves tags written on lines of their own into the note's tags, and removes those lines. |
| Evernote | An .enex export | Converts each note to Markdown with its title, dates, tags and attachments. Each notebook becomes a folder. |
| Roam | A .json export | Makes one note per page. Blocks become nested bullets, block references become embeds, and key:: value lines become properties. |
| Apple Notes | A folder of Markdown files exported from Apple Notes | Reads the folder like plain Markdown. Apple Notes can't make this export itself, and Terra doesn't include an export Shortcut yet. |
| Plain markdown | A folder of .md files | Copies each note as it is, header included. |
| Zotero / Mendeley | A BibTeX (.bib), RIS (.ris) or CSL-JSON (.json) export | Makes one note per reference, with its citation key and bibliographic details as properties. See Build a research library. |
Step 4Set the options and start
Choose a Conflict policy, which decides what happens when a note of the same name is already in the destination: Skip existing (the default), Keep both (suffix) or Replace. It matters when you import the same source twice.
Leave Copy attachments on to bring linked files along, and Preserve original timestamps on to keep the dates from your old app where it has them.
To check before you commit, click Preview contents. Import preview counts the Notes and Attachments to come, and shows Needs review if some files can't be read.
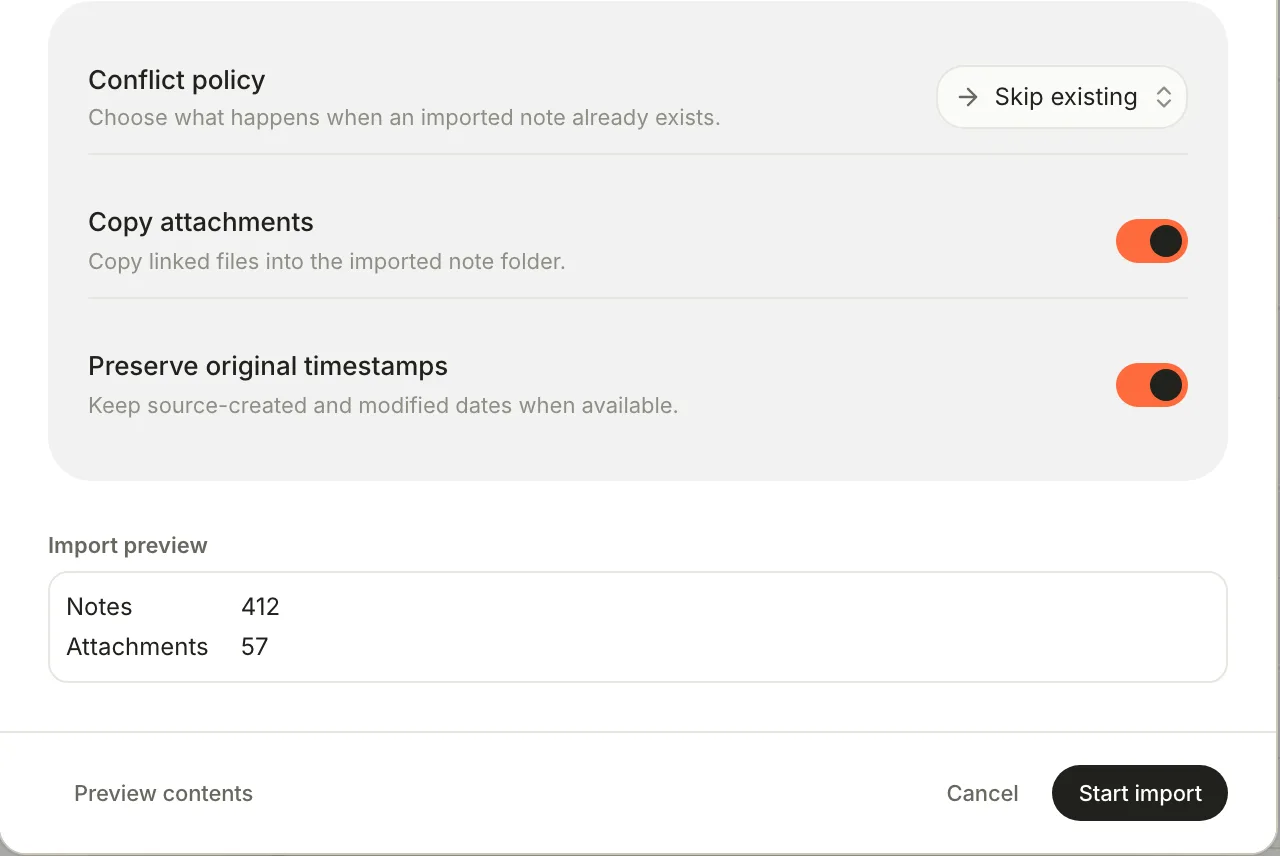
Preview contents counts what's coming before anything is written. Click Start import. The window closes, and a progress bar at the bottom of Terra's window shows Imports with the source, a count and the last note written. Click Cancel on it to stop.
Step 5Check what came in
When the bar reaches 100%, click ▾ Show details for a summary of the run.
Find the new notes under Folders in the sidebar: open Imported, then the folder for your source. Open a few notes to see how they came through.
Click Dismiss to put the summary away.
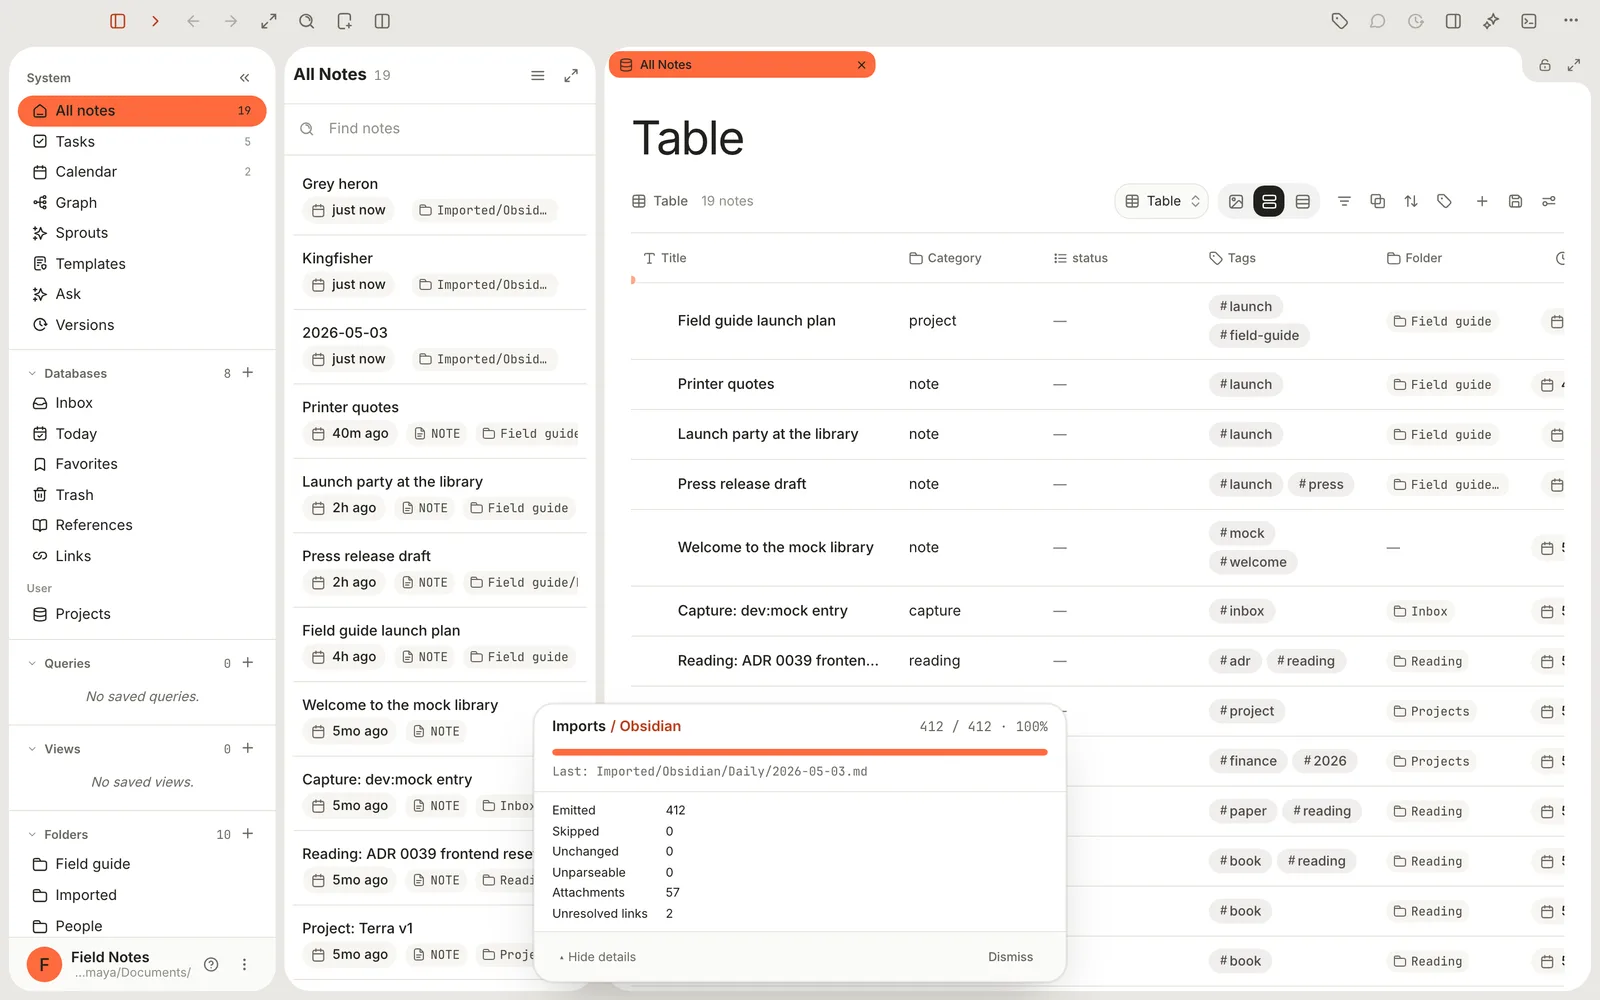
The summary stays until you dismiss it. Unresolved links counts links whose target wasn't in the import.
| In the summary | What it counts |
|---|---|
| Emitted | Notes written to your Library |
| Skipped | Notes left out because they already existed (with Skip existing) |
| Unchanged | Notes that were already identical (with Replace) |
| Unparseable | Files Terra couldn't convert |
| Attachments | Files copied |
| Unresolved links | Links to notes that weren't part of the import |
Unresolved links point at notes your old app didn't export, or that live in another place. Once the notes are in, you can move them into folders of your own, add properties and tags, or build databases around them.
Step 6Drag in individual files
For a few files rather than a whole collection, drag them from Finder onto a folder in Terra's sidebar, or into the window. Terra copies them into your Library and gives each one a note. Markdown files become notes; PDFs, EPUB books, images, spreadsheets and web pages open in Terra's viewers; anything else gets a note with a link to it.
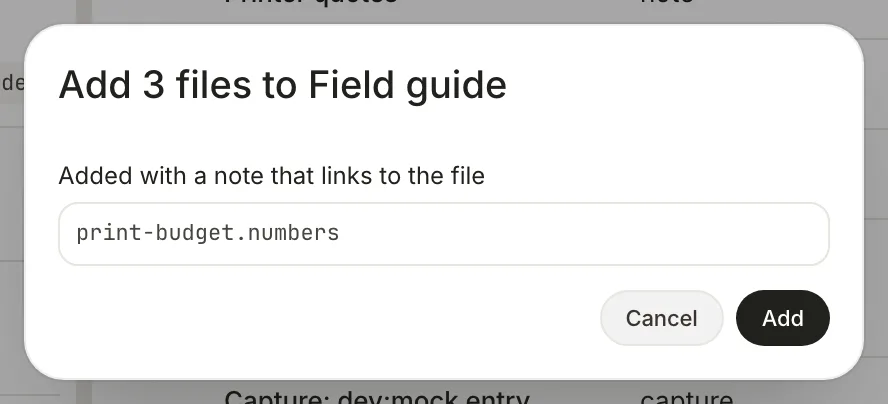
Add files from Finder covers where dropped files go, and Accepted file formats lists every format.
Troubleshooting
Preview contents and Start import are greyed out
They wait for a path. Choose a file or folder with Browse, or paste its path into the box.
"Preview failed" or "Run failed"
The message after it says what went wrong. Most often the path points at the wrong kind of file for the source, such as a folder where Notion expects a .zip export.
I imported twice and have doubled notes
With Keep both (suffix), a second import adds a copy of each note, with -2 at the end of its file name. To start over, right-click your source's folder under Imported › Move to Trash, then import once more with Skip existing.
My Notion databases came in as notes with a CSV file
That's expected: Terra doesn't turn Notion databases into Terra databases. The original CSV is attached to a note, and each row page comes in as a note of its own, usually in a folder named after the database. A folder opens as a database in Terra, so click that folder to see the rows as a table.
Images are missing from imported Obsidian notes
Only files in the same folder as a note come along. Open the vault as a Library (Step 1) to use it with all its files in place.
What's next
- Libraries — switch between your old folder and other Libraries.
- Files and folders — organise what you brought in.
- How Terra stores your notes — what Terra adds to your files.
Was this guide helpful?