# Sync and back up your Library
> Your notes are ordinary files, so any backup or sync tool works. Use Time Machine, a cloud folder or Terra's Versions, and know what each covers.
Source: https://terramd.io/docs/sync-and-back-up
Years of notes shouldn't depend on one laptop. A failed drive, a stolen bag or a careless delete can happen to anyone, and sooner or later you'll want the same notes on a second Mac.
Terra doesn't run a sync service of its own, and it doesn't need one: a [Library](https://terramd.io/docs/libraries) is a folder of ordinary files, so the backup and sync tools you already trust work with it. Terra adds one tool of its own, [Versions](https://terramd.io/docs/glossary#versions), which keeps a history of your notes you can compare and restore, and can send that history to a Git server.
> [!SUMMARY]
> - Know which files make up a Library, and what stays on each Mac
> - Back up with Time Machine or any other backup app
> - Keep a Library in iCloud Drive, Dropbox or OneDrive without losing edits
> - Save versions of your notes, then compare and restore them
> - Send your versions to a Git server and bring them back
> [!BEFORE]
> - A Library open in Terra. New to Libraries? Read [Libraries](https://terramd.io/docs/libraries) first.
> - For Versions: git on your Mac, from Apple's Command Line Tools for Xcode or from Homebrew.
> - To sync through a Git server: an account with a Git host such as GitHub, and Terminal set up to sign in to it.
> - About 15 minutes.
## How it fits together
| Option | Best for | Includes Terra's `.terra` folder |
| --- | --- | --- |
| A backup app, such as Time Machine | Getting everything back after a lost or broken Mac | Yes |
| A cloud folder: iCloud Drive, Dropbox or OneDrive | The same Library on more than one Mac | Yes |
| Versions | A history of each note that you can compare and restore, optionally kept on a Git server | No |
Versions answers "what did this note say last Tuesday?"; a backup covers everything else. They work well together.
## Step 1: Know what to keep
Everything that belongs to a Library is inside its folder: your notes, attachments and sidecars, and the hidden `.terra` folder, which holds your [databases](https://terramd.io/docs/databases), [templates](https://terramd.io/docs/templates), saved views, AI chats and the Library's settings. Back up the whole folder, hidden files included. [How Terra stores your notes](https://terramd.io/docs/how-terra-stores-your-notes) explains each part.
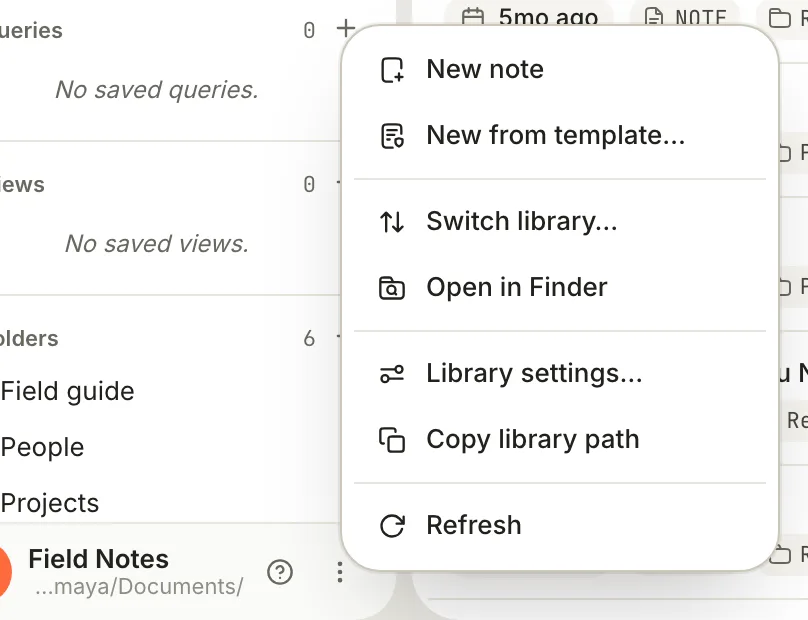
1. Click **⋯** (**Library menu**) at the bottom of the sidebar.
2. Choose **Open in Finder** to see where the folder is, or **Copy library path** to copy its location.
A few things live on each Mac, not in the Library: AI provider keys (in the Keychain), the **Light**, **Dark** or **System** appearance, **Open at launch**, and how you've arranged the sidebar and panes.
## Step 2: Back up with Time Machine
Time Machine, built into macOS, backs up your whole Mac to an external drive, hidden files included, so a Library in your home folder is covered. Turn it on in **System Settings › General › Time Machine**. Any backup app that copies folders works too.
To get back an older copy of a single note, open the Library folder in Finder and browse your Time Machine backups to the date you want. Restore the note's `.md` file, and its `.terra.json` file too if it has one. Terra notices the restored file and updates the note.
## Step 3: Share a Library through a cloud folder
To use the same Library on two Macs, keep it in a folder that iCloud Drive, Dropbox or OneDrive syncs.
1. Switch to another Library, or quit Terra.
2. In Finder, move the Library folder into your iCloud Drive, Dropbox or OneDrive folder.
3. Open Terra, press ⌘ O, choose **Open other…** and pick the folder in its new place.
4. On your other Mac, wait until the folder has finished downloading, then open it the same way.
A few habits keep this smooth:
- **Keep the files downloaded.** If your sync service removes local copies to save space (such as iCloud's **Optimize Mac Storage**), Terra waits for each file to download, and the Library opens slowly.
- **Let edits sync before switching Macs.** If two Macs change the same note before syncing, the service may keep a "conflicted copy". It has the same `id` as the original, so Terra shows only one of the two. Combine them by hand in Finder and delete the copy.
- **Connect AI providers on each Mac.** Keys stay in each Mac's Keychain (see [Ask your Library](https://terramd.io/docs/ask-your-library#troubleshooting)).
## Step 4: Turn on Versions
Versions uses git, the version-control tool programmers use, to keep a history of your notes. It's off until you turn it on.
1. Click **Versions** in the sidebar, under **System**.
2. Click **Initialize version control**.
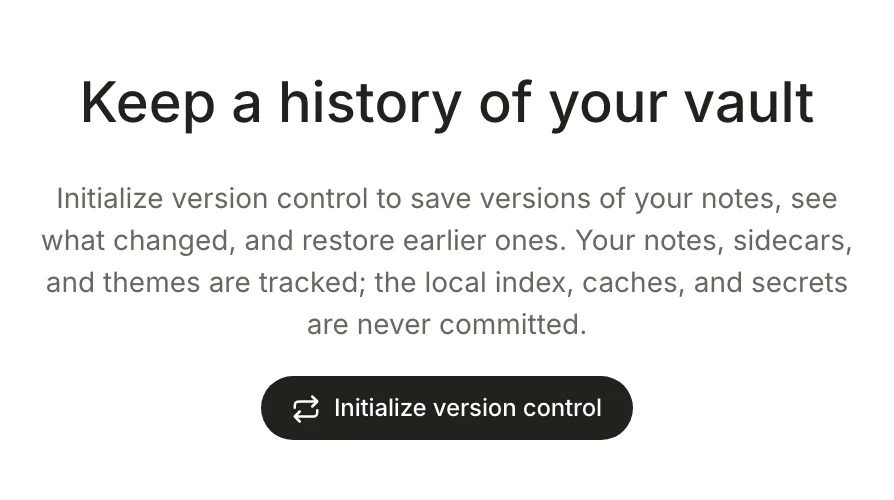
3. macOS asks **Initialize version control?** Click **Allow**. Terra makes the Library a git repository and adds two small files, `.gitignore` and `.gitattributes`. Nothing is saved yet.
If the page says **Version control unavailable** instead, git isn't installed. Install it, then open the Library again.
> [!WARNING] Versions doesn't keep the .terra folder
> Every file in the Library is tracked except `.terra`, which also holds the search index, caches and secrets. That means your databases, templates, saved views and Library settings aren't part of your versions. Keep them safe with a backup or a cloud folder.
## Step 5: Save a version
A version is a snapshot of every changed file in the Library. Terra never saves one on its own, so save whenever you reach a point you might want to come back to, such as the end of a work session.
1. On the **Versions** page, click **Save version**.
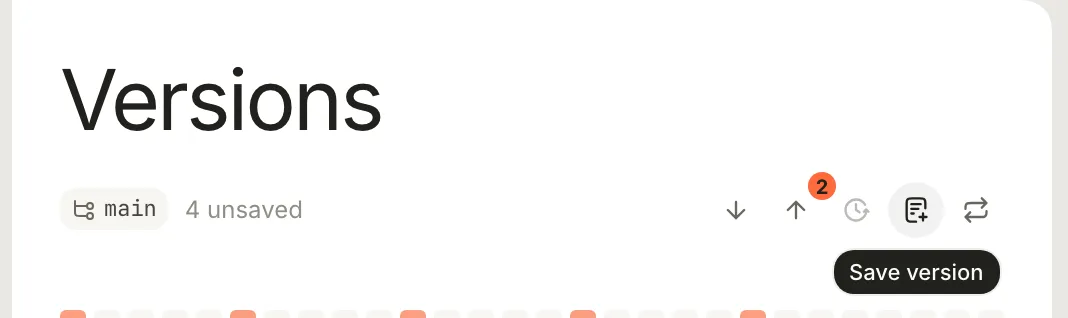
2. macOS asks **Commit Library changes?** Click **Allow**.
3. A message confirms it, for example **Saved version 4e1a9c2**. The version is named with the date and time.
**Save version** is greyed out when nothing has changed. A note with changes that aren't in a version yet shows **Modified** at the bottom of the note.
## Step 6: Compare and restore a note
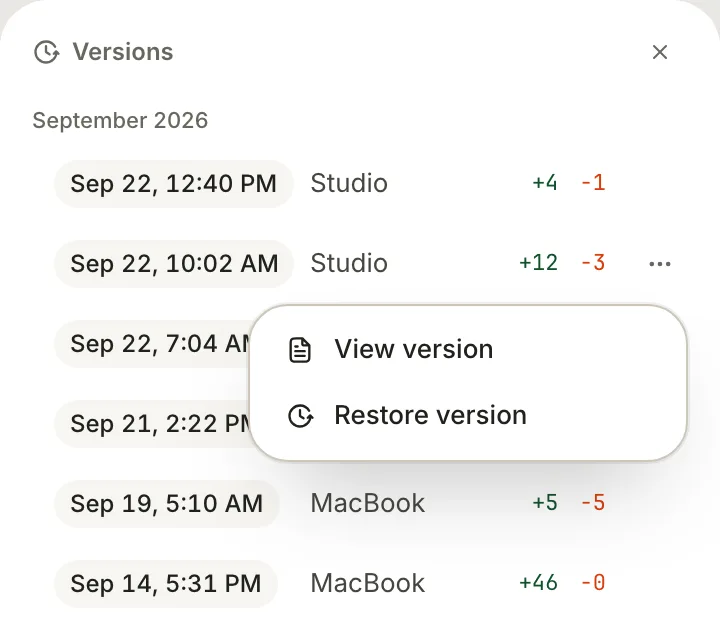
1. Open the note, then click **Versions** in the toolbar (the clock at the top right). The Versions panel lists the note's saved versions, newest first, with how many lines each one added and removed.
2. Click a version to see what it changed, in a pane beside the note.
3. To go back to it, click **⋯** next to the version and choose **Restore version**. When macOS asks **Restore this file version?**, click **Allow**. A message says **Restored to the save from** and the date. **View version** shows it without changing anything.
> [!WARNING] Restoring replaces later changes
> **Restore version** puts back the note's Markdown file exactly as it was, including over edits you've made since your last saved version. Save a version first if you might want them. Attachments and the note's sidecar aren't restored.
## Step 7: Send versions to a Git server
To keep your history off this Mac, push your versions to a private repository on a Git host. Terra never asks for or stores git passwords, so you connect the repository once in Terminal.
1. Create an empty private repository on your Git host and copy its HTTPS or SSH address.
2. In Terra, choose **Library menu › Copy library path**.
3. In Terminal, run these lines, pasting your Library's path and your repository's address:
```bash
cd "/Users/maya/Documents/Field Notes"
git remote add origin git@github.com:maya/field-notes.git
git push -u origin HEAD
```
Sign in if git asks. The remote must be called `origin`, and its address must start with `https://` or use SSH.
From then on, use the buttons on the **Versions** page:
- **Push** sends your saved versions. The number on it counts versions waiting to go. macOS asks **Push Library commits?**; click **Allow**, and a message says **Pushed to upstream**.
- **Pull** brings in versions saved elsewhere and updates your files. The number on it counts versions waiting to come in. macOS asks **Pull and rewrite Library files?**; click **Allow**.
To start on a second Mac, clone the repository in Terminal (`git clone` and the address), then open the folder in Terra with **Open other…**. Because `.terra` isn't in git, that Mac starts with Terra's own default templates and settings, and without your databases.
## Go further
### Turn version history off
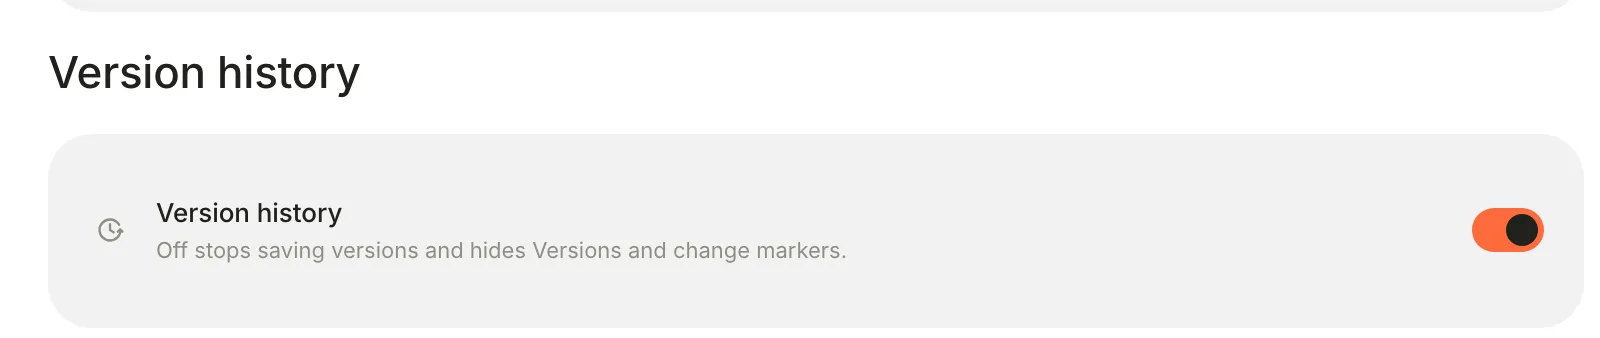
If you don't use Versions in a Library, switch it off in **Settings › Editor › Version history**. Terra then stops saving versions and hides **Versions** and the **Modified** marker. Your existing history stays in the folder.
### Resolve a conflict after pulling
If the same lines changed in two places, the message reads **Pulled with conflicts — resolve the marked notes**. Open each marked note in **Markdown source**, keep the text you want, delete git's `<<<<<<<`, `=======` and `>>>>>>>` lines, then click **Save version**.
## Troubleshooting
> [!NOTE]- Push or Pull fails with a sign-in error
> Terra never stores git credentials. In Terminal, go to the Library folder and run `git push` or `git pull` once, signing in when asked. Then try again in Terra.
> [!NOTE]- "remote transport is not allowed; use HTTPS or SSH"
> The `origin` remote has an address Terra won't use. Change it to an `https://` address or an SSH one, such as `git@github.com:maya/field-notes.git`, with `git remote set-url origin` and the new address.
> [!NOTE]- "no upstream configured for the current branch"
> Run `git push -u origin HEAD` once in Terminal, in the Library folder.
> [!NOTE]- "Version history is off. Turn it on in Settings → Editor."
> Version history is switched off for this Library. Turn on **Settings › Editor › Version history**.
## What's next
- [Libraries](https://terramd.io/docs/libraries) — open, switch and move Libraries.
- [How Terra stores your notes](https://terramd.io/docs/how-terra-stores-your-notes) — every file a backup should include.
- [Files and folders](https://terramd.io/docs/files-and-folders) — the Trash, and getting deleted notes back.