# Get started with Terra
> Install Terra, open a Library, then write, format, link, tag and find your first notes. About fifteen minutes from download to a working Library.
Source: https://terramd.io/docs/quickstart
Terra keeps your notes as plain Markdown files in a folder on your Mac. You write in a rich editor, and Terra saves ordinary text files that any other app can open.
This quickstart takes you from a fresh install to a few linked, tagged notes you can find again in seconds. The example is a small project: you're launching a pocket guide to the birds of the lower valley, and the plan lives in Terra.
> [!SUMMARY]
> - Open a Library, the folder where your notes live
> - Write a note and format it as you type
> - Make one point stand out with a Sprout
> - Link two notes and tag them
> - Find any note again in a couple of keystrokes
> [!BEFORE]
> - A Mac with macOS 14 (Sonoma) or later
> - An internet connection the first time you open Terra, to sign in
> - About 15 minutes
## Step 1: Install and open Terra
1. Download Terra for Mac and move **Terra** to your **Applications** folder.
2. Open Terra.
3. If a banner says **Sign in to edit your notes.**, click **Sign in**. Your browser opens so you can sign in. When the page says **Signed in.**, come back to Terra. Until you sign in, notes open read-only.
## Step 2: Open or create a Library
A [Library](https://terramd.io/docs/libraries) is the folder Terra treats as your collection of notes. It can be a new, empty folder or a folder of Markdown files you already have, such as an Obsidian vault.
1. On the **Open a library** screen, click **Choose folder**.

2. Pick a folder:
- **To start fresh**: Pick a folder on your machine, click **New Folder**, name it (for example *Notes*) and click **Open**.
- **To use files you already have**, select its folder and click **Open**. Terra maintains your work structure.
3. Terra opens the Library on **All notes**.
Terra adds a hidden `.terra` folder, where it keeps its search index and this Library's settings, and an `Inbox` folder for new notes. Next time, Terra reopens this Library on its own. To switch Libraries later, press ⌘ O.
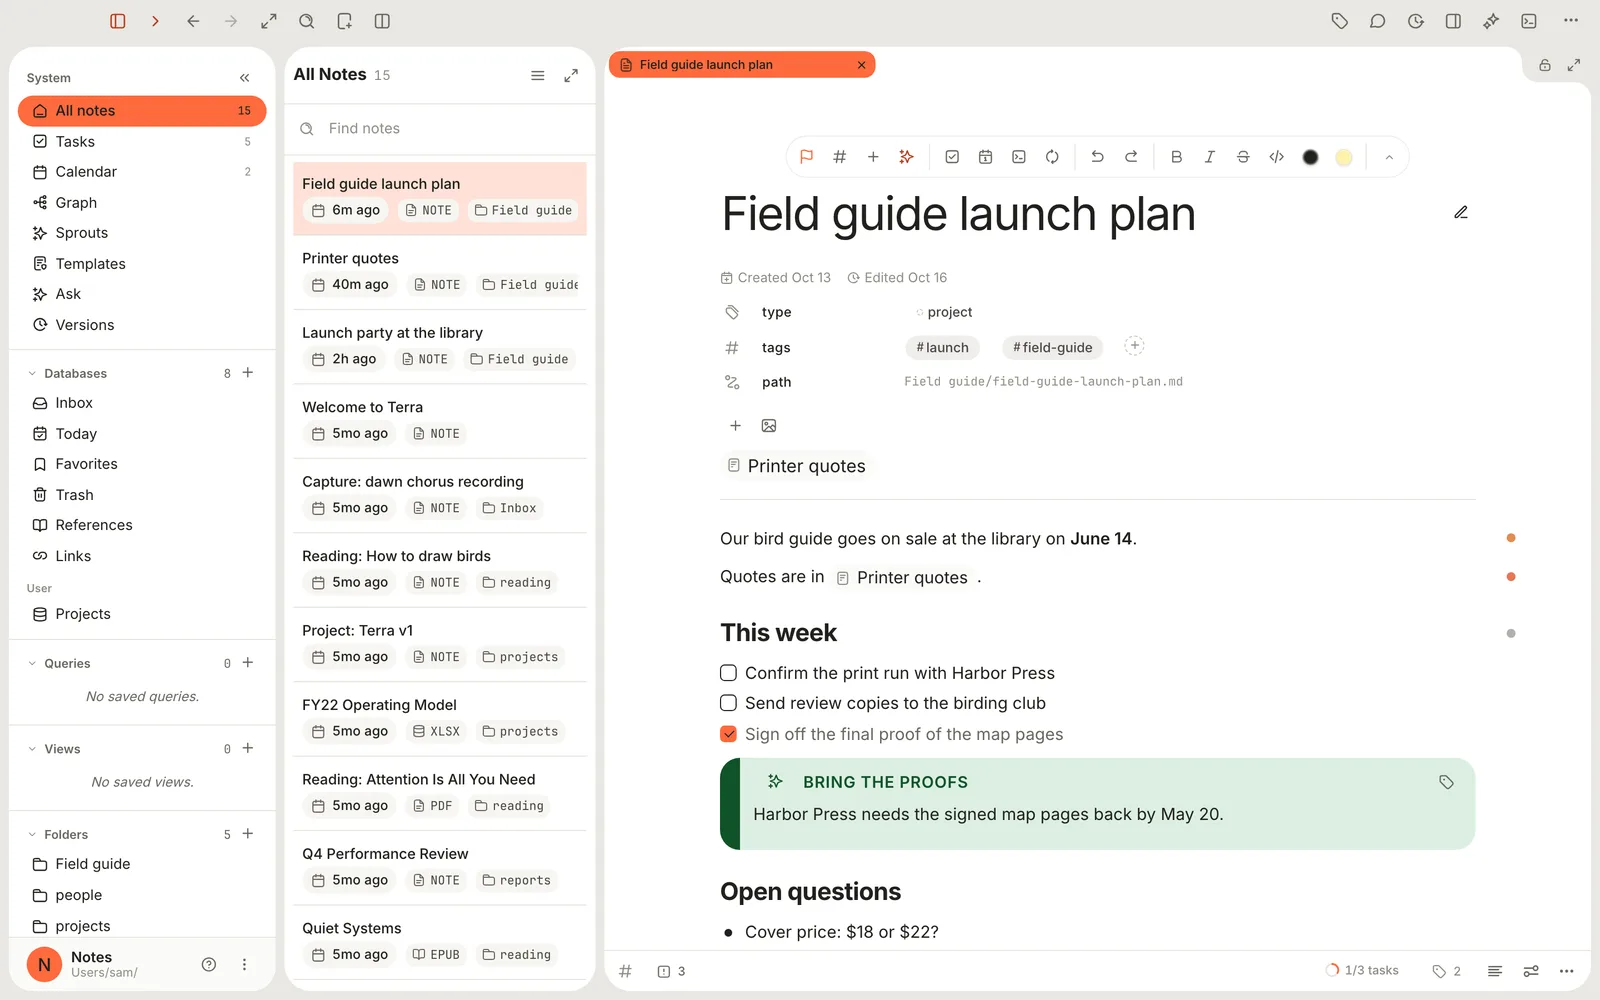
The **sidebar** is sectioned and includes surfaces such as **All notes**, **Tasks** and **Calendar**, then your own databases, saved views and folders. The **file list** shows a filter view of the picked surface in the sidebar. The open file or database fills the rest of the window. [Find your way around](https://terramd.io/docs/find-your-way-around) is the full tour.
## Step 3: Write your first note
1. Press ⌘ N, or choose **File › New Note**. New notes always start in your Library's `Inbox` folder.
2. Click **Untitled** and type a title: *Field guide launch plan*. **Path preview** shows the file name Terra will use.
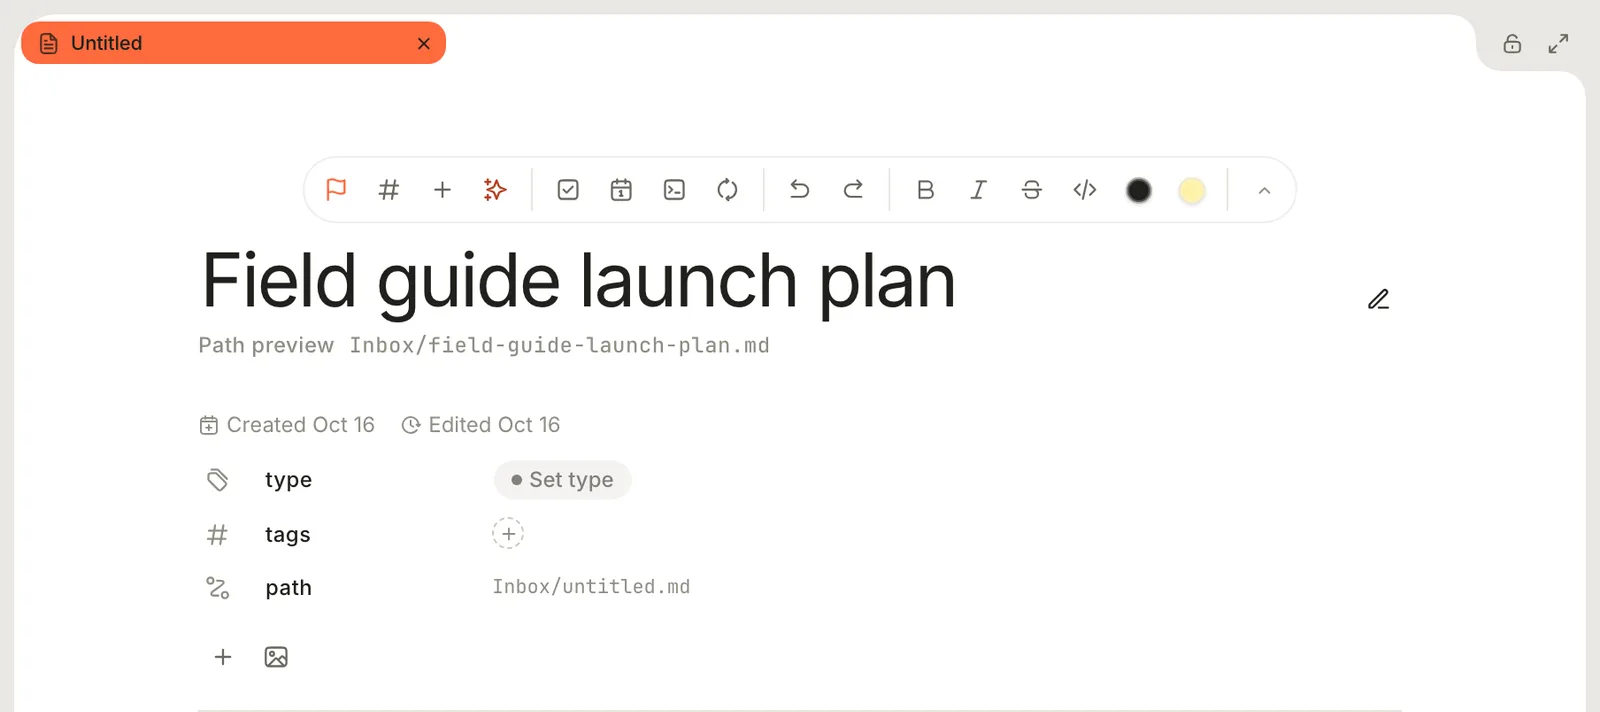
3. Press Return. Terra renames the file to match: `Inbox/field-guide-launch-plan.md`.
There's no Save button. Terra saves as you type.
## Step 4: Format as you type
Terra's principal data format is Markdown, formatted inside the file.
1. Click below the properties and type the first line, with two asterisks on each side of the date: `**June 14**`. Once the last asterisk is recognized this text turns bold.
2. Press Return and type `## `. The line becomes a heading after you type the space after `##`.
3. Press Return, type `[ ]` and a space. The brackets turn into a checkbox.
4. Press Return for each new to-do.
5. Click the last checkbox to tick it off.

In the file, Terra saves standard Markdown:
```markdown
Our bird guide goes on sale at the library on **June 14**.
## This week
- [ ] Confirm the print run with Harbor Press
- [ ] Send review copies to the birding club
- [x] Sign off the final proof of the map pages
```
You can read more about recognized markdown in [basic formatting syntax](https://terramd.io/docs/formatting-syntax)
## Step 5: Add a Sprout
A [Sprout](https://terramd.io/docs/sprouts) is Terra's word for a callout.
1. Type `/sprout` and press Return.
2. Type what the sprout should say.
3. Click **Note** at the top of the Sprout and type title.
4. Click the icon at the Sprout's top left and choose **Tip** to change its class.

In the file, a Sprout is a quote with its kind in brackets.
```markdown
> [!tip] Bring the proofs
> Harbor Press needs the signed map pages back by May 20.
```
The `/` menu inserts other blocks too, such as tables, code blocks and dividers. The **+** button (**Insert block**) in the editor toolbar opens the same menu.
> [!NOTE] Sprouts are meant to grow.
> Sprouts are meant to grow. By clicking on the `Tag` icon you can assign a sprout its own queryable properties, while clickling on the Sprout icon allows you to `Convert to Note` making this sprout its own full fleged note automatically.
You can read more about sprouts in [Sprouts](https://terramd.io/docs/sprouts).
## Step 6: Link two notes
A link lets you jump from one note to another, and Terra keeps track of the links pointing back. See [Links and backlinks](https://terramd.io/docs/links-and-backlinks).
1. Make a second note: press ⌘ N.
2. Go back to the plan: press ⌘ [, or click it in the note list.
3. Click at the end of the first line, press Return and type *Quotes are in @pri*. A list of matching notes appears.
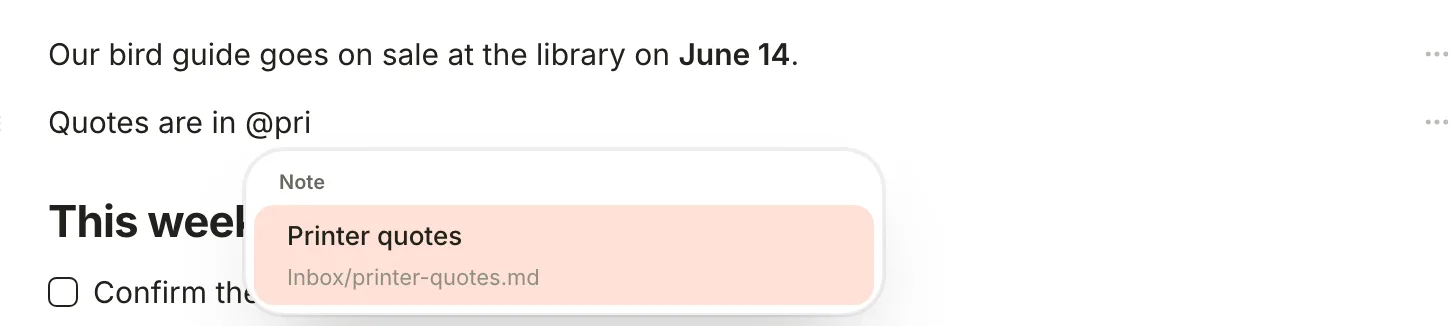
4. Under **Note**, pick **Printer quotes**. The link shows as a chip with the note's title. Click it to open the note.
5. Open **Printer quotes**. Above its text, **Backlinks (1)** shows that one note links here. Click it to see which.
In the file, the link is a wiki-link: `[[Printer quotes]]`. If you rename Printer quotes later, Terra updates the link in every note that uses it.
> [!NOTE] Coming from Obsidian?
> In this version, typing `[[` by hand doesn't make a clean link. Use `@` instead.
## Step 7: Tags
[Tags](https://terramd.io/docs/tags) group files across your library.
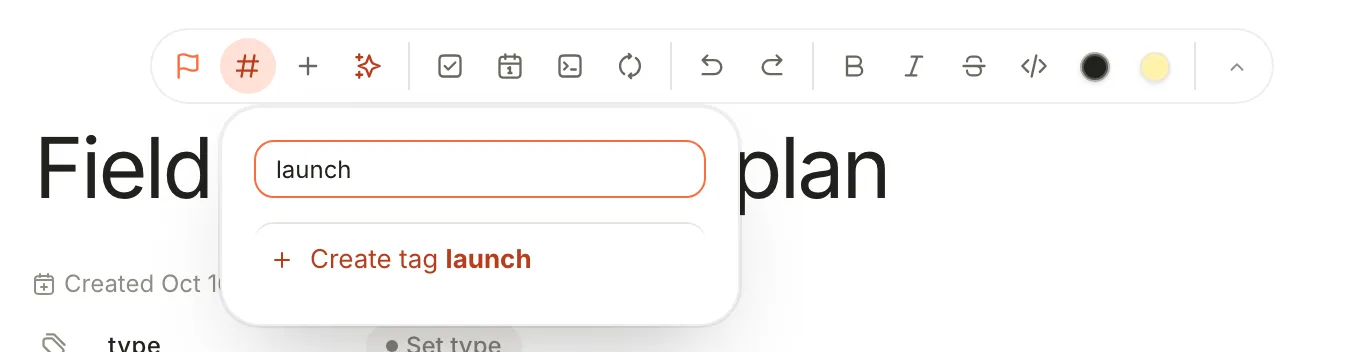
1. Click **#** (**Tag note**) in the editor toolbar.
2. Type `launch` and choose **Create tag launch**. The tag appears in the note's **tags** row.
3. Open **Printer quotes** and tag it `launch` as well. This time, `launch` is in the list.
4. Right-click either `#launch` pill and choose **Open tag page** to see every note with that tag.
You can also tag from the text: type `#launch` followed by a space and it becomes a tag.
## Step 8: Find it again
1. Press ⌘ P (**Go to file**) and type a few letters of a title, such as `quot`. Press Return to open the top match.

2. To search what's *inside* your notes, press ⇧ ⌘ F or click **Search** in the toolbar. Try `tag:launch`, or a phrase in quotes. [Find anything in your Library](https://terramd.io/docs/power-search) shows what else it can do.
3. Press ⌘ K for the command palette. It runs any command by name, opens notes, and answers questions such as *how do I split a pane?* from Terra's Help.
## Troubleshooting
> [!NOTE]- My new note isn't in the folder I wanted
> New notes always start in `Inbox`. To file one, click **⋯** (**Note actions**) at the bottom right of the note and choose **Move note**, then a folder. You can also drag the note from the note list onto a folder in the sidebar.
> [!NOTE]- I can read my notes but can't type
> Terra opens notes read-only when you're signed out or your trial or subscription has ended. The banner at the top says which, with a button to fix it: **Sign in**, **Subscribe**, **Renew** or **Try again**. If the banner says **This Library was last edited by a newer Terra. Update to edit.**, update Terra on this Mac.
## Where to go next
- [Find your way around](https://terramd.io/docs/find-your-way-around): every part of the window, from split panes to Zen mode.
- [Bring in your notes](https://terramd.io/docs/bring-in-your-notes): import from Obsidian, Notion, Bear, Evernote and more.
- [Basic formatting syntax](https://terramd.io/docs/formatting-syntax): headings, lists, links, code and more, as you type them.
- [Databases](https://terramd.io/docs/databases): turn a folder of notes into a table, board or calendar.
- [Keyboard shortcuts](https://terramd.io/docs/keyboard-shortcuts): every key, and how to change them.
- [Make Terra yours](https://terramd.io/docs/make-terra-yours): themes, fonts and your own toolbar.