# Think visually with canvas and mind maps
> Brainstorm on an endless canvas with sticky notes, shapes, arrows and mind maps beside your real notes, then turn the best ideas into notes.
Source: https://terramd.io/docs/canvas-and-mind-maps
Some thinking doesn't fit in lines of text. When you're planning an event, untangling a process or seeing how a dozen ideas relate, you want room to put things down, move them around and draw arrows between them.
A [canvas](https://terramd.io/docs/glossary#canvas) in Terra is that room: an endless board where sticky notes, shapes, arrows, images and your real notes sit wherever you put them. Mind maps grow on it from the keyboard, one idea at a time. When something on the board deserves to be a note, it becomes one in a click.
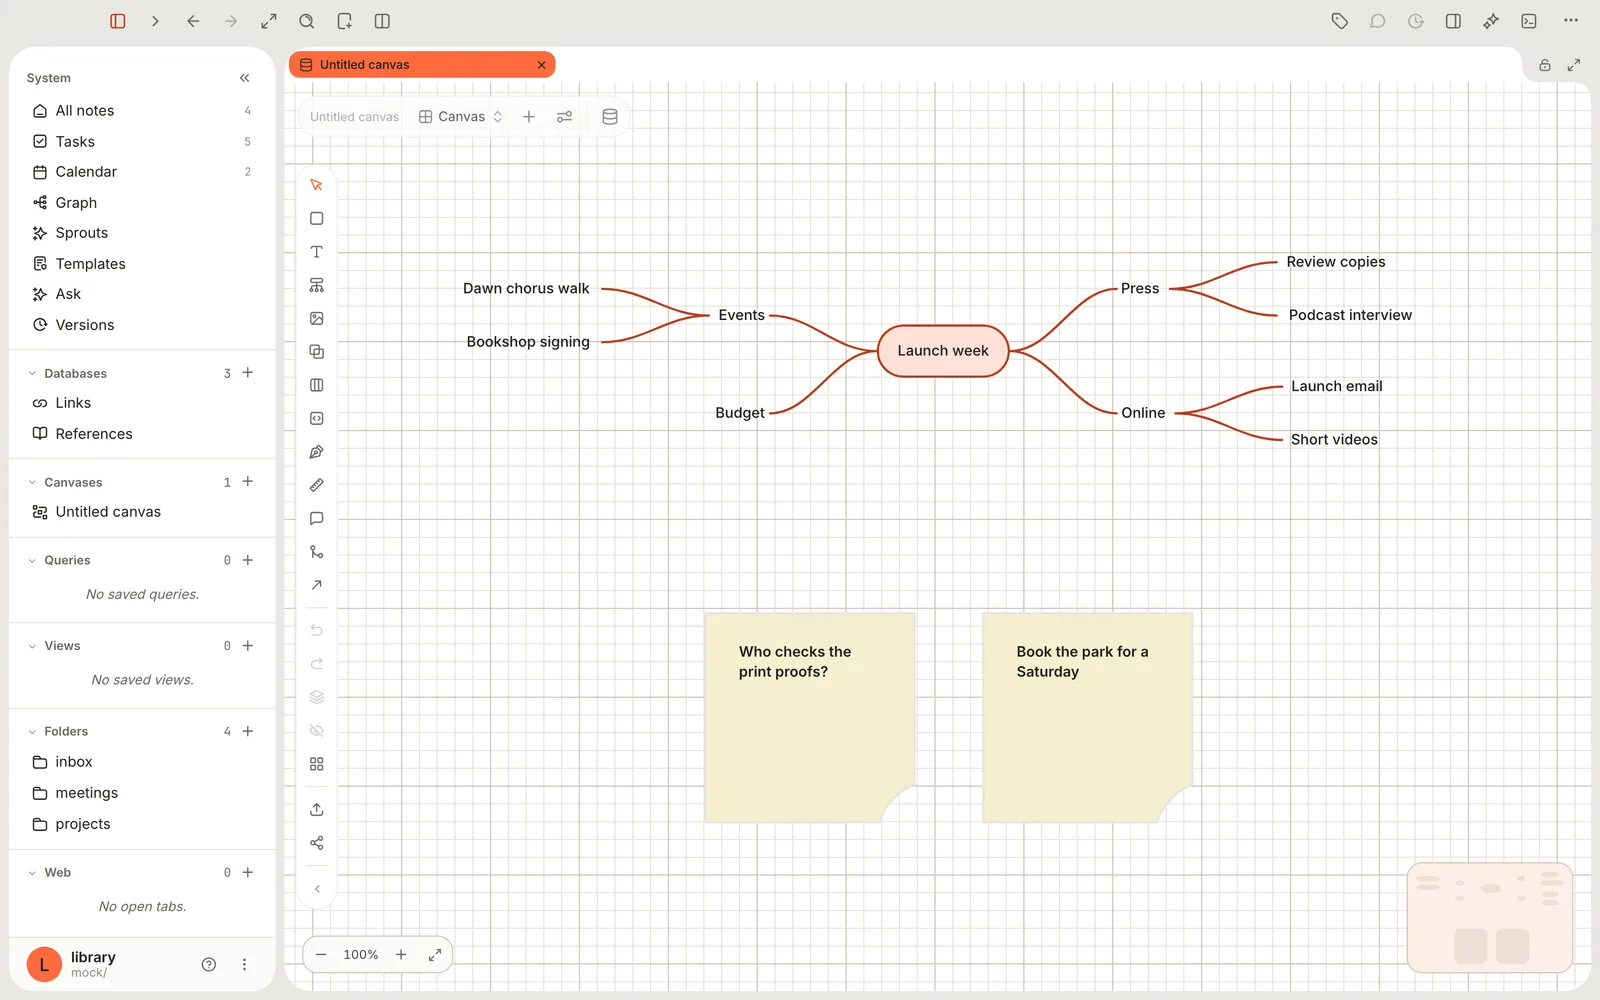
This guide follows Maya as she plans the launch week for her field guide.
> [!SUMMARY]
> - Create a canvas and find your way around it
> - Sketch with text, sticky notes, shapes and arrows
> - Grow a mind map with Tab and Return
> - Bring notes onto the canvas, and turn ideas into notes
> - Arrange, export, and see a note's connections in the graph
> [!BEFORE]
> - A [Library](https://terramd.io/docs/libraries) open in Terra. New to Terra? Start with the [Quickstart](https://terramd.io/docs/quickstart).
> - A trackpad or mouse. The canvas is built for pointing and dragging.
> - About 15 minutes.
## How it fits together
A canvas is a [database](https://terramd.io/docs/databases) shown with the **Canvas** layout, so it holds two kinds of things:
| On the canvas | What it is | Delete it and… |
| --- | --- | --- |
| **Note cards** | Real notes from your Library, shown as cards | Nothing happens to the note. Cards are hidden, not deleted. |
| **Drawn items**: text, sticky notes, shapes, arrows, images, diagrams, ink | Drawings that live only on this canvas | They're gone from the canvas (and **Undo** brings them back) |
The canvases you create with **New canvas** are listed in the sidebar under **Canvases**. Any other database, folder or tag can be laid out as a canvas too; see [Features you might have missed](#features-you-might-have-missed).
## Step 1: Create a canvas
1. Click **New…** in the toolbar and choose **New canvas**. You can also right-click an empty part of the sidebar, or of the window, and choose **New canvas**.
2. An empty canvas called *Untitled canvas* opens, and Terra shows **New canvas**.
3. Rename it: right-click *Untitled canvas* under **Canvases** in the sidebar, choose **Rename**, type *Launch week* and click **Rename**.
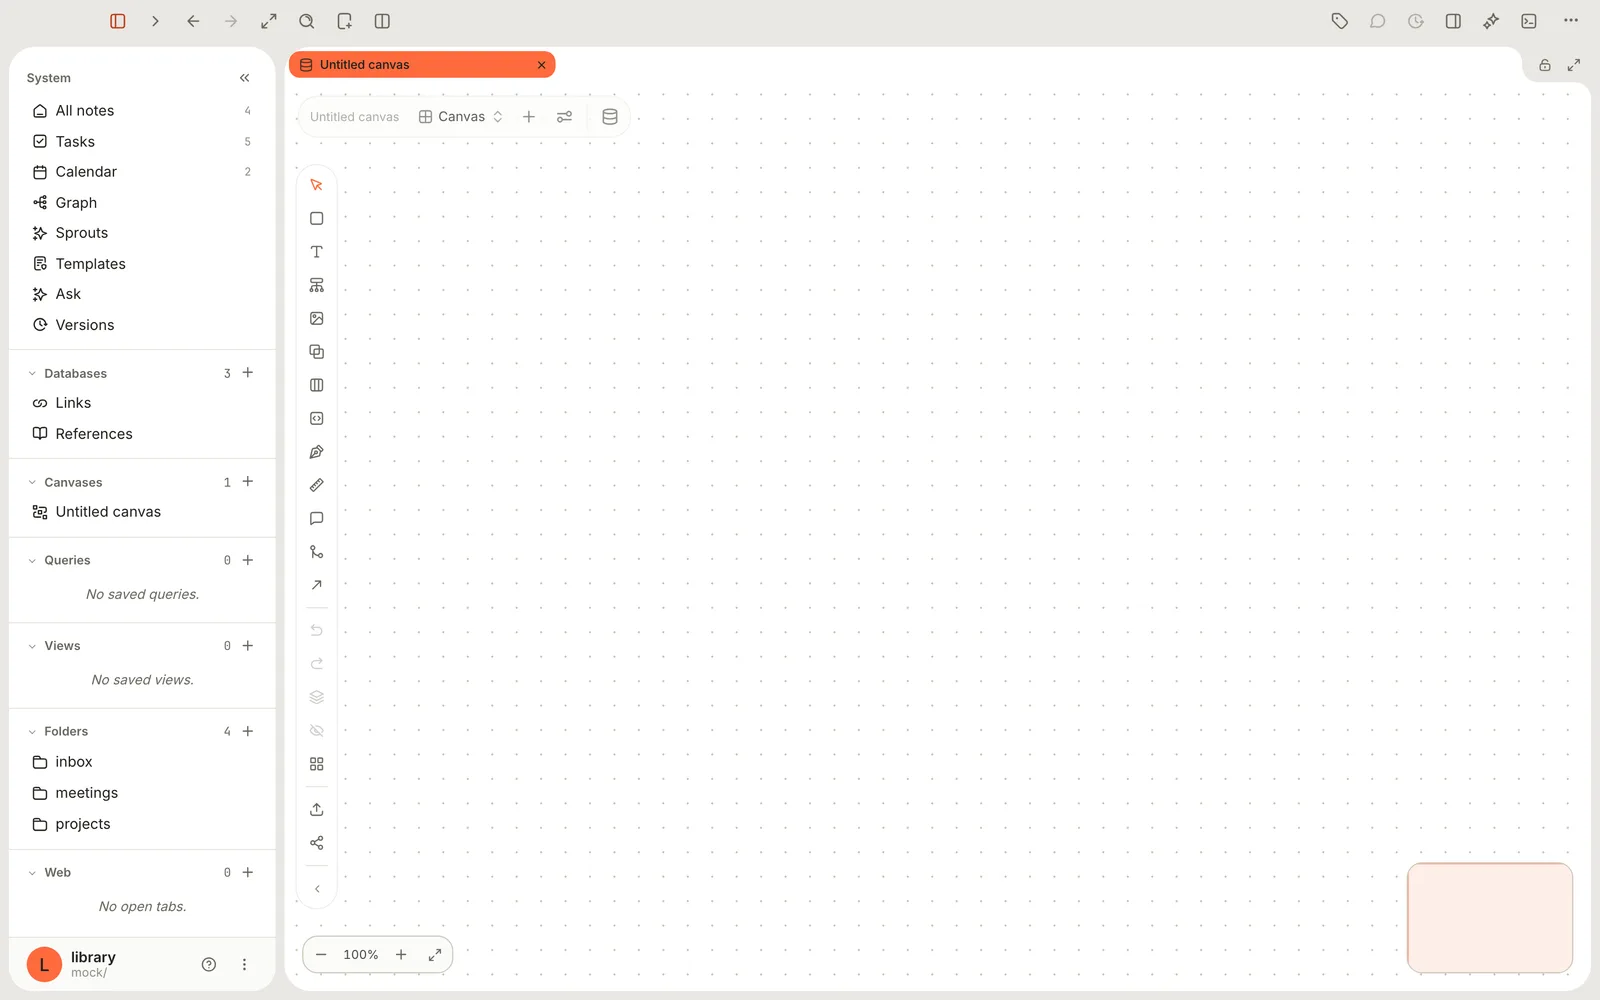
The tools run down the left of the canvas. Point at any of them for its name:
| Tool | Use it to |
| --- | --- |
| **Select** | Pick, move and resize things |
| **Shapes** | Add a shape or a sticky note, and style what's selected |
| **Text** | Add a text box |
| **Mind map** | Start a mind map |
| **Image** | Add a picture, **From library** or **Upload** |
| **Group**, **Swimlane** | Draw a frame, or a frame with two lanes |
| **Diagram** | Turn Mermaid source into a diagram |
| **Ink** | Draw freehand |
| **Connector** | Draw an arrow between two things |
| **Flow connection** | Link two note cards with a real relationship |
Below them sit **Undo**, **Redo**, **Arrange**, **Hide in Canvas**, **Background**, **Import Canvas** and **Export Canvas**.
**Getting around:** drag empty space to move around. Scroll or pinch to zoom, from 25% to 250%. **Zoom in**, **Zoom out** and **Fit to screen** are at the bottom left, and clicking the minimap jumps to that spot.
## Step 2: Sketch with text, sticky notes and shapes
Get ideas down first; arrange them later. Everything new appears in the middle of the view.
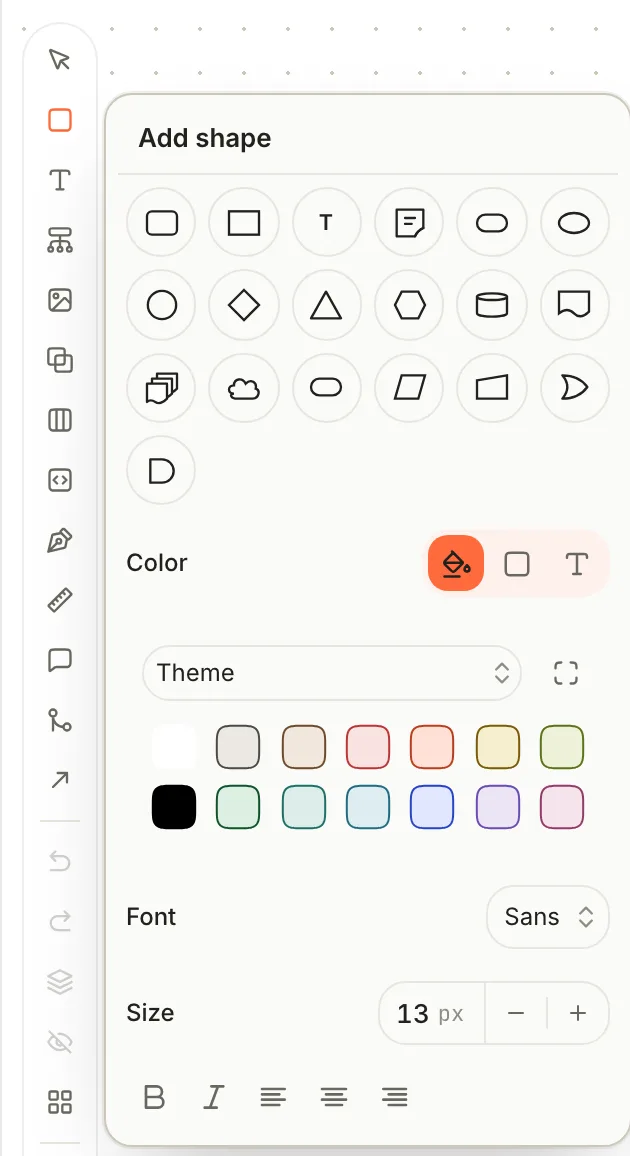
1. Click **Shapes**. The **Add shape** panel opens with 19 shapes, from **Rounded** and **Sticky note** to **Diamond**, **Cylinder** and **Cloud**. Point at one for its name.
2. Click **Sticky note** and type: *Who checks the print proofs?* Press ⌘ Return, or click away, to finish.
3. For a plain label, click **Text** instead. To change any text later, double-click it, or select it and click **Edit text** in the bar at the bottom.
4. To style something, select it and open **Shapes**: switch **Color** between **Fill**, **Border** and **Text** and pick a colour, then set **Font** (**Sans** or **Mono**), **Size** and bold, italic or alignment. New items take the last style you used.
A tool stays chosen after you use it. Press Esc or click **Select** to go back to selecting.
## Step 3: Connect ideas with arrows
1. Click **Connector**.
2. Drag from one item to another, or click one and then the other. The arrow attaches to the sides that face each other; start or finish on one of an item's side handles to pick the side yourself.
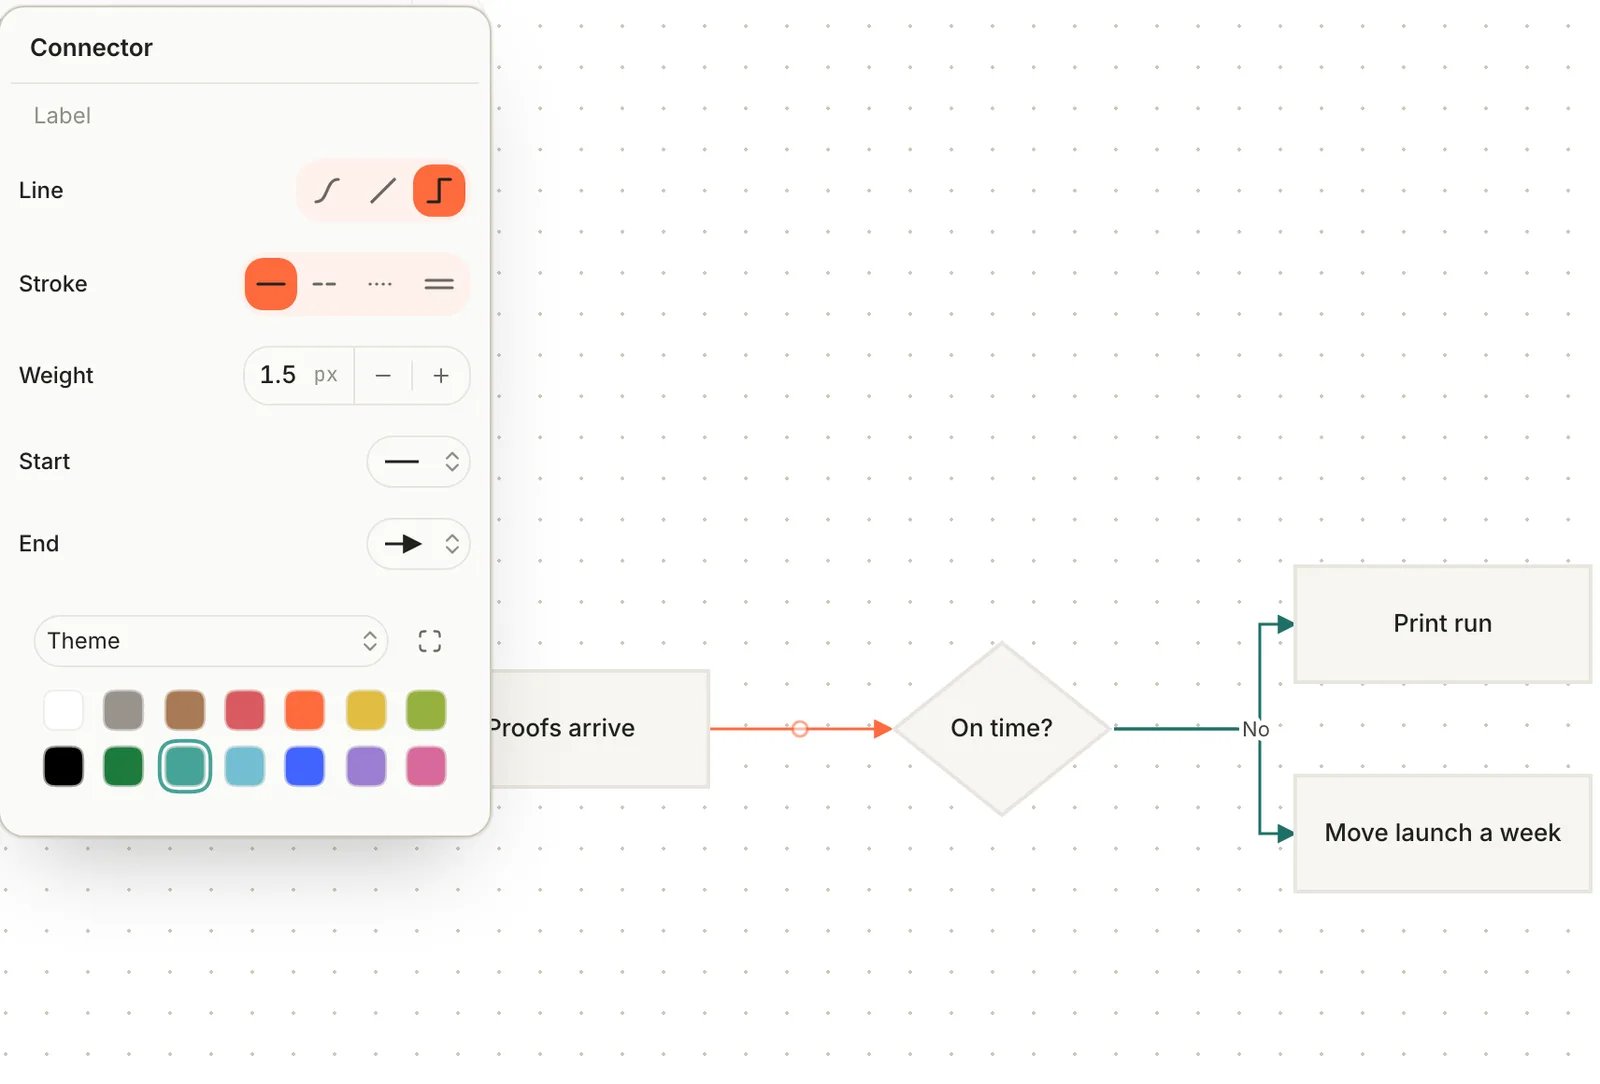
3. To style an arrow, select it and click **Style** in the bottom bar, or double-click it. The **Connector** panel opens.
| Setting | Choices |
| --- | --- |
| **Label** | Text shown on the arrow |
| **Line** | **Curved**, **Straight** or **Elbow** (the default) |
| **Stroke** | **Solid**, **Dashed**, **Dotted**, **Double** |
| **Weight** | 0.5 to 8 px |
| **Start**, **End** | **None**, **Line arrow**, **Triangle arrow**, **Circle arrow**, **Diamond arrow**, **Open diamond**, and the crow's-foot ends used in data diagrams: **One**, **Many**, **One or many**, **Zero or many**, **Zero or one** |
With an arrow selected, drag the small hollow handles along it to add bends; double-click a bend to remove it. With nothing selected, the panel sets the style of the next arrow you draw.
> [!TIP] Draw a flowchart from text
> Click **Diagram**, write a Mermaid flowchart (`flowchart LR`, then lines like `A[Proofs arrive] --> B{On time?}`) and click **Insert diagram** (or press ⌘ Return). Terra lays it out as real shapes and arrows you can move and restyle. Other Mermaid diagram types appear as one picture you can edit later.
## Step 4: Grow a mind map
A mind map starts from one idea and branches out, and you can build one without touching the mouse.
1. Click **Mind map**. A rounded root appears in the middle, ready to type. Type *Launch week*.
2. Press Tab for a child and type *Press*. Tab again for a child of that: *Review copies*.
3. Press Return for a sibling: *Podcast interview*. Press Esc to finish typing; the item stays selected.
4. Click the root and press Tab to start the next branch. Branches spread to both sides and the map lays itself out as it grows.
| Keys | With an item selected | While typing in it |
| --- | --- | --- |
| Tab | Add a child | Save, then add a child |
| ⇧ Tab | Move it up a level | Save, then move it up a level |
| Return | Start typing (text and sticky notes) | Save, then add a sibling (on the root, a child) |
| Esc | Clear the selection | Save and keep it selected |
| Arrow keys | Move around the map | Move the cursor |
| ⌥ ↑ / ⌥ ↓ | Reorder among siblings | |
| ⌘ . | Fold or unfold its branch | |
| Delete | Remove it and its branch | |
**With the mouse:** point at any item and small **+** dots appear on its sides: **Add child**, **Add sibling above**, **Add sibling below**, **Insert between**. Click one to choose what to add: **Text**, **Note**, **Sticky**, **Rounded**, **Pill**, **Ellipse**, **Diamond** or **Cloud**. A **Note** becomes a real note in your Library as soon as you type its text.
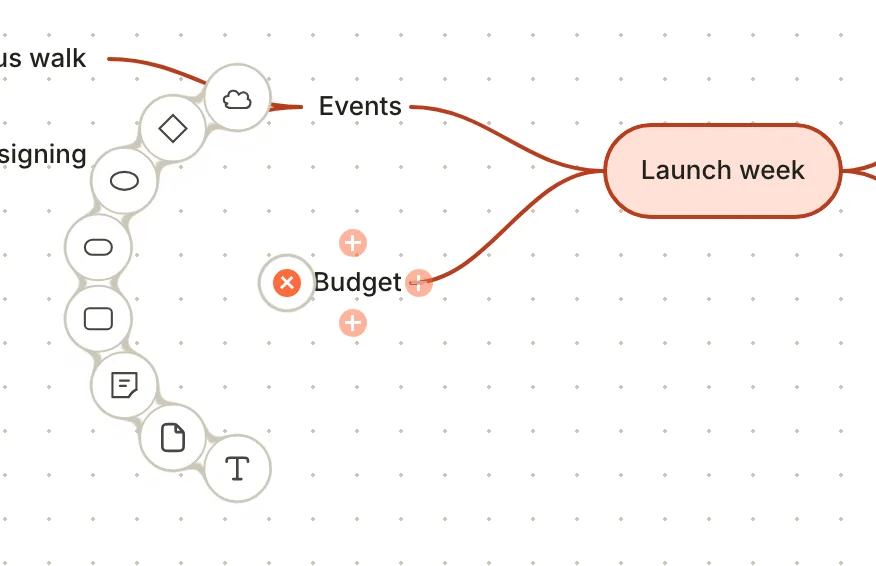
Drag an item onto another to make it a child there, or between siblings to reorder. Dragging the root moves the whole map. To turn any existing item into the root of a new map, select it and click **Start mind map**.
**Change the shape of the map:** select the root and click **Layout** in the bottom bar.
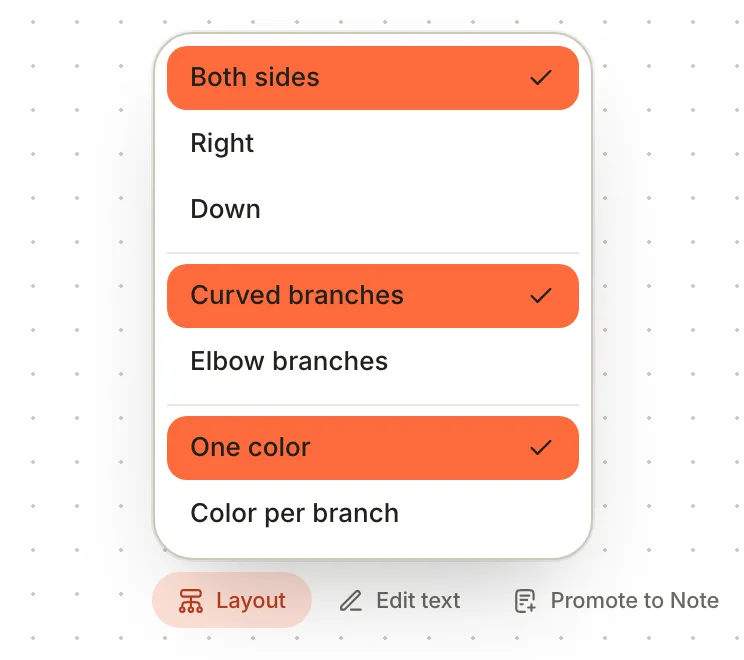
## Step 5: Bring in notes, and turn ideas into notes
A canvas is most useful when your real notes sit beside the sketches.
- **Put a note on the canvas:** drag it from the note list beside the sidebar, or from a search result, and drop it on the canvas. It appears as a card.
- **Open a card:** click it to select it, then click again to open the note.
- **Copy text from a note:** drag blocks by their grip from a note onto the canvas to make text cards. Hold ⌥ as you drop to move them out of the note instead.
When a sticky note turns into a real piece of work, promote it:
1. Select the sticky note (text, diagrams and groups work too).
2. Click **Promote to Note** in the bottom bar.
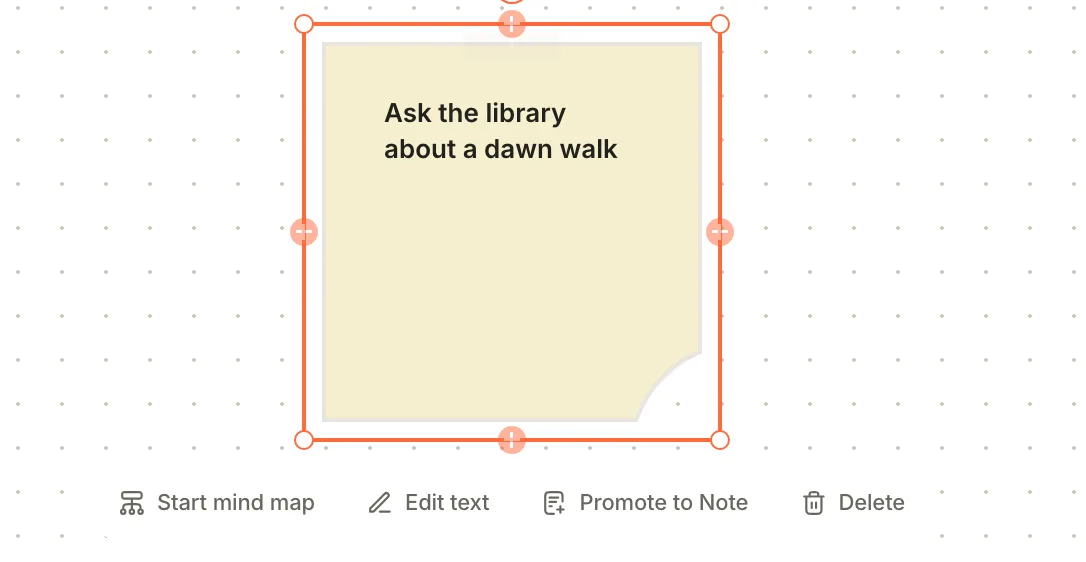
The new note takes its title from the first line and its body from all the text. It's saved in your Inbox, and its card takes the sticky's place. To take a card off the canvas without touching the note, select it and click **Hide in Canvas**.
> [!NOTE] Promote the whole canvas
> Once a canvas holds notes you'd like to see as a list, click **Promote to database** (the database icon at the top of the canvas), or right-click the canvas in the sidebar. Terra adds a **Table** view of the same notes, keeps the canvas as one of its views, and moves it to **Databases**.
## Step 6: Arrange, change the paper, export
**Tidy up.** Shift-drag across empty space to select several items, or press ⌘ A. Then open **Arrange** to align, distribute or stack them, match their widths or heights, **Tidy up** into a grid, or **Bring to front** and **Send to back**. Items snap to each other and to the grid as you drag; hold ⌥ to place them freely, or turn snapping off in **Settings › Canvas** (**Snap to grid**, **Snap to objects**).
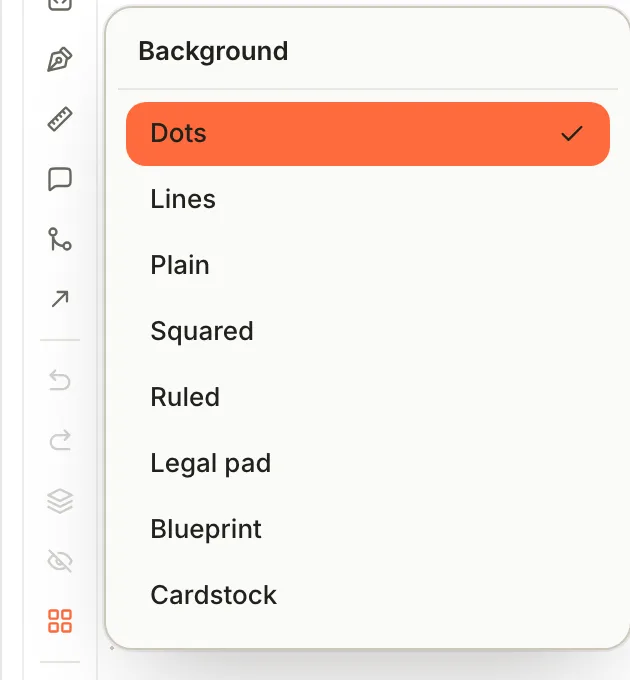
**Change the paper.** Click **Background** for **Dots**, **Lines** or **Plain**, or a paper: **Squared**, **Ruled**, **Legal pad**, **Blueprint** or **Cardstock**.
**Export and import.** **Export Canvas** saves the whole canvas, pictures included, as one `.terra.canvas` file. **Import Canvas** opens one as a new canvas; it never merges into the canvas you have open. Notes that aren't in your Library arrive as text items marked **Missing reference**.
**Where it's kept.** A canvas lives in your Library's hidden `.terra` folder: its database in `.terra/databases`, and its layout, drawings and undo history in `.terra/database-views`, with uploaded pictures beside them. Backups and sync that copy your Library folder copy canvases too, but [Versions](https://terramd.io/docs/sync-and-back-up) doesn't track the `.terra` folder. Export a `.terra.canvas` file when you want a snapshot.
## Step 7: See a note's connections in the graph
A canvas shows the connections you draw. The graph shows the ones already in your notes: every link, embed and citation.
1. Click **Graph** in the sidebar. Each note is a dot, and each link, embed or citation is a line.
2. Point at a dot to see the note's title, tags and how many links it has. Click it to focus on it and its neighbours; click it again to open it.
3. For one note's surroundings, right-click it in the note list beside the sidebar and choose **Graph of this note**. You see the note and everything one link away.
4. To keep a focus, click **Save neighborhood** at the bottom of the graph. **Clear neighborhood** shows everything again.
Any database view can use the **Graph** layout too. A view you switch to **Graph** starts with no lines: open **View preferences › Relationships** and tick **Wikilinks**, **Embeds** or **Citations**, or **Shared** values of a property such as tags. The **Graph** tab tunes how dots spread and lets you colour them with rules.
## Features you might have missed
### Any database as a canvas
Open a database, folder or tag, click **View preferences**, choose the **Canvas** layout and click **Save view**. Every note becomes a card in a grid you can rearrange and draw around. The **Canvas** tab sets the grid: **Arrange all** in **Rows** or **Columns**, **Spacing**, **Wrap**, **Snap to grid** and **Show group regions**. **Reset canvas layout** puts every card back in the grid.
### Real links between cards
**Flow connection** draws a line between two note cards and writes it into the notes as a relationship. The first time, Terra creates a relationship property called *Flow*. Unlike an arrow, it's saved in the notes themselves, as a property you can see and filter on.
### Search reads your canvases
Search finds the text on sticky notes, shapes, labels and diagrams, marked **Canvas ·** in the results. Opening one shows the canvas centred on it. See [Find anything in your Library](https://terramd.io/docs/power-search).
### Undo that outlasts a restart
A canvas remembers its last 50 changes in its own file, so **Undo** still works after you quit and reopen Terra.
### Bend a mind map's branches
⌘-drag a branch line to bend it. The **Branch** menu in the bottom bar mirrors the curve or sets it back with **Reset to automatic**.
## What a canvas can't do yet
- **No picture or PDF export.** **Export Canvas** writes a `.terra.canvas` file only.
- **No other formats.** Obsidian `.canvas`, Excalidraw and draw.io files can't be imported.
- **Copy and paste stays inside Terra.** Canvas items paste into other canvases during the same session, but not into other apps, and text from other apps doesn't paste onto a canvas.
- **No right-click menu** on canvas items. Use the bottom bar and the tools.
- **Some items can't be edited after you place them:** guides, comment pins, and the labels of groups and swimlanes. Moving a group's frame doesn't move what's inside it.
## Troubleshooting
> [!NOTE]- Dragging moves the whole canvas instead of selecting
> Dragging empty space always pans. To select several items, hold ⇧ as you drag, with **Select** chosen.
> [!NOTE]- Scrolling zooms instead of moving around
> On a canvas, scrolling and pinching zoom. To move around, drag empty space.
> [!NOTE]- The Ink eraser doesn't erase
> On a canvas, **Eraser** only stops drawing. Click **Select**, click the stroke and press Delete.
> [!NOTE]- I pressed Delete on a card and nothing happened
> Cards stand for real notes, and a canvas never deletes notes. Select the card and click **Hide in Canvas**; to delete the note itself, open it and delete it there.
> [!NOTE]- My promoted note isn't in the folder I expected
> Notes promoted on a canvas made with **New canvas** go to your Inbox. Move them from there like any note.
> [!NOTE]- New canvas or Graph is missing
> They can be switched off for a Library. Check **Settings › Features** and turn **Canvas** or **Graph** back on.
> [!NOTE]- "Canvas opened read-only"
> Terra couldn't read the canvas file: it may be damaged, or saved by a newer version of Terra. Update Terra; nothing is changed while the banner shows.
## What's next
- [Find anything in your Library](https://terramd.io/docs/power-search): find the notes to bring onto your canvas.
- [Links and backlinks](https://terramd.io/docs/links-and-backlinks): the links the graph draws.
- [Databases](https://terramd.io/docs/databases): what a canvas is underneath, and what else it can be.
- [Views and layouts](https://terramd.io/docs/views-and-layouts): every way to lay out a database.